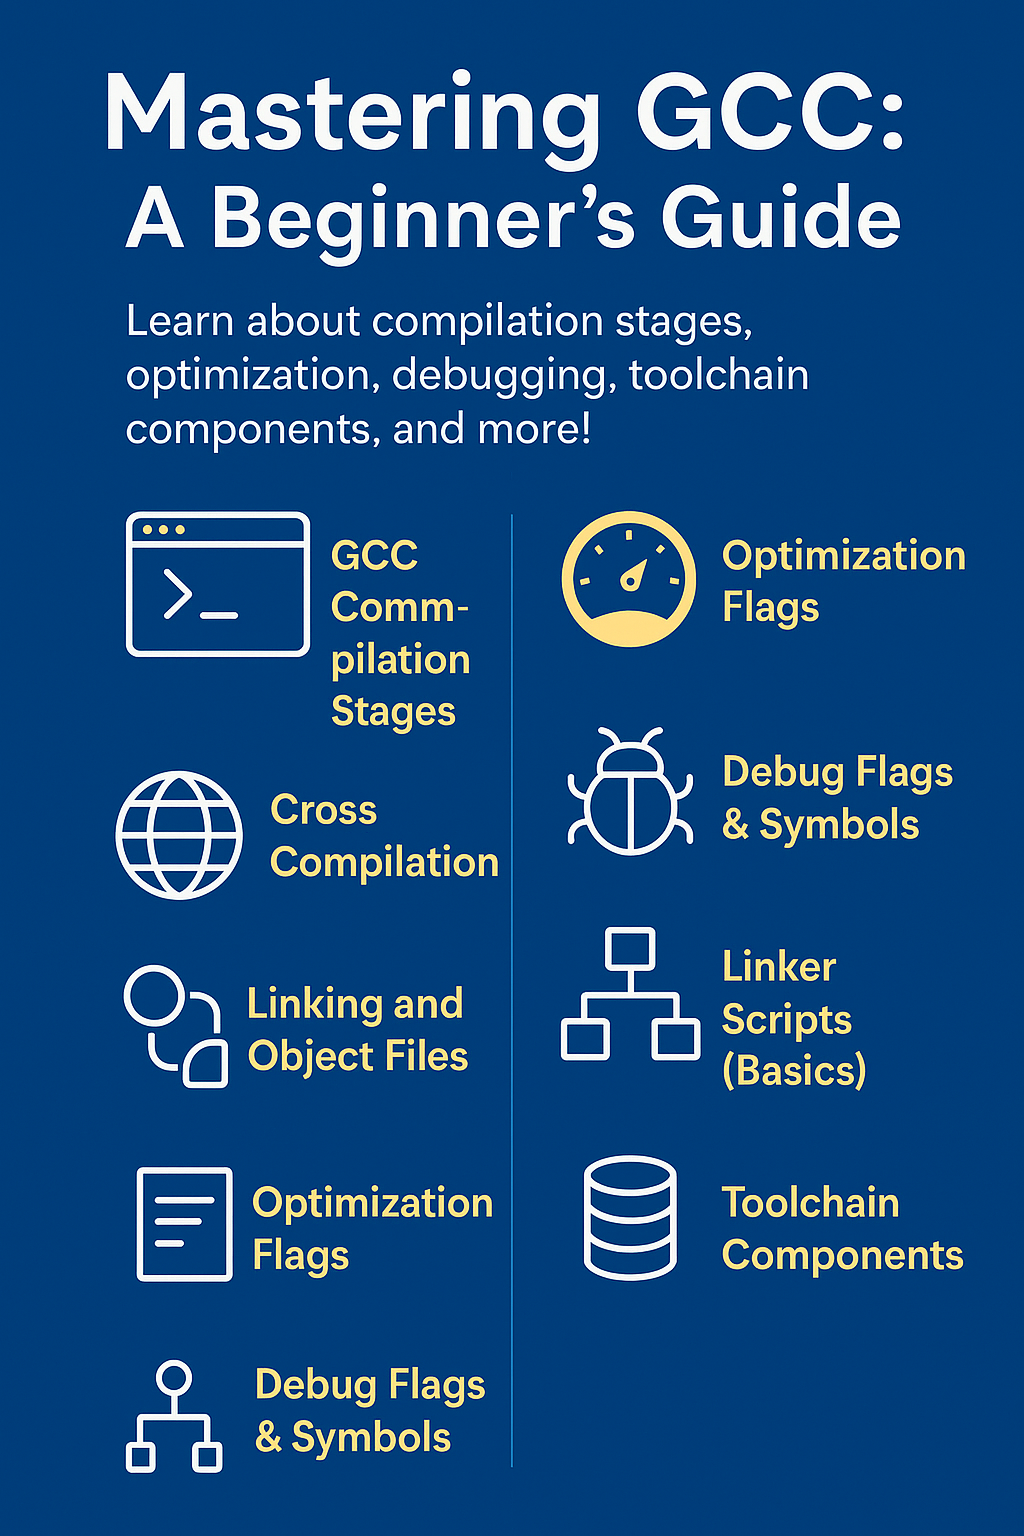
GCC Command Line Options : Are you new to GCC and feeling overwhelmed by flags like -O2, .o files, or linker scripts? This beginner-friendly tutorial will guide you step-by-step through the world of GCC — the GNU Compiler Collection. Learn how your code transforms from .c to executable, understand every compilation stage (Preprocessing, Compilation, Assembly, Linking), and get hands-on with cross-compilation, object files, static vs shared libraries, and optimization techniques.
You’ll also explore how to debug effectively using -g, what linker scripts do, and how to use essential toolchain components like as, ld, objdump, nm, and readelf.
Perfect for embedded programmers, systems developers, or any curious C/C++ learner who wants to master the build process from the inside out!
What You’ll Learnin this tutorial of GCC Command Line Options:
- GCC Command-Line Options Explained
- Compilation Stages (Preprocessing ➝ Linking)
- Cross-Compilation Made Easy
- Understanding
.o,.a,.soFiles - Optimization Flags (
-O0to-O3,-Os,-Ofast) - Debugging with
-gand GDB - Basics of Linker Scripts
- Practical Use of
as,ld,objdump,nm,readelf
What is GCC?
GCC is a powerful compiler used to compile programs written in C, C++, and other languages. It’s used on Linux, embedded systems, and more.
Basic Structure of GCC Command:
gcc [options] source_files [object_files] [-o output_file]
✅ Commonly Used GCC Options:
| Option | Description |
|---|---|
-o output | Specify the name of the output file. |
-c | Compile source to object file (.o) without linking. |
-Wall | Enable most compiler warnings. |
-Werror | Treat all warnings as errors. |
-g | Include debug information. |
-O0 to -O3 | Control optimization level. |
-E | Stop after preprocessing. |
-S | Stop after compilation (output assembly). |
-v | Verbose output showing stages and toolchain paths. |
-I | Add directory to header file search path. |
-L | Add directory to library search path. |
-l | Link with specified library (e.g., -lm for math). |
Example 1: Compile a C file
gcc hello.c -o helloExample 2: Compile with warnings and debug info
gcc -Wall -g hello.c -o helloExample 3: Stop after creating object file
gcc -c hello.cThis creates hello.o which can be linked later.
When to Use What:
| Goal | Flags to Use |
|---|---|
| Debugging | -g -O0 |
| Performance | -O2 or -O3 |
| Library building | -c, -fPIC, -shared |
| Troubleshooting warnings | -Wall -Werror |
Perfect! Let’s move on to:
GCC Compilation Stages (Preprocessing, Compilation, Assembly, Linking)
GCC doesn’t just “compile” your code in one step—it goes through 4 main stages:
Overview of Stages
| Stage | Command Flag | Description |
|---|---|---|
| 1. Preprocessing | -E | Handles macros, #include, #define, removes comments |
| 2. Compilation | -S | Converts preprocessed code to Assembly |
| 3. Assembly | -c | Converts Assembly to Object code (.o) |
| 4. Linking | (default) | Combines object code and libraries into final binary |
1. Preprocessing (-E)
What Happens:
- Expands
#includeheaders - Replaces
#definemacros - Removes comments
Example:
gcc -E hello.c -o hello.i- Output:
hello.i(pure C code with macros expanded)
2. Compilation (-S)
What Happens:
- Converts
.ito assembly (.s) - Handles syntax checking and optimizations
Example:
gcc -S hello.i -o hello.s
- Output:
hello.s(human-readable assembly code)
3. Assembly (-c)
What Happens:
- Converts
.sto machine code (.o) - Done by
as(assembler)
Example:
gcc -c hello.s -o hello.o- Output:
hello.o(object file, not runnable yet)
4. Linking (Default GCC behavior)
What Happens:
- Links
.ofiles and libraries to create final executable - Done by
ld(linker)
Example:
gcc hello.o -o hello- Output:
hello(final executable)
Full Manual Process:
gcc -E hello.c -o hello.i
gcc -S hello.i -o hello.s
gcc -c hello.s -o hello.o
gcc hello.o -o hello
Quick Tip:
To see all stages and tools used by GCC:
gcc -v hello.c -o helloCross Compilation
What is Cross Compilation?
Cross compilation is when you compile code on one system (host) but the output is meant to run on a different system (target), often with a different CPU architecture (e.g., x86 host → ARM target).
Why Use Cross Compilation?
- Building for embedded systems (e.g., ARM Cortex on Raspberry Pi, ESP32)
- Developing for devices with limited resources
- Compiling code for different operating systems (Linux → QNX, Windows → Linux)
Common Cross Compilation Toolchain
| Tool | Purpose |
|---|---|
arm-none-eabi-gcc | GCC for bare-metal ARM targets |
arm-linux-gnueabihf-gcc | GCC for Linux ARM hard-float ABI targets |
aarch64-linux-gnu-gcc | GCC for 64-bit ARM Linux targets |
x86_64-w64-mingw32-gcc | GCC for compiling Windows binaries from Linux |
Structure of a Cross-Compiler:
- Example:
arm-linux-gnueabihf-gcc= cross-compiler for ARM Linux hard-float
Cross Compilation Example:
Let’s say you have this simple C file: main.c
#include
int main() {
    printf("Hello from ARM!\n");
    return 0;
}
Compile for ARM Linux:
arm-linux-gnueabihf-gcc main.c -o main_arm
Result:
- Output binary
main_armruns on ARM target (e.g., Raspberry Pi) - It will not run on your x86 machine
💛 Support Embedded Prep
If you find our tutorials helpful and want to support our mission of sharing high-quality embedded system knowledge, you can contribute by buying us a coffee. Every small contribution helps us keep creating valuable content for learners like you. ☕
Thank you for your support — it truly keeps Embedded Prep growing. 💻✨
How to Check Binary Architecture:
file main_arm
Example Output:
main_arm: ELF 32-bit LSB executable, ARM, EABI5, dynamically linked...Installing Cross Compilers:
On Ubuntu/Debian:
sudo apt-get install gcc-arm-linux-gnueabihfFor bare-metal (no OS):
sudo apt-get install gcc-arm-none-eabiChecklist for Successful Cross Compilation:
- Correct cross-compiler installed
- Use proper
--sysrootor-I,-Lpaths if targeting a full OS - Link against target-specific libraries
- Test the binary on the target device
GCC Optimization Flags: -O0, -O1, -O2, -O3, -Os, -Ofast
GCC offers optimization flags to control how much it tweaks your code to make it faster, smaller, or more efficient.
🔧 These optimizations are applied during the compilation stage (
.c→.s).
Why Use Optimization?
- Improve performance (speed)
- Reduce code size
- Enable inlining, loop unrolling, dead code removal, etc.
Optimization Levels
| Flag | Description |
|---|---|
-O0 | 🔴 No optimization (default in debug mode). Easier to debug. |
-O1 | 🟡 Basic optimization, removes unused code. |
-O2 | 🟢 Aggressive optimization, safe for most applications. |
-O3 | 🔵 Maximum performance. Includes -O2 + inlining & loop unrolling. |
-Os | ⚪ Optimize for size, not speed. |
-Ofast | 🚨 Fastest possible, but unsafe: ignores standards (e.g., IEEE/strict aliasing rules) |
Example:
gcc -O0 main.c -o main_O0
gcc -O2 main.c -o main_O2
gcc -O3 main.c -o main_O3
gcc -Os main.c -o main_Os
Use time ./main_Ox or size main_Ox to compare runtime and binary size.
Inspect Optimized Code:
gcc -S -O3 main.c -o main_O3.s
This outputs assembly code so you can see how optimization changes instructions.
Pro Tip:
Use optimization with debugging (covered next):
gcc -g -O2 main.c -o main
This allows debugging even with optimized code, although some variables might be removed or reordered.
Great! Let’s now cover:
Debug Flags & Symbols: -g, -O0 to -O3
When developing software, debugging is crucial. GCC provides flags to include debug symbols and control optimization levels that affect debugging behavior.
-g: Add Debug Info
- Embeds debugging symbols (like variable names, function names, source lines) into the binary.
- These symbols are used by GDB or other debuggers.
- Doesn’t affect performance or behavior at runtime.
Example:
gcc -g main.c -o main
Now you can debug with:
gdb ./main
Optimization & Debugging
| Flag combo | Use case |
|---|---|
-g -O0 (default) | Easiest debugging: variables, breakpoints work as expected |
-g -O2 or -g -O3 | Debug optimized code: might skip or inline functions, remove variables |
-O2 only | No debug info, faster execution |
-g only | Debug symbols, but no optimization |
Test Code:
#include
int main() {
    int x = 42;
    printf("x = %d\n", x);
    return 0;
}
Compile and debug:
gcc -g -O0 main.c -o debuggable
gdb ./debuggable
Inside GDB:
(gdb) break main
(gdb) run
(gdb) print x
If you compile with -O2 or -O3, x may be optimized away:
gcc -g -O2 main.c -o optimized_debug
Inside GDB:
(gdb) print x
May return “optimized out”.
Common Debug Tools:
| Tool | Purpose |
|---|---|
gdb | Debugger for stepping through code |
valgrind | Memory leak checker |
strace | Trace system calls |
ltrace | Trace library calls |
Combine Flags Smartly
✅ Development:
gcc -g -O0 -Wall -o app app.c
✅ Release (optional debug):
gcc -g -O2 -o app app.c
You can also strip symbols before release:
strip appGCC Toolchain Components
What is a Toolchain?
A toolchain is a set of programming tools used together to build (compile), link, and analyze software — especially in systems programming like C, C++, and embedded development.
Think of it like a production line in a factory: each tool does a specific job to turn your source code into a working executable program.
Basic Steps in a Toolchain:
- Preprocessing – handles
#include,#define, etc. - Compiling – converts C code into assembly.
- Assembling – converts assembly to object code.
- Linking – combines object files and libraries into a final executable.
Each of these steps is done by a specific tool.
Common Components in a GCC Toolchain:
| Step | Tool | Purpose |
|---|---|---|
| Preprocessing | cpp | Processes #include, macros |
| Compiling | gcc or cc1 | Turns C/C++ into assembly code |
| Assembling | as | Converts .s to .o |
| Linking | ld | Combines .o files into binary |
| Debugging | gdb | Debugs your program |
| Analyzing | objdump, nm, readelf | Analyze and inspect binaries |
Why Use a Toolchain?
- Automates the process of building software.
- Helps you go from source code to executable step by step.
- Gives you fine control over what happens at each stage.
- Essential in cross-compilation (e.g., compiling code on a PC to run on an embedded board like ARM or ESP32).
Real-World Analogy:
Imagine you’re baking a cake:
- Recipe (source code) → You follow steps (preprocess, compile, etc.)
- Ingredients → Preprocessed and compiled pieces
- Oven → The assembler
- Icing and decoration → Linker adds libraries and finishes the executable
At the end, you get a ready-to-eat cake, or in our case, a working program!
In this tutorial, we’ll understand 5 key tools:
as— the assemblerld— the linkerobjdump— the binary disassemblernm— lists symbolsreadelf— reads ELF binary structure
1. as — The Assembler
What it does:
as converts assembly language (.s) into machine code object files (.o).
Concept:
After the compiler generates assembly code from C/C++ (gcc -S), the assembler takes this .s file and converts it into binary instructions that the CPU can understand.
Example:
gcc -S hello.c     # Step 1: Get assembly code (hello.s)
as hello.s -o hello.o  # Step 2: Assemble to object file
You now have an object file hello.o.
2. ld — The Linker
What it does:
ld combines multiple .o files and libraries into a single executable.
Concept:
It resolves symbol references (like function calls), adds startup code, and organizes the layout of memory sections (text, data, etc.).
Example:
ld -o hello hello.o -lc -dynamic-linker /lib64/ld-linux-x86-64.so.2 -e main
Note: Usually, gcc does this linking automatically. The above is a manual link.
3. objdump — The Disassembler
What it does:
objdump shows you what’s inside an object or binary file. You can view assembly code, symbol tables, and more.
Concept:
Useful for debugging or reverse engineering. You can see what machine code was generated from your C/C++ code.
Example:
objdump -d hello.o
This disassembles the object file — shows actual assembly instructions.
You can also inspect all:
objdump -x hello.o4. nm — Lists Symbols
What it does:
nm lists symbols (like functions and global variables) from object files or executables.
Concept:
Symbols can be functions, variables, or labels. It shows whether they’re defined, undefined, or global/static.
Example:
nm hello.o
Sample output:
00000000 T main
         U printf
T main: symbolmainis defined in text (code) section.U printf: symbolprintfis undefined (from libc).
5. readelf — Reads ELF Binaries
What it does:
readelf displays information from ELF (Executable and Linkable Format) files — used by Linux.
Concept:
ELF files are used for executables, object files, shared libs, etc. You can view headers, sections, symbol tables, etc.
Example:
readelf -h hello.o    # ELF header
readelf -S hello.o    # Section headers
readelf -s hello.o    # Symbol table
Summary Table
| Tool | Purpose | Example |
|---|---|---|
as | Assembles .s to .o | as file.s -o file.o |
ld | Links .o to executable | ld file.o -o file |
objdump | Shows machine code, symbols | objdump -d file.o |
nm | Lists functions/variables | nm file.o |
readelf | Displays ELF internals | readelf -h file.o |
Try it Yourself: Mini Demo
- Create a file:
// hello.c
#include
void greet() { printf("Hello!\n"); }
int main() { greet(); return 0; }
- Compile step by step:
gcc -S hello.c            # Creates hello.s
as hello.s -o hello.o     # Assemble to object file
ld hello.o -o hello -lc -dynamic-linker /lib64/ld-linux-x86-64.so.2 -e main
./hello                   # Run the program
- Inspect:
nm hello.o
objdump -d hello.o
readelf -h hello
You can also Visit other tutorials of Embedded Prep
- What is eMMC (Embedded MultiMediaCard) memory ?
- Top 30+ I2C Interview Questions
- Bit Manipulation Interview Questions
- Structure and Union in c
- Little Endian vs. Big Endian: A Complete Guide
- Merge sort algorithm
Special thanks to @mr-raj for contributing to this article on EmbeddedPr
Mr. Raj Kumar is a highly experienced Technical Content Engineer with 7 years of dedicated expertise in the intricate field of embedded systems. At Embedded Prep, Raj is at the forefront of creating and curating high-quality technical content designed to educate and empower aspiring and seasoned professionals in the embedded domain.
Throughout his career, Raj has honed a unique skill set that bridges the gap between deep technical understanding and effective communication. His work encompasses a wide range of educational materials, including in-depth tutorials, practical guides, course modules, and insightful articles focused on embedded hardware and software solutions. He possesses a strong grasp of embedded architectures, microcontrollers, real-time operating systems (RTOS), firmware development, and various communication protocols relevant to the embedded industry.
Raj is adept at collaborating closely with subject matter experts, engineers, and instructional designers to ensure the accuracy, completeness, and pedagogical effectiveness of the content. His meticulous attention to detail and commitment to clarity are instrumental in transforming complex embedded concepts into easily digestible and engaging learning experiences. At Embedded Prep, he plays a crucial role in building a robust knowledge base that helps learners master the complexities of embedded technologies.


Panic-mode cleaning rescue, made impossible timeline work. Speed-dialing for future crises. Rapid response appreciation.