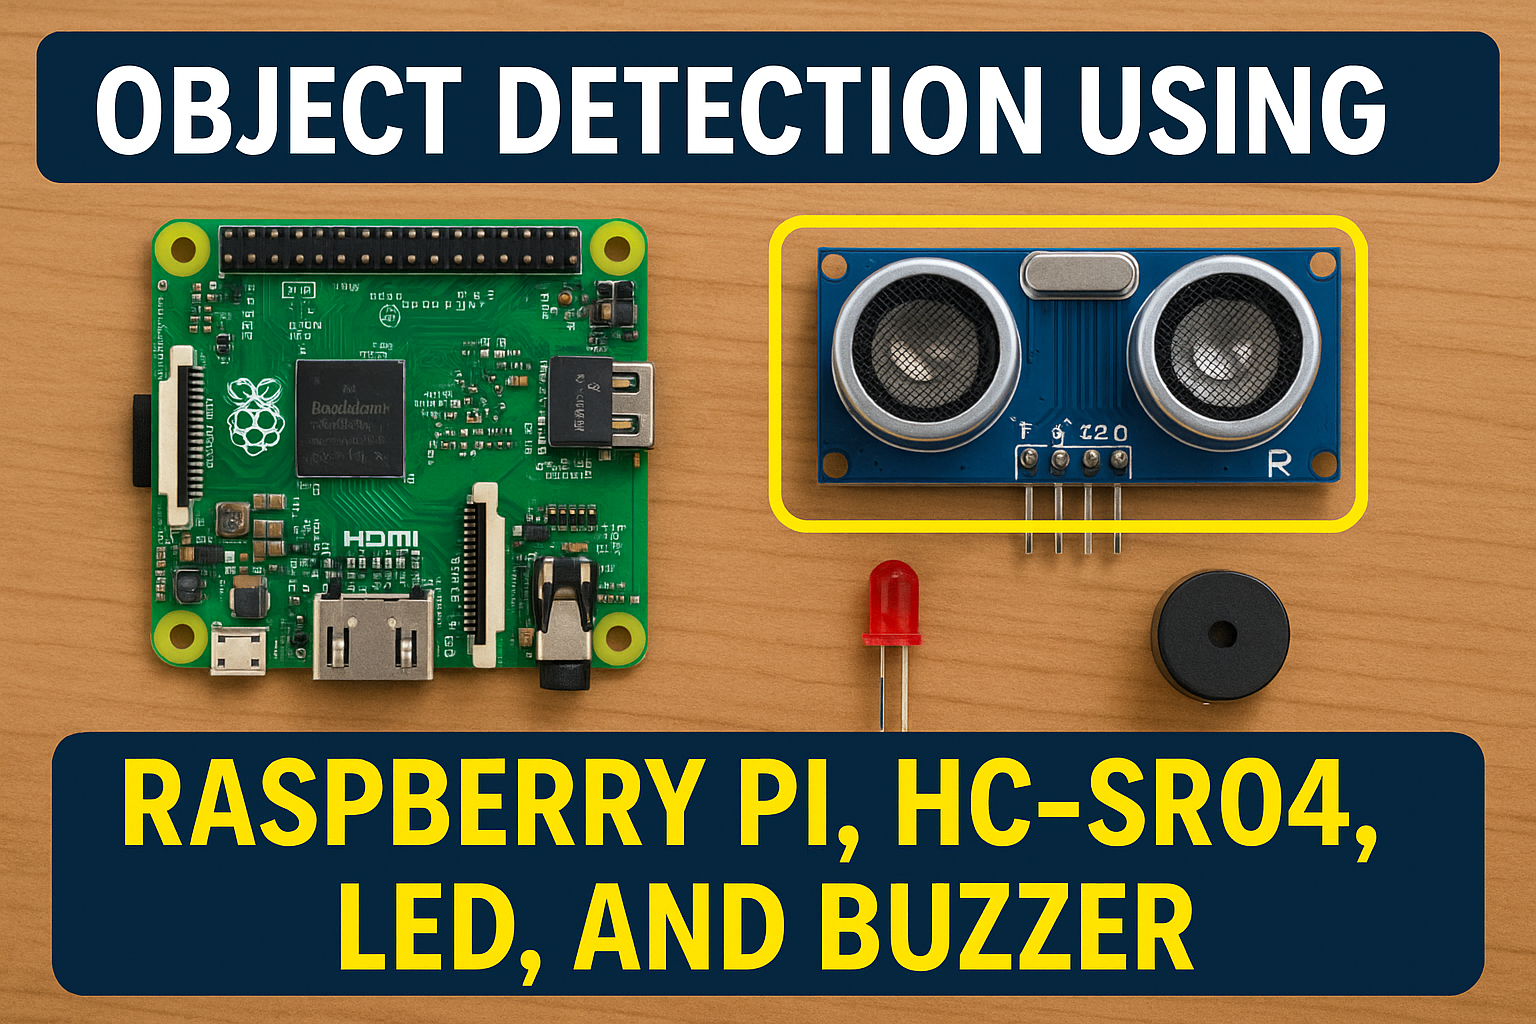
Object Detection Using Raspberry Pi : In this project, we’ll build a simple object detection system using a Raspberry Pi. When the ultrasonic sensor detects an object within a certain distance (e.g., less than 10 cm), it will turn on an LED and sound a buzzer.
Perfect for beginners, this project combines basic GPIO usage with real-world hardware.
Components Required for Object Detection Using Raspberry Pi
| Component | Quantity |
|---|---|
| Raspberry Pi (any model with GPIO) | 1 |
| HC-SR04 Ultrasonic Sensor | 1 |
| Breadboard | 1 |
| Jumper Wires | ~10 |
| LED | 1 |
| Resistor (220Ω for LED) | 1 |
| Active Buzzer | 1 |
| Optional: Resistors for voltage divider (1kΩ + 2kΩ) | 2 |
Raspberry Pi GPIO Pin Mapping (BCM Mode)
| Purpose | GPIO Pin | Physical Pin | Component Pin |
|---|---|---|---|
| Trigger (Ultrasonic) | GPIO 23 | Pin 16 | HC-SR04 TRIG |
| Echo (Ultrasonic) | GPIO 24 | Pin 18 | HC-SR04 ECHO |
| LED Control | GPIO 18 | Pin 12 | LED (via resistor) |
| Buzzer Control | GPIO 25 | Pin 22 | Buzzer (+ve) |
| 5V Power | 5V | Pin 2 or 4 | HC-SR04 VCC, Buzzer |
| Ground | GND | Pin 6 or 9 | All GND pins |
Wiring Instructions
1. HC-SR04 Ultrasonic Sensor
| HC-SR04 Pin | Connect To |
|---|---|
| VCC | 5V (Pin 2/4) |
| GND | GND (Pin 6) |
| TRIG | GPIO 23 (Pin 16) |
| ECHO | GPIO 24 via voltage divider |
⚠️ Important: The ECHO pin outputs 5V, but Raspberry Pi GPIO only supports 3.3V. Use a voltage divider:
- 1kΩ resistor between Echo and Pi GPIO24
- 2kΩ resistor between Echo and GND
- Tap from junction to GPIO24
2. LED
| LED Pin | Connect To |
|---|---|
| Anode (+) | GPIO 18 via 220Ω resistor |
| Cathode (-) | GND |
3. Buzzer (Active Type)
| Buzzer Pin | Connect To |
|---|---|
| +ve | GPIO 25 |
| -ve | GND |
If you’re using a passive buzzer, use a transistor (NPN) to drive it safely.
Python Code
Here’s the complete Python script to read the ultrasonic sensor, and control the LED and buzzer based on object detection:
import RPi.GPIO as GPIO
import time

# Set GPIO mode
GPIO.setmode(GPIO.BCM)

# Define pin numbers
GPIO_TRIGGER = 23
GPIO_ECHO = 24
LED_PIN = 18
BUZZER_PIN = 25

# Set pin directions
GPIO.setup(GPIO_TRIGGER, GPIO.OUT)
GPIO.setup(GPIO_ECHO, GPIO.IN)
GPIO.setup(LED_PIN, GPIO.OUT)
GPIO.setup(BUZZER_PIN, GPIO.OUT)

def distance():
    # Send 10us pulse to trigger
    GPIO.output(GPIO_TRIGGER, True)
    time.sleep(0.00001)
    GPIO.output(GPIO_TRIGGER, False)

    start_time = time.time()
    stop_time = time.time()

    while GPIO.input(GPIO_ECHO) == 0:
        start_time = time.time()

    while GPIO.input(GPIO_ECHO) == 1:
        stop_time = time.time()

    time_elapsed = stop_time - start_time
    distance_cm = (time_elapsed * 34300) / 2
    return distance_cm

try:
    while True:
        dist = distance()
        print(f"Measured Distance = {dist:.1f} cm")

        if dist < 10.0:
            GPIO.output(LED_PIN, GPIO.HIGH)
            GPIO.output(BUZZER_PIN, GPIO.HIGH)
        else:
            GPIO.output(LED_PIN, GPIO.LOW)
            GPIO.output(BUZZER_PIN, GPIO.LOW)

        time.sleep(1)

except KeyboardInterrupt:
    print("Measurement stopped by User")
    GPIO.cleanup()
How It Works
- The HC-SR04 sends an ultrasonic pulse.
- When it bounces back from an object, the sensor calculates the distance.
- If the distance is less than 10 cm, it:
- Turns ON the LED
- Activates the buzzer
- Otherwise, both remain OFF.
Tips
- Ensure all ground connections are common.
- Always power off Raspberry Pi while wiring.
- Use
GPIO.cleanup()to reset pins after the script ends. - You can tweak the threshold distance (
if dist < 10.0:) based on your requirement.
Applications
- Obstacle detection for robots
- Proximity-based alerts
- Contactless doorbell or switch
- Smart trash bin lid opener
You can expand it further by adding a display (OLED/LCD), sending alerts via email, or connecting to a mobile app!
UltrasonicMailCam.py |
import RPi.GPIO as GPIO
import time
import subprocess
import yagmail
import os

# === GPIO Pin Setup ===
GPIO.setmode(GPIO.BCM)

GPIO_TRIGGER = 23
GPIO_ECHO = 24
LED_PIN = 18
BUZZER_PIN = 25

GPIO.setup(GPIO_TRIGGER, GPIO.OUT)
GPIO.setup(GPIO_ECHO, GPIO.IN)
GPIO.setup(LED_PIN, GPIO.OUT)
GPIO.setup(BUZZER_PIN, GPIO.OUT)

# === Distance Measurement Function ===
def measure_distance():
    GPIO.output(GPIO_TRIGGER, True)
    time.sleep(0.00001)
    GPIO.output(GPIO_TRIGGER, False)

    start_time = time.time()
    stop_time = time.time()

    while GPIO.input(GPIO_ECHO) == 0:
        start_time = time.time()
    while GPIO.input(GPIO_ECHO) == 1:
        stop_time = time.time()

    time_elapsed = stop_time - start_time
    distance_cm = (time_elapsed * 34300) / 2
    return distance_cm

# === Image Capture Function ===
def capture_image_libcamera(filename="captured.jpg"):
    subprocess.run(["libcamera-still", "-o", filename, "--nopreview"], check=True)

# === Email Sending Function ===
def send_email_with_attachment(sender, app_password, receiver, subject, message, attachment_path):
    yag = yagmail.SMTP(user=sender, password=app_password)
    yag.send(
        to=receiver,
        subject=subject,
        contents=message,
        attachments=attachment_path
    )
    print("📧 Email sent successfully!")

# === Main Function ===
if __name__ == '__main__':
    try:
        image_sent = False  # To avoid sending multiple emails rapidly

        while True:
            dist = measure_distance()
            print(f"Measured Distance = {dist:.1f} cm")

            if dist < 10.0:
                GPIO.output(LED_PIN, GPIO.HIGH)
                GPIO.output(BUZZER_PIN, GPIO.HIGH)

                if not image_sent:
                    print("📸 Object detected! Capturing image and sending email...")

                    # Capture image
                    image_file = "captured.jpg"
                    capture_image_libcamera(image_file)

                    # Send email
                    sender_email = "nishantsingh2jan1998@gmail.com"
                    app_password = "rooh lcrd byqw wuab"
                    receiver_email = "nishantkumarsingh131@gmail.com"
                    subject = "Captured Image from Raspberry Pi"
                    message = "Hi, this is the captured image attached."
                    send_email_with_attachment(sender_email, app_password, receiver_email, subject, message, image_file)

                    # Remove image after sending
                    if os.path.exists(image_file):
                        os.remove(image_file)
                        print("🗑️ Temporary image file removed.")

                    image_sent = True  # Mark as sent

            else:
                GPIO.output(LED_PIN, GPIO.LOW)
                GPIO.output(BUZZER_PIN, GPIO.LOW)
                image_sent = False  # Reset flag when object is gone

            time.sleep(1)

    except KeyboardInterrupt:
        print("\n🛑 Program stopped by user.")
        GPIO.cleanup()
You can also Visit other tutorials of Embedded Prep
- Structure with Pointers
- Master How to Use a Saleae Logic Analyzer with Arduino Uno (2025)
- Top 30+ I2C Interview Questions
- Bit Manipulation Interview Questions
- Structure and Union in c
- Fault Handling in Arm Cortex Mx Processor
- Merge sort algorithm
Special thanks to @mr-raj for contributing to this article on
Mr. Raj Kumar is a highly experienced Technical Content Engineer with 7 years of dedicated expertise in the intricate field of embedded systems. At Embedded Prep, Raj is at the forefront of creating and curating high-quality technical content designed to educate and empower aspiring and seasoned professionals in the embedded domain.
Throughout his career, Raj has honed a unique skill set that bridges the gap between deep technical understanding and effective communication. His work encompasses a wide range of educational materials, including in-depth tutorials, practical guides, course modules, and insightful articles focused on embedded hardware and software solutions. He possesses a strong grasp of embedded architectures, microcontrollers, real-time operating systems (RTOS), firmware development, and various communication protocols relevant to the embedded industry.
Raj is adept at collaborating closely with subject matter experts, engineers, and instructional designers to ensure the accuracy, completeness, and pedagogical effectiveness of the content. His meticulous attention to detail and commitment to clarity are instrumental in transforming complex embedded concepts into easily digestible and engaging learning experiences. At Embedded Prep, he plays a crucial role in building a robust knowledge base that helps learners master the complexities of embedded technologies.


