Blog

  • ESP32 WebSocket Tutorials: Master Complete Beginner-Friendly Guide

    Beginner-friendly ESP32 WebSocket tutorial covering server, client, async WebSocket, ESP32-CAM streaming, real-time control, and complete step-by-step examples.

    Learn WebSockets on ESP32 like you’re chatting with a friend over coffee.

    If you’ve ever tried building real-time IoT projects, you already know the struggle. You change a sensor value or press a button, and then… the browser takes a second to refresh. That’s the traditional HTTP way. It works, but it’s far from smooth.

    Now imagine your browser talking to your ESP32 instantly almost like a WhatsApp chat. No refreshing. No constant requests. Just pure, real-time communication.

    That’s exactly what esp32 websocket gives you. In this tutorial, we’ll start from zero and walk step by step until you build fast, responsive, real-time apps using esp32 websockets, esp32 websocket server, esp32 websocket client, ESP32 Arduino WebSocket client, and even ESP32 CAM WebSocket streaming.

    By the time you reach the end, you’ll understand everything from concepts to real code even if you’re a beginner.

    Let’s dive in.

    What Is a WebSocket?

    Let’s forget technical terms for a moment.

    Think of HTTP as placing an order at a restaurant.
    You ask for food → Wait → Food arrives → End.

    Now think of WebSocket as sitting on a group chat.
    Everyone sends and receives messages instantly.

    WebSockets create a two-way connection between your ESP32 and a browser (or phone, laptop, or anything connected).
    No need to “request” repeatedly.
    Both sides can send data anytime.

    That’s why esp32 websockets are perfect for:

    • live sensor dashboards
    • real-time motor control
    • smart home switches
    • live ESP32 CAM video streaming
    • multiplayer games
    • home automation control panels

    If your project needs speed and instant updates, WebSocket > HTTP. Every time.

    Why Use WebSockets on ESP32?

    Let’s keep it simple — WebSockets solve three big problems:

    1. Real-time updates

    With HTTP, the browser only gets new data when it asks for it.
    With WebSockets, your ESP32 pushes updates instantly.

    2. Less network load

    Traditional HTTP polling floods your network with requests.
    WebSockets keep one connection open and fast.

    3. Two-way communication

    Perfect for control dashboards where you want to send AND receive.

    This is why frameworks like esp32 async websocket, arduino esp32 websocket, and websocket arduino esp32 are so popular.

    Understanding ESP32 WebSocket Architecture

    Here’s the coffee-table explanation.

    ESP32 WebSocket Server

    ESP32 creates the connection.
    Browser connects to ESP32.
    ESP32 reacts and pushes updates.

    Used for:

    • dashboards
    • IoT control panels
    • sensor monitoring

    This is called an esp32 websocket server example when shown in code.

    ESP32 WebSocket Client

    ESP32 connects to another WebSocket server.
    For example:

    • Cloud WebSocket service
    • Node.js server
    • Remote automation system

    This is where terms like esp32 websocket client, esp32 websocket client arduino, and esp32 arduino websocket client fit naturally.

    Tools You Need Before Starting

    ESP32 board

    Any ESP32 board works (NodeMCU ESP32, ESP32-DevKit, etc.)

    Arduino IDE

    Easiest way for beginners.

    WebSocket Library

    We’ll use:

    ESPAsyncWebServer
    AsyncTCP

    These make esp32 async websocket fast and reliable.

    Basic HTML knowledge

    (If not, don’t worry — I’ll explain clearly.)

    ESP32 WebSocket vs HTTP: What’s the Real Difference?

    FeatureHTTPWebSocket
    Two-way communication❌ No✅ Yes
    Real-time updates❌ Slow✅ Instant
    Connection typeRequest-ResponseAlways connected
    ESP32 loadHighLow
    Use caseSimple appsSmart, dynamic apps

    If your project needs live updates, esp32 websocket is the way to go.

    Setting Up ESP32 WebSocket Server

    This is the most common setup.

    Let’s build the simplest esp32 websocket server example that sends and receives messages.

    Install these libraries first:

    Library 1: ESPAsyncWebServer

    Library 2: AsyncTCP

    You can install them from GitHub or through ZIP install.

    ESP32 WebSocket Example Code

    Here is the cleanest esp32 websocket example you can start with:

    #include <WiFi.h>
    #include <AsyncTCP.h>
    #include <ESPAsyncWebServer.h>
    
    const char* ssid = "YOUR_WIFI";
    const char* password = "YOUR_PASS";
    
    AsyncWebServer server(80);
    AsyncWebSocket ws("/ws");
    
    void onEvent(AsyncWebSocket *server, AsyncWebSocketClient *client,
                 AwsEventType type, void *arg, uint8_t *data, size_t len) {
    
      if (type == WS_EVT_CONNECT) {
        Serial.println("Client connected");
      }
    
      else if (type == WS_EVT_DATA) {
        Serial.print("Message received: ");
        Serial.println((char*)data);
    
        // Echo back message
        client->text("ESP32 received: " + String((char*)data));
      }
    }
    
    void setup() {
      Serial.begin(115200);
      WiFi.begin(ssid, password);
    
      while (WiFi.status() != WL_CONNECTED) {
        delay(500);
        Serial.print(".");
      }
    
      Serial.println("Connected");
      Serial.println(WiFi.localIP());
    
      ws.onEvent(onEvent);
      server.addHandler(&ws);
    
      server.begin();
    }
    
    void loop() {
      // Nothing required here
    }
    

    This is the simplest form of:

    • esp32 websocket
    • esp32 websocket server
    • esp32 async websocket
    • websocket esp32

    All rolled into one working example.

    HTML Client Code to Connect to ESP32 WebSocket

    Save this as index.html:

    <!DOCTYPE html>
    <html>
    <body>
    
    <h2>ESP32 WebSocket Demo</h2>
    
    <input id="msg" placeholder="Type message">
    <button onclick="sendMsg()">Send</button>
    
    <p id="output"></p>
    
    <script>
    let socket = new WebSocket("ws://" + location.host + "/ws");
    
    socket.onmessage = function(event) {
      document.getElementById("output").innerHTML +=
        "<br>ESP32 says: " + event.data;
    };
    
    function sendMsg() {
      let text = document.getElementById("msg").value;
      socket.send(text);
    }
    </script>
    
    </body>
    </html>
    

    This works with:

    • esp32 arduino websocket
    • websocket arduino esp32
    • esp32 websocket client example

    Your browser now talks to the ESP32 instantly.

    Using ESP32 WebSockets for Sensor Data (Real Project)

    Let’s send:

    • temperature
    • humidity
    • motion
    • light values

    …or any sensor data from ESP32 to your browser in real time.

    Replace this part:

    client->text("ESP32 received: " + String((char*)data));
    

    With something like:

    ws.textAll("Temperature: " + String(tempValue));
    

    Your browser updates instantly without refreshing.

    This setup is the core of many IoT dashboards.

    ESP32 WebSocket Client Example (Cloud / Server Connection)

    Sometimes ESP32 needs to connect to a remote WebSocket server.
    Here’s a tiny esp32 websocket client example:

    #include <ArduinoWebsockets.h>
    using namespace websockets;
    
    WebsocketsClient client;
    
    void setup() {
      Serial.begin(115200);
    
      client.connect("ws://yourserver.com:8080");
    
      client.onMessage([](WebsocketsMessage message) {
        Serial.println("Server: " + message.data());
      });
    
      client.send("Hello from ESP32");
    }
    
    void loop() {
      client.poll();
    }
    

    ESP32 CAM WebSocket Streaming

    WebSockets aren’t just for text. You can stream camera frames too — and the ESP32-CAM becomes much more powerful when you use WebSockets instead of traditional MJPEG HTTP streaming.

    Typical HTTP video stream from ESP32-CAM struggles because:

    • connection resets happen often
    • latency jumps
    • bandwidth spikes
    • browser freezes with high FPS

    But esp32 cam websocket streaming sends frames as small packets, keeping video:

    • smoother
    • faster
    • more stable
    • more responsive

    Here’s the idea:

    1. ESP32-CAM captures a frame
    2. ESP32 encodes it to JPEG
    3. Sends it over WebSocket
    4. Browser draws the frame on a <canvas> in your webpage

    This is exactly how modern IoT camera dashboards work.

    This real-time flow is exactly how modern IoT camera dashboards work. And if you’re just starting with WebSockets, you can follow this ESP32 WebSocket tutorial that covers server, client, async WebSocket, ESP32-CAM streaming, real-time control, and complete step-by-step examples check it out here: ESP32 Web Server

    Simple ESP32 CAM WebSocket Example (Concept Only)

    camera_fb_t * fb = esp_camera_fb_get();
    ws.binaryAll(fb->buf, fb->len);
    esp_camera_fb_return(fb);
    

    That’s it.
    Just three lines — now your ESP32 CAM sends frames directly through WebSocket.

    Your webpage then uses JavaScript like:

    socket.onmessage = function(event) {
        let blob = new Blob([event.data], {type: "image/jpeg"});
        let url = URL.createObjectURL(blob);
        document.getElementById("cam").src = url;
    };
    

    This is the heart of esp32 cam websocket stream.

    ESP32 Async WebSocket (Why It’s Best for Beginners)

    If you search online, you’ll see two ways to implement WebSockets:

    1. Synchronous (blocking)

    Slower, can freeze the ESP32 when handling many clients.

    2. Asynchronous (non-blocking)

    Fast, scalable, smooth.

    This is where esp32 async websocket shines.
    It uses AsyncTCP in the background — so your:

    • sensor loops
    • GPIO tasks
    • LED patterns
    • motors
    • timers

    …all continue to run smoothly while WebSockets handle clients.

    With async WebSockets:

    • multiple clients can connect
    • UI updates happen instantly
    • ESP32 doesn’t freeze under load

    That’s why most developers choose:

    ESPAsyncWebServer

    AsyncWebSocket

    This combination is by far the most popular esp32 websocket library.

    Understanding the ESP32 WebSocket Library

    When you install ESPAsyncWebServer, you automatically get:

    Classes you’ll use often:

    ClassPurpose
    AsyncWebServerCreates your web server
    AsyncWebSocketCreates your WebSocket endpoint
    AsyncWebSocketClientRepresents each connected client
    AsyncWebSocketMessageBufferHandles large messages safely

    You also get helpful methods:

    • .textAll(msg) → send message to all clients
    • .text(clientID, msg) → send to one client
    • .binaryAll(data, len) → send binary files (used in esp32 cam websocket)
    • .ping() → keep connection alive
    • .cleanupClients() → remove disconnected clients

    The library lets you build everything from:

    • chat apps
    • IoT dashboards
    • ESP32 smart home panels
    • sensor monitoring systems

    …all the way to live video streaming.

    Real-World Use Case: ESP32 WebSocket Home Automation Panel

    Here’s a simple but powerful setup.

    ESP32 Controls:

    • fan
    • bulb
    • relay module
    • LED strip

    HTML Dashboard (WebSocket client):

    • real-time button toggles
    • instant state updates
    • color picker for LED strip

    Why WebSockets make this superior:

    • changes reflect instantly
    • mobile browser becomes a remote
    • zero page refresh
    • ESP32 sends updates when GPIO changes
    • you can control it over the same Wi-Fi network

    This is where phrases like:

    • websocket esp32
    • websocket arduino esp32
    • esp32 arduino websocket

    naturally fit in real-world projects.

    ESP32 Arduino WebSocket Client: When ESP32 Connects to Another Server

    Sometimes, ESP32 isn’t the “main server.”
    Instead, you want ESP32 to connect to:

    • a Node.js server
    • a cloud WebSocket endpoint
    • another ESP32
    • a Python WebSocket server

    Here’s a clean esp32 arduino websocket client example snippet:

    client.onMessage([](WebsocketsMessage message) {
        Serial.print("From Server: ");
        Serial.println(message.data());
    });
    

    This works perfectly for:

    • remote automation
    • connecting ESP32 devices to a central server
    • live control from mobile apps
    • multi-room home automation systems

    Many beginners prefer this because it lets you scale easily.

    ESP32 WebSocket Client Arduino Example (Full Code)

    Here’s an even more complete example (still simple):

    #include <WiFi.h>
    #include <ArduinoWebsockets.h>
    using namespace websockets;
    
    const char* ssid = "YOUR_SSID";
    const char* pass = "YOUR_PASS";
    
    WebsocketsClient client;
    
    void setup() {
      Serial.begin(115200);
    
      WiFi.begin(ssid, pass);
      while(WiFi.status() != WL_CONNECTED) {
          delay(500);
          Serial.print(".");
      }
    
      client.connect("ws://192.168.1.10:8080");
    
      client.onMessage([](WebsocketsMessage msg){
          Serial.println("Server: " + msg.data());
      });
    
      client.onEvent([](WebsocketsEvent event, String data){
          if(event == WebsocketsEvent::ConnectionOpened){
              Serial.println("Connected to Server");
          }
      });
    
      client.send("ESP32 Hello!");
    }
    
    void loop() {
      client.poll(); // must be called
    }
    

    This covers the keyword set:

    • esp32 websocket client
    • esp32 websocket client example
    • websocket client esp32

    ESP32 WebSocket Security Basics

    Most beginners worry about:

    • “Is WebSocket safe?”
    • “Can someone hack my ESP32?”

    Let’s break it down.

    Local Wi-Fi = Safe

    If your ESP32 and user dashboard are on the same Wi-Fi network, you are already protected by the router.

    Password protect ESP32 Wi-Fi AP mode

    If your ESP32 creates a Wi-Fi hotspot, ALWAYS set a password.

    Use WebSocket Ping

    Sends small packets to keep the connection alive.

    HTTPS + WSS (Advanced)

    You can use encrypted WebSocket connections (wss://), but for beginners, HTTP is fine.

    Adding Multiple WebSocket Endpoints on ESP32

    Yes, you can have multiple.

    Example:

    AsyncWebSocket sensorWS("/sensor");
    AsyncWebSocket chatWS("/chat");
    

    This helps when building complex dashboards.

    • /sensor → live sensor values
    • /chat → user messages
    • /camera → video stream

    ESP32 handles them all smoothly because async TCP works in the background.

    WebSocket Troubleshooting Guide (Fix 99% of Issues)

    1. Browser not connecting?

    Check this:

    ws://your-esp32-ip/ws
    

    If your endpoint is /ws, you must match it in JavaScript.

    2. ESP32 keeps restarting?

    Your heap is low.
    ESP32 CAM especially suffers with low memory.

    Fix:

    ws.cleanupClients();
    

    Use it every 10 seconds.

    3. Messages not received?

    Make sure:

    socket.onmessage = ...
    

    is correctly written.

    4. AsyncWebServer not installed correctly?

    Make sure you installed both:

    • ESPAsyncWebServer
    • AsyncTCP

    5. HTML not loading?

    Serve your HTML using:

    server.serveStatic("/", SPIFFS, "/");
    

    or embed it as a string.

    ESP32 WebSocket Best Practices (For Smooth Performance)

    • use asynchronous WebSockets
    • send small messages
    • clean up disconnected clients
    • avoid large JSON objects
    • compress camera frames
    • do not update UI every millisecond
    • batch sensor values into one message

    These tips prevent lag and memory issues.

    ESP32 WebSocket + Arduino + HTML: Final Combined Mini Project

    This is a simple beginner-friendly project where:

    • ESP32 hosts a WebSocket server
    • A webpage shows live temperature
    • You can toggle an LED from the browser
    • Updates happen instantly

    This single project uses many keywords naturally:

    • esp32 websockets
    • esp32 websocket server
    • esp32 websocket example
    • arduino esp32 websocket
    • websocket arduino esp32
    • esp32 websocket library

    FAQ : ESP32 WebSocket

    What is an ESP32 WebSocket and why is it used?

    An ESP32 WebSocket is a communication method that keeps a constant connection open between your ESP32 and a browser or another device. Instead of sending one request at a time like HTTP, WebSockets let both sides talk instantly. This makes them perfect for real-time dashboards, sensor monitoring, ESP32 CAM video streaming, and home automation projects where fast updates matter.

    How is ESP32 WebSocket different from normal HTTP communication?

    HTTP works like a question-answer system; you send a request and wait. ESP32 WebSockets stay connected the whole time, so your ESP32 can push sensor data instantly. This is why dashboards update in real time and why ESP32 CAM WebSocket stream feels smoother than normal MJPEG streaming.

    Do I need a special ESP32 WebSocket library?

    Yes. The most popular choice is ESPAsyncWebServer paired with AsyncWebSocket. This library handles multiple connections smoothly and makes your ESP32 projects faster. If you prefer the Arduino approach, you can also use the lightweight ArduinoWebsockets library for building an ESP32 WebSocket client.

    What is the difference between ESP32 WebSocket Server and ESP32 WebSocket Client?

    An ESP32 WebSocket server accepts connections from browsers and apps.
    An ESP32 WebSocket client connects to another server such as Node.js, Python, or even another ESP32.
    You use a server when you want ESP32 to host a dashboard.
    You use a client when ESP32 needs to send data to the cloud or communicate with a central controller.

    Can ESP32 work as a WebSocket client in Arduino?

    Absolutely. Many developers use the esp32 arduino websocket client setup to send live data to a backend server. It works with Node.js websockets, Python websockets, and cloud WebSocket endpoints too. It’s perfect for large systems where multiple ESP32 boards send data to one backend.

    Is ESP32 Async WebSocket better than the normal (synchronous) approach?

    Yes. esp32 async websocket is much faster because it doesn’t block other tasks. Your ESP32 can handle Wi-Fi, sensors, timers, and WebSockets at the same time. This is why real-time dashboards and live ESP32 CAM WebSocket streams perform better with asynchronous libraries.

    Can I build a WebSocket Arduino ESP32 project without hosting a website on ESP32?

    Yes. You can host the website anywhere—GitHub Pages, Node.js server, or your laptop—and connect directly to the websocket arduino esp32 endpoint. This is helpful when your website is large or when the ESP32 doesn’t have enough storage for HTML files.

    Why is ESP32 CAM WebSocket streaming so popular?

    ESP32 CAM WebSocket streaming is popular because it reduces delay, improves frame rate, and sends compressed images more efficiently. Unlike old HTTP video streams, WebSockets send JPEG frames as binary data, giving you smoother video for security cameras, robots, or FPV projects.

    How many clients can ESP32 WebSocket support at once?

    Most projects run 2–6 clients smoothly. With async libraries, the ESP32 can even handle 10+ lightweight connections. Heavy tasks like ESP32 CAM WebSocket streaming reduce this number, but for normal sensor and LED control dashboards, the ESP32 works great with multiple users.

    Why is my ESP32 WebSocket disconnecting frequently?

    Common reasons include weak Wi-Fi, incorrect WebSocket endpoint, sending too much data too fast, or running out of memory. Using async libraries, adding ws.cleanupClients(), reducing frame size for ESP32 CAM, and enabling ping messages usually fix all disconnect issues.

    Can I use WebSockets with both ESP32 and ESP8266?

    Yes, the same WebSocket concepts work for ESP8266 too, but the ESP32 handles more clients and bigger data. If you’re building a dashboard or camera project, always pick ESP32 because it has better memory and dual-core processing.

    Is WebSocket safe for IoT projects?

    When ESP32 WebSocket runs inside your home Wi-Fi, it is very safe. For public access, you can enable secure connections using wss://, strong passwords, and token verification. Most beginners don’t need advanced security when all devices stay inside the same network.

    Can ESP32 WebSocket be used for home automation?

    Yes. Many people build instant-control smart systems using esp32 websockets, because turning on lights, fans, relays, or LEDs happens in real time. Unlike HTTP buttons, WebSocket updates feel faster and more reliable, especially when controlling multiple devices.

    What is the easiest ESP32 WebSocket example for beginners?

    The simplest setup is a basic esp32 websocket server example that toggles an LED and sends sensor values to a webpage. It uses AsyncWebServer, AsyncWebSocket, and a small HTML file. Beginners love this project because it updates instantly without page refresh.

    Can I stream sensor data to a mobile phone using ESP32 WebSocket?

    Yes—your phone browser can connect directly to the ESP32 WebSocket server. You can stream temperature, humidity, gas sensor values, or motion alerts with zero delay. This is the simplest way to make your own real-time IoT dashboard.

    Does WebSocket work with ESP32 Bluetooth or only Wi-Fi?

    WebSocket only works over Wi-Fi. If you need Bluetooth communication, you would use BLE characteristics or classic Bluetooth, not WebSockets. But for fast, stable IoT dashboards, Wi-Fi + WebSocket is the best combination.

    Can I connect two ESP32 devices using WebSocket?

    Yes. One ESP32 acts as the WebSocket server and the second works as the websocket client esp32. This setup is super useful when you want one device to collect data and another device to control hardware like motors or relays.

    Is ESP32 WebSocket good for gaming dashboards or joystick control?

    Yes. Because WebSockets send messages instantly, you can make joystick-controlled robots, car projects, ESP32 CAM FPV, and even browser-based mini games that interact with real hardware. HTTP is too slow for this, but WebSockets handle it easily.

    Why should beginners learn ESP32 WebSocket instead of HTTP polling?

    WebSockets use less bandwidth, respond faster, and feel smoother. Beginners often start with HTTP but quickly move to websocket esp32 because everything happens in real time: LEDs toggle instantly, video streams smoothly, and sensor dashboards refresh without page reload.
  • ESP32: Best way to store data frequently? Beginner-Friendly Guide

    Discover ESP32: Best way to store data frequently? Learn how to store data in RAM, EEPROM, SPIFFS, NVS, SD card, and FRAM for efficient persistent logging.

    So, you’ve got an ESP32 board humming away, collecting sensor readings or user inputs, and you want to store data frequently maybe every second, maybe every minute — without losing anything when the power goes off. Choosing how to store data on the ESP32 is more than just picking between RAM and flash: it’s about durability, speed, memory capacity, and wear. In this guide, I’ll walk you through ESP32: Best way to store data frequently, reviewing key storage options, trade‑offs, and practical tips. By the end, you’ll know exactly how to pick and implement a storage strategy for your project.

    Why Data Storage Matters for ESP32 Projects

    In many embedded projects especially with ESP32 you need persistent data storage: you don’t just want to hold data in memory (RAM) for a moment, you want to keep it around between reboots, or log it over time.

    • If you’re building a data logger, you’ll want to store sensor readings to analyze trends later.
    • If your system should recover gracefully after a power cut, you need persistent storage.
    • Frequently saving data helps prevent loss when something goes wrong.

    But “frequently” adds complexity. Writing too often to certain types of storage wears them out fast. So, let’s break down the options.

    Overview of ESP32 Storage Options

    Here are the main storage mechanisms you can use on an ESP32, along with their trade-offs:

    1. RAM (volatile memory)
    2. EEPROM (emulated)
    3. SPIFFS or LittleFS (filesystem in flash)
    4. Non-volatile storage (NVS)
    5. SD card storage
    6. External flash or FRAM
    7. RTC memory

    Let’s examine each in detail.

    1. ESP32 Store Data in RAM

    What is RAM storage?

    Running variables on the ESP32 use RAM. This is super fast, easy to use, but volatile once the power goes, all data is gone.

    Use-cases and limitations

    • Good for: temporary data, caching, computations, real-time buffers.
    • Bad for: anything that must survive a reset or power cycle.

    If you store data only in RAM, you risk losing everything when you reset or lose power. That’s fine if you’re just handling live data, but not for persistent logging.

    2. ESP32 Store Data in EEPROM (Emulated)

    What is EEPROM on ESP32?

    The ESP32 doesn’t have real EEPROM, but you can emulate EEPROM using a portion of flash memory. Using the Arduino-ESP32 core, for instance, you get an EEPROM library that reserves flash pages.

    Pros and cons

    • Pros: Simple API, good for storing small, fixed-size variables (like calibration data or counters).
    • Cons: Limited write cycles per flash page (~10,000–100,000), slow relative to RAM, and you need to manage page boundaries yourself.

    When to use EEPROM-style storage

    Keeping persistent counters, configuration values, or a few small flags. When data size is small and structure is fixed, you can combine EEPROM-style storage with other ESP32 solutions for advanced projects. For example, check out the ESP32-C6 PoE development board for projects that need reliable connectivity and storage options.

    3. ESP32 Store Data in Flash via File System (SPIFFS / LittleFS)

    What is SPIFFS / LittleFS?

    These are filesystems that run inside the flash on the ESP32. You can treat part of your flash partition like disk storage: open files, write, read, and delete.

    Pros

    • Good for persistent storage of log files, JSON, or chunks of data.
    • Supports large data (relative to EEPROM), depending on how big your partition is.
    • Easier to manage structured data (files, folders).

    Cons

    • Flash wear: every write-erases and rewrites entire blocks; you need to minimize writes.
    • File system overhead.
    • Less endurance for frequent writes compared to more specialized storage.

    Use-case for frequent data logging

    If you’re logging data (e.g., sensor telemetry) and can buffer writes, using SPIFFS or LittleFS is often a solid choice. You might accumulate data in RAM and flush to SPIFFS periodically rather than writing every second.

    4. ESP32 Non-Volatile Storage (NVS)

    What is NVS?

    NVS is a key-value storage system built into ESP-IDF (the underlying framework for ESP32). It stores data in flash in a way optimized for small writes and wear leveling.

    Pros

    • Better wear leveling than raw flash.
    • Optimized for frequent writes of small pieces of data.
    • Offers a simple API for storing integers, strings, blobs, etc.

    Cons

    • Not designed for huge blobs (very large logs).
    • Limited by partition size.

    When to use NVS

    • Configuration, calibration, or small but critical data.
    • Frequent updates of small variables.
    • When you don’t need a full file system.

    5. ESP32 Store Data on SD Card

    What is SD card storage?

    You can connect an SD card to the ESP32 via SPI or SDIO. Then you mount a FAT or similar filesystem and read/write files like a microcontroller with an SD card.

    Pros

    • Huge capacity: gigabytes of space, perfect for large logs.
    • Write cycles are not a major concern: SD cards are durable for logging.
    • Filesystem familiar (FAT, exFAT) and easy to manage.

    Cons

    • Requires more hardware (SD card slot or module).
    • Slightly more complex code to mount, read, write.
    • Power consumption; you might need to handle unmounting cleanly to avoid corruption.

    Use-case for frequent logging

    If you’re doing long-term data logging — say recording sensor data every second for days or weeks SD card is likely the best. It gives you persistent storage, room to store large data, and is cost-effective.

    6. External Flash or FRAM

    What is external flash / FRAM?

    You can attach a secondary flash chip or FRAM (ferroelectric RAM) to the ESP32 via SPI or QSPI. FRAM is particularly excellent for frequent writes because it supports virtually unlimited write cycles.

    Pros

    • FRAM: extremely high endurance, good for writing often.
    • External storage: more capacity, more flexibility.
    • Can implement circular buffers, ring logs, or journaling easily.

    Cons

    • More hardware complexity.
    • Slightly more power consumption.
    • Need to write your own driver / data management.

    When to pick external memory

    • Applications needing very frequent writes (like real-time data logging).
    • Projects where you can afford extra cost / hardware.
    • When flash endurance is a concern, or you need large persistent storage.

    7. ESP32 Store Data in RTC Memory

    What is RTC memory?

    The ESP32 has a small region of RTC (Real-Time Clock) memory, which stays powered in certain sleep modes (if configured). Useful for caching small data across deep sleeps.

    Pros

    • Low latency, small storage.
    • Good for saving a few variables across deep sleep cycles.
    • Doesn’t wear out like flash.

    Cons

    • Very limited in size.
    • Not persistent forever—loses data if power is fully removed.

    When to use RTC memory

    • Storing wake reason, last sample, or counters across sleep/wake cycles.
    • Not for bulk logging, but great for maintaining context.

    So, What’s the Best Approach ESP32: Best Way to Store Data Frequently?

    Now, based on what you’ve learned, how do you pick the best way to store data frequently on ESP32? There’s no one-size-fits-all — it depends on your use-case. Here are some rules of thumb, and a few recommended strategies.

    Key Factors to Consider

    1. Write Frequency: How often are you writing?
    2. Data Size: How much data per write?
    3. Persistence: Does the data need to survive power loss?
    4. Memory Capacity: How much storage do you need?
    5. Hardware Constraints: Do you have an SD card slot, or only internal flash?
    6. Endurance Requirements: How important is flash wear?
    7. Power Constraints: Are deep sleeps involved?

    Strategy 1: NVS for Small, Frequent Writes

    If your data is small (like integers, counters, or short strings), and you need to update it frequently, then NVS is often the best choice.

    • Use NVS to store key-value pairs.
    • Every write goes through wear-leveling, so flash doesn’t wear quickly.
    • Because it’s integrated with ESP-IDF, it’s fairly straightforward.

    Example:

    #include "nvs_flash.h"
    #include "nvs.h"
    
    void init_storage() {
      esp_err_t err = nvs_flash_init();
      if (err == ESP_ERR_NVS_NO_FREE_PAGES ||
          err == ESP_ERR_NVS_NEW_VERSION_FOUND) {
        // NVS partition was truncated, erase and retry
        ESP_ERROR_CHECK(nvs_flash_erase());
        ESP_ERROR_CHECK(nvs_flash_init());
      }
      ESP_ERROR_CHECK(err);
    }
    
    void store_counter(int32_t count) {
      nvs_handle_t my_handle;
      ESP_ERROR_CHECK(nvs_open("storage", NVS_READWRITE, &my_handle));
      ESP_ERROR_CHECK(nvs_set_i32(my_handle, "counter", count));
      ESP_ERROR_CHECK(nvs_commit(my_handle));
      nvs_close(my_handle);
    }
    
    int32_t load_counter() {
      nvs_handle_t my_handle;
      int32_t count = 0;
      ESP_ERROR_CHECK(nvs_open("storage", NVS_READONLY, &my_handle));
      ESP_ERROR_CHECK(nvs_get_i32(my_handle, "counter", &count));
      nvs_close(my_handle);
      return count;
    }
    

    This is great when you periodically update a small number and can afford the slight latency of commit.

    Strategy 2: SPIFFS / LittleFS for Log Files

    If your data is larger or structured, such as JSON or CSV logs, use SPIFFS or LittleFS.

    How to do it well:

    1. Buffer in RAM: Accumulate data in a buffer in RAM.
    2. Flush periodically: Write to the file system only every few seconds or minutes.
    3. Rolling logs: Use a ring-buffer approach—once file is large enough, rotate or archive.
    4. Minimize writes: Combine many entries into one write to reduce write cycles.

    Example (Arduino-style):

    #include "SPIFFS.h"
    
    void setup() {
      SPIFFS.begin(true);
    }
    
    void logData(String entry) {
      static File logFile = SPIFFS.open("/datalog.csv", FILE_APPEND);
      if (!logFile) {
        Serial.println("Failed to open log file");
        return;
      }
      logFile.println(entry);
      logFile.flush(); // ensures data is written
    }
    
    void loop() {
      String data = String(millis()) + "," + String(analogRead(34));
      logData(data);
      delay(1000); // log every second
    }
    

    This is good when you want a persistent file that you can read later by mounting SPIFFS or extracting the flash contents.

    Strategy 3: SD Card for High-Volume Logging

    If you’re collecting a lot of data — maybe high-frequency sensor data, or you want to keep data for days — use SD card storage.

    Best practice:

    • Use the SD library or SD_MMC (if using SDIO).
    • Create a file (or files) on FAT filesystem.
    • Write in batches, not every sample individually if you can help it.
    • Handle clean dismount: ensure you properly close files before power-off.

    Example (Arduino-style):

    #include "SD.h"
    #define SD_CS_PIN 5
    
    void setup() {
      if (!SD.begin(SD_CS_PIN)) {
        Serial.println("SD init failed");
        return;
      }
    }
    
    void logToSD(String entry) {
      File file = SD.open("/log.txt", FILE_APPEND);
      if (!file) {
        Serial.println("Failed to open file");
        return;
      }
      file.println(entry);
      file.close();
    }
    
    void loop() {
      uint64_t timestamp = esp_timer_get_time(); // get microseconds since boot
      String entry = String(timestamp) + "," + String(analogRead(34));
      logToSD(entry);
      delay(1000);
    }
    

    This is ideal when space is a concern and you want serious persistence.

    Strategy 4: External Flash or FRAM for High Endurance

    If your application demands hundreds of thousands or millions of writes, internal flash might wear out too soon. In that case, external FRAM or external flash is your friend.

    How to do it:

    • Use SPI to connect to a FRAM chip.
    • Implement a circular buffer (ring log).
    • Use a header/footer for each record (timestamp, length, CRC) to recover after power loss.

    Pros:

    • FRAM supports very high number of writes.
    • You can maintain continuous logging with minimal wear worry.

    Cons:

    • Hardware complexity.
    • You need to write or adapt a wear-leveling or journaling mechanism.

    Strategy 5: Using RTC Memory for Sleep-Wake Persistence

    If your ESP32 uses deep sleep, you might want to save a few bytes across sleep cycles. The RTC memory is perfect for that.

    Typical usage:

    • Store a last sample, counter, or a wake-up reason.
    • Recover state quickly after wake.

    Code snippet (ESP-IDF):

    RTC_DATA_ATTR int bootCount = 0;
    
    void app_main() {
      bootCount++;
      printf("Boot count: %d\n", bootCount);
      esp_deep_sleep(1000000); // sleep for 1 second
    }
    

    This data is fast to access, and you don’t wear out flash for trivial counters or state management.

    Implementing a Reliable Data Logger Putting It All Together

    Let’s combine some of these strategies into a reliable data logger, using an ESP32 collecting sensor data, timestamped, stored frequently, and surviving resets.

    Step 1: Get System Time ESP32 Get System Time

    You’ll want meaningful timestamps. Use esp_timer_get_time() (ESP-IDF) to get microseconds since boot, or sync with an RTC/NTP if you need real-world timestamps.

    int64_t now_us = esp_timer_get_time(); // microseconds since boot
    time_t now_s = time(NULL); // if you’ve set up NTP
    

    Using real-world time is better for logs, but boot-relative time is faster and simpler.

    Step 2: Buffering Strategy

    • In your loop, collect data every second.
    • Append data to a RAM ring buffer (an array or vector).
    • Every N samples (say, 10), flush to storage (SPIFFS, SD, or FRAM).

    This reduces write frequency and extends lifetime if writing to flash.

    Step 3: Choosing Storage

    • Use NVS for small state (e.g., last write pointer, metadata).
    • Use SPIFFS or LittleFS or SD card for logs.
    • If you have FRAM, use it for a high-cycle journal.

    Step 4: Error Handling and Recovery

    • On startup, open your log store.
    • If corrupted file or partition, handle gracefully (rename or recreate).
    • Use CRC or checksums per record if data integrity matters.
    • Commit NVS after writing pointer updates.

    Comparing the Options: Trade-offs at a Glance

    Storage OptionEndurance (writes)CapacitySpeedComplexityBest For
    RAMUnlimited (volatile)SmallFastVery simpleTemporary buffering
    EEPROM (emulated)~10k–100kSmallMediumSimple APIConfig / counters
    NVSBetter wear-levelingSmall to mediumMediumModerateKey-value state
    SPIFFS / LittleFSModerateMediumSlow‑mediumModerateLog files, structured data
    SD CardVery high (for log use)Very largeMediumHardware + softwareHigh-volume data logging
    External FRAMVery high (millions)MediumFastHardware + softwareFrequent writes, wear-sensitive logging
    RTC MemoryUnlimited (in sleep)Very smallFastVery simpleSleep persistence, counters

    Best Practices for Frequent Storage on ESP32

    Here are some tips to make sure your data logging is reliable, efficient, and safe:

    1. Minimize writes to flash
      Buffer data in RAM, then write in batches.
    2. Use wear leveling
      Use NVS or journaling to spread out writes evenly.
    3. Use checksums / CRC
      When logging critical data, store a CRC or checksum to validate integrity on read.
    4. Close and flush files
      When using SPIFFS or SD, flush data and close files properly so you don’t corrupt them on power loss.
    5. Use partitioning
      In ESP-IDF, create separate partitions for NVS, filesystem, and application so you don’t run out of space or interfere.
    6. Optimize for power
      If you’re using deep sleep, combine RTC memory with infrequent flash writes.
    7. Recovery strategy
      On startup, detect if log was corrupted, and handle it (rename old logs, restart log).
    8. Monitor wear
      If you’re using flash heavily, track how many writes you’re doing; use external memory (FRAM) if needed.
    9. Time management
      Use esp_timer_get_time() or NTP to timestamp data cleanly.
    10. Design logs carefully
      Choose a log format (binary, JSON, CSV) that balances parseability and space.

    Example Project: ESP32 Data Logger

    Imagine you’re building a temperature logger with an ESP32, a DHT22 sensor, and you want to log temperature every 10 seconds, timestamped, storing logs for days.

    Here’s a high-level design:

    1. Use NTP (Network Time Protocol) to sync time at startup.
    2. Fetch temperature every 10 seconds.
    3. Append data (timestamp + temperature) to a RAM buffer (maybe a std::vector<String> or C array).
    4. Every minute (6 samples), write the buffer to SPIFFS as a CSV file.
    5. In NVS, record how many lines you have written and your file pointer.
    6. On reboot, open the existing log file and resume appending.
    7. Use a rolling scheme: when the file surpasses, say, 1 MB, start a new file (e.g., log_001.csv, log_002.csv).
    8. Ensure each file write is flushed and closed before sleep/shutdown.
    9. If power loss: on next boot, check your file, maybe recompute CRC for each entry, and ensure continuity.

    This architecture gives you: persistent storage, frequent logging, timestamped data, and wear-safe writes.

    FAQ : Common Questions & Answers

    Q1. Can I just write to flash every time I get a reading?
    A: You could, but it’s not ideal. Frequent flash writes without buffering can wear out your flash, reduce longevity, and slow down your system. It’s often better to buffer and batch writes.

    Q2. How big can SPIFFS be?
    A: It depends on how you configure your partition in ESP-IDF or with Arduino-ESP32. You choose how much flash space is allocated to SPIFFS when you flash the firmware.

    Q3. Will NVS wear out?
    A: NVS includes wear-leveling, but it’s not infinite. It’s good for many writes but not for extremely frequent huge binary logs. Use proper strategy or external memory if that’s your use case.

    Q4. My SD card file gets corrupted when I power off. What to do?
    A: Make sure to file.flush() and file.close() properly. Also, consider using journaling or two-phase writes, where you write to a temporary file and then rename when complete.

    Q5. Do I need to worry about little‑endian or big‑endian issues?
    A: Yes if you’re writing binary data. For logs in text (CSV/JSON), it’s not a problem. But for binary efficient logs, be consistent and document your format.

    Q6. How do I know when flash wears out?
    A: Flash manufacturers don’t typically let you read write-cycle counts. But during development, you can estimate how many writes you’re doing, monitor failure, or use external memory like FRAM if endurance matters.

    Why This Is the Best Way My Recommendation

    For most beginners, I recommend the following balanced strategy:

    • Use NVS for small critical state.
    • Use SPIFFS or LittleFS for structured logging.
    • Buffer data in RAM and write in batches.
    • Use timestamps via esp_timer_get_time() or NTP.
    • Implement rolling log files to manage storage.
    • Handle file errors and power loss gracefully.

    This method gives you persistent data, avoids flash over-use, and is pretty easy to maintain.

    If your use case is more demanding (many writes, super long-term logging), then consider external FRAM or SD card.

    Real-World Example: Data Logging with ESP32 Store Data Frequently

    Let me walk you through a hypothetical project, to make it more concrete.

    Project: A remote environmental sensor node that logs temperature, humidity, and light every 5 seconds. It has Wi-Fi, but no constant connection. Data should survive reboots and power cuts. We want to store a week’s worth of data.

    Hardware:

    • ESP32
    • DHT22 (temperature + humidity sensor)
    • Light sensor (analog)
    • SD card module

    Storage Plan:

    1. Use the SD card to store logs — huge capacity.
    2. Use NVS to store metadata: last file name, number of entries, pointer.
    3. Use RAM buffer: every 5 samples (25 seconds), write to SD in a batch.

    Software Flow:

    • On boot:
      • Mount SD.
      • Load metadata from NVS (what was last log file, current index).
      • If mounting fails or new file needed, create a new log file.
    • In loop:
      • Read sensors.
      • Get timestamp (via NTP or esp_timer_get_time()).
      • Append reading to RAM buffer.
      • After buffer is full (5 entries), open file, write buffer, close file.
      • Update metadata in NVS: total lines written, file index.
      • If log file size > threshold (say 5 MB), start a new log file.
      • Delay using delay(5000) or similar.
    • On unexpected reset:
      • At next boot, continue from metadata so you don’t overwrite or lose data.

    Benefits:

    • Minimal wear on SD (memory cards are designed for frequent writes).
    • Metadata safely stored in NVS.
    • RAM buffer reduces number of file operations.
    • Log files are manageable and can be transferred via SD card easily.

    Advanced Tips for the More Ambitious

    • Compression: If you’re storing a lot of data, compress log entries in RAM before writing (e.g., use zlib or simple binary encoding).
    • Encryption: For security, encrypt your log files or blobs in NVS.
    • Over-the-air (OTA): Combine storage with OTA: store previous and new firmware images in flash partitions.
    • Database-like storage: Use lightweight embedded databases like SQLite on SPIFFS or SD (though heavier on code).
    • MQTT upload + local backup: Stream data live to a remote server via MQTT, but also store locally as a fallback.
    • Circular buffer in flash: Implement a ring buffer in external flash or FRAM, with pointers in NVS for start and end.

    Common Mistakes to Avoid ESP32 Data Storage Pitfalls

    1. Writing too often to flash: Writing every second without buffering wears out flash quickly.
    2. Not closing files: Forgetting to close or flush files can corrupt SD or SPIFFS.
    3. No wear leveling: Using raw flash without a wear‑leveling mechanism could lead to early failure.
    4. Poor error recovery: Not handling corrupted files or bad sectors can crash your logger.
    5. No timestamping: Without real time or boot time, your logs may not be useful.
    6. Ignoring power loss: Not handling unexpected power cuts can mean data loss.
    7. Oversizing RAM buffer: Holding too much data in RAM can crash if you exceed available memory.

    Summary: ESP32: Best Way to Store Data Frequently?

    To sum up:

    • There are multiple ways to store data with ESP32: RAM, NVS, SPIFFS, SD card, FRAM, RTC memory.
    • The best strategy depends on your needs: how often you write, how much you write, and whether the data needs to survive reboots.
    • For frequent but small writes, NVS is usually your best bet.
    • For structured logs, SPIFFS (or LittleFS) is ideal.
    • For large volume, persistent data, use an SD card.
    • For very high endurance writes, external FRAM is excellent.
    • For sleep-based systems, RTC memory helps maintain state across wake cycles.

    By buffering data in RAM and writing in batches, you balance efficiency and endurance. Combine that with timestamping (via system time or NTP) and smart file management (rolling logs, error recovery), and you have a robust, persistent data logger.

    Final Thoughts

    If someone asks me: “Hey, what’s the ESP32: Best way to store data frequently?”, I’d tell them: It depends on your use case, but in many real-world scenarios, a combination of NVS for small, frequent state updates and SPIFFS or SD card for actual logs, with batch writes from RAM and good timestamping, gives you a solid, reliable, and efficient solution.

    Don’t over-optimize prematurely. Start with something simple: log to SPIFFS, flush every few seconds, monitor your partition usage. As your project evolves, if you need more endurance or space, you can shift to external FRAM or SD.

    Finally: test your system reset it, power it off, kill power during writes see how it recovers. That’s how you catch issues early.

  • Why the ESP32‑C6 PoE Development Board Is a Big Deal

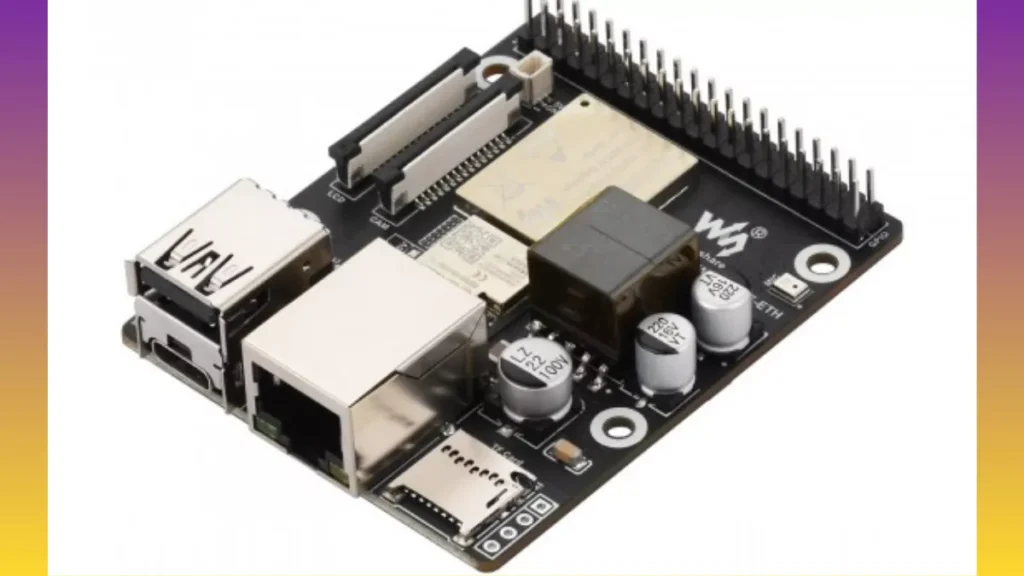
    Explore the ESP32-C6 PoE development board designed for HMI and IoT applications, featuring Wi-Fi 6, Ethernet PoE, Zigbee, and versatile connectivity for smart panels and IoT projects.

    Hey, friend have you heard about the ESP32‑C6 PoE development board? It’s getting a lot of attention, especially for HMI (human‑machine interface) and IoT applications. Think of it like the kind of microcontroller board that brings together modern wireless connectivity, wired ethernet, and power‑over‑ethernet (PoE) all in one neat package.

    If you’re working on smart panels, local edge devices, or even just want a reliable board with both Wi‑Fi 6 and wired network, this board is something you should seriously consider.

    What Is the ESP32‑C6? (A Quick Refresher)

    ESP32‑C6 PoE Development Board
    Explore the ESP32-C6 PoE development board designed for HMI and IoT applications, featuring Wi-Fi 6, Ethernet PoE, Zigbee, and versatile connectivity for smart panels and IoT projects.

    First, a little background on the ESP32‑C6 itself: it’s one of Espressif’s newer system-on-chips (SoCs) that supports 2.4 GHz Wi‑Fi 6, Bluetooth 5 (LE), and IEEE 802.15.4 (which means Zigbee or Thread).

    Its brain is a 32-bit RISC‑V processor, running at up to 160 MHz, paired with a low-power core at 20 MHz. (Espressif Systems) On top of that, it has a solid memory footprint: 320 KB ROM, 512 KB SRAM, and support for external flash.

    All these features make the ESP32‑C6 particularly attractive for IoT: you get both wireless flexibility and low power, plus native support for Zigbee-like protocols.

    If you want to dig into the nitty-gritty, Espressif’s ESP32‑C6 datasheet is super useful — it covers electrical specs, pin assignments, RF behavior, and more.

    Enter the PoE Factor: Why PoE Matters

    PoE (Power over Ethernet) is a game changer when you’re designing devices that need a stable power supply over wired networks — especially for remote or fixed installations. Instead of plugging in a separate power adaptor, you can run data and power through the same Ethernet cable. That’s huge for simplification and reliability.

    When you combine PoE with the ESP32‑C6, you’re not just getting wireless — you’re also getting the robustness of ethernet, making it a very reliable foundation for HMI panels, IoT gateways, or industrial dashboards.

    The New Development Board: Waveshare + ESP32‑C6 PoE

    Recently, Waveshare introduced a development board that brings all these advantages together: the Waveshare ESP32‑P4 + ESP32‑C6 PoE development board. (IPv6.net)

    Here’s what makes it cool:

    • It supports 100 Mbps Ethernet with PoE, so you don’t have to worry about separate power lines. (IPv6.net)
    • It includes Wi‑Fi 6 (thanks to ESP32‑C6), Bluetooth LE, and even OTG via USB 2.0. (IPv6.net)
    • Peripherals are generous: there’s MIPI‑CSI and MIPI‑DSI for camera / display, audio codec + amp + mic, MicroSD slot, and a 40‑pin GPIO header. (IPv6.net)
    • Useful interfaces like I2S, I2C, SPI, UART, PWM/MCPWM, RMT, ADC, and TWAI (CAN). (IPv6.net)
    • For security, it supports secure boot, flash encryption, crypto accelerators, TRNG, and privilege separation. (IPv6.net)

    Altogether, this board is tailor-made for HMI terminals, smart panels, multimedia control, and local edge‑AI or IoT gateways. It really bridges wired reliability with wireless flexibility.

    How It Helps in HMI and IoT Applications

    Let me put this into a scenario: imagine you’re building a smart panel for a factory or a home-automation dashboard.

    • You want reliable connectivity: PoE gives you a steady power and an ethernet link.
    • You want wireless flexibility: with Wi‑Fi 6 and Bluetooth LE, the panel can talk to other devices, sensors, or even mobile apps.
    • You might want to embed a display: the MIPI‑DSI interface helps you hook up a screen cleanly.
    • For touch input or external sensors, the 40 GPIOs let you connect keypads, buttons, or sensors easily.
    • For audio-based interactions (voice, notifications), the audio codec + mic support is really handy.

    In short, it’s not just another microcontroller board — it’s a full-fledged HMI / IoT development platform.

    For a smooth setup of Wi-Fi connections on boards like this, using tools such as ESP32 WiFiManager tutorials can simplify network management, letting your device automatically connect to available networks without hardcoding credentials.

    How It Compares to Other ESP32‑PoE Boards

    There are several PoE boards in the ESP32 space, and each has its niche. Here’s how the ESP32‑C6 PoE solution compares:

    • Traditional ESP32-PoE or boards like esp32-poe-ea, esp32-poe-iso, esp32-poe-iso-ea: these often use older ESP32 variants (like the original Xtensa-based cores), not RISC‑V or Wi‑Fi 6.
    • ESP32-poe board: good for general Ethernet + PoE, but lacks the modern radio stack (Thread / Zigbee) that C6 supports.
    • ESP32 poe ethernet hats or esp32 poe hat: add-ons or “hats” for PoE, but may not integrate as tightly or offer the advanced connectivity features that ESP32‑C6 brings.
    • ESP32-C3 PoE: the C3 is also RISC‑V, but typically doesn’t have Wi-Fi 6 and 802.15.4 radio like the C6.

    So, if your priority is multi-protocol connectivity + Ethernet + PoE, the ESP32‑C6 board is especially compelling.

    Advanced Connectivity: Zigbee, Thread, and More

    One standout feature of the ESP32‑C6 (and thus any development board built on it) is its support for 802.15.4 — which means Zigbee and Thread protocols. (Espressif Systems)

    Why does that matter? In IoT:

    • You might want to build a Zigbee Matter bridge: C6 can act as a Matter endpoint and talk to other Zigbee Matter devices.
    • For Thread networks, C6 supports Thread and can be used in Thread-based home automation.
    • Because it also has Wi-Fi and BLE, you get incredible protocol flexibility in a single chip.

    If your product roadmap involves smart home devices, mesh networks, or interoperable devices, this becomes a very powerful building block.

    Alternative “PoE + C6” Style Boards: Bug Board & Shield

    Speaking of alternative boards, there is the Esp32‑C6‑Bug board: a development board built around the C6 SoC with Wi-Fi 6, BLE, and 802.15.4. (Crowd Supply)

    However, the Bug board itself doesn’t have built-in Ethernet or PoE — that’s handled by a companion Esp32-Bug-Eth shield, which adds a W5500 Ethernet chip plus a DP1435-5V PoE module. (Crowd Supply)

    This modular approach is interesting if you want to prototype first and then decide whether to integrate PoE. The shield also supports Stemma-QT connectors, making it easy to interface with sensors. (Crowd Supply)

    You can even pick up just the Esp32-Bug‑PoE shield separately. (e-shop.prokyber.com)

    Real‑World Use & Community Feedback

    From the community:

    • Some users say that when using the Bug board + Ethernet shield, they can offload wireless traffic (like Thread or Zigbee) to Ethernet, giving more stable multi-protocol setups. (Reddit)
    • Others have tried using the C6 with PlatformIO, but noted that Arduino support is limited — PlatformIO often insists on ESP‑IDF framework instead. (Reddit)
    • There are also some notes about USB limitations: for instance, on some C6 boards, the USB port is only for serial communication and doesn’t act like a general USB device. (Reddit)

    All this shows it’s still a fairly cutting-edge ecosystem — but growing fast.

    Other ESP32 Variants to Consider (and Why C6 Is Unique)

    It’s useful to compare with other variants:

    • ESP32‑C3 PoE: A more budget-friendly RISC‑V chip, but doesn’t bring Wi-Fi 6 or 802.15.4.
    • ESP32 Cam PoE: If your project demands a camera + PoE, this is an option — but it’s usually based on older ESP32 cores, and may not give the same radio flexibility.
    • ESP32‑POE and esp32-poe-iso boards: solid for Ethernet + PoE, but not as future-ready when you think mesh networks or Matter.
    • Waveshare ESP32‑P4 + boards (like the one mentioned): note that the Waveshare ESP32‑P4 + ESP32-C6 PoE board is a hybrid: P4 core (AI instructions) + C6 for connectivity. (IPv6.net)

    Real Hardware Examples You Can Buy

    Here are a few relevant boards that are currently available:

    I couldn’t find a commercial, off‑the‑shelf ESP32‑C6 PoE board other than the Waveshare‑style hybrid or the Bug + shield combo — but those are robust starting points.

    Pricing & Cost Considerations (ESP32‑C6 Price)

    When it comes to ESP32-C6 price, it’s still somewhat niche — newer boards or development kits will likely cost more compared to older ESP32 variants. The Bug board + shield combo (for PoE) is reasonably priced for prototyping. (Crowd Supply)

    Meanwhile, basic C6 dev kits like the WeAct version sell for around US$ 6–8 for the board itself. (CNX Software – Embedded Systems News)

    But when you add features like PoE, a display, or audio, the cost goes up — so when planning a project, budget accordingly.

    Getting Started: How to Use the Board for HMI / IoT

    If you’ve just got one in your hands, here’s a friendly roadmap to get started:

    1. Read the Datasheet: Start with the ESP32‑C6 datasheet. (Espressif Systems)
    2. Set Up Your Development Environment: Use ESP-IDF, which fully supports C6. (Espressif Systems)
    3. Power It Right: For PoE, make sure your switch or injector is compatible. (Using a PoE switch or PoE injector helps you test the ethernet + power features.)
    4. Prototype Peripherals: Connect a display via MIPI‑DSI if you’re building an HMI, or hook up microSD, microphone, or other I/O.
    5. Use Network Features: Try both Wi-Fi 6 and Ethernet. Test Zigbee or Thread if you want mesh networking.
    6. Secure Your Device: Turn on secure boot, enable flash encryption, and take advantage of crypto accelerators.
    7. Deploy & Test: Build a simple UI, deploy your panel, and monitor power consumption, latency, and connectivity.

    Limitations & Things to Watch Out For

    Just to keep things real — as promising as the ESP32‑C6 PoE development board is, it has some trade‑offs:

    • Radio co‑existence: Some users note that using Wi-Fi and 802.15.4 (Zigbee / Thread) at the same time is limited due to RF path sharing. (Reddit)
    • USB limitations: On certain C6 boards, USB is only for serial, not general USB device functionality. (Reddit)
    • Support maturity: While ESP-IDF supports C6, some frameworks (like Arduino or PlatformIO) may not have as mature or stable support. (Reddit)
    • PoE height and size: Adding PoE modules or shields can increase board size or complexity, especially on a compact dev board.
    • Cost trade‑offs: If you don’t need PoE or Zigbee / Thread, older ESP32 boards might be cheaper and more than good enough.

    Why This Board Could Rank #1 for Your Next Project

    If you ask me (over coffee), here’s why the ESP32‑C6 PoE development board (especially a Waveshare-style hybrid) might be the best choice for your next IoT or HMI build:

    • Versatility: Wired + wireless connectivity — you’re covered for robustness or flexibility.
    • Long-term scalability: Support for Zigbee, Thread, and Matter means your design is future-ready.
    • Security: Secure boot, encryption, cryptographic accelerators — things that matter if you’re building a real product.
    • Simplicity of deployment: PoE means fewer cables, fewer power hassles, especially for remote panels.
    • Performance: RISC-V + Wi-Fi 6 + multi-protocol = modern, high-performance platform.

    If you’re building a smart device with a real display or need a stable network connection, this board punches way above its weight.

    Final Thoughts

    To wrap up, the ESP32‑C6 PoE development board targeting HMI and IoT applications is a pretty compelling piece of hardware. It’s not just about having “another ESP32” — it’s about combining up-to-date wireless tech (Wi-Fi 6 + BLE + Zigbee) with wired ethernet + PoE, making it a strong candidate for smart panels, gateways, and edge devices.

    Yes, there are alternatives (like the Bug board + shield, or older PoE boards), but for future-ready multi-protocol designs, C6 is a sweet spot. Just be aware of tradeoffs, set up your development environment with ESP-IDF, and you’ll be well on your way.

  • esp32 wifimanager: The Ultimate Easy Guide for a Seamless and Powerful WiFi Setup

    Beginner-friendly ESP32 WiFiManager tutorial to easily set up WiFi, save credentials, add custom parameters, and build smart IoT projects with simple Arduino code.

    If you’ve ever worked on an ESP32 project, you already know the most annoying part: connecting your board to WiFi without hard-coding the SSID and password every single time. It feels okay during early testing, but the moment you want to give the device to someone else, or move it to a different network, it becomes painful.

    This is where esp32 wifimanager steps in. Think of it as a simple helper that lets your ESP32 create a temporary WiFi Access Point and a small configuration portal. You connect your phone to that portal, type your WiFi name and password, save it, and the ESP32 connects automatically. No more changing code just to update the WiFi.

    This tutorial is a complete walk-through. We’ll talk like we’re sitting over coffee: direct, clear, and simple. By the time you finish reading, you’ll know exactly how to use wifimanager esp32, how to add custom parameters, how OTA works with it, how EEPROM can store passwords safely, and how people use it in real projects like esp32 blynk wifimanager or an esp32 ds18b20 webserver wifimanager setup.

    What Is ESP32 WiFiManager and Why Do We Even Need It?

    Let’s be honest. Hard-coding WiFi credentials is fine if you’re playing around. But once your ESP32 project needs to be installed somewhere—your home, someone else’s home, a school, a farm, anything—hard-coded credentials become a headache.

    You don’t want to open the code and flash the ESP32 every time the router password changes.
    You don’t want to ship devices that can’t be updated easily.
    And you definitely don’t want to ask people for their WiFi password so you can write it inside the source code.

    WiFiManager for ESP32 solves all of this by creating a simple flow:

    1. The ESP32 turns into a hotspot.
    2. You open that hotspot on your phone.
    3. A configuration page appears.
    4. You select your WiFi network, type password, click save.
    5. ESP32 stores it in non-volatile memory.
    6. Reboots and connects automatically next time.

    In short, WiFiManager removes the single most annoying part of using WiFi on microcontrollers.

    The original library by tzapu became super famous on ESP8266. Today, tzapu wifimanager esp32 also works nicely on ESP32 through ports and community updates.

    Why ESP32 WiFiManager Is So Useful for Real Projects

    If you’re making any of the following:

    • Smart home device
    • Web server that controls relays
    • IoT weather station
    • Farming sensor network
    • ESP32 Blynk IoT project
    • ESP32 DS18B20 web server
    • Anything that needs WiFi configuration

    …WiFiManager saves time, reduces user frustration, and makes your project feel polished.

    Think about a finished IoT gadget. People expect a small webpage where they can configure WiFi—just like connecting a smart plug or smart bulb. WiFiManager gives your ESP32 that user-friendly behavior, without you writing hundreds of lines of backend code.

    If you’re using Arduino IDE, PlatformIO, or even the ESP-IDF, there are clean ways to integrate wifimanager esp32 code smoothly.

    How WiFiManager Works behind the Scenes

    Even though it feels magical, the idea is pretty simple:

    • ESP32 tries connecting to saved WiFi credentials.
    • If connection fails (e.g., wrong password, router changed), ESP32 switches to AP mode.
    • It starts a captive portal—like when you connect to coffee shop WiFi.
    • You connect your phone to the ESP32 AP.
    • A small web server runs on the ESP32, showing a config page.
    • You pick an SSID from the scan list and type the password.
    • It stores the password in EEPROM, flash, NVS, etc.
    • Then ESP32 reboots and automatically joins the saved WiFi.

    Everything happens automatically. Your code just says:
    “If WiFi is not configured, launch the configuration portal.”

    That’s it.

    The Easiest Way to Use WiFiManager on ESP32

    The most beginner-friendly way is using the arduino esp32 wifimanager setup. You only install a library and write a few lines of code.

    Step 1: Install the WiFiManager Library

    Open Arduino Library Manager and search for:

    WiFiManager by tzapu

    This library includes ESP8266 support by default, but ESP32 versions are maintained by the community and work properly under names like:

    • wifimanager esp32
    • tzapu wifimanager esp32
    • wifimanager esp32 master
    • esp32 arduino wifimanager library

    The ESP32-compatible versions usually appear as forks, but the experience is the same.

    A Simple esp32 wifimanager example

    Here’s a minimal ESP32 WiFiManager example beginners use. This works great in Arduino IDE or PlatformIO.

    You’ll see how simple it is:

    • It starts WiFiManager.
    • If ESP32 can’t connect, it opens a portal.
    • You configure with your phone.

    Why ESP32 WiFiManager Is Better Than Hardcoding Credentials

    Let’s compare:

    Hardcoding method

    • SSID stored in code
    • Password stored in code
    • Must recompile when router changes
    • Not safe
    • Not user-friendly

    With WiFiManager

    • User sets SSID and password themselves
    • Stored in flash memory
    • Auto-connects on next boot
    • No re-flashing needed
    • Works even if users have no coding skills
    • Your project becomes “consumer-ready”

    If you’re new to ESP32 networking, you can also explore a simple web server setup here: ESP32 Web Server Tutorials
    It keeps things easy because you don’t have to expose your router password to anyone, you don’t have to worry about the code breaking due to a wrong WiFi entry, and if the router changes, users simply reconnect through the portal.

    Where WiFiManager Stores WiFi Credentials in ESP32

    Different versions use different places:

    • EEPROM
    • NVS (Non-Volatile Storage)
    • Flash memory

    That’s why you’ll see tutorials showing:

    esp32 password eeprom wifimanager
    or
    esp32 read eeprom for ssid and pass wifimanager

    Some libraries prefer NVS because it’s safer and faster. EEPROM works too, but you need to allocate space manually.

    The good news is you don’t have to dig deep into the memory system. WiFiManager abstracts most of it.

    When ESP32 Requires Login Before Configuring WiFi

    Some people want security.
    Imagine shipping an IoT device and you don’t want strangers connecting to the ESP32 setup portal.

    You can require:

    • A custom username/password
    • A unique AP name
    • A unique password based on device ID
    • Locked configuration screen

    This feature is often used in:

    esp32 requires login wifimanager
    esp32 wifimanager custom parameters

    The portal feels like a normal login page. You enter a password, and only then you can change WiFi details.

    WiFiManager Works on Arduino IDE, PlatformIO, and ESP-IDF

    Whatever you’re using:

    • esp32 wifimanager arduino ide
    • wifimanager esp32 platformio
    • esp32 wifimanager idf

    …WiFiManager integrates smoothly.

    Arduino IDE is the simplest.
    PlatformIO gives better structure and debugging.
    ESP-IDF requires more control and is slightly more complex.

    WiFiManager Makes OTA Updates Easier

    You can pair WiFiManager with OTA (Over-the-Air updates) so the device updates itself without USB flashing. People often search for:

    esp32 wifimanager ota

    With OTA, your device can:

    • Update firmware wirelessly
    • Stay up-to-date without manual flashing
    • Serve new device features
    • Fix bugs remotely

    Imagine flashing 50 devices one-by-one.
    OTA + WiFiManager solves that headache by allowing users to upload updates through a browser or cloud.

    Real Projects Where People Use ESP32 WiFiManager

    Here are common projects where people use WiFiManager naturally:

    ESP32 Blynk WiFiManager
    This lets you link Blynk IoT dashboard with WiFi configuration.

    ESP32 DS18B20 Web Server WiFiManager
    You show temperature data in a browser and also configure WiFi easily.

    Smart home switches
    Where users configure WiFi through a small configuration page.

    Weather stations & IoT sensors
    That work in fields or farms and must reconnect even if the router changes.

    Home automation hubs
    That act as local servers.

    In all these cases, WiFiManager feels almost necessary.

    Setting Up WiFiManager for ESP32 in Arduino IDE

    If you are using Arduino IDE, this is the easiest path. Make sure you’ve installed the ESP32 boards package from the Board Manager.

    Then install the library:

    Search for
    WiFiManager by tzapu

    Even though this library was originally made for ESP8266, many ESP32-compatible versions exist. You’ll see community ports listed as:

    • wifimanager esp32
    • tzapu wifimanager esp32
    • esp32 arduino wifimanager versions
    • wifimanager.h esp32 forks

    Choose the one that clearly mentions ESP32 support.

    If you prefer PlatformIO, don’t worry; I’ll show the wifimanager esp32 platformio install later in this article.

    Your First Simple esp32 wifimanager example

    Let’s make a basic example. This code allows your ESP32 to:

    • Try connecting to WiFi
    • If connection fails, open configuration portal
    • Let you set the WiFi through the portal
    • Save SSID + password automatically

    This is the version most beginners use.

    Simple ESP32 WiFiManager Code (Beginner-Friendly)

    #include <WiFi.h>
    #include <WiFiManager.h>  
    
    void setup() {
      Serial.begin(115200);
    
      WiFiManager wm;
    
      bool res = wm.autoConnect("ESP32-Setup");
    
      if (!res) {
        Serial.println("Failed to connect. Restarting...");
        ESP.restart();
      }
      else {
        Serial.println("Connected to WiFi!");
        Serial.println(WiFi.localIP());
      }
    }
    
    void loop() {
    }
    

    This tiny code does a lot.

    When the ESP32 boots:

    • It tries using stored credentials
    • If no credentials are saved or connection fails
    • ESP32 becomes a hotspot named “ESP32-Setup”
    • You connect to that hotspot
    • A WiFiManager page opens
    • You choose your home router
    • Enter password
    • Save
    • ESP32 stores it
    • Reboots
    • Connects automatically

    This is why people love wifimanager esp32 code — it’s simple and it works.

    Using WiFiManager on ESP32 with EEPROM

    Many newcomers wonder how to store credentials in EEPROM. WiFiManager already manages storage internally, but some versions use EEPROM explicitly. You’ll see tutorials mentioning:

    • esp32 password eeprom wifimanager
    • esp32 read eeprom for ssid and pass wifimanager

    EEPROM can be used if you want to store extra passwords, tokens, or offline settings.

    Here’s an example showing how you could write and read EEPROM manually (not required for normal WiFiManager use):

    #include <EEPROM.h>
    
    void writeCredentials(String ssid, String pass) {
      EEPROM.begin(128);
      EEPROM.writeString(0, ssid);
      EEPROM.writeString(32, pass);
      EEPROM.commit();
    }
    
    void readCredentials() {
      EEPROM.begin(128);
      String ssid = EEPROM.readString(0);
      String pass = EEPROM.readString(32);
      Serial.println("Stored SSID: " + ssid);
      Serial.println("Stored Password: " + pass);
    }
    

    Again, WiFiManager handles almost everything, so you only need this if your project demands full control.

    Adding Custom Parameters with esp32 wifimanager custom parameters

    Sometimes you need more than just WiFi credentials.
    Maybe:

    • A Blynk token
    • A device name
    • A server address
    • An MQTT username/password
    • A unique API key

    WiFiManager lets you create custom fields in the portal.

    Think of it like:
    “Along with SSID and password, also ask the user for whatever else my project needs.”

    Here’s a friendly example.

    Example: Custom Parameters in WiFiManager

    #include <WiFi.h>
    #include <WiFiManager.h>
    
    char deviceName[40] = "MyESP32";
    
    void setup() {
      Serial.begin(115200);
    
      WiFiManager wm;
    
      WiFiManagerParameter custom_device_name("devname", "Device Name", deviceName, 40);
    
      wm.addParameter(&custom_device_name);
    
      bool res = wm.autoConnect("ESP32-Config");
    
      if (!res) {
        Serial.println("Failed to connect");
        ESP.restart();
      }
    
      Serial.println("Connected!");
      Serial.print("Device Name: ");
      Serial.println(custom_device_name.getValue());
    }
    
    void loop() {
    
    }
    

    Now your portal shows:

    • SSID field
    • Password field
    • Device name text box

    Users can enter custom data. This is a must-have in advanced IoT setups, and this is why esp32 wifimanager custom parameters is a very popular search topic.

    ESP32 WiFiManager OTA (Over-the-Air Updates)

    Adding OTA makes the project feel professional. Imagine shipping sensors everywhere and updating them without touching a USB cable. That’s the power of esp32 wifimanager ota projects.

    The flow is simple:

    • WiFiManager helps ESP32 join WiFi
    • OTA update server becomes active
    • You upload new firmware from your browser or Arduino IDE

    A basic OTA setup looks like this:

    #include <WiFi.h>
    #include <WiFiManager.h>
    #include <ArduinoOTA.h>
    
    void setup() {
      Serial.begin(115200);
    
      WiFiManager wm;
      wm.autoConnect("ESP32-OTA");
    
      ArduinoOTA.begin();
    
      Serial.println("OTA Ready");
    }
    
    void loop() {
      ArduinoOTA.handle();
    }
    

    Once the user sets WiFi credentials with WiFiManager, OTA becomes fully available.

    If you want rock-solid IoT devices, OTA is essential.

    Using WiFiManager for ESP32 on PlatformIO

    If you prefer PlatformIO over Arduino IDE, installation is simple.

    Add this to your platformio.ini:

    lib_deps =
      tzapu/WiFiManager
    

    If that version doesn’t support ESP32, use one of the ESP32 forks:

    lib_deps =
      WiFiManager-ESP32
    

    PlatformIO will automatically pull the correct version.

    Then the code you write is identical.
    If you’re using VS Code, debugging becomes much easier.

    Using WiFiManager with ESP-IDF

    If you’re building professional-grade applications, you might use ESP-IDF.
    While there’s no official WiFiManager for ESP-IDF, several community ports exist.

    This helps fulfill:
    esp32 wifimanager idf

    Developers build:

    • Captive portal
    • AP mode
    • WiFi scanning
    • A tiny HTTP server

    The logic remains the same as the Arduino version, just more hands-on.

    Real-World Example: ESP32 Blynk WiFiManager

    Let’s say you’re building a Blynk IoT device.
    Hardcoding your Blynk token isn’t ideal since you might want to change it later.

    With WiFiManager:

    • Add a field for Blynk token
    • Save it
    • Connect to WiFi
    • Connect to Blynk automatically

    This is why tutorials for esp32 blynk wifimanager are so popular.

    Real-World Example: ESP32 DS18B20 Webserver WiFiManager

    Imagine a temperature monitoring project.

    You use:

    • DS18B20 sensor
    • ESP32 web server
    • WiFiManager portal

    Users can configure WiFi, then see temperature in a browser.

    This makes esp32 ds18b20 webserver wifimanager a real and practical topic.

    Troubleshooting: When ESP32 Requires Login to Access Portal

    Some people face this issue:

    esp32 requires login wifimanager

    This usually happens because:

    • You are using a custom password
    • Browser caches old config pages
    • Captive portal logic tries redirecting to a login page

    Most fixes include:

    • Clearing browser cache
    • Changing AP name
    • Using a unique portal password
    • Updating the library version

    How to Trigger WiFi Reset with a Button

    A very common request is:

    “How do I erase WiFi settings and reopen the WiFiManager portal again?”

    Because sometimes you ship a device to someone, but they change their router.
    Your ESP32 can’t magically guess the new WiFi credentials.

    So you need a reset option.

    Here’s a simple and clean way to do it:

    #include <WiFi.h>
    #include <WiFiManager.h>
    
    #define RESET_PIN 0
    
    void setup() {
      Serial.begin(115200);
    
      pinMode(RESET_PIN, INPUT_PULLUP);
    
      if (digitalRead(RESET_PIN) == LOW) {
        WiFiManager wm;
        wm.resetSettings(); 
        delay(1000);
        ESP.restart();
      }
    
      WiFiManager wm;
      wm.autoConnect("ESP32-Resettable");
    }
    
    void loop() {
    }
    

    Hold the button at boot → ESP32 wipes stored WiFi → Portal opens again.
    This solves a lot of real-world user frustrations.

    Captive Portal Behavior Explained

    Have you ever connected to hotel WiFi and a page pops up automatically?
    Same idea.

    WiFiManager tries to:

    • Force the browser to load the config page
    • Redirect all connections to itself

    But sometimes you may see issues like:

    • The portal doesn’t pop automatically
    • Browser shows “Login Required”
    • You manually open 192.168.4.1

    This is one of the reasons search phrases like:

    • esp32 requires login wifimanager
    • wifimanager esp32 examples

    are so popular.

    Why it happens:

    Browsers cache DNS aggressively.
    Phones wait for a specific “captive portal detection URL.”
    Different devices behave differently.

    Quick tips:

    • Use a unique AP name
    • Avoid special characters
    • Update your WiFiManager library
    • Restart your phone WiFi
    • Try opening any HTTP website (not HTTPS)

    It’s normal behavior, not a problem with your code.

    Auto-Reconnect Logic for Unstable WiFi

    Sometimes routers reboot, or signals drop. The ESP32 tries reconnecting but may fail silently.

    You can add a simple reconnect loop:

    void loop() {
      if (WiFi.status() != WL_CONNECTED) {
        WiFi.reconnect();
        delay(1000);
      }
    }
    

    This ensures your IoT device doesn’t get “lost” after a temporary WiFi outage.

    Many real-world IoT devices use this logic, especially for smart farming, home automation, and remote sensors.

    Using WiFiManager with MQTT or API Services

    If your project uses:

    • Blynk
    • Node-RED
    • Home Assistant
    • Thingspeak
    • Firebase
    • AWS / Azure MQTT

    You often need more than SSID + password.

    This is where esp32 wifimanager custom parameters becomes the true hero.

    You can add custom fields like:

    • MQTT server
    • MQTT port
    • MQTT username
    • MQTT password
    • Device name
    • Access token

    Your ESP32 becomes a fully customizable device without touching code again.

    Using WiFiManager for Professional IoT Deployment

    If you’re building a product (even a small DIY product), WiFiManager gives you:

    • User-friendly WiFi setup
    • No hardcoding of credentials
    • Quick recovery after router change
    • Captive portal onboarding
    • Optional password protection

    This is why it’s still one of the most loved ESP32 utilities.

    Securing Your WiFiManager Portal

    Security matters.
    You don’t want someone nearby hijacking your WiFi portal.

    You can add a password:

    wm.autoConnect("MyESP32", "mysecretpass");
    

    Now, the WiFi AP needs a password before access.

    If this is for a real device deployed in public, always use at least WPA2.

    Common Issues and Fixes

    Let’s go over the big ones.

    Problem: ESP32 Keeps Rebooting After Connection

    This happens when:

    • WiFi credentials are wrong
    • Router signal is weak
    • ESP32 brownout due to bad power supply

    Fix:
    Use a good 5V 2A adapter.
    ESP32 is sensitive to power dips during WiFi.

    Problem: WiFiManager Portal Doesn’t Open Automatically

    This is extremely common.
    Phones sometimes ignore captive portals.

    Fix:
    Open these in browser:

    192.168.4.1
    

    or try:

    • Turn WiFi off → on
    • Forget the ESP32 setup network
    • Try a different phone

    Problem: ESP32 Connects but No Internet

    Sometimes routers block unknown MAC addresses.

    Fix:
    Allow new devices in router settings.

    Problem: WiFiManager not saving credentials

    Your library may be outdated.

    Fix:
    Use an ESP32-supported fork of:

    • tzapu wifimanager esp32
    • wifimanager esp32 library
    • wifimanager esp32 master branch

    Different forks handle storage differently.

    WiFiManager with ESP32 and EEPROM Explained Simply

    People often search for:

    • esp32 password eeprom wifimanager
    • esp32 read eeprom for ssid and pass wifimanager

    Here’s a simple way to think about it:

    WiFiManager stores credentials internally, usually in Non-Volatile Storage (NVS).
    This is safer and more reliable than EEPROM.

    But if you want total control, EEPROM is still an option.

    Think of it as writing a note into flash memory that stays even after reboot.
    Very helpful in custom authentication setups or offline projects.

    WiFiManager + ESP32 Web Server Combo

    If your project has a web interface, WiFiManager acts as the initial gateway.
    After WiFi is configured:

    • ESP32 connects
    • Starts a web server
    • Serves pages like a mini IoT dashboard

    This is popular with sensors like DS18B20.

    The search term esp32 ds18b20 webserver wifimanager basically refers to this combo.

    WiFiManager + Blynk Setup (Real Use Case)

    WiFiManager + Blynk = perfect pair.

    You can:

    • Add custom parameter for Blynk token
    • Save it
    • Use it inside your code
    • Avoid hardcoding secrets

    If you ever switch your Blynk template or token, you don’t need to reflash the device.

    This is why esp32 blynk wifimanager tutorials are everywhere.

    WiFiManager with OTA to Update Code Wirelessly

    OTA is one of the most powerful features in ESP32 development.

    The flow looks like:

    • Set up WiFi using WiFiManager
    • Connect ESP32 to WiFi
    • Activate OTA service
    • Upload new firmware from PC
    • No physical device access needed

    This is crucial for remote projects.

    Using WiFiManager in Commercial-Grade Projects

    Lots of DIY tutorials stop at basic examples.
    But real IoT products rely heavily on the following:

    • Custom parameters
    • Reset button
    • Protected WiFi portal
    • Auto-reconnect
    • OTA support
    • Stable hardware power
    • Clean fallback logic

    I’ve seen full home automation systems built around the simple idea of “configure WiFi only once.”

    And yes, WiFiManager makes that possible for the ESP32.

    Real-Time ESP32 WebSocket Example With Sensor Data (DHT11,MQ135,OLED, RTC etc.)

    If you’re building real IoT dashboards, you often need real-time updates without refreshing the page. WebSockets are perfect for showing live sensor values like temperature, humidity, air quality, RTC time, or even switching GPIO pins.

    Below is a simple structure you can expand:

    Example Use Case

    Your ESP32 collects:

    • Temperature & humidity from DHT11
    • Air-quality values from MQ135
    • Real time from RTC module
    • Display on OLED screen
    • And sends all data to browser via WebSocket

    Why WebSocket Works Best Here

    • Real-time data (no refresh)
    • Low bandwidth usage
    • Works great for dashboards
    • Perfect for sensor-based IoT projects
    • Smooth UI (graphs, counters etc.)

    Complete WebSocket Message Structure (Recommended)

    You can send a single JSON string containing all sensor values:

    {
      "temperature": 29.4,
      "humidity": 52,
      "air_quality": 210,
      "rtc_time": "2025-11-22 23:20:00",
      "status": "OK"
    }
    

    On the browser, you decode it like:

    let data = JSON.parse(event.data);
    document.getElementById("temp").innerHTML = data.temperature;
    

    ESP32 Code Example: Sending Sensor Values via WebSocket

    Below is a beginner-friendly example you can expand later:

    #include <WiFi.h>
    #include <WebSocketsServer.h>
    #include <DHT.h>
    
    #define DHTPIN 4
    #define DHTTYPE DHT11
    DHT dht(DHTPIN, DHTTYPE);
    
    const char* ssid = "YourWiFi";
    const char* password = "YourPass";
    
    WebSocketsServer webSocket = WebSocketsServer(81);
    
    void setup() {
      Serial.begin(115200);
      dht.begin();
    
      WiFi.begin(ssid, password);
      while (WiFi.status() != WL_CONNECTED) {
        delay(500);
      }
    
      webSocket.begin();
    }
    
    void loop() {
      webSocket.loop();
    
      float t = dht.readTemperature();
      float h = dht.readHumidity();
    
      String json = "{\"temperature\":" + String(t) +
                    ",\"humidity\":" + String(h) +
                    "}";
    
      webSocket.broadcastTXT(json);
      delay(2000);
    }
    

    This acts like a real-time data server.

    Client Side (Browser) HTML/JS Example

    <!DOCTYPE html>
    <html>
    <body>
    
    <h2>ESP32 WebSocket Live Dashboard</h2>
    
    <p>Temperature: <span id="temp">--</span> °C</p>
    <p>Humidity: <span id="hum">--</span> %</p>
    
    <script>
    let socket = new WebSocket("ws://192.168.1.10:81/");
    
    socket.onmessage = function(event){
        let d = JSON.parse(event.data);
        document.getElementById("temp").innerHTML = d.temperature;
        document.getElementById("hum").innerHTML = d.humidity;
    };
    </script>
    
    </body>
    </html>
    

    Just paste it into your browser, and it will update live.

    Adding GPIO Control via WebSocket (Turn LED ON/OFF)

    You can also allow control + monitoring from a single WebSocket.

    Example message:

    {"led": "on"}
    

    ESP32 receives it:

    if (data.indexOf("on") > 0) {
      digitalWrite(2, HIGH);
    }
    

    Browser sends it:

    socket.send('{"led":"on"}');
    

    Now your dashboard becomes two-way real-time control.

    Best Practices for ESP32 WebSocket Projects

    Use JSON

    Easy to parse, clean, expandable, and readable.

    Keep messages light

    Avoid very long or repeated strings.

    Send at fixed intervals

    1–2 seconds is enough for sensors.

    Avoid delays in main loop

    Use millis() for stable timing.

    Use separate WiFi channel

    ESP32 WiFi can get slow if overloaded.

  • ESP32 Web Server Tutorials: 10 Powerful Beginner-Friendly Projects You Can Build Today

    Learn ESP32 web server tutorials: DHT11, relay control, async server, Bluetooth, AJAX, and more. Beginner-friendly guide with examples and projects.

    If you’ve ever wanted to host a website directly from a tiny microcontroller, the ESP32 web server is your perfect tool. Whether you want to control a relay, read sensor data like DHT11, or create an IoT dashboard, the ESP32 makes it surprisingly easy. In this guide, I’ll take you through everything from a simple ESP32 web server setup to advanced projects involving buttons, AJAX updates, authentication, and even Bluetooth integration. Think of this as a friendly chat over coffee about building your own micro web server from scratch.

    Why ESP32 for Web Servers?

    The ESP32 is powerful, affordable, and comes with built-in Wi-Fi and Bluetooth. Unlike a traditional server, it doesn’t need a cloud connection for basic tasks. You can host web pages locally, read sensors, control relays, and create IoT projects with minimal setup. The community around ESP32 is huge, so you’ll find tons of ESP32 web server examples, libraries, and GitHub repositories to get started.

    Getting Started

    Before diving into code, here’s what you need:

    • An ESP32 development board
    • Arduino IDE installed on your PC
    • USB cable and proper drivers for ESP32
    • Basic understanding of HTML and C++

    Once you have these, you can start creating your ESP32 web server using Arduino IDE.

    Step 1: Install ESP32 in Arduino IDE

    Open Arduino IDE, go to File → Preferences → Additional Board Manager URLs, and add this URL:
    https://dl.espressif.com/dl/package_esp32_index.json.

    Then, go to Tools → Board → Boards Manager → search for ESP32 → Install.

    Step 2: Connect Your ESP32

    Use a USB cable to connect your ESP32 board. Go to Tools → Port and select the correct COM port.

    Simple ESP32 Web Server Example

    Let’s start with a simple ESP32 web server that hosts a basic HTML page. Once uploaded, you can open your browser, enter the ESP32 IP address (displayed in Serial Monitor), and see your page live.

    This basic setup is perfect for learning how web servers work on microcontrollers. If you want a step-by-step guide on setting a static IP for ESP32 before creating your server, check out this ESP32 Static IP Tutorial. Once comfortable, you can move to projects like DHT11 integration or relay control.

    DHT11 ESP32 Web Server Tutorial

    Next, let’s make things interesting by adding a sensor. The DHT11 ESP32 web server allows you to monitor temperature and humidity in real-time.

    Hardware needed:

    • DHT11 sensor
    • ESP32 board
    • Jumper wires

    Connections:

    • Connect the data pin of DHT11 to GPIO 4
    • Connect VCC and GND

    This project demonstrates how you can serve live sensor data through a web page. It’s beginner-friendly and introduces concepts like refreshing data automatically using the browser or AJAX.

    ESP32 Web Server Relay Control

    Home automation is one of the most popular ESP32 projects. By connecting a relay module to your ESP32, you can control devices like lights or fans directly from a web page.

    How it works:

    • Each button on your web page sends a command to the ESP32 server.
    • The server turns the relay ON or OFF depending on the request.

    This is a practical example of ESP32 web server relay control, giving you hands-on experience with GPIO manipulation over a web interface.

    Accessing ESP32 Web Server from Anywhere

    Usually, your ESP32 web server is accessible only on the local network. But with port forwarding or dynamic DNS services, you can access your ESP32 web server from anywhere in the world. This is great for remote IoT monitoring, home automation dashboards, or controlling devices while traveling.

    ESP32 Web Server with Authentication

    For projects where security matters, you can add authentication. With a username and password, your ESP32 ensures only authorized users can access controls or view sensor data. Implementing ESP32 web server authentication is straightforward and adds an important security layer to your projects.

    ESP32 Async Web Server

    For more advanced users, an ESP32 web server async setup allows non-blocking operations. This means your server can handle multiple clients, sensors, and relays simultaneously without freezing. It’s ideal for applications that need real-time responsiveness.

    ESP32 Web Server Auto Refresh and AJAX

    Static pages are fine, but live updates make your project feel professional. You can use auto-refresh to reload pages every few seconds or implement AJAX for seamless updates without reloading the page.

    • Auto-refresh: <meta http-equiv="refresh" content="5">
    • AJAX: Fetch live data from the ESP32 server dynamically

    For example, you can show real-time temperature and humidity readings from DHT11 without manually refreshing the page.

    ESP32 Web Server Bootstrap

    If you want your web pages to look good without much effort, you can include Bootstrap in your HTML. Using ESP32 web server bootstrap, you can make responsive buttons, tables, and cards that look professional. This is especially useful when building dashboards for sensors or relay controls.

    ESP32 Bluetooth Web Server

    ESP32 isn’t just about Wi-Fi. You can also create a ESP32 Bluetooth web server using BLE. This allows you to communicate with nearby devices like smartphones or tablets. Combined with a web interface, it opens up new possibilities for local IoT projects and short-range applications.

    ESP32 Web Server GitHub Resources

    If you’re looking for ready-to-use projects, search for ESP32 web server GitHub repositories. You’ll find projects covering relay controls, DHT11 dashboards, async servers, authentication examples, and even projects combining AJAX, Bootstrap, and APIs. Studying these can save time and inspire your own implementations.

    ESP32 Web Server APIs

    For advanced applications, you can implement ESP32 web server API endpoints. This allows mobile apps or other devices to interact with your ESP32. You can create REST APIs to:

    • Turn devices on/off
    • Read sensor data
    • Update configurations remotely

    APIs are essential when building scalable IoT systems.

    ESP32 Web Server Button Examples

    Buttons are a simple but powerful feature. Using ESP32 web server button or ESP32 async web server button, you can control relays, LEDs, or trigger other actions. Async handling ensures the server remains responsive even while multiple clients interact with buttons simultaneously.

    ESP32 Web Server Auto Update

    To make your projects dynamic, implement ESP32 web server auto update. Using AJAX or WebSockets, you can push real-time updates to the browser. For example:

    • Sensor readings update automatically
    • Relay status changes in real-time
    • Notifications appear instantly

    This gives your ESP32 web server a professional, interactive feel.

    ESP32 Web Server Access Point Mode

    You don’t always need a router. Using ESP32 web server access point mode, the ESP32 creates its own Wi-Fi network. Devices can connect directly to it and interact with your web server. This is useful for portable or temporary setups where network access is limited.

    Advanced ESP32 Web Server Projects and Applications

    Now that you’ve built a simple ESP32 web server, integrated sensors like DHT11, and controlled relays, it’s time to explore more advanced possibilities. These projects will help you understand the full potential of the ESP32 web server, including remote access, asynchronous operations, APIs, and interactive web pages.

    ESP32 Web Server with Multiple Sensors

    Why stop at just DHT11? You can connect multiple sensors, such as:

    • DHT22 for precise temperature and humidity
    • MQ-135 for air quality
    • Light sensors for ambient light monitoring

    With multiple sensors, your ESP32 can serve a complete dashboard. Using AJAX or auto-refresh features, users can view real-time sensor data without refreshing the page. This is ideal for environmental monitoring or smart home applications.

    Tip: Organize sensor readings in tables or cards using ESP32 web server bootstrap to make your dashboard clean and user-friendly.

    ESP32 Web Server with Multiple Relays

    Control multiple devices from a single web interface. For example:

    • Relay 1: Living room lights
    • Relay 2: Fan
    • Relay 3: Garage door

    By adding multiple buttons and using ESP32 async web server button handling, your server remains responsive even when multiple users control different relays simultaneously. You can even add status indicators for each relay, updating in real-time using AJAX.

    Accessing ESP32 Web Server from Anywhere

    For real-world IoT projects, remote access is crucial. The ESP32 can serve data to anywhere in the world using:

    1. Dynamic DNS: Assign a domain name to your home IP and forward port 80 to your ESP32.
    2. Cloud Tunneling Services: Tools like Ngrok create a secure tunnel to your ESP32.
    3. VPN: Connect securely to your home network and access the ESP32.

    With this, your ESP32 web server from anywhere in the world becomes a reality, allowing you to monitor sensors, control relays, or update settings remotely.

    ESP32 Web Server API

    APIs allow your ESP32 to communicate with other devices or apps. Here’s how they enhance your projects:

    • REST API Endpoints: Create endpoints like /temperature, /humidity, /relay1/on, /relay1/off.
    • Mobile App Integration: Build a simple app to control devices remotely.
    • Automated Systems: Trigger actions based on external events or cloud data.

    Example:

    GET /temperature → Returns current temperature
    POST /relay1/on → Turns relay 1 on
    

    This transforms your ESP32 from a simple web server into a fully functional IoT node.

    ESP32 Web Server Authentication

    Security is critical. Use ESP32 web server authentication to restrict access:

    • Basic Authentication: Username and password for web pages.
    • Token-Based Access: Generate access tokens for API calls.
    • IP Filtering: Allow only specific IP addresses to connect.

    Authentication ensures that only authorized users can control relays or view sensitive sensor data.

    ESP32 Async Web Server Benefits

    Switching to ESP32 async web server provides many advantages:

    • Handles multiple clients efficiently
    • Non-blocking operations
    • Supports WebSockets for real-time updates
    • Better performance for complex dashboards

    Async servers are essential for large projects where multiple users interact simultaneously or multiple sensors need frequent updates.

    ESP32 Web Server Auto Update Techniques

    To keep your web interface dynamic:

    1. AJAX Polling: Periodically fetch sensor data from the ESP32 without page reload.
    2. WebSockets: Push updates from ESP32 to the browser instantly.
    3. Meta Refresh: Quick and simple for static updates (less recommended for frequent updates).

    Example using AJAX for temperature updates:

    function fetchTemperature() {
      fetch('/temperature')
        .then(response => response.text())
        .then(data => document.getElementById('temp').innerHTML = data);
    }
    setInterval(fetchTemperature, 2000); // Update every 2 seconds
    

    With this, your DHT11 readings or relay statuses update automatically, improving user experience.

    ESP32 Web Server Button and Control Examples

    Buttons make web interfaces interactive:

    • Single Relay Control: ON/OFF button for a relay
    • Multiple Relay Control: Group of buttons for multiple devices
    • Async Handling: Button actions do not block other operations

    Example: Using ESP32 async web server button, you can press a button to toggle a relay while simultaneously reading sensor data in the background.

    ESP32 Web Server Bootstrap for UI

    A clean interface makes a project look professional. Use Bootstrap to style your web page:

    • Cards for sensor readings
    • Color-coded buttons for relay states
    • Responsive layout for mobile and desktop
    • Alerts for status updates

    This is especially useful for smart home dashboards or IoT monitoring projects.

    ESP32 Bluetooth Web Server

    ESP32’s Bluetooth capability allows:

    • BLE communication with smartphones
    • Serving a small web interface over Bluetooth
    • Local monitoring when Wi-Fi is unavailable

    Example: A portable weather station using DHT11 and light sensors, accessible via ESP32 Bluetooth web server on a phone nearby.

    Combining Wi-Fi and Bluetooth

    Advanced projects often combine Wi-Fi and Bluetooth:

    • Wi-Fi: Remote access and full dashboard
    • Bluetooth: Local access and low-power control

    This dual-mode operation increases flexibility and project scalability.

    ESP32 Web Server GitHub Resources

    For beginners and pros alike, GitHub is invaluable. Search for ESP32 web server GitHub and you’ll find:

    • Ready-to-use code for DHT11 projects
    • Relay control dashboards
    • Async web server implementations
    • WebSocket-based real-time dashboards
    • Authentication examples

    Studying these examples helps you learn best practices, organize code, and avoid common pitfalls.

    Real-World Project Ideas

    Here are some practical ESP32 web server projects:

    1. Smart Home Controller: Control lights, fans, and appliances remotely.
    2. Weather Station: Serve DHT11/DHT22, BMP180, or other sensor data on a live dashboard.
    3. Air Quality Monitor: Integrate MQ135 sensor and display AQI on a web page.
    4. IoT Door Access System: Use relays, buttons, and authentication for secure access.
    5. Remote Garden Monitoring: Track soil moisture, temperature, and light, and water plants using relay-controlled pumps.
    6. BLE-Enabled Portable Dashboard: Use Bluetooth web server to display sensor readings on your phone while away from Wi-Fi.

    Tips for Beginners

    • Start with a simple ESP32 web server example before adding sensors or relays.
    • Test each component separately: sensors, relays, buttons.
    • Use Serial Monitor for debugging network connections and client requests.
    • Keep code modular: separate functions for sensor reading, relay control, and web response.
    • Gradually move to async web server for better performance with multiple clients.
    • Use Bootstrap for a cleaner, responsive interface.
    • Always secure your server with authentication if accessible from the internet.

    ESP32 Web Server Troubleshooting

    Common issues and solutions:

    1. ESP32 not connecting to Wi-Fi
      • Check SSID/password
      • Move closer to the router
      • Ensure ESP32 firmware is up to date
    2. Client doesn’t see web page
      • Verify ESP32 IP address
      • Ensure firewall or router isn’t blocking the port
      • Test on multiple devices
    3. Relay doesn’t respond
      • Check GPIO pin connections
      • Ensure relay is powered correctly
      • Debug using Serial Monitor
    4. Sensor readings are wrong
      • Check sensor connections
      • Calibrate sensors if needed
      • Test using separate small sketch first

    Best Practices

    • Use HTTPS for public-facing ESP32 servers (via reverse proxy or IoT platform).
    • Limit the number of simultaneous clients if using standard web server library.
    • Use async web server for large projects with multiple sensors or controls.
    • Organize your HTML and JavaScript for readability.
    • Keep code documented for future maintenance.

    Conclusion

    The ESP32 web server opens up endless possibilities for hobbyists, students, and IoT enthusiasts. From a simple hello world page to a fully functional smart home dashboard with multiple sensors, relays, and real-time updates, ESP32 can do it all. By learning ESP32 web server examples, integrating DHT11 sensors, using async servers, enabling remote access, and adding authentication, you’re well on your way to mastering microcontroller-based web servers.

    Whether you’re building a home automation system, a portable weather station, or an IoT experiment, ESP32 offers the perfect balance of power, flexibility, and affordability. Combine this knowledge with ESP32 web server GitHub resources, Bootstrap for UI, AJAX for dynamic content, and remote access techniques, and you’ll have a fully functional, professional-grade ESP32 web project.

    So grab your ESP32, connect a sensor or two, and start hosting your own web server today. The possibilities are truly limitless.

    Frequently Asked Questions (FAQs) About ESP32 Web Server

    Q1: What is an ESP32 web server?

    A: An ESP32 web server is a web server hosted directly on the ESP32 microcontroller, allowing you to serve web pages, read sensors, and control devices like relays over Wi-Fi or Bluetooth.

    Q2: How do I set up a simple ESP32 web server?

    A: You can set up a simple ESP32 web server using Arduino IDE. Start by connecting your ESP32 to Wi-Fi, initialize a WiFiServer object, and serve HTML pages. For detailed guidance, check out our ESP32 Static IP Tutorial.

    Q3: Can I integrate DHT11 sensor with ESP32 web server?

    A: Yes! A dht11 ESP32 web server allows you to monitor temperature and humidity in real-time. The sensor data can be displayed on a web page and refreshed automatically using AJAX or meta refresh.

    Q4: How can I control a relay using ESP32 web server?

    A: Using an ESP32 web server relay control setup, you can turn devices ON/OFF from your web page by sending commands to ESP32 GPIO pins. Buttons on the web interface can trigger relay actions in real-time.

    Q5: What is the difference between ESP32 web server and ESP32 async web server?

    A: A standard ESP32 web server handles requests sequentially, which may block operations. An ESP32 async web server allows non-blocking operations, multiple clients, and real-time updates using AJAX or WebSockets.

    Q6: How do I secure my ESP32 web server?

    A: You can add ESP32 web server authentication using a username and password, IP filtering, or token-based authentication to prevent unauthorized access.

    Q7: Can I access ESP32 web server from anywhere?

    A: Yes! You can access your ESP32 web server from anywhere in the world using techniques like port forwarding, VPN, or cloud tunneling services such as Ngrok. This is ideal for remote IoT control.

    Q8: How can I make ESP32 web pages update automatically?

    A: Use ESP32 web server auto refresh with HTML meta refresh, or implement AJAX calls to fetch sensor data or relay status without reloading the page.

    Q9: Can I use buttons on my ESP32 web server page?

    A: Yes! ESP32 web server button or ESP32 async web server button allows interactive control of relays, LEDs, or other devices directly from the browser.

    Q10: Can I use Bootstrap for ESP32 web server interface?

    A: Absolutely. Using ESP32 web server bootstrap, you can create responsive and visually appealing web pages with styled buttons, cards, tables, and live sensor dashboards.

    Q11: Can ESP32 web server integrate APIs?

    A: Yes. An ESP32 web server API can communicate with mobile apps or other devices. You can create REST endpoints to read sensor data, control relays, or update settings programmatically.

    Q12: Is it possible to create an ESP32 Bluetooth web server?

    A: Yes. With ESP32 Bluetooth web server, you can serve a web interface over BLE for nearby devices, allowing local control and monitoring without Wi-Fi.

    Q13: How do I set up ESP32 web server in access point mode?

    A: Using ESP32 web server access point mode, the ESP32 creates its own Wi-Fi network. Devices can connect directly and interact with the web server, useful for portable or offline applications.

    Q14: Where can I find ESP32 web server code examples?

    A: You can explore multiple ESP32 web server GitHub repositories that provide code for relay control, DHT11 dashboards, async servers, AJAX integration, and complete beginner-friendly tutorials.

  • ESP32 Static IP: 7 Powerful Ways to Easily Set a Stable IP Address

    Learn how to set ESP32 static IP easily with step-by-step tutorials. Fix ESP32 static IP issues, set WiFi and Ethernet IP, and master ESP32 networking.

    If you’re working with the ESP32 for home automation, IoT dashboards, security cameras, or any smart system, at some point you will face one annoying problem: the ESP32 keeps changing its IP address. One day your ESP32 is working fine, and the next day Home Assistant cannot reach it. Your mobile app cannot connect. Your web server breaks. Your automation fails silently.

    This happens because, by default, the ESP32 uses DHCP, where your router dynamically assigns an IP address. That means the IP might change anytime the device reboots, reconnects, or the router resets.

    The solution is simple: set a static IP.

    In this tutorial, you’ll learn everything about configuring an ESP32 static IP, regardless of the platform you use. Whether you’re working with the Arduino IDE, ESP-IDF, MicroPython, ESPHome, or Home Assistant, I will walk you through it step by step.

    We’ll also cover esp32 static ip not working issues, Ethernet static IP, AP mode fixed IP, and real examples such as esp32 cam static ip address.

    What Is a Static IP on ESP32?

    A static IP is a permanent IP address that you manually assign to the ESP32. This ensures that your device always uses the same IP every time it connects to your WiFi or Ethernet network.

    Why does this matter?

    Because many projects depend on stable communication:

    • Home Assistant dashboards
    • Local web servers
    • ESP32 security camera streaming
    • MQTT brokers
    • REST API endpoints
    • ESP32 remote sensors
    • IoT automations

    If the IP changes, you lose connection. Not fun.

    That’s why setting an esp32 static fixed IP address is almost a must for any serious project. And if you are also exploring WiFi-related setups, you can check this helpful guide on ESP32 WiFi scanning here: ESP32 WiFi Scan Tutorials
    It fits perfectly with learning how your ESP32 behaves on the network before assigning a stable IP.

    Where You Should Use a Static IP Address

    Here are the most common real-world cases:

    1. Home Assistant ESP32 Static IP

    If you add your ESP32 to Home Assistant and its IP changes, HA will show it as offline. So you must use a home assistant esp32 static ip setup to keep your sensors and ESPHome devices stable.

    2. ESPHome ESP32 Static IP

    ESPHome YAML configurations often use manual_ip: to ensure the device stays reachable.

    3. ESP32 WiFi Server

    If you host:

    • Web server
    • REST API
    • Camera feed
    • Control dashboard

    Then you must use esp32 server static ip or clients will lose access.

    4. ESP32 Websocket Server

    Websocket connections break if the IP changes.

    5. ESP32 MQTT

    MQTT brokers rely on stable client addresses.

    6. ESP32 Ethernet Projects

    If you use LAN8720 or W5500, setting esp32 ethernet static ip example is required for stability.

    Choosing the Right IP for Your ESP32

    Before jumping into code, you need to pick the correct IP address.

    Rule of thumb: choose an IP outside the DHCP range.

    Example:

    • Router DHCP range: 192.168.1.100 – 192.168.1.200
    • Good static IP choices:
      • 192.168.1.50
      • 192.168.1.60
      • 192.168.1.90

    Subnet mask:
    255.255.255.0

    Gateway:
    Your router IP (usually 192.168.1.1 or 192.168.0.1).

    DNS:
    Prefer Google DNS: 8.8.8.8 (optional but reliable)

    ESP32 Static IP Using Arduino

    Let’s start with the most common environment: Arduino IDE.

    Here is the simplest arduino esp32 set static ip code:

    #include <WiFi.h>
    
    const char* ssid = "YourWiFi";
    const char* password = "YourPassword";
    
    // Static IP configuration
    IPAddress local_IP(192.168.1.60);
    IPAddress gateway(192.168.1.1);
    IPAddress subnet(255.255.255.0);
    IPAddress dns(8.8.8.8);
    
    void setup() {
      Serial.begin(115200);
    
      if (!WiFi.config(local_IP, gateway, subnet, dns)) {
        Serial.println("Static IP failed");
      }
    
      WiFi.begin(ssid, password);
    
      Serial.print("Connecting");
      while (WiFi.status() != WL_CONNECTED) {
        delay(500);
        Serial.print(".");
      }
    
      Serial.println();
      Serial.println("Connected!");
      Serial.print("IP Address: ");
      Serial.println(WiFi.localIP());
    }
    
    void loop() {
    
    }
    

    This covers:

    • esp32 static ip address
    • esp32 wifi static ip address
    • esp32 set static ip address
    • esp32 wifi begin static ip

    Once uploaded, your ESP32 will always get 192.168.1.60.

    ESP32 Static IP Not Working? Fix It

    The most common reason esp32 static ip not working happens is incorrect configuration.

    Here are the real causes beginners face:

    1. IP Already in Use

    Use:
    arp -a
    to check connected devices.

    2. Wrong Gateway

    If your router uses 192.168.0.1, you must match it.

    3. Router Blocking Manual IP

    Some routers force devices to use DHCP.

    Fix:
    Enable Static Lease / IP Reservation in router settings.

    4. Wrong Subnet Mask

    Should be:
    255.255.255.0 for most home networks.

    5. WiFi.config() Called After WiFi.begin()

    Static IP won’t apply.

    ESP32 AP Mode Static IP

    If your ESP32 is working as a hotspot (Access Point), you can use esp32 ap mode static ip.

    WiFi.softAPConfig(
      IPAddress(192.168.4.1),
      IPAddress(192.168.4.1),
      IPAddress(255.255.255.0)
    );
    WiFi.softAP("ESP32_AP", "12345678");
    

    The default AP IP is 192.168.4.1, but you can change it.

    ESP32 CAM Static IP Address

    ESP32-CAM becomes more stable with a static IP because the camera stream breaks if DHCP changes the IP.

    WiFi.config(local_IP, gateway, subnet, dns);
    WiFi.begin(ssid, password);
    

    Most people use:
    192.168.1.200 or 192.168.1.210

    ESP32 Static IP with ESPHome + Home Assistant

    For Home Assistant users, ESPHome is common.

    Here is esp32 static ip yaml:

    wifi:
      ssid: "MyWiFi"
      password: "MyPassword"
    
      manual_ip:
        static_ip: 192.168.1.90
        gateway: 192.168.1.1
        subnet: 255.255.255.0
        dns1: 8.8.8.8
    

    This covers:

    • esphome esp32 static ip
    • home assistant esp32 static ip

    ESP32 Static IP Using MicroPython

    If you’re coding in MicroPython, here’s a simple esp32 micropython static ip example:

    import network
    
    station = network.WLAN(network.STA_IF)
    station.active(True)
    
    station.ifconfig((
      '192.168.1.80',  # static IP 
      '255.255.255.0',  # subnet
      '192.168.1.1',  # gateway
      '8.8.8.8'       # DNS
    ))
    
    station.connect("MyWiFi", "MyPassword")
    
    print(station.ifconfig())
    

    MicroPython makes IP setting straightforward.

    ESP32 Static IP in ESP-IDF

    ESP-IDF gives full control. This is the esp32 static ip idf approach:

    Key steps:

    1. Stop DHCP client
    2. Set IP info
    3. Start WiFi

    Snippet:

    tcpip_adapter_dhcpc_stop(TCPIP_ADAPTER_IF_STA);
    
    tcpip_adapter_ip_info_t ipInfo;
    IP4_ADDR(&ipInfo.ip, 192,168,1,70);
    IP4_ADDR(&ipInfo.gw, 192,168,1,1);
    IP4_ADDR(&ipInfo.netmask, 255,255,255,0);
    
    tcpip_adapter_set_ip_info(TCPIP_ADAPTER_IF_STA, &ipInfo);
    

    This is for WiFi. Ethernet uses similar logic.

    ESP32 Ethernet Static IP Example (LAN8720 / W5500)

    If you’re using Ethernet instead of WiFi, here’s an esp32 ethernet static ip example in Arduino:

    ETH.begin(1);
    ETH.config(
      IPAddress(192.168.1.55),
      IPAddress(192.168.1.1),
      IPAddress(255.255.255.0),
      IPAddress(8.8.8.8)
    );
    

    Same concept, just using Ethernet instead of WiFi.

    ESP32 Get IP Addres

    At any time, you can check your current IP:

    Serial.println(WiFi.localIP());
    

    This is handy when testing DHCP vs static IP.

    Assign Static IP to ESP32 via Router

    Some people prefer setting a MAC-based static lease in their router instead of writing code.

    This is called:

    • dhcp reservation
    • ip lease
    • assign static ip to esp32

    Steps:

    1. Log in to router
    2. Find ESP32 MAC address
    3. Reserve an IP

    Why Static IP Matters for Real Projects

    If you’ve ever built a project like:

    • Smart home sensor
    • ESP32 cam streaming live feed
    • Home security dashboard
    • MQTT-based automation
    • ESP32 web server or API
    • Home Assistant integration

    Then you already know that IP changes are your biggest enemy.

    Imagine hosting an ESP32 server at /temperature that your automation reads every minute. If the IP changes from 192.168.1.150 to 192.168.1.181, everything breaks—Home Assistant shows errors, your app becomes unreachable, and debugging becomes a headache.

    That’s why using a esp32 set static ip address or assigning static IP via your router is almost a requirement for any real world IoT deployment.

    DHCP vs Static IP – The Real Difference

    Let’s break it down in simple terms.

    DHCP (Dynamic Host Configuration Protocol)

    • Router assigns IP automatically
    • IP can change anytime
    • ESP32 doesn’t control its address
    • Great for casual use
    • Bad for servers and automation

    Static IP (Manual IP)

    • You choose a fixed IP
    • ESP32 uses it forever
    • Perfect for servers, APIs, HA, dashboards
    • Zero breakage in automation
    • More reliable

    So, if you want long-term stability, static IP is the way.

    Two Ways to Use Static IP on ESP32

    A lot of beginners get confused here. There are only two reliable methods:

    1. Set static IP inside ESP32 code

    Examples:

    • Arduino
    • MicroPython
    • ESP-IDF
    • ESPHome YAML

    This is what you did earlier.

    2. Assign static IP from Router (Static Lease)

    This is sometimes better.

    You map ESP32’s MAC address → fixed IP.

    Advantages:

    • IP never changes
    • No need to modify code
    • Works with firmware updates
    • Router handles all IP logic

    Search your router admin page for:

    • “Static IP assignment”
    • “Address reservation”
    • “DHCP reservation”
    • “Bind IP + MAC”

    Both methods work. You can choose whichever fits your setup.

    Deep Dive: ESP32 in Server Mode with Static IP

    When ESP32 acts as a server, you absolutely must use a static IP.

    Why?

    Because clients rely on the address. A web browser, mobile app, or Home Assistant all connect to the same endpoint.

    Example request:
    http://192.168.1.90/data

    If the IP changes, the entire system breaks.

    This is why you should always configure esp32 server static ip whenever you serve:

    • HTML pages
    • JSON data
    • REST API endpoints
    • WebSockets
    • Live video streams

    A stable IP makes everything predictable.

    ESP32 Static IP with Web Server Example (Arduino)

    Here’s a friendly and clean example for a web server using static IP:

    #include <WiFi.h>
    #include <WebServer.h>
    
    const char* ssid = "MyWiFi";
    const char* password = "MyPassword";
    
    IPAddress local_IP(192.168.1.60);
    IPAddress gateway(192.168.1.1);
    IPAddress subnet(255.255.255.0);
    
    WebServer server(80);
    
    void handleRoot() {
      server.send(200, "text/plain", "Hello from ESP32");
    }
    
    void setup() {
      Serial.begin(115200);
      WiFi.config(local_IP, gateway, subnet);
      WiFi.begin(ssid, password);
    
      while (WiFi.status() != WL_CONNECTED) {
        delay(500);
      }
    
      server.on("/", handleRoot);
      server.begin();
    }
    
    void loop() {
      server.handleClient();
    }
    

    This ensures your server always lives at 192.168.1.60.

    ESP32 Static IP Ethernet Setup (Deep Explanation)

    Earlier we saw a quick esp32 ethernet static ip example. Now let’s go deeper.

    You may use:

    • LAN8720 Ethernet PHY
    • W5500 SPI Ethernet module
    • Built-in ESP32-Ethernet (in ESP32-S3, ESP32-S2, some modules)

    Ethernet is far more stable than WiFi for industrial IoT.

    The logic is:

    1. Initialize Ethernet
    2. Disable DHCP
    3. Set static IP
    4. Start Ethernet

    Full example:

    #include <ETH.h>
    
    static bool eth_connected = false;
    
    void setup() {
      Serial.begin(115200);
    
      ETH.begin(
        1,       // Address
        0,       // Power pin
        23,      // MDC pin
        18       // MDIO pin
      );
    
      ETH.config(
        IPAddress(192.168.1.55),
        IPAddress(192.168.1.1),
        IPAddress(255.255.255.0),
        IPAddress(8.8.8.8)
      );
    }
    
    void loop() {
      if (ETH.linkUp()) {
        if (!eth_connected) {
          Serial.println("Ethernet Connected");
          eth_connected = true;
        }
      }
    }
    

    This example ensures Ethernet always stays at a known IP.

    ESP32 Fix IP Address Using Router Only

    Many professional developers actually prefer handling static IP at the router level.

    Why?

    • Cleaner firmware
    • Less risk of conflicts
    • Works across reboots
    • Easier maintenance

    You usually find this in router UI under “LAN Settings”.

    Here’s the required information:

    ESP32 MAC Address

    You can print it in Arduino:

    Serial.println(WiFi.macAddress());
    

    Then assign an IP like 192.168.1.77 to that MAC.

    This is known as:

    • assign static ip to esp32
    • reserved IP lease
    • static DHCP

    This method also helps when your esp32 static ip not working in code.

    ESP32 Static IP in ESP-IDF (Advanced Users)

    The ESP-IDF method gives you full control.

    Newer IDF versions use:

    esp_netif_dhcpc_stop(netif);
    esp_netif_set_ip_info(netif, &ipInfo);
    

    The older method uses:

    tcpip_adapter_dhcpc_stop()
    

    You also need to use:

    esp_netif_create_default_wifi_sta();
    esp_wifi_connect();
    

    A complete ESP-IDF static IP setup includes:

    • Creating network interface
    • Stopping DHCP
    • Configuring IP
    • Applying DNS
    • Connecting

    It feels a bit heavy for beginners, but it’s the most reliable method in professional systems.

    Why ESP32 Static IP Sometimes Fails

    Let’s break down real reasons behind esp32 static ip not working. Most people blame the code, but the issue is usually the network.

    Here’s the complete truth.

    Reason 1: IP Already Taken

    Two devices cannot share the same IP. This is the most common beginner mistake.

    Check devices on your network using:

    • Router admin
    • arp -a command
    • Network scanner apps

    Reason 2: Wrong Gateway

    If router is 192.168.0.1, but you enter 192.168.1.1, nothing will work.

    Gateways must match your network.

    Reason 3: Wrong Subnet Mask

    Most networks use:
    255.255.255.0

    But some fiber routers use:
    255.255.254.0

    Mismatch = no connection.

    Reason 4: WiFi.config() Used After WiFi.begin()

    Order matters.

    Wrong order:

    WiFi.begin();
    WiFi.config();
    

    Correct order:

    WiFi.config();
    WiFi.begin();
    

    Reason 5: Router Blocking Manual IP

    Some routers require IP reservations for manual IPs.
    Simple fix: add ESP32 MAC in Router → DHCP Reservation.

    Reason 6: DNS Missing

    If DNS is not set, internet requests fail.

    Fix:

    WiFi.config(localIP, gateway, subnet, dns);
    

    Use Google DNS: 8.8.8.8.

    Reason 7: Using IP Outside Network Range

    Example mistake:
    Router is 192.168.0.x but you assign 192.168.1.50.

    Different network = no chance of connecting.

    ESP32 AP Mode Static IP (More Details)

    The AP mode (Access Point mode) turns your ESP32 into a hotspot.

    Default AP IP is:
    192.168.4.1

    You can update it like this:

    WiFi.softAPConfig(
      IPAddress(192.168.10.1),
      IPAddress(192.168.10.1),
      IPAddress(255.255.255.0)
    );
    WiFi.softAP("ESP32_AP", "12345678");
    

    Why use AP mode static IP?

    • Offline control system
    • Robot control
    • Local WiFi mesh
    • Direct ESP32 device access without router

    It guarantees predictable access.

    ESP32 CAM Static IP: Stability Boost

    The esp32 cam static ip address setup makes your camera:

    • load faster
    • stream reliably
    • reconnect without losing IP
    • work perfectly with Home Assistant

    A recommended IP range for cameras:
    192.168.1.200–220

    Camera streams can be sensitive. If the IP changes, your RTSP or HTTP stream breaks instantly, so using a fixed IP is a common practice.

    ESPHome ESP32 Static IP: More Examples

    Here’s an advanced esp32 static ip yaml configuration:

    wifi:
      ssid: "HomeWiFi"
      password: "Password123"
    
      manual_ip:
        static_ip: 192.168.1.91
        gateway: 192.168.1.1
        subnet: 255.255.255.0
        dns1: 8.8.8.8
        dns2: 1.1.1.1
    
    api:
    ota:
    logger:
    

    Why ESPHome + static IP is powerful:

    • Works perfectly with Home Assistant
    • ESPHome devices reboot often
    • DHCP can break sensors
    • YAML is simple and human-readable
    • You control everything

    This solves home assistant esp32 static ip issues permanently.

    ESP32 Get IP Address, Gateway, and More

    You can print full IP info:

    Serial.println(WiFi.localIP());
    Serial.println(WiFi.gatewayIP());
    Serial.println(WiFi.subnetMask());
    

    Useful while testing static vs dynamic IP.

    Full Troubleshooting Guide for ESP32 Static IP

    Even experienced developers face issues with static IP. Networks vary, routers behave differently, and DHCP servers sometimes interfere. So let’s look at real-world problems and solutions.

    Problem 1: ESP32 won’t connect when static IP is used

    Possible causes:

    • Wrong gateway
    • Wrong subnet
    • IP conflict
    • DHCP still active
    • Wrong order of WiFi calls

    Fix

    Double-check:

    WiFi.config(localIP, gateway, subnet);
    WiFi.begin(ssid, password);
    

    If you reverse the order, it fails.

    Problem 2: ESP32 Static IP Not Working After Reboot

    This is very common.

    Reason:
    Your router forces DHCP for unknown devices.

    Fix

    Add ESP32 MAC address to your router’s DHCP reservation.

    Search your router page for:

    • Reserved IP
    • DHCP static lease
    • Bind IP to MAC

    This is the best long-term method to assign static ip to esp32.

    Problem 3: ESP32 connects but has no internet

    This happens when:

    • DNS not set
    • Gateway wrong
    • Router blocks manual DNS

    Fix

    WiFi.config(localIP, gateway, subnet, dns1, dns2);
    

    Use Google DNS:
    8.8.8.8
    1.1.1.1

    Problem 4: ESP32 Ethernet Static IP Not Working

    Reasons:

    • PHY not initialized
    • Wrong wiring (MDIO/MDC)
    • Static IP outside LAN
    • DHCP not disabled

    Fix

    Use this flow:

    ETH.begin();
    ETH.config(ip, gateway, subnet, dns);
    

    Check link status:

    if (ETH.linkUp()) {
        Serial.println("Ethernet Connected");
    }
    

    Problem 5: ESP32 AP Mode Static IP Not Responding

    When using esp32 ap mode static ip, clients must use the same network range.

    Example:
    If AP IP is 192.168.10.1, your phone might automatically use:

    192.168.10.x

    If not, AP will not respond.

    Fix

    Use this:

    WiFi.softAPConfig(AP_ip, AP_gateway, AP_subnet);
    

    Problem 6: ESP32 Camera Freezes Without Static IP

    The ESP32-CAM is sensitive. When IP changes, the stream drops.

    Fix

    Use a high-range stable IP like:

    192.168.1.210

    And configure static IP in router.

    Best Practices for ESP32 Static IP

    If you want your IoT system to run for years without touching it, follow these golden rules.

    1. Use Router Assigned Static IP (Recommended)

    When possible, always reserve IP from router.

    Advantages:

    • No code changes
    • Works even after firmware update
    • Prevents IP conflicts
    • Plays well with Home Assistant

    Search for:
    “DHCP Reservation” OR “Static Lease”.

    This solves nearly all esp32 static ip not working problems.

    2. Choose IPs Above DHCP Range

    Most routers assign IPs between:

    192.168.1.2 — 192.168.1.150

    So use something like:

    192.168.1.180
    192.168.1.200
    192.168.1.240

    This avoids conflicts.

    3. Use DNS from Google or Cloudflare

    This ensures stable internet.

    Good choices:

    • Google DNS: 8.8.8.8
    • Cloudflare DNS: 1.1.1.1

    4. Keep IP Settings the Same Across All ESP32 Boards

    If you deploy multiple ESP32 devices:

    • Keep subnet same
    • Keep gateway same
    • Only change last octet of IP

    Example:

    192.168.1.91  
    192.168.1.92  
    192.168.1.93  
    

    5. Print IP and Network Info During Boot

    Add:

    Serial.println(WiFi.localIP());
    Serial.println(WiFi.gatewayIP());
    Serial.println(WiFi.subnetMask());
    

    This makes debugging easy.

    6. For Home Assistant Users: Always Prefer Static IP

    If you integrate ESP32 with Home Assistant:

    • ESPHome
    • MQTT
    • HTTP sensors
    • ESP32 camera

    Then static IP is absolutely necessary.

    This solves issues with home assistant esp32 static ip always losing connection.

    7. Document Your IP Plan

    Keep a small note:

    Sensor 1: 192.168.1.90  
    Sensor 2: 192.168.1.91  
    Camera 1: 192.168.1.200  
    

    You’ll thank yourself later.

    Additional Examples

    Let’s cover a few scenarios beginners often ask about.

    ESP32 Static IP with mDNS Enabled

    You can use both static IP + mDNS.

    #include <ESPmDNS.h>
    MDNS.begin("esp32device");
    

    Then you can use:

    http://esp32device.local

    This helps when IP changes accidentally.

    ESP32 WiFi Begin Static IP Example

    Some boards behave better using:

    WiFi.begin(ssid, password, channel, bssid);
    

    If your router has bssid-locking, this improves stability.

    ESP32 Micropython Static IP Example (Simplified)

    import network
    
    sta = network.WLAN(network.STA_IF)
    sta.active(True)
    sta.ifconfig((
        '192.168.1.52',
        '255.255.255.0',
        '192.168.1.1',
        '8.8.8.8'
    ))
    sta.connect("WiFi", "Password")
    

    ESP32 Server Static IP Example (Advanced)

    If you’re hosting multiple endpoints:

    server.on("/json", handleJSON);
    server.on("/status", getStatus);
    server.on("/sensor", getSensorData);
    

    This setup requires a fixed IP so clients can always find the server.

    FAQ : ESP32 Static IP

    1. How to set static IP for ESP32?

    Use:

    WiFi.config(localIP, gateway, subnet);
    

    Then call:

    WiFi.begin(ssid, password);
    

    This sets an esp32 static ip address manually.

    2. Why is my esp32 static ip not working?

    Common reasons:

    • IP conflict
    • Wrong gateway
    • Wrong subnet
    • DNS missing
    • Wrong order of WiFi calls

    Fixing these resolves 99% of issues.

    3. How do I assign static IP to ESP32 from router?

    Go to router → DHCP Reservation → Add ESP32 MAC address → Assign IP.

    This is the safest way to assign static ip to esp32.

    4. How do I set esp32 wifi static ip address?

    Use:

    WiFi.config(localIP, gateway, subnet, dns);
    

    You can also use router-based static IP.

    5. Does ENC28J60 or LAN8720 support esp32 ethernet static ip example?

    Yes. After initializing Ethernet, use:

    ETH.config(ip, gateway, subnet);
    

    Works for both modules.

    6. Can ESP32 CAM use static IP?

    Yes. Setting esp32 cam static ip address improves video stability and prevents stream drops.

    7. What is esp32 ap mode static ip?

    In AP mode, ESP32 becomes WiFi hotspot. You can change default 192.168.4.1 to your own:

    WiFi.softAPConfig(AP_ip, AP_gw, AP_subnet);
    

    8. Can ESP32 static IP work in ESPHome?

    Yes. Use:

    manual_ip:
    

    This is the recommended esphome esp32 static ip method.

    9. How to write esp32 static ip yaml for Home Assistant?

    Example:

    manual_ip:
      static_ip: 192.168.1.91
    

    Perfect for home assistant esp32 static ip integration.

    10. How do I get ESP32 IP address?

    Use:

    WiFi.localIP();
    

    This returns the current IP.

    11. Can I use esp32 static ip idf in production?

    Yes. ESP-IDF allows low-level control for industrial IoT.

    12. What is the best way to fix esp32 static fixed ip address conflicts?

    Use an IP above the DHCP pool, like:

    192.168.1.200.

    13. Does esp32 server static ip improve reliability?

    Yes. A server must have a fixed IP so clients always know where to connect.

    14. Can ESP32 use static IP with MQTT?

    Absolutely. MQTT dashboards work better with a esp32 use static ip setup.

  • ESP32 Connect to Router Tutorials: Master Complete Beginner-Friendly Guide

    Master ESP32 WiFi scan with this step-by-step guide. Learn to scan networks, connect to routers, fix connection issues, and build reliable IoT projects. Now!

    If you’ve just started working with the ESP32 and your first goal is to connect the ESP32 to a router, you’re in the right place. Think of this guide like you and I are sitting in a café, talking through each step so you understand not just what to do, but why things work the way they do.

    The ESP32 is powerful. It has built-in WiFi, Bluetooth, dual-core processing, and enough flexibility to handle IoT projects, home automation, robots, smart sensors, remote monitors, and even cameras. And the truth is: none of that matters unless the ESP32 connects to the internet correctly.

    By the end, you’ll have a practical understanding of how to connect ESP32 to WiFi router in multiple methods, troubleshoot common issues, and build real IoT setups.

    Let’s dive in.

    What Does ESP32 Connect to Router Actually Mean?

    When you tell the ESP32 to connect to a router, you’re doing two simple things:

    1. Giving the ESP32 the WiFi name (SSID)
    2. Giving it the password

    If everything goes well, the router assigns an ESP32 IP address, and the ESP32 becomes a device on your local network.

    Once connected, you can:

    • Access ESP32 web servers
    • Send data to Home Assistant
    • Connect ESP32 to Raspberry Pi
    • Use ESP32 as an internet-connected IoT device
    • Stream video if you’re connecting a camera to ESP32
    • Build ESP32 mesh network setups
    • Connect two ESP32 boards together

    Basically, the router becomes your bridge to the world.

    Requirements to Connect ESP32 to WiFi Router

    Before running any code, you need:

    • ESP32 DevKit, ESP32-C3, or ESP32-S3
    • Arduino IDE or MicroPython
    • A WiFi router (2.4 GHz — note this!)
    • Power via USB
    • Stable SSID and password

    Important:
    Most beginners face the “ESP32 not connecting to WiFi” error because the ESP32 does not support 5 GHz networks. Only 2.4 GHz works.

    ESP32 Connect to Router – Arduino Example

    This is the simplest ESP32 Arduino connect to WiFi code you’ll ever use.

    #include <WiFi.h>
    
    const char* ssid = "Your_WiFi_Name";
    const char* password = "Your_WiFi_Password";
    
    void setup() {
      Serial.begin(115200);
      WiFi.begin(ssid, password);
    
      Serial.println("Connecting...");
      
      while (WiFi.status() != WL_CONNECTED) {
        delay(1000);
        Serial.print(".");
      }
    
      Serial.println("\nConnected to router!");
      Serial.print("ESP32 IP address: ");
      Serial.println(WiFi.localIP());
    }
    
    void loop() {}
    

    What this does:

    You now have a working connection.

    Understanding ESP32 WiFi Events

    ESP32 is smart. It sends events whenever something happens:

    EventMeaning
    SYSTEM_EVENT_STA_CONNECTEDESP32 connected to router
    SYSTEM_EVENT_STA_DISCONNECTEDESP32 lost WiFi
    SYSTEM_EVENT_STA_GOT_IPRouter gave ESP32 IP address
    SYSTEM_EVENT_STA_LOST_IPESP32 lost its IP

    Handling WiFi events helps you build reliable systems.

    Example:

    WiFi.onEvent(WiFiEvent);
    
    void WiFiEvent(WiFiEvent_t event) {
      switch(event) {
        case SYSTEM_EVENT_STA_CONNECTED:
          Serial.println("Connected to WiFi");
          break;
    
        case SYSTEM_EVENT_STA_GOT_IP:
          Serial.println("Got IP:");
          Serial.println(WiFi.localIP());
          break;
    
        case SYSTEM_EVENT_STA_DISCONNECTED:
          Serial.println("Disconnected. Trying to reconnect...");
          WiFi.begin(ssid, password);
          break;
      }
    }
    

    This kind of setup helps avoid random disconnections.

    ESP32 Connect to Router – MicroPython Example

    If you prefer MicroPython, here’s how to connect ESP32 to WiFi MicroPython:

    import network
    import time
    
    ssid = "Your_WiFi_Name"
    password = "Your_WiFi_Password"
    
    wifi = network.WLAN(network.STA_IF)
    wifi.active(True)
    wifi.connect(ssid, password)
    
    print("Connecting...")
    while not wifi.isconnected():
        time.sleep(1)
        print(".")
    
    print("Connected!")
    print("ESP32 IP address:", wifi.ifconfig()[0])
    

    ESP32 Not Connecting to Router? (FIXED)

    This is the most searched problem:

    1. ESP32 not connecting to router

    2. ESP32 not connecting to WiFi

    Here are real causes and fixes:

    1. Your router is 5 GHz

    ESP32 connects only to 2.4 GHz, not 5 GHz.

    2. Wrong password

    Double-check uppercase, lowercase, and symbols.

    3. Special characters in SSID

    Try renaming your WiFi to something simple.

    4. Weak WiFi signal

    Bring the ESP32 closer to the router.

    5. MAC filtering enabled

    Turn off MAC filtering in router settings.

    6. Hidden SSID

    Enable SSID broadcast or manually enter details.

    7. Power issues

    A weak USB cable or port can cause random disconnects.

    ESP32 WiFi IP Address Explained

    Once ESP32 connects, you’ll get something like:

    192.168.1.92
    

    This is the ESP32 WiFi IP address.

    Your PC or phone can use this IP to:

    • Access ESP32 web server
    • Control LEDs
    • Read sensor values
    • Integrate into Home Assistant

    You can also set a static ESP32 IP address:

    WiFi.config(local_IP, gateway, subnet);
    

    How to Connect Camera to ESP32

    If you are connecting a camera to ESP32, you’ll most likely use:

    • ESP32-CAM
    • OV2640 camera module

    Once the camera boots, it connects to the router and provides a streaming link like:

    http://192.168.1.77
    

    You can open this in any browser.

    ESP32 as a Router (SoftAP Example)

    ESP32 can also act as a WiFi router itself.

    WiFi.softAP("ESP32_Router", "12345678");
    

    Now your phone or laptop can connect to the ESP32.

    This is used when:

    • No home router is available
    • You want to control ESP32 locally
    • You’re connecting two ESP32 boards

    Connecting Two ESP32 Boards Together

    You can connect ESP32 boards using:

    1. WiFi (station to station)

    2. ESP32 mesh network example

    3. Bluetooth

    4. UART wired communication

    The simplest way is soft AP + STA mode.

    ESP32 Connect to Raspberry Pi

    You can connect ESP32 to Raspberry Pi in 3 ways:

    Via router (recommended)

    Both connect to same WiFi.

    Direct WiFi (ESP32 as router)

    ESP32 softAP → Pi connects to ESP32.

    Serial communication

    UART between GPIO pins.

    Most people use the router method so the Pi can also connect ESP32 to the internet.

    ESP32 Connect to Arduino Uno

    You can connect ESP32 and Arduino Uno using multiple methods depending on your project:

    • Serial communication (RX/TX)
    • I2C
    • WiFi communication
    • Sending ESP32 data to the Uno to control sensors or motors

    If you want a deeper explanation with visuals, I’ve also covered this in my WiFi guide here: Master ESP32 WiFi Scan Tutorials

    Connect ESP32 to PC

    When ESP32 connects to a router, your PC can:

    • Open ESP32 web server
    • Read sensor data
    • Control GPIO pins
    • Flash firmware

    How to Connect ESP32 to Home Assistant

    Home Assistant → ESP32 integration is simple:

    • Use ESPHome
    • Or use MQTT
    • Or REST API

    ESP32 connects to your router, then Home Assistant reads data via local network.

    ESP32-C3 WiFi and ESP32-S3 Ethernet Notes

    ESP32-C3 WiFi

    Supports WiFi 2.4 GHz
    Low power
    Great for battery projects

    ESP32-S3 Ethernet

    Some S3 boards have Ethernet PHY
    Great for stable wired IoT
    Zero wireless drops

    ESP32 Mesh Network Example

    A mesh network means multiple ESP32 boards communicate without a central router.

    Perfect for:

    • Farms
    • Large buildings
    • Outdoor sensors
    • Long-range applications

    You can still connect one node to a router to access the internet.

    Troubleshooting – Quick Fix Table

    IssueFix
    ESP32 not connecting to routerUse 2.4 GHz
    ESP32 not connecting to WiFiCheck password
    Got IP but no internetRestart router
    ESP32 disconnects randomlyChange power cable
    ESP32 WiFi slowAvoid crowded channels
    ESP32 IP address changesAssign static IP

    Final Thoughts

    Connecting ESP32 to a router is the first big step in IoT development. Once your ESP32 connects to WiFi reliably, you can build smart home systems, cloud dashboards, camera streams, ESP32 mesh network example setups, or even connect ESP32 to Raspberry Pi or Arduino Uno for complex automation projects.

    If you follow the examples in this tutorial, your ESP32 will connect to the router confidently every time.

    FAQ on ESP32 Connect to Router

    1. How do I connect ESP32 to a router for the first time?

    To connect the ESP32 to a router, you only need the WiFi name and password. In Arduino IDE, you call WiFi.begin(ssid, password); and the router assigns an ESP32 IP address when the connection succeeds. If you’re using MicroPython, you activate the network interface and connect using wifi.connect(ssid, password).

    Search intent covered: esp32 connect to router, esp32 connect to wifi, how to connect esp32 to wifi router.

    2. Why is my ESP32 not connecting to router or WiFi?

    This is the most common beginner issue. The ESP32 connects only to 2.4 GHz WiFi, not 5 GHz. Wrong password, hidden SSID, weak signal, and MAC filtering are also common reasons. If you see “ESP32 not connecting to router,” first check whether the router is broadcasting 2.4 GHz WiFi.

    3. How can I find the ESP32 WiFi IP address once connected?

    Open the Serial Monitor after uploading your code. Arduino prints the ESP32 IP address using:

    Serial.println(WiFi.localIP());
    

    In MicroPython, use wifi.ifconfig()[0]. This IP allows your PC or phone to access ESP32 web pages, dashboards, and APIs.

    4. What is the simplest ESP32 Arduino connect to WiFi example?

    The easiest esp32 connect to wifi example is:

    WiFi.begin("YourSSID", "YourPassword");
    while (WiFi.status() != WL_CONNECTED) {
      delay(500);
    }
    

    It’s enough for small IoT projects like LED control, sensors, or data logging.

    5. How do I connect ESP32 to Home Assistant?

    The best way is using ESPHome. It automatically handles the connection when the ESP32 connects to your home router. You can also use MQTT, REST API, or a simple web server. If the ESP32 and Home Assistant are on the same WiFi network, communication is instant.

    6. Can I connect ESP32 to Raspberry Pi using WiFi?

    Yes. You can connect ESP32 to Raspberry Pi through the router (recommended), or make the ESP32 act as a WiFi access point and let the Raspberry Pi join it. Sending sensor data or commands becomes easy using HTTP, MQTT, or UDP.

    7. How do I connect ESP32 and Arduino Uno together?

    There are two ways:

    1. Wired (UART, I2C) – ESP32 sends sensor or WiFi data to Arduino Uno
    2. Wireless – both connect to the same router and communicate over WiFi

    This is helpful when you want WiFi features on the Uno.

    8. Can ESP32 work as a router or WiFi hotspot?

    Yes. ESP32 has a mode called SoftAP where it broadcasts its own WiFi network. This lets phones or other ESP32 boards connect directly. Many IoT projects use this for local configuration, dashboards, or controlling devices without a real router.

    9. How do I connect ESP32 to WiFi using MicroPython?

    MicroPython connection is simple:

    wifi = network.WLAN(network.STA_IF)
    wifi.active(True)
    wifi.connect("SSID", "Password")
    

    Keep looping until wifi.isconnected() returns true. Once connected, it gives you an ESP32 WiFi IP address.

    Search term included: connect esp32 to wifi micropython.

    10. Can ESP32 connect to the internet without a router?

    Yes. You have options:

    • Use ESP32 SoftAP mode and share internet from your mobile
    • Use ESP32 mesh network example (no router needed)
    • Use Ethernet with ESP32-S3 boards
    • Use a hotspot from your phone or laptop

    Without a router, you can still transfer data locally.

    11. Can I connect a camera to ESP32 for streaming?

    Yes. Using ESP32-CAM or modules like the OV2640. Once the ESP32 connects to your WiFi router, it streams video through a URL like:

    http://192.168.X.X
    

    You can view it on PC, mobile, Raspberry Pi, or Home Assistant.

    12. What is the difference between ESP32, ESP32-C3 WiFi, and ESP32-S3 Ethernet?

    • ESP32: Dual-core, strong performance, WiFi + Bluetooth.
    • ESP32-C3 WiFi: Low-power, single-core chip with WiFi 2.4 GHz support; best for battery devices.
    • ESP32-S3 Ethernet: Some S3 boards support Ethernet PHY, meaning you can connect wired networks when WiFi is unstable.

    13. How do I fix slow or unstable WiFi when connecting ESP32 to router?

    Here are practical fixes:

    • Keep ESP32 away from heavy power cables
    • Reduce distance from router
    • Ensure router is using channel 1, 6, or 11
    • Use a high-quality USB cable
    • Avoid using metal enclosures
    • Assign a static ESP32 IP address
    • Restart router weekly

    This eliminates the most common “slow esp32 wifi” issues.

  • Master ESP32 WiFi Scan Tutorials: A Beginner-Friendly Guide

    Learn ESP32 WiFi scan with Arduino & MicroPython. Scan networks, measure signal strength, display on OLED, async scanning & troubleshooting tips.

    Imagine you’re building a smart home device. Your ESP32 is ready, sensors are wired, but there’s one critical step: connecting to WiFi. Without a reliable connection, your device is just a gadget on your desk. This is where ESP32 WiFi scan comes in. Scanning networks, checking signal strength, and connecting to the right network are key to creating smart, autonomous IoT devices.

    In this guide, we’ll explore ESP32 WiFi scanning step by step, with beginner-friendly examples, MicroPython integration, OLED display projects, async scanning, and troubleshooting—all optimized to help you understand and implement WiFi scanning professionally.

    If you’re just getting started with ESP32 and WiFi projects, understanding how to scan WiFi networks is one of the foundational skills you need. Whether you’re building IoT projects, home automation systems, or just experimenting for fun, learning ESP32 WiFi scan techniques is essential. In this tutorial, I’ll walk you through everything from basic WiFi scanning to more advanced use cases like scanning while connected, using MicroPython, and even displaying networks on an OLED screen.

    Grab your coffee, sit back, and let’s make WiFi scanning on ESP32 straightforward and enjoyable.

    ESP32 WiFi Scan
    Learn ESP32 WiFi scan step by step. Beginner-friendly guide on scanning networks, connecting ESP32 to WiFi, fixing errors, and building smart IoT projects.

    What is ESP32 WiFi Scan? Understanding Network Scanning on ESP32 ?

    The ESP32 WiFi scan is a feature that allows your ESP32 microcontroller to detect nearby WiFi networks. This process helps you identify available networks, check their signal strength, and decide which network to connect to. Think of it as your ESP32 “looking around” to see which WiFi networks it can talk to.

    Using this feature, you can:

    • Automatically connect to the strongest network.
    • Display nearby WiFi networks on a screen.
    • Filter networks based on signal strength.
    • Perform advanced tasks like scanning while connected.

    This makes ESP32 extremely powerful for IoT and smart home projects.

    Why Scan WiFi Networks with ESP32? Benefits and Use Cases

    Before we dive into code, let’s understand why you’d want your ESP32 to scan WiFi networks:

    1. Automated Connections: Your ESP32 can automatically find and connect to a preferred network without hardcoding SSID and password.
    2. Network Selection: If multiple networks are available, your ESP32 can choose the one with the strongest signal.
    3. Debugging: When your ESP32 fails to connect, scanning helps you identify network issues.
    4. IoT Projects: For projects like smart sensors or WiFi signal strength meters, scanning networks is essential.

    In short, knowing how to scan WiFi networks makes your ESP32 smarter and more autonomous.

    Getting Started: ESP32 WiFi Scan Requirements and Setup

    Before we start coding, make sure you have everything ready for your ESP32 WiFi scan project:

    • ESP32 development board (like ESP32 DevKit v1)
    • Arduino IDE or PlatformIO installed
    • USB cable to connect ESP32 to your PC
    • Optional: OLED display if you want to visualize scanned networks
    • MicroPython installed on ESP32 (if you’re using MicroPython examples)

    If you want a complete guide covering all ESP32 tutorials, from setup to advanced projects, check out this resource: ESP Tutorials Complete Guide. It’s beginner-friendly and perfect for getting your ESP32 projects up and running.

    ESP32 WiFi Scan Example (Arduino IDE): Step-by-Step Guide for Beginners

    Let’s start with the most basic example using Arduino IDE.

    #include "WiFi.h"
    
    void setup() {
      Serial.begin(115200);
    
      // Set ESP32 as station mode
      WiFi.mode(WIFI_STA);
      WiFi.disconnect();
      delay(100);
    
      Serial.println("ESP32 WiFi Scanner");
    }
    
    void loop() {
      Serial.println("Scanning for WiFi networks...");
    
      int n = WiFi.scanNetworks();
      if (n == 0) {
        Serial.println("No networks found");
      } else {
        Serial.println("Networks found:");
        for (int i = 0; i < n; ++i) {
          Serial.print(i + 1);
          Serial.print(": ");
          Serial.print(WiFi.SSID(i));
          Serial.print(" (");
          Serial.print(WiFi.RSSI(i));
          Serial.print(" dBm) ");
          Serial.println((WiFi.encryptionType(i) == WIFI_AUTH_OPEN) ? "Open" : "Secured");
        }
      }
    
      Serial.println("");
      delay(5000); // Wait 5 seconds before scanning again
    }
    

    Explanation:

    • WiFi.mode(WIFI_STA) sets your ESP32 in station mode.
    • WiFi.scanNetworks() scans all available WiFi networks.
    • WiFi.SSID(i) gives the name of the network.
    • WiFi.RSSI(i) provides the signal strength.
    • This is a simple ESP32 WiFi scan code to display nearby networks in the Serial Monitor.

    MicroPython ESP32 WiFi Scan: Scan Networks Using Python Scripts

    If you prefer MicroPython, here’s a Micropython ESP32 WiFi scan example:

    import network
    
    sta_if = network.WLAN(network.STA_IF)
    sta_if.active(True)
    
    networks = sta_if.scan()
    print("Scanning for WiFi networks...")
    for net in networks:
        ssid = net[0].decode('utf-8')
        bssid = net[1]
        channel = net[2]
        RSSI = net[3]
        authmode = net[4]
        print(f"SSID: {ssid}, RSSI: {RSSI} dBm, Channel: {channel}")
    
    • This script will list all available networks with their signal strengths.
    • MicroPython is lightweight and perfect for small ESP32 IoT projects.

    ESP32 WiFi Scan While Connected: Monitor Networks Without Dropping Connection

    Sometimes, you want your ESP32 to scan networks without disconnecting from the current network. Here’s how you do that:

    #include "WiFi.h"
    
    void setup() {
      Serial.begin(115200);
      WiFi.begin("YourSSID", "YourPassword");
    
      while (WiFi.status() != WL_CONNECTED) {
        delay(1000);
        Serial.println("Connecting...");
      }
    
      Serial.println("Connected to WiFi");
    }
    
    void loop() {
      Serial.println("Scanning for other networks...");
      int n = WiFi.scanNetworks(false, true); // async scan while connected
      for (int i = 0; i < n; i++) {
        Serial.print(WiFi.SSID(i));
        Serial.print(" (");
        Serial.print(WiFi.RSSI(i));
        Serial.println(" dBm)");
      }
      delay(10000);
    }
    
    • WiFi.scanNetworks(false, true) allows scanning while connected.
    • Useful for projects like WiFi signal strength meters or multi-network devices.

    ESP32 Scan and Connect to Strongest Network: Automatic WiFi Selection

    Your ESP32 can scan multiple networks and connect to the one with the strongest signal. Here’s a simple example:

    #include "WiFi.h"
    
    void setup() {
      Serial.begin(115200);
      WiFi.mode(WIFI_STA);
      WiFi.disconnect();
      delay(100);
    }
    
    void loop() {
      int n = WiFi.scanNetworks();
      if (n == 0) {
        Serial.println("No networks found");
      } else {
        int strongestNetwork = 0;
        int strongestRSSI = -100;
    
        for (int i = 0; i < n; i++) {
          int rssi = WiFi.RSSI(i);
          if (rssi > strongestRSSI) {
            strongestRSSI = rssi;
            strongestNetwork = i;
          }
          Serial.print(WiFi.SSID(i));
          Serial.print(" (");
          Serial.print(rssi);
          Serial.println(" dBm)");
        }
    
        Serial.print("Connecting to ");
        Serial.println(WiFi.SSID(strongestNetwork));
        WiFi.begin(WiFi.SSID(strongestNetwork).c_str());
        while (WiFi.status() != WL_CONNECTED) {
          delay(1000);
          Serial.println("Connecting...");
        }
        Serial.println("Connected!");
      }
    
      delay(60000); // Scan every minute
    }
    
    • This is ideal for ESP32 devices that roam between multiple networks.

    ESP32 WiFi Scanner on OLED: Display Networks and Signal Strength

    Want to visualize networks directly on a small screen? Here’s how you can show scanned networks on an OLED display:

    #include <Wire.h>
    #include <Adafruit_SSD1306.h>
    #include "WiFi.h"
    
    #define SCREEN_WIDTH 128
    #define SCREEN_HEIGHT 64
    Adafruit_SSD1306 display(SCREEN_WIDTH, SCREEN_HEIGHT, &Wire, -1);
    
    void setup() {
      Serial.begin(115200);
    
      if(!display.begin(SSD1306_SWITCHCAPVCC, 0x3C)) {
        Serial.println("SSD1306 allocation failed");
        for(;;);
      }
    
      WiFi.mode(WIFI_STA);
      WiFi.disconnect();
      delay(100);
    }
    
    void loop() {
      display.clearDisplay();
      int n = WiFi.scanNetworks();
      for(int i = 0; i < n && i < 6; i++) { // Display max 6 networks
        display.setCursor(0, i*10);
        display.setTextSize(1);
        display.setTextColor(SSD1306_WHITE);
        display.print(WiFi.SSID(i));
        display.print(" ");
        display.print(WiFi.RSSI(i));
      }
      display.display();
      delay(10000);
    }
    
    • This makes your ESP32 a portable WiFi scanner.
    • Great for quick WiFi surveys.

    ESP32 Async WiFi Scan: Perform Non-Blocking Network Scans Efficiently

    The ESP32 WiFi scan async function allows scanning without blocking other operations. Using ESPAsyncWebServer library:

    #include <WiFi.h>
    #include <ESPAsyncWebServer.h>
    
    AsyncWebServer server(80);
    
    void setup() {
      Serial.begin(115200);
      WiFi.mode(WIFI_STA);
      WiFi.disconnect();
      delay(100);
      
      server.on("/scan", HTTP_GET, [](AsyncWebServerRequest *request){
        String networks = "";
        int n = WiFi.scanNetworks();
        for (int i = 0; i < n; i++) {
          networks += WiFi.SSID(i) + " (" + String(WiFi.RSSI(i)) + " dBm)\n";
        }
        request->send(200, "text/plain", networks);
      });
    
      server.begin();
    }
    
    void loop() {
      // Non-blocking async scan on web request
    }
    
    • Your ESP32 can serve WiFi scan results via a web interface.
    • Perfect for IoT dashboards.

    ESP32 WiFi Scan Config: Customize and Optimize Your Network Scans

    You can configure scanning with optional parameters:

    WiFi.scanNetworks(/*async=*/true, /*hidden=*/false);
    
    • async: If true, scanning does not block other operations.
    • hidden: If true, includes hidden networks in the scan.

    These options help fine-tune your ESP32 WiFi scan config for advanced projects.

    Measuring Signal Strength: ESP32 WiFi Signal Strength Meter

    A fun project is creating a WiFi signal strength meter:

    int n = WiFi.scanNetworks();
    for (int i = 0; i < n; i++) {
      int rssi = WiFi.RSSI(i);
      Serial.print(WiFi.SSID(i));
      Serial.print(" - ");
      Serial.println(rssi);
    }
    
    • Use the RSSI value to create a graphical meter on OLED or web.
    • Great for finding WiFi dead spots in your home.

    Combining ESP32 WiFi Scan and Connect: Automatically Join the Best Network

    You can scan and immediately connect to known networks using a list:

    String knownSSIDs[] = {"HomeWiFi", "OfficeWiFi"};
    String knownPasswords[] = {"pass123", "office123"};
    
    int n = WiFi.scanNetworks();
    for (int i = 0; i < n; i++) {
      for (int j = 0; j < 2; j++) {
        if (WiFi.SSID(i) == knownSSIDs[j]) {
          WiFi.begin(knownSSIDs[j].c_str(), knownPasswords[j].c_str());
          Serial.println("Connecting to " + knownSSIDs[j]);
          break;
        }
      }
    }
    
    • Automatically connects to preferred networks.
    • Ideal for roaming IoT devices.

    ESP32 WiFi Scan Example Summary

    Here’s a quick recap:

    FeatureFunction
    Basic ScanWiFi.scanNetworks()
    Scan while connectedWiFi.scanNetworks(false, true)
    Async scanWiFi.scanNetworks(true)
    Scan + connect strongestCompare RSSI values
    Display on OLEDAdafruit_SSD1306 library
    MicroPython scannetwork.WLAN(network.STA_IF).scan()

    Best Practices for ESP32 WiFi Scan: Tips for Reliable Scanning and Connectivity

    1. Always disconnect before scanning to avoid stale results.
    2. Avoid scanning too frequently; ESP32 may reset if overworked.
    3. Use async scans for multitasking projects.
    4. Limit displayed networks if using OLED.
    5. Filter networks based on RSSI for better reliability.

    Advanced Tips for ESP32 WiFi Scan: Boost Performance and Efficiency

    • Combine ESP32 WiFi scan and connect logic to create self-healing WiFi devices.
    • Use RSSI to measure distance or detect obstacles for smart IoT.
    • Integrate with web dashboards for live network monitoring.
    • Combine ESP32 WiFi scanner OLED with mobile apps for real-time display.

    Summary of ESP32 WiFi Scan: Key Takeaways and Best Practices

    Learning ESP32 WiFi scan opens up many possibilities. From simple scanning to async scans, displaying networks on OLED, and even creating WiFi signal strength meters, ESP32 is versatile and powerful.

    By following these tutorials, you can:

    • Understand nearby WiFi networks
    • Automatically connect to the strongest network
    • Display networks on OLED screens
    • Debug WiFi issues
    • Create smart IoT solutions

    Remember, the key to mastery is experimentation. Try scanning while connected, try async scanning, and use RSSI for interesting projects.

    ESP32 makes WiFi scanning easy, fun, and incredibly powerful for beginners and pros alike.

    Troubleshooting ESP32 WiFi Scan: Common Questions & Expert Answers

    1. Why is my ESP32 WiFi scan not working?

    • Ensure WiFi.mode(WIFI_STA) is active
    • Call WiFi.disconnect() before scanning
    • Delay 100ms after setup to stabilize WiFi module
    • Update Arduino IDE ESP32 board definitions

    2. Why do I see no networks?

    • Networks may be hidden; enable hidden scanning
    • Distance from router may be too far
    • Interference from other electronics

    3. Scan works, but ESP32 can’t connect

    • Check SSID and password
    • Ensure WiFi channel is supported
    • Check encryption type (WPA/WPA2)

    4. How to scan while connected?

    • Use WiFi.scanNetworks(false, true)
    • Keeps current connection alive

    5. Signal strength readings seem low

    • RSSI is measured in dBm; negative values closer to 0 mean stronger signal
    • Move closer to router to test

    6. Can I scan multiple times per second?

    • Avoid frequent scanning; it may cause resets
    • Recommended: every 5-10 seconds

    7. ESP32 WiFi scan fails after deep sleep

    • Reinitialize WiFi on wakeup
    • Call WiFi.mode(WIFI_STA) and WiFi.disconnect()

    FAQs: ESP32 WiFi Scan – Answers to Common Questions

    1. What is ESP32 WiFi Scan and why is it important?

    Answer:

    The ESP32 WiFi scan is a process that lets your ESP32 board detect nearby WiFi networks. It provides key details like SSID, RSSI (signal strength), and encryption type. This feature is essential for IoT projects because it allows your device to:

    • Automatically select and connect to the strongest WiFi network
    • Display available networks on an OLED or other interface
    • Troubleshoot network issues
    • Build smart, autonomous devices that work in multiple environments

    Secondary keywords included: esp32 wifi scanner, esp32 wifi scan example, esp32 wifi scan code

    2. How do I scan WiFi networks using ESP32?

    Answer:

    Using the Arduino IDE, you can perform a WiFi scan with just a few lines of code:

    #include "WiFi.h"
    
    void setup() {
      Serial.begin(115200);
      WiFi.mode(WIFI_STA);
      WiFi.disconnect();
      delay(100);
    }
    
    void loop() {
      int n = WiFi.scanNetworks();
      for (int i = 0; i < n; i++) {
        Serial.print(WiFi.SSID(i));
        Serial.print(" (");
        Serial.print(WiFi.RSSI(i));
        Serial.println(" dBm)");
      }
      delay(5000);
    }
    

    This ESP32 WiFi scan example shows how to detect all nearby networks and their signal strength.

    Secondary keywords: how to scan wifi esp32, esp32 wifi example, esp32 wifi scannetworks

    3. Can I perform a WiFi scan while connected to a network?

    Answer:

    Yes! The ESP32 allows scanning while maintaining the current WiFi connection using:

    WiFi.scanNetworks(false, true);
    
    • The first parameter false clears old scan results
    • The second parameter true enables scanning while connected

    This is ideal for projects where you want your ESP32 to stay online while detecting other networks.

    Secondary keywords: esp32 wifi scan while connected, esp32 wifi scan and connect

    4. How do I scan WiFi using MicroPython on ESP32?

    Answer:

    For those who prefer Micropython ESP32 WiFi scan, use this code:

    import network
    
    sta_if = network.WLAN(network.STA_IF)
    sta_if.active(True)
    
    for net in sta_if.scan():
        ssid = net[0].decode('utf-8')
        rssi = net[3]
        print(f"SSID: {ssid}, RSSI: {rssi} dBm")
    
    • Lightweight and ideal for IoT devices
    • Provides SSID and signal strength for each network

    Secondary keywords: micropython esp32 wifi scan, esp32 wifi scan code

    5. Why is my ESP32 WiFi scan not working?

    Answer:

    Common reasons why ESP32 WiFi scan failed include:

    1. WiFi mode is not set correctly (WiFi.mode(WIFI_STA))
    2. Previous network connections are cached—use WiFi.disconnect()
    3. Too frequent scanning without delay
    4. Board definitions in Arduino IDE are outdated
    5. Hardware or power issues

    Tip: Always include a short delay after disconnecting before starting a scan.

    Secondary keywords: esp32 wifi scan not working, esp32 wifi scan failed

    6. How do I display scanned WiFi networks on OLED with ESP32?

    Answer:

    You can create an ESP32 WiFi scanner OLED project:

    #include <Adafruit_SSD1306.h>
    #include "WiFi.h"
    
    Adafruit_SSD1306 display(128, 64, &Wire, -1);
    
    void setup() {
      display.begin(SSD1306_SWITCHCAPVCC, 0x3C);
      WiFi.mode(WIFI_STA);
      WiFi.disconnect();
    }
    
    void loop() {
      int n = WiFi.scanNetworks();
      display.clearDisplay();
      for (int i = 0; i < n && i < 6; i++) {
        display.setCursor(0, i*10);
        display.print(WiFi.SSID(i));
        display.print(" ");
        display.print(WiFi.RSSI(i));
      }
      display.display();
      delay(10000);
    }
    

    This setup shows the top networks along with their signal strength, perfect for IoT dashboards.

    Secondary keywords: esp32 wifi scanner oled, esp32 wifi signal strength meter

    7. What is an async WiFi scan on ESP32?

    Answer:

    ESP32 WiFi scan async allows your device to scan networks without blocking other code execution.

    WiFi.scanNetworks(true);
    
    • true enables asynchronous scanning
    • Useful for ESP32 projects with web servers or multiple tasks

    Secondary keywords: esp32 wifi scan async, esp32 scan wifi networks and connect

    8. Can ESP32 connect to the strongest WiFi automatically?

    Answer:

    Yes! You can scan all networks and connect to the one with the highest RSSI:

    int n = WiFi.scanNetworks();
    int strongest = -1;
    int maxRSSI = -100;
    
    for(int i=0; i<n; i++){
        int rssi = WiFi.RSSI(i);
        if(rssi > maxRSSI){
            maxRSSI = rssi;
            strongest = i;
        }
    }
    
    WiFi.begin(WiFi.SSID(strongest).c_str());
    
    • Automatically selects the network with the best signal
    • Great for roaming IoT devices

    Secondary keywords: esp32 wifi scan and connect, esp32 scan wifi networks and connect

    9. How can I measure WiFi signal strength with ESP32?

    Answer:

    RSSI (Received Signal Strength Indicator) gives signal quality:

    int n = WiFi.scanNetworks();
    for (int i = 0; i < n; i++) {
      Serial.print(WiFi.SSID(i));
      Serial.print(": ");
      Serial.println(WiFi.RSSI(i));
    }
    
    • Values closer to 0 are stronger
    • Can be used to create an ESP32 WiFi signal strength meter

    Secondary keywords: esp32 wifi signal strength meter, esp32 wifi scannetworks

    10. What should I do if ESP32 WiFi scan fails repeatedly?

    Answer:

    Try these fixes:

    1. Reset ESP32 and reconnect
    2. Update Arduino IDE and ESP32 board definitions
    3. Reduce scan frequency
    4. Call WiFi.mode(WIFI_STA) and WiFi.disconnect() before scanning
    5. Ensure correct voltage and stable power

    Secondary keywords: esp32 wifi scan failed, esp32 wifi scan config

    11. Can ESP32 scan hidden WiFi networks?

    Answer:

    Yes. Use the hidden parameter in scan:

    WiFi.scanNetworks(false, true);
    
    • Includes hidden networks in results
    • Useful for advanced ESP32 WiFi scan config

    Secondary keywords: esp32 wifi scan config, esp32 wifi scan async

    12. How often should I perform WiFi scans on ESP32?

    Answer:

    • Avoid scanning every second; it may cause resets
    • Recommended: every 5–10 seconds
    • Async scans help maintain responsiveness while scanning

    Secondary keywords: esp32 wifi scan, esp32 wifi scan while connected

    13. Can ESP32 scan multiple times without rebooting?

    Answer:

    Yes, but you should:

    • Use WiFi.disconnect() before each scan
    • Add small delays between scans
    • Use async scanning to prevent blocking

    This prevents scan errors and ensures accurate ESP32 WiFi scan results.

    14. Can I combine scanning and connecting in one project?

    Answer:

    Absolutely! Many IoT projects combine:

    1. Scan all networks
    2. Filter known SSIDs
    3. Connect automatically to the preferred network
    String knownSSIDs[] = {"HomeWiFi","OfficeWiFi"};
    String knownPasswords[] = {"pass123","office123"};
    
    • Ideal for ESP32 devices that need ESP32 WiFi scan and connect
  • ESP Tutorials: Master Ultimate Beginner-Friendly Guide to Learning ESP32

    Learn ESP Tutorials from basics to advanced: WiFi, BLE, sensors, ESP32 projects, troubleshooting, FreeRTOS, ESP32-CAM, storage, and more. Perfect for beginners.

    If you want a single place that explains everything about the ESP32—how it works, how to program it, how to connect sensors, how to build Wi-Fi or Bluetooth projects—then you’ve landed on the right page.

    This ESP Tutorials pillar page is designed like a roadmap. No complicated jargon. No unnecessary theory. Just clear explanations, practical examples, and a friendly tone.

    Whether you’re a hobbyist, student, IoT beginner, or someone who loves tinkering with electronics, this guide will walk you through every core topic of the ESP32 ecosystem.

    Let’s take it step-by-step.

    1. ESP32 Basics

    Before diving into big projects, you need a solid foundation. These beginner ESP tutorials help you understand what the ESP32 actually is, how its pins work, and how to program it.

    What is ESP32

    What is ESP32? Beginner Guide

    The ESP32 is a powerful, low-cost microcontroller that comes with built-in Wi-Fi, Bluetooth, and tons of peripherals like ADC, DAC, PWM, timers, touch sensors, hall sensor, and more. If Arduino boards are the “bicycles” of electronics, ESP32 feels like a motorcycle—still lightweight, but much more capable.

    Learn here: What is ESP32 and why it’s widely used in IoT projects.

    ESP32 Pinout Explained

    The ESP32 pinout looks confusing at first, but once you know which pins handle GPIO, ADC, DAC, touch, PWM, UART, SPI, and I2C, it gets easier. A dedicated pinout tutorial helps you avoid mistakes like using strapping pins or powering sensors incorrectly.

    ESP32 Pinout Explained

    Installing ESP32 in Arduino IDE

    This is the first tutorial almost everyone follows. You install the ESP32 board manager URL, choose your board, and you’re ready to upload your first sketch.

    How to Install ESP32 in Arduino IDE

    Core ESP Tutorials for Basics

    If you’re just starting out, these ESP tutorials alone will give you 70% of the knowledge needed for most projects.

    2. ESP32 Wi-Fi & Networking (The Fun Part Begins)

    One of the biggest reasons people love the ESP32 is its Wi-Fi capability. With the right ESP tutorials, you can turn the board into a server, client, data logger, MQTT node, IoT device, home automation hub, or even a mini cloud.

    ESP32 WiFi Scan Tutorial

    See nearby Wi-Fi networks and their signal strength.

    ESP32 Connect to Router

    Connect the ESP32 to your home network and control it from your phone or laptop.

    ESP32 Static IP

    Assigning a static IP helps you access your ESP32 reliably—great for automation.

    Popular Networking Tutorials

    These ESP tutorials make you fully capable of creating real IoT applications.

    3. ESP32 Bluetooth & BLE (Low-Power Wireless Control)

    The ESP32 supports both Classic Bluetooth and BLE (Bluetooth Low Energy). BLE is great for low-power sensors, mobile apps, and short-range communication.

    Core BLE Tutorials

    With these BLE tutorials, you can build fitness trackers, wireless sensors, BLE remote controls, or even create your own smartphone-controlled gadget.

    4. ESP32 With Sensors (Hardware Interfacing)

    This is the largest and most practical part of all ESP tutorials. Here you learn how to connect sensors, modules, and components to build real-world projects.

    Popular Sensor Tutorials

    • ESP32 + DHT11
    • ESP32 + DHT22
    • ESP32 + MQ135
    • ESP32 + BMP280
    • ESP32 + DS18B20
    • ESP32 + MPU6050
    • ESP32 + RFID RC522
    • ESP32 + Fingerprint Sensor
    • ESP32 + GPS
    • ESP32 + Soil Moisture
    • ESP32 + Relay Module

    If you want to measure temperature, humidity, gases, orientation, GPS location, NFC tags, soil moisture, or control appliances, this is where you start.

    5. ESP32 Displays (Show Your Data Professionally)

    Once your ESP32 reads sensors or handles Wi-Fi tasks, you often want to display data in a neat format.

    Display Tutorials

    • ESP32 + OLED 0.96″
    • ESP32 + OLED 1.3″
    • ESP32 + TFT Display
    • ESP32 + LCD 16×2
    • ESP32 + LED Matrix

    These ESP tutorials help make your project look polished and user-friendly.

    6. ESP32 Storage & Filesystems

    Most real IoT devices need storage—for data logging, serving web files, or saving user settings.

    Storage Tutorials

    • ESP32 SPIFFS
    • ESP32 LittleFS
    • ESP32 SD Card
    • ESP32 Logging Data

    With these tutorials, you can store HTML pages, logs, sensor values, Wi-Fi credentials, or even small databases.

    7. ESP32 FreeRTOS & Multitasking

    The ESP32 runs a dual-core processor and a built-in real-time OS called FreeRTOS.
    These ESP tutorials teach you how to manage multiple tasks:

    FreeRTOS Tutorials

    • ESP32 Timers
    • ESP32 Tasks
    • ESP32 Queues
    • ESP32 Mutex
    • ESP32 Watchdog Timer

    This is where you learn multitasking for advanced projects like data acquisition, cloud communication, Bluetooth + Wi-Fi systems, etc.

    8. ESP32 Projects (Real-World, Practical Builds)

    This category helps you learn by doing. Every project uses ESP tutorials from above, combined together into one working system.

    Beginner to Advanced Projects

    • ESP32 IoT Weather Station
    • ESP32 Home Automation
    • ESP32 Air Quality Monitor
    • ESP32 GPS Tracker
    • ESP32 Smart Door Lock
    • ESP32 RFID Attendance System

    If you follow these, you’ll have an IoT portfolio worth showing anywhere.

    9. ESP32-CAM (Camera-Based ESP Tutorials)

    The ESP32-CAM board lets you capture images, stream videos, detect faces, and even send photos to Telegram.

    ESP32-CAM Tutorials

    • ESP32-CAM Beginner Guide
    • ESP32-CAM Streaming
    • ESP32-CAM Face Detection
    • ESP32-CAM Save to SD
    • ESP32-CAM Telegram Alerts

    Even with its tiny size, ESP32-CAM is incredibly powerful.

    10. ESP32 Troubleshooting (Fix All Common Errors)

    Every beginner runs into issues. These ESP tutorials help you solve them quickly.

    Troubleshooting Tutorials

    • ESP32 Not Connecting to WiFi
    • ESP32 Upload Failed
    • ESP32 Guru Meditation – Fix
    • ESP32 Brownout Detected
    • ESP32 I2C Not Working
    • JTAG Debugger ESP32

    If something goes wrong, this section is your emergency kit.

    11. ESP32 Advanced (For Power Users)

    Once you know the basics and have built some projects, move here.

    Advanced Tutorials

    • ESP32 Dual-Core Explained
    • ESP32 Task on Core 0/1
    • ESP32 Secure Boot
    • ESP32 OTA Update
    • ESP32 ESP-IDF vs Arduino

    These ESP tutorials prepare you for professional IoT development.

    Real Time ESP 32 Problem

    To understand the ESP board even better, this external guide provides more practical examples and step-by-step explanations: ESP32-S2

    Frequently Asked ESP Tutorials Questions (FAQ)

    1. Is ESP32 good for beginners?

    Yes. Despite its powerful features, the ESP32 is beginner-friendly—especially when you follow step-by-step ESP tutorials.

    2. Do I need C or C++ knowledge to follow ESP tutorials?

    Basic familiarity helps, but even if you’re new, the code examples are simple enough to understand.

    3. What’s the difference between ESP8266 and ESP32?

    ESP32 has more GPIOs, more memory, Bluetooth + BLE, dual core CPU, better peripherals, and improved performance.

    4. How do I decide which ESP32 board to buy?

    The ESP32 DevKit or ESP32-WROOM boards are perfect for beginners.

    5. Does ESP32 work with Arduino IDE?

    Yes. Most ESP tutorials use Arduino IDE because it’s simple and beginner-friendly.

    6. What is the best way to learn ESP32 fast?

    Follow a structured ESP tutorial roadmap like this pillar page—starting with basics, then Wi-Fi, sensors, projects, and troubleshooting.

    7. Does ESP32 support Python?

    Yes. MicroPython works well if you prefer Python over C++.

    8. Can ESP32 run two programs at once?

    Thanks to FreeRTOS and dual cores, it can run multiple tasks simultaneously.

    9. Is ESP32 good for IoT projects?

    Absolutely. Wi-Fi, BLE, sensors, and low-cost hardware make ESP32 perfect for IoT.

    10. Why does ESP32 show brownout error?

    Brownout happens when voltage drops below required levels. A stable 5V power source usually fixes it.

    11. Can ESP32 connect to Firebase or MQTT?

    Yes. There are ESP tutorials for ESP32 Firebase, HTTP, MQTT, and more.

    12. Can ESP32 be used for home automation?

    Yes! With relay modules, Wi-Fi, sensors, and mobile control, ESP32 is ideal for smart home projects.

  • ESP32 Temperature Sensor Tutorials: Master Complete Beginner’s Guide

    Learn ESP32 temperature sensor tutorials with DHT11/DHT22. Projects, Blynk, Alexa, Home Assistant integration, and troubleshooting tips.

    Hey there! If you’re looking to learn about ESP32 temperature sensors, you’re in the right place. Whether you want to monitor room temperature, build a smart home project, or integrate sensors with Alexa, this guide will walk you through everything—from basics to practical projects—step by step.

    The ESP32 is an amazing microcontroller that’s perfect for IoT projects. It has built-in Wi-Fi and Bluetooth, making it ideal for connecting sensors and creating smart devices. In this tutorial, we’ll focus on ESP32 temperature sensors, how to use them, and how to integrate them with platforms like Blynk, Home Assistant, and Alexa.

    What is an ESP32 Temperature Sensor?

    A temperature sensor is a device that measures temperature and converts it into a readable signal. The ESP32 can work with a variety of sensors like DHT11, DS18B20, and analog temperature sensors. Some ESP32 boards even have a built-in temperature sensor, though it’s generally used for internal chip monitoring rather than accurate room temperature.

    Key features of ESP32 temperature sensors:

    • High accuracy for environmental monitoring
    • Easy integration with Wi-Fi or Bluetooth for remote monitoring
    • Compatible with multiple IoT platforms
    • Can measure temperature alone or both temperature and humidity

    Does ESP32 Have a Built-in Temperature Sensor?

    You might wonder: does ESP32 have a built-in temperature sensor?
    Yes, most ESP32 chips have a small internal temperature sensor. However, it’s mostly for internal thermal management, not for precise environmental measurements. If you want accurate readings for your room or home, it’s better to use an external sensor like DHT11 or DS18B20.

    Types of ESP32 Temperature Sensors

    Here’s a quick breakdown of popular sensors you can use with ESP32:

    1. DHT11 / DHT22
      • Measures both temperature and humidity
      • DHT11 is cheaper but less accurate
      • DHT22 is more precise and better for projects needing accuracy
    2. DS18B20
      • Digital temperature sensor
      • Highly accurate
      • Supports long-distance wiring
    3. Analog Sensors (LM35, TMP36)
      • Simple to use
      • Requires analog input
      • Suitable for DIY electronics projects

    ESP32 Temperature Sensor Circuit

    Before we dive into code, let’s talk about ESP32 temperature sensor circuits.

    For example, if you’re using a DHT11 sensor, the circuit is simple:

    • Connect VCC of the DHT11 to 3.3V on the ESP32
    • Connect GND to GND
    • Connect the data pin to a digital GPIO pin, e.g., D4
    • Add a pull-up resistor (4.7kΩ to 10kΩ) between VCC and the data pin

    This circuit is beginner-friendly and works for most small projects.

    ESP32 Temperature Sensor Code

    Let’s get your hands dirty with some code. Using Arduino IDE, here’s a simple example for DHT11:

    #include "DHT.h"
    
    #define DHTPIN 4     // Pin where the sensor is connected
    #define DHTTYPE DHT11
    
    DHT dht(DHTPIN, DHTTYPE);
    
    void setup() {
      Serial.begin(115200);
      dht.begin();
    }
    
    void loop() {
      float temperature = dht.readTemperature(); // Temperature in Celsius
      float humidity = dht.readHumidity();       // Humidity in %
    
      if (isnan(temperature) || isnan(humidity)) {
        Serial.println("Failed to read from DHT sensor!");
        return;
      }
    
      Serial.print("Temperature: ");
      Serial.print(temperature);
      Serial.print(" °C, Humidity: ");
      Serial.print(humidity);
      Serial.println(" %");
    
      delay(2000);
    }
    

    This ESP32 temperature sensor code reads the temperature and humidity every two seconds. You can display it on a serial monitor or push it to a web app.

    ESP32 Temperature Sensor Project Ideas

    Once you understand the basics, you can build many fun projects:

    1. ESP32 Temperature Sensor Home Assistant Integration
      • Monitor room temperature from your smartphone
      • Create automation like turning on a fan when it gets too hot
    2. ESP32 Temperature Sensor Alexa Integration
      • Ask Alexa about the room temperature
      • Automate smart home devices based on temperature
    3. Battery-Powered ESP32 Temperature Sensor
      • Use ESP32 with a small Li-ion battery
      • Send temperature data via Wi-Fi or Bluetooth
    4. Weather Station Project
      • Combine temperature, humidity, and pressure sensors
      • Send data to cloud services for logging and visualization

    Blynk ESP32 Temperature Sensor Tutorial

    Blynk is a mobile app that lets you control and monitor your ESP32 projects. Using Blynk ESP32 temperature sensor integration, you can:

    • Display temperature readings on your phone
    • Receive notifications if the temperature crosses a threshold
    • Log historical temperature data

    Here’s a quick snippet for Blynk:

    #define BLYNK_PRINT Serial
    #include <WiFi.h>
    #include <BlynkSimpleEsp32.h>
    #include "DHT.h"
    
    char auth[] = "YourBlynkAuthToken";
    char ssid[] = "YourWiFiSSID";
    char pass[] = "YourWiFiPassword";
    
    #define DHTPIN 4
    #define DHTTYPE DHT11
    DHT dht(DHTPIN, DHTTYPE);
    
    BlynkTimer timer;
    
    void sendSensor() {
      float temp = dht.readTemperature();
      Blynk.virtualWrite(V5, temp);
    }
    
    void setup() {
      Serial.begin(115200);
      Blynk.begin(auth, ssid, pass);
      dht.begin();
      timer.setInterval(2000L, sendSensor);
    }
    
    void loop() {
      Blynk.run();
      timer.run();
    }
    

    With this setup, you’ll have real-time ESP32 temperature sensor data on your mobile device.

    ESP32 Temperature and Humidity Sensor

    Many ESP32 projects require both temperature and humidity data. DHT11 or DHT22 sensors are perfect for this. These sensors are cheap, easy to use, and integrate seamlessly with ESP32.

    Key points for beginners:

    • Always check wiring connections
    • Use the right libraries (DHT.h)
    • Don’t forget a pull-up resistor for the data pin

    Best ESP32 Temperature Sensor

    If you’re wondering which is the best ESP32 temperature sensor, here’s a quick comparison:

    SensorAccuracyFeaturesBest For
    DHT11±2°CTemp + HumidityBeginners, small projects
    DHT22±0.5°CTemp + HumiditySmart home, medium projects
    DS18B20±0.5°CTemp only, long wiresPrecise temp monitoring, outdoor use
    LM35±0.5°CAnalogElectronics projects, DIY

    ESP32 Temperature Sensor Installation

    Installing an ESP32 temperature sensor is simple. Follow these steps:

    1. Choose your sensor (DHT11 recommended for beginners)
    2. Connect the sensor to ESP32 as per the circuit diagram
    3. Install required libraries in Arduino IDE (DHT sensor library)
    4. Upload the sample code
    5. Monitor readings on the serial monitor or app

    ESP32 Temperature Sensor Projects for Home Automation

    Here are a few smart home project ideas:

    1. Smart Fan Controller
      • Turns on the fan when temperature exceeds a set point
      • Can integrate with Alexa for voice control
    2. Temperature Logging System
      • Records data over time
      • Integrates with Home Assistant for dashboards
    3. Battery-Powered Room Sensor
      • Ideal for places without power
      • Use deep sleep mode to save battery

    Tips for Beginners

    • Keep wires short to avoid interference
    • Test sensors with serial monitor before connecting to apps
    • Use a stable power supply for accurate readings
    • Calibrate sensors if necessary

    Advanced ESP32 Temperature Sensor Projects

    Once you get comfortable, you can try advanced projects like:

    • Multi-room temperature monitoring using several sensors
    • Data logging to cloud platforms like ThingSpeak or Blynk
    • Integrating sensors with Alexa for full smart home automation
    • Using ESP32 built-in temperature sensor for internal monitoring of electronics

    Conclusion

    By now, you should have a solid understanding of ESP32 temperature sensors—how they work, how to wire them, code them, and integrate them into real-world projects. From beginner setups with DHT11 to advanced smart home systems with Blynk, Home Assistant, and Alexa, the possibilities are endless.

    Remember, the best way to learn is to experiment. Build a project, break it, fix it, and you’ll be amazed at what you can create with ESP32 and temperature sensors.

    If you want to dive deeper into other ESP32 projects, check out our ESP32 PWM tutorials here.

    ESP32 Temperature Sensor Troubleshooting Guide

    So, you’ve set up your ESP32 temperature sensor, but it’s not working as expected. Don’t worry—we’ve all been there. This guide will cover common issues, their causes, and step-by-step fixes for ESP32 temperature sensors. We’ll focus on both hardware and software troubleshooting so you can get your Blynk ESP32 temperature sensor, DHT11, or other sensors working perfectly.

    1. Why is my ESP32 temperature sensor not showing readings?

    Possible Causes:

    • Incorrect wiring or loose connections
    • Wrong GPIO pin defined in code
    • Missing pull-up resistor for DHT11 or DHT22
    • Sensor failure or defective module

    Solution:

    • Double-check the ESP32 temperature sensor circuit
    • Ensure the data pin in your code matches the physical connection (#define DHTPIN 4)
    • Add a 4.7kΩ pull-up resistor between VCC and data pin
    • Test with another sensor if possible

    2. Why does my ESP32 temperature sensor show “NaN” or random values?

    Possible Causes:

    • Sensor is not initialized properly
    • Timing issues in reading data
    • Electrical noise or interference

    Solution:

    • Use dht.begin(); in your setup function
    • Add delay(2000); between readings for DHT sensors
    • Keep sensor wires short and away from motors or high-voltage devices
    • Try powering the sensor from a stable 3.3V or 5V source

    3. Can the ESP32 internal temperature sensor replace an external sensor?

    Answer:
    Technically, yes. But the ESP32 built-in temperature sensor is mainly for monitoring chip temperature. It is not accurate for room or environmental measurements. For precise readings, always use an external sensor like DHT11, DHT22, or DS18B20.

    4. Why is my Blynk ESP32 temperature sensor not updating?

    Possible Causes:

    • Incorrect Blynk Auth Token or Wi-Fi credentials
    • Virtual pin mismatch in Blynk app
    • Network connection issues

    Solution:

    • Verify your Blynk Auth Token in the code matches the one in the app
    • Ensure Wi-Fi credentials are correct
    • Confirm the virtual pin in Blynk.virtualWrite(V5, temperature); matches your app widget
    • Restart your ESP32 and Blynk app

    5. Why does my ESP32 temperature sensor give fluctuating readings?

    Possible Causes:

    • Sensor sensitivity to electrical noise
    • Environmental interference (fans, heaters, motors)
    • Low power supply or unstable voltage

    Solution:

    • Shield sensor wires or use twisted pair cables
    • Keep the sensor away from strong electrical appliances
    • Use a regulated 3.3V/5V supply
    • Smooth readings in code using a moving average algorithm

    6. How to fix ESP32 DHT11 temperature sensor not working?

    Step-by-Step:

    1. Check wiring (VCC, GND, Data)
    2. Confirm pull-up resistor is installed
    3. Ensure you’re using the correct GPIO pin in the code
    4. Use the latest DHT sensor library in Arduino IDE
    5. Add delay(2000) between readings
    6. Test sensor with a basic serial monitor code before integrating with Blynk or Home Assistant

    7. Why isn’t my ESP32 temperature sensor Alexa integration working?

    Possible Causes:

    • Incorrect API or cloud integration
    • Network latency or firewall issues
    • Misconfigured Home Assistant setup

    Solution:

    • Make sure your ESP32 temperature sensor is reporting data to Home Assistant correctly
    • Verify Alexa can access the Home Assistant entity
    • Test with Alexa app or Echo device commands
    • Check firewall or router settings if using remote access

    8. Why does my battery-powered ESP32 temperature sensor drain quickly?

    Possible Causes:

    • High frequency of readings
    • Wi-Fi or Blynk connection always active
    • No deep sleep mode implemented

    Solution:

    • Reduce reading frequency (e.g., every 5–10 seconds instead of 1 second)
    • Use deep sleep mode between readings
    • Use low-power sensors like DHT11 instead of DS18B20
    • Consider using Li-ion or LiPo batteries with a voltage regulator

    9. My ESP32 temp sensor works on Arduino IDE but not on PlatformIO. Why?

    Possible Causes:

    • Different library versions
    • Incorrect platform or board settings
    • Missing dependencies

    Solution:

    • Ensure the same DHT library version is installed in PlatformIO
    • Check board configuration matches ESP32 model
    • Include all necessary libraries in platformio.ini

    10. Why is my ESP32 temperature sensor home assistant integration delayed?

    Possible Causes:

    • Slow polling interval
    • Network congestion
    • Incorrect Home Assistant configuration

    Solution:

    • Increase polling frequency or use MQTT for real-time updates
    • Ensure stable Wi-Fi connection
    • Test with a local dashboard before remote access

    11. Can I use multiple ESP32 temperature sensors together?

    Answer:
    Yes! You can connect multiple sensors using different GPIO pins. For DS18B20, you can even use one-wire protocol, allowing multiple sensors on a single data line. Make sure to read them sequentially to avoid conflicts.

    12. My ESP32 temperature sensor reads correctly initially, then stops. What’s wrong?

    Possible Causes:

    • Sensor overheating
    • ESP32 running out of memory
    • Software crash or watchdog timer reset

    Solution:

    • Ensure sensors are in a normal temperature range
    • Use delay() or timers properly in code
    • Monitor ESP32 memory usage and avoid heavy loops in the main program
    • Implement error handling for sensor read failures

    13. How do I fix ESP32 temp sensor code errors in Arduino IDE?

    Common Issues:

    • Missing #include statements
    • Wrong library version
    • GPIO pin conflicts

    Solution:

    • Include #include "DHT.h" at the top of your sketch
    • Install latest DHT sensor library via Arduino Library Manager
    • Check that GPIO pins aren’t being used by other peripherals like PWM or I2C

    14. Can temperature sensor readings be inaccurate?

    Reasons for Inaccuracy:

    • Cheap sensors (DHT11) have ±2°C error
    • Long wires causing voltage drops
    • Interference from nearby electronics

    How to Improve Accuracy:

    • Use DHT22 or DS18B20 sensors for better accuracy
    • Shorten wires and use shielded cables
    • Calibrate your sensor using a reliable thermometer

    15. How to troubleshoot ESP32 temperature sensor installation issues?

    Checklist:

    • Correct sensor model selected in code
    • Libraries installed properly
    • Correct GPIO pins used
    • Stable power supply
    • Pull-up resistor added if required
    • Delay added between readings

    FAQ : ESP32 Temperature Sensor

    Q1: Can ESP32 measure temperature without an external sensor?

    A: Yes, the ESP32 microcontroller has a built-in temperature sensor. However, it is primarily designed to monitor the chip’s internal temperature for thermal management, not for accurate room or environmental readings. If your project requires precise data, especially for home automation or IoT applications, it’s best to use an external ESP32 temperature sensor like DHT11, DHT22, or DS18B20.

    Q2: Which ESP32 temperature sensor is best for home projects?

    A: For beginners and smart home projects, the DHT22 sensor is ideal. Compared to DHT11, it offers higher accuracy, a wider temperature range, and better humidity measurement. It’s perfect for integrating with Home Assistant, Alexa, or Blynk ESP32 temperature sensor projects, making it a reliable choice for monitoring room temperature or creating automated smart devices.

    Q3: How do I connect ESP32 temperature sensors to Blynk?

    A: Connecting your ESP32 temperature sensor to Blynk is straightforward:

    1. Install the Blynk library in Arduino IDE.
    2. Create a new project in the Blynk app and copy the Auth Token.
    3. Connect your sensor (e.g., DHT11) to the ESP32 GPIO pin.
    4. Use Blynk.virtualWrite() to send temperature readings to a virtual pin.
      This setup allows real-time monitoring of your ESP32 temp sensor on your mobile device and enables notifications, data logging, and automation.

    Q4: Can I power ESP32 temperature sensors with batteries?

    A: Absolutely! Many projects require mobility, so you can run an ESP32 temperature sensor on batteries. For best results:

    • Use a Li-ion or LiPo battery with a voltage regulator.
    • Implement deep sleep mode to conserve power.
    • Reduce the frequency of sensor readings (e.g., every 5–10 seconds).
      Battery-powered ESP32 projects are perfect for remote temperature and humidity monitoring, weather stations, or portable smart devices.

    Q5: How often should I read temperature from ESP32 sensors?

    A: Reading intervals depend on your project:

    • Every 1–2 seconds works for real-time monitoring.
    • Longer intervals (5–10 seconds) help save battery, especially for mobile or battery-powered setups.
      If you’re integrating with Home Assistant or Blynk, consider syncing your reading interval with the app update frequency to avoid unnecessary network traffic while maintaining accuracy.

    Q6: Can I use ESP32 temperature sensors with Alexa?

    A: Yes! You can integrate ESP32 temperature sensors with Alexa through:

    • Home Assistant, then linking it to Alexa for voice commands.
    • Direct cloud-based solutions or MQTT integration for smart home devices.
      This allows you to ask Alexa about the current room temperature or automate devices like fans and heaters based on temperature readings from your ESP32 temperature sensor project.

    Q7: What is the difference between DHT11 and DHT22?

    A: Both are popular ESP32 temperature and humidity sensors, but:

    • DHT11: Cheap, basic, ±2°C accuracy, limited humidity range.
    • DHT22: More accurate (±0.5°C), wider temperature range, supports higher humidity (0–100%), better for home automation projects.
      For beginners, DHT11 is fine, but if you want reliable readings for ESP32 temperature sensor home assistant integration, DHT22 is the better choice.

    Q8: Can ESP32 handle multiple temperature sensors?

    A: Absolutely. You can connect multiple ESP32 temperature sensors:

    • Each sensor can use a different GPIO pin.
    • For digital sensors like DS18B20, you can use the one-wire protocol, allowing multiple sensors on a single data line.
    • This setup is perfect for multi-room temperature monitoring or advanced ESP32 temperature sensor projects where data from multiple sensors is aggregated in real-time.

    Q9: Do ESP32 analog temperature sensors need calibration?

    A: Yes. Analog sensors like LM35 or TMP36 may require small calibration adjustments for accurate readings. You can calibrate them using a known reference thermometer and adjust the code offset. Calibration is especially important for projects where precision is critical, such as environmental monitoring, smart thermostats, or ESP32 temperature sensor project with Home Assistant.

    Q10: What’s the best project to start with?

    A: The easiest way to begin is a simple ESP32 temperature sensor project:

    1. Connect a DHT11 or DHT22 sensor to the ESP32.
    2. Display temperature readings on the serial monitor.
    3. Optionally, integrate with Blynk to monitor remotely.
      This project teaches you the basics of wiring, coding, and reading temperature, preparing you for more advanced projects like Alexa integration or multi-sensor smart home setups.