Category: Embedded

  • Master UART USART Interview Questions (Beginner Friendly 2026)

    1. Introduction to UART and USART

    UART USART Interview Questions : Understand the difference between UART (Universal Asynchronous Receiver Transmitter) and USART (Universal Synchronous/Asynchronous Receiver Transmitter). You’ll learn that both are serial communication protocols, but USART can work in both asynchronous and synchronous modes, while UART works only in asynchronous mode.

    Understand the Importance of Serial Communication: You will grasp why UART and USART are widely used for communication between microcontrollers and other devices like sensors, actuators, and peripherals, making it essential for embedded systems design.

    2. Fundamental Components of UART and USART

    • Start, Data, and Stop Bits: You will learn about the data frame structure in UART/USART communication, which includes start bits, data bits, and stop bits. You’ll gain knowledge of how data is transmitted serially, one bit at a time.
    • Baud Rate, Parity, and Flow Control: Understand key communication parameters like baud rate, parity bit, and flow control mechanisms such as RTS/CTS (hardware flow control) and XON/XOFF (software flow control).
      • Baud Rate determines the speed of communication.
      • Parity provides a method to detect errors in data transmission.
      • Flow control prevents data loss by ensuring that the receiving end is ready to accept more data.

    3. Data Transmission in UART/USART

    • Transmission Modes – Asynchronous vs. Synchronous: Learn the core difference between asynchronous communication (in UART) and synchronous communication (in USART) and when each mode is used.
      • In asynchronous mode, there is no clock signal. Data is sent using start and stop bits.
      • In synchronous mode, there is a shared clock signal, which allows for faster communication.
    • Learn About Full-Duplex and Half-Duplex: You’ll understand how full-duplex communication (where data can be transmitted and received simultaneously) works, as well as half-duplex (where data flows in only one direction at a time).

    4. Configuring UART and USART Communication

    • Pin Configurations (TX/RX, RTS/CTS): Learn how to configure the essential pins of UART/USART like TX (Transmit) and RX (Receive) for basic communication. You’ll also learn about RTS and CTS pins used for hardware flow control.
    • Baud Rate Configuration: Learn how to configure the baud rate for accurate data transmission between two devices. You will understand how baud rates are calculated based on system clock settings.
    • Parity and Stop Bits: Learn how to set parity (even, odd, none) and configure the number of stop bits to ensure correct data transmission and error detection.

    5. Error Handling in UART/USART

    • Framing Errors: Learn what framing errors are and how they occur when the receiver doesn’t receive the correct number of bits for each data frame.
    • Overrun Errors: Understand overrun errors that happen when the receiver’s buffer is full, and new data arrives before the previous data is processed.
    • Parity Errors: Learn how parity errors occur when the parity bit doesn’t match the expected value, signaling corrupted data.

    6. Practical Applications of UART and USART

    • Communication Between Microcontrollers: Learn how to use UART/USART for communication between microcontrollers in a system.
    • Interfacing with Peripherals: Gain knowledge of how UART is commonly used to interface with peripherals like GPS modules, Bluetooth modules, and other devices for wireless communication, debugging, and more.
    • Debugging Embedded Systems via UART: Discover how serial debugging works, where UART is used to send debug messages from microcontrollers to a terminal for monitoring and troubleshooting.

    7. Practical Considerations for UART/USART Implementation

    • Voltage Level Considerations: Learn about the voltage levels required for UART communication (e.g., 3.3V or 5V), and understand the importance of ensuring compatible voltage levels between devices or using level shifters.
    • Cable Length and Transmission Distance: Understand the limitations of UART communication, such as transmission distance, and the use of buffer amplifiers or signal conditioning for longer cable runs.
    • Setting Up a UART Communication Link: You will learn how to physically wire up UART links, configure microcontroller peripherals for UART operation, and troubleshoot issues like incorrect wiring, mismatched baud rates, or pin configurations.

    8. Hands-On Learning

    • Writing Code to Initialize UART/USART: Learn how to write embedded code to initialize UART/USART on a microcontroller, configure parameters like baud rate, data bits, and flow control, and set up an interrupt-based UART communication system.
    • Sending and Receiving Data: Gain hands-on experience with sending and receiving data via UART using software libraries, handling the data in your code, and ensuring reliable communication.
    • Implementing Flow Control in UART Communication: You will learn how to implement hardware or software flow control to prevent data loss in high-speed communication scenarios.

    9. Debugging and Troubleshooting UART/USART

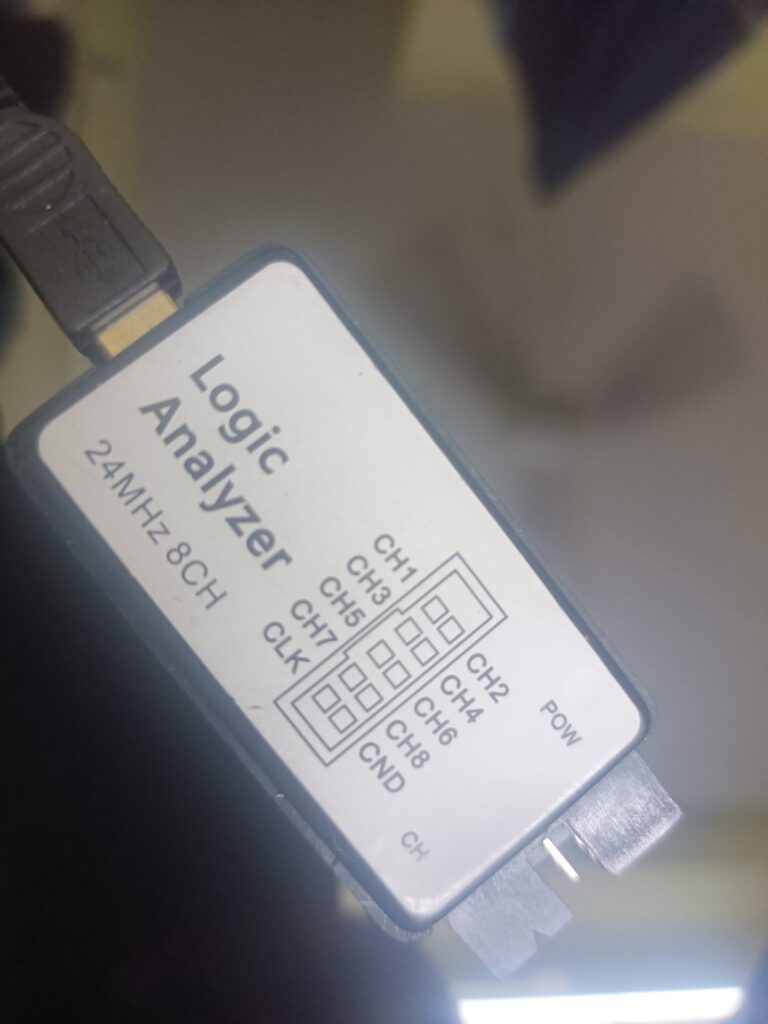
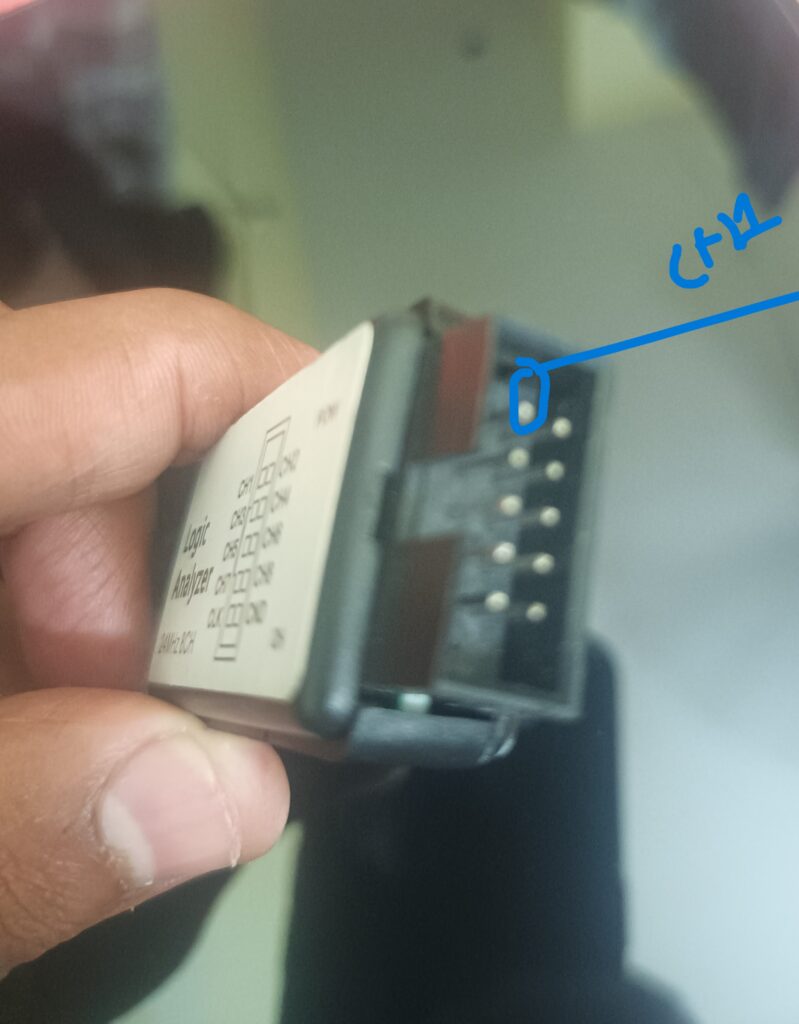
    • Use of Serial Monitors and Logic Analyzers: Learn how to use tools like serial monitors to visualize data sent over UART. You’ll also discover how to use logic analyzers to troubleshoot UART/USART signals by capturing and decoding the data stream.
    • Testing Communication Between Devices: Learn how to test the UART communication link between two devices, identify common problems like baud rate mismatches, incorrect wiring, or noise in the data transmission.

    What Skills You Will Gain:

    • UART/USART Protocols: A strong understanding of both asynchronous (UART) and synchronous (USART) communication, including how to configure them on embedded devices.
    • Error Handling: Practical knowledge of handling communication errors like framing, overrun, and parity errors.
    • Flow Control Management: How to implement flow control techniques (RTS/CTS and XON/XOFF) to ensure reliable communication in high-speed applications.
    • Embedded Programming Skills: Learn how to write embedded code for configuring, sending, and receiving data over UART/USART on microcontrollers and other devices.
    • Practical Troubleshooting: Master debugging techniques and use of tools like serial monitors and logic analyzers for troubleshooting UART/USART communication.

    Learning Outcomes

    By the end of your learning journey on UART and USART communication, you will:

    1. Be able to configure UART/USART on embedded devices and interfaces.
    2. Understand how data frames are structured and how transmission occurs bit by bit.
    3. Be equipped with the skills to handle baud rate, flow control, and error management.
    4. Gain hands-on experience in sending and receiving data in real-world embedded systems.
    5. Learn to troubleshoot and debug UART communication using various tools and techniques.
    6. Be proficient in implementing UART communication between multiple devices, including microcontrollers and peripherals.

    What is UART/USART?

    • UART stands for Universal Asynchronous Receiver Transmitter.
    • USART stands for Universal Synchronous/Asynchronous Receiver Transmitter.

    💡 Simple difference:

    • UART = Only Asynchronous communication.
    • USART = Can do both Synchronous and Asynchronous.

    Basic Interview Questions

    1. What is UART?

    UART is a hardware communication protocol used to send and receive data serially (bit-by-bit) over two lines:

    • TX (Transmit)
    • RX (Receive)

    It does not require a clock signal and is hence asynchronous.

    2. What is the difference between UART and USART?

    FeatureUARTUSART
    ClockNo clockCan use clock (synchronous)
    ModeAsynchronousSynchronous & Asynchronous
    SpeedSlowerFaster in synchronous mode

    3. What are the main pins in UART?

    • TX (Transmit) – sends data
    • RX (Receive) – receives data
      Optional:
    • GND – common ground between devices

    4. How does UART communication work?

    When UART sends data:

    • It adds a Start Bit (0)
    • Sends data bits (typically 8)
    • Adds an optional Parity Bit
    • Ends with one or more Stop Bits (1)

    💡 Example Frame:
    [Start][D0][D1][D2]...[D7][Parity][Stop]

    5. What is baud rate?

    • Baud rate is the speed of communication.
    • It defines the number of bits sent per second (bps).
    • Common values: 9600, 115200, etc.

    Example: 9600 baud = 9600 bits per second.

    6. Is UART full-duplex or half-duplex?

    • Full-duplex.
    • Can send and receive data simultaneously using separate TX and RX lines.

    7. What is the difference between SPI, I2C, and UART?

    FeatureUARTSPII2C
    Wires2 (TX, RX)4 (MOSI, MISO, SCK, SS)2 (SDA, SCL)
    SpeedMediumFastSlower
    Master-SlavePeer-to-peerMaster-SlaveMaster-Slave
    ComplexityLowMediumHigh

    8. What is a parity bit in UART?

    • Used for error detection.
    • Even parity: number of 1s including the parity bit is even.
    • Odd parity: number of 1s including the parity bit is odd.

    9. What happens if baud rates don’t match?

    If two devices use different baud rates:

    • Data will be misaligned.
    • Receiver may see garbage data or framing errors.

    10. How can you implement UART in embedded systems?

    Two common ways:

    1. Using built-in UART hardware module (e.g., STM32, Atmega)
    2. Software UART (bit-banging) – manually control GPIOs using code (less reliable)

    Bonus: Code Example (Arduino)

    void setup() {
      Serial.begin(9600); // Set baud rate
    }
    
    void loop() {
      Serial.println("Hello UART!");
      delay(1000);
    }
    

    Quick Tips for Interviews:

    • Know the UART data frame structure.
    • Understand baud rate and error handling.
    • Be ready to explain how UART differs from SPI/I2C.
    • Practice writing simple UART send/receive code.

    Basic Questions:

    1. What is UART?
    2. What is USART, and how is it different from UART?
    3. Explain the basic working principle of UART communication.
    4. What are the key differences between synchronous and asynchronous communication?
    5. What are the main pins used in UART communication?
    6. What is the baud rate in UART communication?
    7. What is the significance of the start bit and stop bit in UART communication?
    8. What are data bits in UART?
    9. What is a parity bit, and what are the types of parity used in UART?
    10. What are the advantages of UART over other serial communication protocols (e.g., SPI, I2C)?

    Intermediate Questions:

    1. What is full-duplex communication in UART?
    2. Explain the role of the TX and RX lines in UART.
    3. What happens if the baud rates of the sender and receiver do not match in UART communication?
    4. What is the maximum distance supported by UART communication?
    5. Explain the error detection mechanisms in UART (e.g., framing error, overrun error).
    6. How does UART handle data flow control? What are the methods of flow control?
    7. Explain how the receiver knows when to start reading data in UART.
    8. Can UART communication be used for long-range communication? Why or why not?
    9. What is the purpose of the flow control signals (RTS/CTS) in UART?
    10. What are the key differences between SPI, I2C, and UART?

    Advanced Questions:

    1. What is the significance of the baud rate, and how is it determined?
    2. What are the various error types in UART communication, and how can they be mitigated?
    3. How does UART handle synchronization between the transmitter and receiver?
    4. What is the role of the framing error in UART communication?
    5. Explain how to implement UART communication using interrupts in embedded systems.
    6. How can you implement a UART-based protocol for communication between multiple devices?
    7. What are the typical applications of UART in embedded systems?
    8. How can UART be used in embedded systems to communicate with peripheral devices (e.g., sensors, Bluetooth modules)?
    9. What is a “half-duplex” mode in UART, and how does it differ from full-duplex?
    10. Explain how UART data is transmitted and received in the form of binary frames.

    Practical/Implementation-Based Questions:

    1. Write a simple code to transmit data using UART in Arduino.
    2. How would you troubleshoot a UART communication problem where data is not being received properly?
    3. How would you handle UART communication errors (e.g., framing errors or overrun errors) in embedded systems code?
    4. What would you do if you have a mismatch in the baud rate or data format between two UART devices?
    5. Explain how you would implement UART communication in an RTOS environment (e.g., QNX or FreeRTOS).
    6. Design a UART-based communication protocol between a microcontroller and a PC.
    7. How would you perform UART-based data logging in embedded systems?

    Behavioral/Conceptual Questions:

    1. Why do you think UART is still widely used in embedded systems?
    2. What are the challenges you face while working with UART communication in embedded systems?
    3. Explain the trade-offs between UART and other serial communication protocols like SPI or I2C.
    4. Can you explain a scenario where you had to debug UART communication issues in your previous projects?
    5. What are the key considerations when selecting UART for a new embedded system design?

    You can also Visit other tutorials of Embedded Prep 

    Special thanks to @mr-raj for contributing to this article on Embedded Prep
  • Privacy Policy

    Effective Date: June 21, 2025
    App Name: SSC GK MCQ in Hindi 2025
    Developer: Exam Guide

    1. Introduction

    This privacy policy explains how SSC GK MCQ in Hindi 2025 (“we”, “our”, or “us”) handles user data and protects your privacy while using our app. By using the app, you agree to the terms of this privacy policy.

    2. Information We Do Not Collect

    We do not collect, store, or share any personal information such as:

    • Your name, email address, or contact details
    • Your device ID or IP address
    • Your location or browsing history

    This app is designed for educational purposes and works completely offline (if true). It does not require any login or registration.

    3. Permissions

    Our app may request standard permissions (such as internet access) only to:

    • Load web-based content (e.g., if there are any WebView quiz features)
    • Show ads (if AdMob or other ad services are integrated)

    We do not use permissions to access any sensitive user data.

    4. Third-Party Services

    If our app displays advertisements or analytics, third-party services like Google AdMob or Google Analytics for Firebase may collect limited non-personal data such as:

    • Anonymous device information
    • Ad performance statistics

    5. Children’s Privacy

    Our app is suitable for users of all ages and does not knowingly collect personal information from children under the age of 13.

    6. Changes to This Privacy Policy

    We may update this privacy policy from time to time. We encourage you to review this page periodically for any changes. The updated policy will be effective as of the date it is posted.

    7. Contact Us

    If you have any questions or suggestions about this Privacy Policy, please contact us:

    Email: sscgkmcqapp@gmail.com

  • Object Detection Using Raspberry Pi, HC-SR04, LED, and Buzzer | Master Implementation using python 2026

    Object Detection Using Raspberry Pi : In this project, we’ll build a simple object detection system using a Raspberry Pi. When the ultrasonic sensor detects an object within a certain distance (e.g., less than 10 cm), it will turn on an LED and sound a buzzer.

    Perfect for beginners, this project combines basic GPIO usage with real-world hardware.

    Components Required for Object Detection Using Raspberry Pi

    ComponentQuantity
    Raspberry Pi (any model with GPIO)1
    HC-SR04 Ultrasonic Sensor1
    Breadboard1
    Jumper Wires~10
    LED1
    Resistor (220Ω for LED)1
    Active Buzzer1
    Optional: Resistors for voltage divider (1kΩ + 2kΩ)2

    Raspberry Pi GPIO Pin Mapping (BCM Mode)

    PurposeGPIO PinPhysical PinComponent Pin
    Trigger (Ultrasonic)GPIO 23Pin 16HC-SR04 TRIG
    Echo (Ultrasonic)GPIO 24Pin 18HC-SR04 ECHO
    LED ControlGPIO 18Pin 12LED (via resistor)
    Buzzer ControlGPIO 25Pin 22Buzzer (+ve)
    5V Power5VPin 2 or 4HC-SR04 VCC, Buzzer
    GroundGNDPin 6 or 9All GND pins

    Wiring Instructions

    1. HC-SR04 Ultrasonic Sensor

    HC-SR04 PinConnect To
    VCC5V (Pin 2/4)
    GNDGND (Pin 6)
    TRIGGPIO 23 (Pin 16)
    ECHOGPIO 24 via voltage divider

    ⚠️ Important: The ECHO pin outputs 5V, but Raspberry Pi GPIO only supports 3.3V. Use a voltage divider:

    • 1kΩ resistor between Echo and Pi GPIO24
    • 2kΩ resistor between Echo and GND
    • Tap from junction to GPIO24

    2. LED

    LED PinConnect To
    Anode (+)GPIO 18 via 220Ω resistor
    Cathode (-)GND

    3. Buzzer (Active Type)

    Buzzer PinConnect To
    +veGPIO 25
    -veGND

    If you’re using a passive buzzer, use a transistor (NPN) to drive it safely.

    Python Code

    Here’s the complete Python script to read the ultrasonic sensor, and control the LED and buzzer based on object detection:

    import RPi.GPIO as GPIO
    import time
    
    # Set GPIO mode
    GPIO.setmode(GPIO.BCM)
    
    # Define pin numbers
    GPIO_TRIGGER = 23
    GPIO_ECHO = 24
    LED_PIN = 18
    BUZZER_PIN = 25
    
    # Set pin directions
    GPIO.setup(GPIO_TRIGGER, GPIO.OUT)
    GPIO.setup(GPIO_ECHO, GPIO.IN)
    GPIO.setup(LED_PIN, GPIO.OUT)
    GPIO.setup(BUZZER_PIN, GPIO.OUT)
    
    def distance():
        # Send 10us pulse to trigger
        GPIO.output(GPIO_TRIGGER, True)
        time.sleep(0.00001)
        GPIO.output(GPIO_TRIGGER, False)
    
        start_time = time.time()
        stop_time = time.time()
    
        while GPIO.input(GPIO_ECHO) == 0:
            start_time = time.time()
    
        while GPIO.input(GPIO_ECHO) == 1:
            stop_time = time.time()
    
        time_elapsed = stop_time - start_time
        distance_cm = (time_elapsed * 34300) / 2
        return distance_cm
    
    try:
        while True:
            dist = distance()
            print(f"Measured Distance = {dist:.1f} cm")
    
            if dist < 10.0:
                GPIO.output(LED_PIN, GPIO.HIGH)
                GPIO.output(BUZZER_PIN, GPIO.HIGH)
            else:
                GPIO.output(LED_PIN, GPIO.LOW)
                GPIO.output(BUZZER_PIN, GPIO.LOW)
    
            time.sleep(1)
    
    except KeyboardInterrupt:
        print("Measurement stopped by User")
        GPIO.cleanup()
    

    How It Works

    • The HC-SR04 sends an ultrasonic pulse.
    • When it bounces back from an object, the sensor calculates the distance.
    • If the distance is less than 10 cm, it:
      • Turns ON the LED
      • Activates the buzzer
    • Otherwise, both remain OFF.

    Tips

    • Ensure all ground connections are common.
    • Always power off Raspberry Pi while wiring.
    • Use GPIO.cleanup() to reset pins after the script ends.
    • You can tweak the threshold distance (if dist < 10.0:) based on your requirement.

    Applications

    • Obstacle detection for robots
    • Proximity-based alerts
    • Contactless doorbell or switch
    • Smart trash bin lid opener

    You can expand it further by adding a display (OLED/LCD), sending alerts via email, or connecting to a mobile app!

    UltrasonicMailCam.py
    import RPi.GPIO as GPIO
    import time
    import subprocess
    import yagmail
    import os
    
    # === GPIO Pin Setup ===
    GPIO.setmode(GPIO.BCM)
    
    GPIO_TRIGGER = 23
    GPIO_ECHO = 24
    LED_PIN = 18
    BUZZER_PIN = 25
    
    GPIO.setup(GPIO_TRIGGER, GPIO.OUT)
    GPIO.setup(GPIO_ECHO, GPIO.IN)
    GPIO.setup(LED_PIN, GPIO.OUT)
    GPIO.setup(BUZZER_PIN, GPIO.OUT)
    
    # === Distance Measurement Function ===
    def measure_distance():
        GPIO.output(GPIO_TRIGGER, True)
        time.sleep(0.00001)
        GPIO.output(GPIO_TRIGGER, False)
    
        start_time = time.time()
        stop_time = time.time()
    
        while GPIO.input(GPIO_ECHO) == 0:
            start_time = time.time()
        while GPIO.input(GPIO_ECHO) == 1:
            stop_time = time.time()
    
        time_elapsed = stop_time - start_time
        distance_cm = (time_elapsed * 34300) / 2
        return distance_cm
    
    # === Image Capture Function ===
    def capture_image_libcamera(filename="captured.jpg"):
        subprocess.run(["libcamera-still", "-o", filename, "--nopreview"], check=True)
    
    # === Email Sending Function ===
    def send_email_with_attachment(sender, app_password, receiver, subject, message, attachment_path):
        yag = yagmail.SMTP(user=sender, password=app_password)
        yag.send(
            to=receiver,
            subject=subject,
            contents=message,
            attachments=attachment_path
        )
        print("📧 Email sent successfully!")
    
    # === Main Function ===
    if __name__ == '__main__':
        try:
            image_sent = False  # To avoid sending multiple emails rapidly
    
            while True:
                dist = measure_distance()
                print(f"Measured Distance = {dist:.1f} cm")
    
                if dist < 10.0:
                    GPIO.output(LED_PIN, GPIO.HIGH)
                    GPIO.output(BUZZER_PIN, GPIO.HIGH)
    
                    if not image_sent:
                        print("📸 Object detected! Capturing image and sending email...")
    
                        # Capture image
                        image_file = "captured.jpg"
                        capture_image_libcamera(image_file)
    
                        # Send email
                        sender_email = "nishantsingh2jan1998@gmail.com"
                        app_password = "rooh lcrd byqw wuab"
                        receiver_email = "nishantkumarsingh131@gmail.com"
                        subject = "Captured Image from Raspberry Pi"
                        message = "Hi, this is the captured image attached."
                        send_email_with_attachment(sender_email, app_password, receiver_email, subject, message, image_file)
    
                        # Remove image after sending
                        if os.path.exists(image_file):
                            os.remove(image_file)
                            print("🗑️ Temporary image file removed.")
    
                        image_sent = True  # Mark as sent
    
                else:
                    GPIO.output(LED_PIN, GPIO.LOW)
                    GPIO.output(BUZZER_PIN, GPIO.LOW)
                    image_sent = False  # Reset flag when object is gone
    
                time.sleep(1)
    
        except KeyboardInterrupt:
            print("\n🛑 Program stopped by user.")
            GPIO.cleanup()
    

    You can also Visit other tutorials of Embedded Prep 

    Special thanks to @mr-raj for contributing to this article on

  • Master Structures in C – A Beginner’s Guide with Interview Questions (2026)

    Structures in C : Unlock the power of structures in C programming with this beginner-friendly guide tailored for 2025 tech interviews! Whether you’re new to C or brushing up for embedded and systems programming interviews, this post offers a clear and practical explanation of structures — from basic syntax to advanced concepts like structure padding, bit-fields, and pointers to structures.

    Dive deep into real-world examples, memory layout illustrations, and commonly asked interview questions that help you build a strong foundation and gain confidence in handling Structures data in C.

    What You’ll Learn:

    • What is a structure and why it’s used in C
    • How to define, initialize, and access structure members
    • Structure padding and memory alignment
    • Bit-fields and their practical usage
    • Structure pointers and dynamic memory allocation
    • Array of structures and nested structures
    • Top interview questions and expert tips

    Perfect for students, job-seekers, and professionals aiming to master data organization in C, this guide equips you with everything you need to ace interviews and write better, cleaner C code.

    What is a Structure in C?

    A structure is a user-defined data type that allows combining variables of different types under one name. Each variable inside a structure is called a member of the structure.

    Syntax:

    struct StructureName {
        dataType member1;
        dataType member2;
        ...
    };
    

    Example:

    #include <stdio.h>
    
    struct Student {
        int id;
        char name[50];
        float marks;
    };
    
    int main() {
        struct Student s1 = {1, "John", 87.5};
        
        printf("ID: %d\n", s1.id);
        printf("Name: %s\n", s1.name);
        printf("Marks: %.2f\n", s1.marks);
        
        return 0;
    }
    

    Key Concepts:

    Declaration

    You can declare a structure type and create variables:

    struct Employee {
        int emp_id;
        float salary;
    } e1, e2;
    

    Accessing Structure Members

    Use the dot (.) operator:

    e1.emp_id = 101;
    e1.salary = 50000.00;
    

    Structure Pointer and Arrow (->) Operator

    struct Employee *ptr = &e1;
    ptr->salary = 55000.00;
    

    Nested Structures

    struct Date {
        int day, month, year;
    };
    
    struct Employee {
        int id;
        struct Date joiningDate;
    };
    

    Array of Structures

    struct Student students[5];
    

    Why Use Structures?

    • To group logically related data
    • To create complex data models
    • To make code more readable and maintainable
    • Crucial for hardware register mapping in embedded C

    Memory Layout of Structures

    Structure members are stored sequentially in memory, and padding may be added for alignment. You can control this using #pragma pack (compiler-specific).

    Important Notes:

    • You can’t initialize members inside the struct definition.
    • Structures can’t contain functions, but they can contain function pointers.
    • sizeof(struct) returns the size including padding bytes.
    • You can pass structure to functions by value or pointer.

    What is the size of a structure in C if nothing is defined inside it?

    In Standard C:

    In standard C (C89/C90 and later), a structure must contain at least one member. An empty structure is not allowed and will typically give a compiler error.

    Example:

    struct Empty {
        // nothing inside
    };
    
    int main() {
        struct Empty e;
        printf("%lu", sizeof(e));
        return 0;
    }
    

    Output (for most compilers like GCC):

    error: structure has no members
    

    In GNU C (GCC) – Extension:

    GCC does allow empty structures as a compiler extension (used sometimes in low-level code or placeholders). In such cases:

    • The size of an empty struct is typically 1 byte, to ensure each variable has a unique address.

    ✔️ Example (GCC):

    struct Empty { };
    
    int main() {
        struct Empty e;
        printf("%zu\n", sizeof(e)); // Output: 1
        return 0;
    }
    

    Why 1 byte?

    This is done to ensure that even an empty structure occupies a unique memory location (not zero bytes), which is important for things like:

    • Arrays of structures
    • Memory alignment
    • Pointers

    Summary Table:

    CompilerEmpty struct allowed?sizeof(struct)
    GCC✅ (extension)1 byte
    Clang✅ (extension)1 byte
    MSVC❌ (error)Compilation error
    Standard C❌ (not allowed)Compilation error

    Interview Tip:

    Q: What is the size of an empty structure in C?

    A: In standard C, empty structures are not allowed and give a compile-time error. But in GCC (as an extension), it is allowed and the size is 1 byte.

    Structure Padding in C

    What is Padding?

    Padding is the process of adding unused memory (bytes) between structure members to align data in memory according to the CPU architecture’s alignment requirements.

    Why is Padding Needed?

    Most processors access data faster when it’s aligned to its natural boundary:

    • int (4 bytes) should be stored at addresses divisible by 4
    • short (2 bytes) at addresses divisible by 2, etc.

    To maintain this alignment, compilers insert padding bytes between structure members.

    Example of Padding:

    #include <stdio.h>
    
    struct A {
        char a;   // 1 byte
        int b;    // 4 bytes
    };
    
    int main() {
        printf("Size of struct A: %lu\n", sizeof(struct A));
        return 0;
    }
    

    Output:

    Size of struct A: 8
    

    Explanation:

    MemberSizeOffsetNotes
    a1 B0
    padding3 B1-3for alignment
    b4 B4-7aligned on 4-byte boundary

    How to Minimize Padding?

    1. Reorder members from largest to smallest:
    struct B {
        int b;   // 4 bytes
        char a;  // 1 byte
    };
    

    ➡️ sizeof(struct B) will be 8, but more efficient than previous layout.

    1. Use #pragma pack(1) to disable padding (GCC-specific):
    #pragma pack(1)
    struct Packed {
        char a;
        int b;
    };
    #pragma pack()
    

    But be careful—disabling padding can cause slower access or alignment faults on some hardware (especially embedded/ARM CPUs).

    What is typedef in C?

    typedef is a keyword in C (and C++) used to create a new alias (name) for an existing data type. It helps in making code more readable, portable, and easier to maintain.

    Syntax:

    typedef existing_type new_type_name;
    

    Basic Example:

    typedef unsigned int uint;
    
    uint a = 10;   // Same as: unsigned int a = 10;
    

    Here, uint is a new name (alias) for unsigned int.

    Why Use typedef?

    PurposeBenefit
    Simplify complex typesMakes code readable and reduces clutter
    Increase portabilityAbstracts platform-dependent types (e.g., typedef int int32_t)
    Easier maintenanceUpdate one typedef instead of multiple changes in code
    Used with structsGives simple names to struct types without needing struct every time

    Common Use with struct:

    struct Student {
        int id;
        char name[50];
    };
    
    typedef struct Student Student;
    

    Now you can just write:

    Student s1;
    

    Instead of:

    struct Student s1;
    

    Or even more compact:

    typedef struct {
        int id;
        char name[50];
    } Student;
    

    With Pointers:

    typedef int* IntPtr;
    
    IntPtr p1, p2;  // Both p1 and p2 are int pointers
    

    Common Mistake:

    typedef int* IntPtr;
    
    IntPtr a, b;
    

    Many think both a and b are int*, but they are. This is correct.

    But if written as:

    int* a, b;  // a is int*, b is int (confusing)
    

    This is why typedef helps avoid confusion.

    Summary:

    FeatureDescription
    Keywordtypedef
    PurposeRename/alias a data type
    UsageUseful with structs, complex pointers
    BenefitImproves code clarity and maintainability

    Bit Fields in Structures

    What Are Bit Fields?

    Bit fields allow you to allocate specific number of bits to structure members instead of full bytes.

    Syntax:

    struct Flags {
        unsigned int a : 1;
        unsigned int b : 2;
        unsigned int c : 5;
    };
    
    • a uses 1 bit
    • b uses 2 bits
    • c uses 5 bits

    This is useful in:

    • Embedded systems (e.g., setting hardware registers)
    • Flag control
    • Memory optimization

    Example:

    #include <stdio.h>
    
    struct Status {
        unsigned int error : 1;
        unsigned int ready : 1;
        unsigned int mode : 2;
    };
    
    int main() {
        struct Status s = {1, 0, 2};
        printf("Size of Status: %lu\n", sizeof(s));
        return 0;
    }
    

    Output:

    Size of Status: 4
    

    Even though total bits = 1 + 1 + 2 = 4 bits, size is still rounded to nearest word size (here: 4 bytes on 32-bit machine).

    Rules and Notes:

    • Bit fields must be of integer type
    • You can’t take address of bit field
    • Compiler decides bit packing and alignment
    • Use unsigned int to avoid sign extension issues

    Structure Pointers

    What is a Structure Pointer?

    A pointer to a structure stores the address of a structure variable. This is useful for:

    • Passing structures efficiently to functions
    • Dynamic memory allocation
    • Embedded register access

    Example:

    #include <stdio.h>
    
    struct Student {
        int id;
        char name[20];
    };
    
    int main() {
        struct Student s = {101, "John"};
        struct Student *ptr = &s;
    
        printf("ID: %d\n", ptr->id);         // OR (*ptr).id
        printf("Name: %s\n", ptr->name);
        
        return 0;
    }
    

    Access Operators:

    SyntaxMeaning
    ptr->memberShortcut to access
    (*ptr).memberLonger version

    Both work the same.

    Use in Dynamic Memory:

    struct Student *ptr = malloc(sizeof(struct Student));
    ptr->id = 10;
    strcpy(ptr->name, "Alice");
    

    Real-World Use Case: Register Mapping in Embedded C

    #define UART0_BASE 0x4000C000
    
    struct UART {
        volatile uint32_t DR;
        volatile uint32_t SR;
    };
    
    #define UART0 ((struct UART *)UART0_BASE)
    

    Now you can write:

    UART0->DR = 0x55;

    Interview Questions on Structures in C

    Beginner Level

    1. What is a structure in C?
    2. What are the advantages of using structures?
    3. How do you declare and access a structure member?
    4. What is the difference between structure and array?
    5. Can we initialize members inside the structure?

    Intermediate Level

    1. How can you pass a structure to a function?
    2. What is the difference between . and -> operators?
    3. Explain nested structures with an example.
    4. What is the size of an empty structure?
    5. Can a structure contain another structure?

    Advanced/Embedded Level

    1. How is memory aligned in structures?
    2. How to minimize structure padding in embedded C?
    3. Can a structure contain a pointer to itself?
    4. Explain structure packing using #pragma pack.
    5. How are structures used in embedded register mapping?
    6. What is structure padding and how can you avoid it?
    7. Why does the compiler insert padding bytes in a structure?
    8. What are bit fields and where are they used?
    9. Can we take the address of a bit field? Why or why not?
    10. Explain structure pointers and -> operator.
    11. How are structure pointers useful in embedded system programming?
    12. What happens when you use #pragma pack(1)?
    13. Can we dynamically allocate memory for a structure?
    14. How can structure padding affect data sent over network or stored in file?
    15. Can a struct contain a pointer to itself? What is a self-referential structure?

    Sample Embedded Interview Scenario

    struct UART_Registers {
        volatile uint32_t DR;
        volatile uint32_t SR;
        volatile uint32_t CR;
    };
    
    #define UART1 ((struct UART_Registers *) 0x40011000)
    

    Question: What does this code do?

    ✅ Answer: It defines a structure for UART registers and maps it to the memory-mapped I/O address 0x40011000.

    Summary

    FeatureStructure
    Custom Data TypeYes
    Mixed Data TypesYes
    Can be nestedYes
    Dot and Arrow AccessYes
    Memory EfficientWith alignment
    Real-world use casesSystem-level data modeling, embedded register mapping

    📘 Practice Task

    Create a structure to store employee details (name, id, department, salary), and write a C program to:

    • Read data of 5 employees
    • Print details of the highest-paid employee

    You can also Visit other tutorials of Embedded Prep 

    Special thanks to @mr-raj for contributing to this article on EmbeddedPrep

  • Master Structure with Pointers in C 2026

    Structure with Pointers : This beginner-friendly article explains the powerful combination of structures and pointers in C programming. You’ll learn how to define and use pointers to structures, access structure members with the arrow operator (->), dynamically allocate memory for structures using malloc, and pass structures by reference to functions. With easy-to-understand code examples, common interview questions, and practical tips, this guide is perfect for anyone preparing for C programming interviews or trying to strengthen their understanding of pointers and structs. Whether you’re a student or an embedded developer, this article builds a solid foundation in handling structures efficiently using pointers.

    Structure with Pointers

    Basics Recap: Structure with Pointers Definition and Access

    struct Student {
        int id;
        char name[20];
    };
    

    Without Structure with Pointers:

    struct Student s1 = {101, "Alice"};
    printf("%d", s1.id);
    

    With Structure with Pointers:

    struct Student s1 = {101, "Alice"};
    struct Student *ptr = &s1;
    printf("%d", ptr->id);         // Or: (*ptr).id
    

    Accessing Members: Dot (.) vs Arrow (->)

    ExpressionMeaning
    ptr->idPreferred: Dereference and access member
    (*ptr).idAlso valid, but less readable

    Using Pointers to Modify Structure with Pointers

    void update(struct Student *s) {
        s->id = 202;
        strcpy(s->name, "Bob");
    }
    
    int main() {
        struct Student s1 = {101, "Alice"};
        update(&s1);
        printf("%d %s", s1.id, s1.name);
    }
    

    ✅ This modifies the original structure by passing pointer, not a copy.

    Dynamic Memory Allocation for Structure with Pointers

    #include <stdlib.h>
    struct Student *s = (struct Student *)malloc(sizeof(struct Student));
    s->id = 1;
    strcpy(s->name, "Charlie");
    free(s);
    

    Why use dynamic allocation?

    • When the number of objects isn’t known at compile time
    • Saves stack memory
    • Useful in data structures (linked list, tree)

    Array of Structures with Pointers

    struct Student students[3] = {
        {101, "Alice"},
        {102, "Bob"},
        {103, "Eve"}
    };
    
    struct Student *ptr = students;
    
    for (int i = 0; i < 3; i++) {
        printf("ID: %d, Name: %s\n", (ptr + i)->id, (ptr + i)->name);
    }
    

    ✅ ptr + i gives address of each element; use -> to access fields.

    Self-Referencing Structure (Linked List Use Case)

    struct Node {
        int data;
        struct Node *next;
    };
    

    ✅ Used to build:

    • Linked lists
    • Trees
    • Graphs
    struct Node *head = (struct Node *)malloc(sizeof(struct Node));
    head->data = 10;
    head->next = NULL;
    

    Pointer to Array of Structures (Advanced Usage)

    struct Student *arr = malloc(3 * sizeof(struct Student));
    arr[0].id = 1;
    strcpy(arr[0].name, "A");
    

    ✅ Use arr[i] or (*(arr + i)).id

    Key Mistakes to Avoid Structure with Pointers

    MistakeFix
    Using structure pointer without initializationAlways assign memory first
    Forgetting -> when using pointerUse ptr->member, not ptr.member
    Not freeing dynamically allocated structureAlways use free() after malloc()
    Passing structure by value when large in sizeUse pointer to avoid stack overhead
    Accessing freed pointerSet to NULL after freeing

    Summary Table

    ConceptExamplePurpose
    Pointer to structurestruct *ptr = &obj;Efficient access/modification
    Dynamic allocationmalloc(sizeof(struct))Runtime memory usage
    Arrow operator ->ptr->fieldShortcut for pointer access
    Self-referencing structurestruct Node *next;Linked list, tree, stack, queue
    Array of struct pointersstruct *arr[n];Complex data structures
    Memory-mapped I/O with struct(struct *)0xADDREmbedded register mapping

    1. Basic Structure Without Pointer

    #include <stdio.h>
    
    struct Student {
        int id;
        char name[20];
        float marks;
    };
    
    int main() {
        struct Student s1 = {101, "John", 87.5};
    
        printf("ID: %d\n", s1.id);
        printf("Name: %s\n", s1.name);
        printf("Marks: %.2f\n", s1.marks);
    
        return 0;
    }
    

    2. Pointer to Structure: The Basics

    To access members using a pointer to a structure, we use the -> (arrow) operator.

    #include <stdio.h>
    
    struct Student {
        int id;
        float marks;
    };
    
    int main() {
        struct Student s1 = {102, 91.5};
        struct Student *ptr = &s1;
    
        printf("ID: %d\n", ptr->id);       // Equivalent to (*ptr).id
        printf("Marks: %.2f\n", ptr->marks);
    
        return 0;
    }
    

    🔍 Interview Tip: Explain both ptr->id and (*ptr).id. They are functionally the same.

    3. Dynamically Allocating Structure Using malloc()

    #include <stdio.h>
    #include <stdlib.h>
    
    struct Student {
        int id;
        float marks;
    };
    
    int main() {
        struct Student *ptr = (struct Student *)malloc(sizeof(struct Student));
    
        ptr->id = 103;
        ptr->marks = 75.5;
    
        printf("ID: %d\n", ptr->id);
        printf("Marks: %.2f\n", ptr->marks);
    
        free(ptr); // Always free memory
        return 0;
    }
    

    🔍 Interview Tip: You may be asked to dynamically create an array of structures.

    4. Passing Structure Pointer to Function

    #include <stdio.h>
    
    struct Student {
        int id;
        float marks;
    };
    
    void display(struct Student *ptr) {
        printf("ID: %d\n", ptr->id);
        printf("Marks: %.2f\n", ptr->marks);
    }
    
    int main() {
        struct Student s = {104, 89.0};
        display(&s);  // Pass address
        return 0;
    }
    

    🔍 Interview Tip: This is memory-efficient compared to passing the full structure.

    5. Array of Structures with Pointers

    #include <stdio.h>
    
    struct Student {
        int id;
        float marks;
    };
    
    int main() {
        struct Student students[2] = {
            {201, 76.5},
            {202, 88.0}
        };
    
        struct Student *ptr = students; // Point to first element
    
        for (int i = 0; i < 2; i++) {
            printf("ID: %d, Marks: %.2f\n", ptr->id, ptr->marks);
            ptr++;
        }
    
        return 0;
    }
    

    6. Nested Structures with Pointers

    #include <stdio.h>
    
    struct Date {
        int day, month, year;
    };
    
    struct Student {
        int id;
        struct Date dob;
    };
    
    int main() {
        struct Student s = {301, {10, 6, 2000}};
        struct Student *ptr = &s;
    
        printf("DOB: %02d-%02d-%d\n", ptr->dob.day, ptr->dob.month, ptr->dob.year);
        return 0;
    }
    

    Interview Questions on Structure with Pointers

    1. What is the difference between ptr->x and (*ptr).x?
      • Both are the same. ptr->x is syntactic sugar for (*ptr).x.
    2. Why use structure pointers instead of structures in functions?
      • Efficient: avoids copying large structure data.
    3. Can we allocate memory dynamically for structure?
      • Yes, using malloc.
    4. How to create a linked list using structure pointer?
      • Each node has a structure with a pointer to the next node.
    5. What happens if we dereference an uninitialized pointer to struct?
      • It leads to undefined behavior (usually segmentation fault).

    Basic Level

    1. What is a pointer to a structure?
    2. How do you access members of a structure using a pointer?
    3. What is the difference between (*ptr).member and ptr->member?

    Intermediate Level

    1. How do you dynamically allocate memory for a structure?
    2. What happens if you pass a structure to a function by value vs by pointer?
    3. How can you use pointers to modify structure data inside a function?
    4. Explain how you access an array of structures using a pointer.
    5. Can you pass a pointer to a structure as a function parameter? Show an example.

    Advanced Level

    1. What is a self-referential structure? How is it used in linked lists?
    2. How do you handle a structure containing dynamically allocated members?
    3. What happens when you access a structure pointer without initializing it?
    4. What is the memory layout difference between structure and structure pointer?
    5. How do you implement a generic structure pointer that can point to multiple types (with void pointers)?
    6. How is pointer to structure used in memory-mapped I/O (e.g., in embedded systems)?

    Real-World/Embedded Examples

    1. Explain how you would map a peripheral register block to a structure pointer.
    #define UART_BASE 0x40001000
    struct UART {
        volatile uint32_t DATA;
        volatile uint32_t STATUS;
    };
    #define UART0 ((struct UART *)UART_BASE)
    
    1. Why is volatile used with structure pointers in embedded systems?

    Practice Problems

    1. Write a program to create and print an array of n students using dynamic allocation.
    2. Implement a linked list using self-referential structures.
    3. Write a function that swaps two structure variables using pointers.
    4. Write a function that returns a pointer to a dynamically created structure.
    5. Simulate a memory-mapped I/O register set using structure pointers in C.

    You can also Visit other tutorials of Embedded Prep 

    Special thanks to @mr-raj for contributing to this article on EmbeddedPrep

  • Master Embedded C Interview Questions 2026

    Welcome to our comprehensive blog on Embedded C Interview Questions, your one-stop resource to prepare for embedded systems interviews with confidence. Whether you’re a beginner looking to break into embedded development or an experienced engineer brushing up on key concepts, this blog offers a curated list of frequently asked interview questions and expert answers.

    Explore a wide range of topics including memory management, pointers, data structures, bitwise operations, interrupts, real-time operating systems (RTOS), and microcontroller programming. Each question is explained in a clear, beginner-friendly manner with practical code examples and real-world relevance.

    Perfect for students, job seekers, and professionals, this blog helps you build a solid foundation in Embedded C and crack interviews at companies like Bosch, Qualcomm, STMicroelectronics, NXP, and more.

    Stay ahead in your career—start mastering Embedded C today!

    Basic Embedded C Interview Questions

    • What is Embedded C Programming? How is Embedded C different from C
      language?
    • What are the different data types in Embedded C?
    • What is the role of main() in Embedded C programs?
    • What is Void Pointer in Embedded C and why is it used?
    • Why do we use the volatile keyword?
    • What are the differences between the const and volatile qualifiers in embedded
      C?
    • What are preprocessor directives? Name a few.
    • What Is Concatenation Operator in Embedded C?
    • How will you use a variable defined in source file1 inside source file2?
    • What are the differences between Inline and Macro Function?
    • Is it possible for a variable to be both volatile and const?
    • Is it possible to declare a static variable in a header file?
    • What do you understand by the pre-decrement and post-decrement operators?
    • What is a reentrant function?
    • What kind of loop is better – Count up from zero or Count Down to zero?
    • What do you understand by a null pointer in Embedded C?
    • Why is the statement ++i faster than i+1?
    • Is it possible to protect a character pointer from accidentally pointing it to a different address?
    • What do you understand by Wild Pointer? How is it different from Dangling Pointer?
    • What are the differences between the following 2 statements #include “…” and #include <…>?
    • Difference between while(1) and while(0) in C language?
    • Describe the role of the “typedef” keyword in embedded C.
    • Difference Between Structure and Array in C?
    • Difference Between Structure and Union in C?
    • Explain What Are The Different Storage Classes In C?
    • Explain What Are The Different Qualifiers In C?
    • What Is Pass By Value And Pass By Reference?
    • What are the uses of the Keyword Static?
    • What does “const int x;” mean?
    • Where are constant variables stored in memory?
    • How can you protect a character pointer by some accidental modification with the pointer address?
    • What is the keyword “volatile” used for in embedded C?
    • Can a variable be volatile and const both?
    • What is a Null pointer?
    • What is the size of a pointer?
    • What is the difference between little-endian and big-endian byte ordering
    • Explain the difference between static and dynamic memory allocation in embedded C.
    • How do you perform bitwise operations in embedded C?
    • What is the significance of the “restrict” keyword in embedded C?
    • Explain the concept of bit fields in embedded C.
    • What is a union and how is it used in embedded C?
    • Explain the concept of portability in embedded C programming.
    • How do you implement a finite state machine in embedded C?
    • Describe the process of handling errors in embedded C programming.
    • How do you perform input/output operations in embedded C?
    • What is the purpose of the “inline” keyword in embedded C?
    • How do you handle multi-threading in embedded C?
    • How do you handle endianness issues in embedded C?
    • Describe the process of implementing a software stack in embedded C.
    • How do you debug embedded C code?
    • How do you handle floating-point arithmetic in embedded C?
    • What is a pointer-to-function in embedded C?
    • How do you perform code optimization in embedded C?

    Intermediate Embedded C Interview Questions

    1. What are memory-mapped I/O and how is it implemented in Embedded C?
    2. How can you implement circular buffer (ring buffer) in Embedded C?
    3. What is ISR (Interrupt Service Routine) and how do you write one in C?
    4. How do you share data between main code and ISR safely?
    5. What are the race conditions in Embedded C and how do you avoid them?
    6. Explain how stack overflow can occur in embedded systems and how to prevent it.
    7. What is memory leak and how can it happen in embedded firmware?
    8. How do you perform memory alignment in Embedded C?
    9. How would you use __attribute__((section(".name"))) in Embedded C?
    10. What is the difference between using a union and casting in accessing hardware registers?
    11. How would you implement delay without using delay() function or timers?
    12. How do you prevent compiler optimization for a specific variable or function?
    13. What is zero initialization and when does it occur in Embedded C?
    14. What is the difference between memcpy() and memmove()?
    15. How do you ensure atomicity of operations in Embedded C?
    16. What is tail recursion? Is it helpful in embedded development?
    17. How does compiler optimization affect Embedded C behavior?
    18. What is aliasing in Embedded C and how can it lead to undefined behavior?
    19. How do you prevent structure padding and packing issues?
    20. What is bus contention and how can software reduce its occurrence?

    Advanced Embedded C Interview Questions

    1. How do you implement RTOS-level features like task switching using C?
    2. How does the compiler manage interrupt vector tables in Embedded C?
    3. How can function pointers be used to implement polymorphism in Embedded C?
    4. How do you create bootloader code in Embedded C?
    5. What is position-independent code and how do you write it in Embedded C?
    6. Explain memory sections (.text, .data, .bss) and how they are used in linker scripts.
    7. How can Embedded C be used to interface with DMA (Direct Memory Access)?
    8. How do you implement memory pools or custom allocators in Embedded C?
    9. How do you perform low-power optimization in firmware (C-level techniques)?
    10. How do you handle memory-mapped peripherals in systems with shared buses?
    11. What is undefined behavior in C, and how does it manifest in embedded systems?
    12. How does the volatile keyword behave with pointers to structures?
    13. How would you debug stack corruption or heap fragmentation in embedded systems?
    14. What techniques do you use to profile and measure code performance in embedded systems?
    15. How would you implement a watchdog timer service in C?
    16. How can inline assembly be used in Embedded C?
    17. How do you ensure MISRA C compliance in large codebases?
    18. How do you implement lock-free programming techniques in Embedded C?
    19. How do you use linker script to map specific variables/functions to specific addresses?
    20. How do you implement a software-based CRC algorithm in C?
    21. How do you handle large memory access (above 64 KB) in 16-bit microcontrollers?
    22. How do you implement double buffering in Embedded C for smooth data acquisition?
    23. How do you write unit tests for Embedded C code without hardware?
    24. How do you manage firmware upgrades (FOTA) in embedded C systems?
    25. What are trampolines in embedded programming and when are they used?

    Programming Questions – Embedded C Interview Questions 2025

    Basic Level Programming

    1. Write a C program to toggle an LED connected to a GPIO pin every 1 second using delay loops.
    2. Write a function to reverse an array of integers in place.
    3. Implement a function to check if a given number is a power of two using bitwise operations.
    4. Write a C program to count the number of 1s in an 8-bit integer.
    5. Write a function to implement your own strlen() function.
    6. Write a program to swap two variables without using a temporary variable.
    7. Write a program to implement a simple circular buffer with fixed size.
    8. Implement a debounce algorithm in C for a push-button input.

    Intermediate Level Programming

    1. Write a program to implement a software delay function using timers (assume STM32/AVR-like architecture).
    2. Write an ISR (Interrupt Service Routine) to handle external interrupt on a GPIO pin.
    3. Implement a state machine to control an LED that turns on/off with a button press and blinks when held.
    4. Implement a memory copy function similar to memcpy() and ensure it handles overlapping memory regions.
    5. Create a struct-based system to store and manage sensor readings with timestamp support.
    6. Write a function that takes a pointer to a function and executes a list of callback functions.
    7. Create a firmware-like program to blink 3 LEDs in sequence using only one timer.
    8. Write a program to transmit a string via UART using polling (non-interrupt method).

    Advanced Level Programming

    1. Implement a finite state machine (FSM) in C to manage a simple traffic light system.
    2. Simulate a watchdog timer that resets a system if a task fails to report within a certain time window.
    3. Write code to allocate memory from a fixed-size memory pool (custom allocator).
    4. Implement a CRC-8 or CRC-16 checksum algorithm in C.
    5. Write embedded-safe code to compute the average of N ADC values with integer arithmetic only.
    6. Implement an event queue system in Embedded C with event handlers and a dispatcher.
    7. Write a bootloader stub that checks for a firmware update signature and jumps to the main application.
    8. Implement I²C read/write operations with software bit-banging in C.
    9. Write a code to simulate a multi-task scheduler (round-robin) in pure Embedded C.

    You can also Visit other tutorials of Embedded Prep 

    Special thanks to @mr-raj for contributing to this article on EmbeddedPrep

  • Master I²C Debugging with Saleae Logic Analyzer – Top Interview Questions (2026)

    I²C Debugging with Saleae Logic Analyzer : If you’re preparing for an embedded systems or automotive software interview, I²C communication and debugging skills are a must. Especially with tools like the Saleae Logic Analyzer, companies are looking for candidates who can confidently debug hardware communication issues.

    In this post, we’ve compiled the most commonly asked and advanced I²C debugging with Saleae Logic Analyzer. Mastering these questions will set you apart in 2025’s competitive tech landscape.

    I²C Debugging with Saleae Logic Analyzer

    Section 1: Basic I²C & Saleae Understanding

    1. What is I²C and how does it differ from other communication protocols like SPI or UART?
    2. How does a Saleae Logic Analyzer help in debugging I²C communication?
    3. What are the required hardware connections between a Saleae Logic Analyzer and an I²C bus?
    4. How do you set up Saleae software to capture I²C data?
    5. What is protocol decoding in Saleae, and how do you enable it?

    Section 2: Practical Debugging Approach

    1. How would you connect a Saleae Logic Analyzer to an Arduino I²C setup?
    2. What is the process to capture I²C communication on a Saleae Analyzer?
    3. How do you differentiate between master and slave devices on the Saleae waveform?
    4. What visual cues in the Saleae output help identify I²C address, data, and ACK/NACK bits?
    5. How do you verify if the correct I²C address is being sent by the master?

    Section 3: Troubleshooting Scenarios

    1. You see the clock and data lines active, but the slave device does not respond. How do you debug it using Saleae?
    2. What might cause repeated NACK responses from a slave device and how can Saleae help diagnose the issue?
    3. What would you do if the SDA line stays LOW during capture?
    4. How would you debug intermittent I²C communication failures using Saleae?
    5. How do you confirm the slave is acknowledging data correctly?

    Section 4: Signal & Timing Analysis

    1. How can you use Saleae to measure clock speed and ensure it matches the expected I²C frequency (e.g., 100kHz or 400kHz)?
    2. What is clock stretching and how would it appear in a Saleae capture?
    3. How can you detect setup and hold time violations using Saleae?
    4. What sampling rate would you choose in Saleae for reliable I²C capture and why?
    5. Can you identify glitching or bus contention with Saleae? How?

    Section 5: Advanced and Real-World Use Cases

    1. How would you debug a sensor that works in one board but not another using Saleae?
    2. You suspect a race condition or overlapping I²C transactions. How can Saleae help you prove this?
    3. How do you debug repeated START conditions using Saleae?
    4. Your OLED at address 0x3C does not display anything, even though the master is active. What’s your debugging process?
    5. What happens when two masters try to control the bus simultaneously, and how do you detect this in Saleae?

    Section 6: Tool-Specific Mastery

    1. How do you configure trigger conditions in Saleae to capture a specific I²C address?
    2. Can you automate or script data analysis from Saleae captures?
    3. How do you filter large I²C log data in Saleae to find specific transactions?
    4. How do you export Saleae captures for documentation or debugging?
    5. Can Saleae Logic software help identify mismatched voltage levels or missing pull-up resistors?

    Bonus Section: Interview-Ready Case Studies

    1. What’s an example of a real bug you debugged using Saleae Logic Analyzer?
    2. How do you communicate I²C debugging results to a hardware or firmware team?
    3. How would you verify if a microcontroller is stuck waiting for an ACK using Saleae?
    4. What does a proper initialization sequence look like on Saleae when an OLED display powers up?
    5. How do you validate driver-level I²C communication with actual bus signals?

    You can also Visit other tutorials of Embedded Prep 

    Special thanks to @mr-raj for contributing to this article on EmbeddedPrep

  • Master Decode I²C with Saleae Logic Analyzer and Arduino Uno (2026)

    I²C with Saleae Logic Analyzer : I²C (Inter-Integrated Circuit) is a powerful two-wire communication protocol that allows multiple devices—such as sensors, displays, and memory modules—to communicate with a microcontroller like the Arduino using just SDA (Serial Data Line) and SCL (Serial Clock Line).

    In this practical guide, you’ll learn how to decode, monitor, and debug I²C communication using the Saleae Logic Analyzer. Whether you’re dealing with an unresponsive OLED display or trying to understand data flow between your Arduino and I²C peripherals, this tutorial will help you visualize I²C signals, interpret data frames, and detect common issues—all with a user-friendly Saleae interface.

    Perfect for beginners and embedded developers, this hands-on guide simplifies I²C debugging and gives you the confidence to troubleshoot any I²C-based project

    Plan: Simulate I²C Using Arduino + ESP32 + Saleae

    What You’ll Do:

    1. Connect Arduino Uno (Master) and ESP32 (Slave) via I²C.
    2. Upload I²C code to both devices.
    3. Monitor SDA and SCL lines with Saleae.
    4. Decode and analyze I²C protocol in the Saleae software.
    +------------------+       +-----------------+       +-------------------------+
    |    Arduino Uno   |       |     ESP32       |       |   Saleae Logic Analyzer |
    |------------------|       |-----------------|       |-------------------------|
    | A4 (SDA) --------+------>+ GPIO 21 (SDA)    |------>+ CH0                    |
    | A5 (SCL) --------+------>+ GPIO 22 (SCL)    |------>+ CH1                    |
    | GND ------------+-------+ GND              |------>+ GND                     |
    +------------------+       +-----------------+       +-------------------------+
    

    Code Part 1: Arduino Uno as I²C Master

    #include <Wire.h>
    
    void setup() {
      Wire.begin(); // I2C Master
      Serial.begin(9600);
      delay(1000);
    }
    
    void loop() {
      Serial.println("Sending data to ESP32...");
      Wire.beginTransmission(0x08);  // Slave address
      Wire.write("Hi");
      byte status = Wire.endTransmission();
    
      if (status == 0) {
        Serial.println("✅ ESP32 acknowledged the message!");
      } else {
        Serial.print("❌ Error sending to ESP32. Code: ");
        Serial.println(status);
      }
    
      delay(1000);
    }
    

    Code Part 2: ESP32 as I²C Slave

    #include <Wire.h>
    
    void receiveEvent(int bytes) {
      Serial.print("Received: ");
      while (Wire.available()) {
        char c = Wire.read();
        Serial.print(c);  // Show character
      }
      Serial.println();
    }
    
    void setup() {
      Serial.begin(115200);
      Wire.begin(0x08);  // ESP32 as Slave at address 0x08
      Wire.onReceive(receiveEvent);  // Set receive handler
    }
    
    void loop() {
      delay(100);
    }
    

    What You Need | I²C with Saleae Logic

    • Arduino Uno
    • ESP32 Dev Board
    • Saleae Logic Analyzer
    • Jumper Wires
    • Arduino IDE

    Wiring Between Arduino and ESP32

    Arduino UnoESP32Saleae Logic
    A4 (SDA)GPIO 21 (SDA)CH0 (SDA)
    A5 (SCL)GPIO 22 (SCL)CH1 (SCL)
    GNDGNDGND

    Use Saleae Logic Analyzer

    1. Connect Channel 0 to SDA (A4/GPIO21), Channel 1 to SCL (A5/GPIO22), and GND.
    2. In the Saleae Logic software:
      • Set sampling rate: 1MHz or higher
      • Add I²C Analyzer (Channel 0 = SDA, Channel 1 = SCL)
    3. Hit Start, and observe the communication!

    What You’ll See in Saleae

    You’ll decode messages like:

    [0x08] WRITE → 0x48 0x69
    Which corresponds to ASCII:
    
    H  i
    " That’s the "Hi" sent from Arduino to ESP32 "
    

    Tips & Gotchas

    • If the ESP32 doesn’t show messages: check address match and wiring.
    • Pull-up resistors (4.7kΩ) might be needed if you get unreliable signals.
    • You can use Wire.onReceive() on ESP32 to handle multiple bytes and print them.

    You can also Visit other tutorials of Embedded Prep 

    Special thanks to @mr-raj for contributing to this article on EmbeddedPrep

  • Master How to Use a Saleae Logic Analyzer with Arduino Uno (2026)

    How to Use a Saleae Logic Analyzer : If you’re new to Arduino and curious about how digital signals really work under the hood, a Saleae Logic Analyzer is the perfect tool to start exploring. In this beginner-friendly guide, I’ll walk you through my learning journey of using the Saleae Logic Analyzer with a simple Arduino Uno sketch.

    You’ll learn how to capture, visualize, and interpret digital signals in real time—making it easier to debug issues, understand timing, and get deeper insight into your embedded projects. Whether you’re monitoring a blinking LED or analyzing serial communication, this tutorial will help you unlock the full power of digital signal analysis.

    Perfect for makers, students, and embedded enthusiasts looking to build a strong foundation in hardware debugging and signal analysis.

    What is a Saleae Logic Analyzer?

    A Saleae Logic Analyzer is a tool that lets you capture and visualize digital signals from your circuits. It’s like an oscilloscope but specialized for digital data. It helps you see when signals go HIGH (on) or LOW (off) over time.

    The Arduino Sketch

    For my experiment, I wrote a very simple program to blink the built-in LED on pin 13 of the Arduino Uno:

    void setup() {
      pinMode(13, OUTPUT);  // Set pin 13 as an output
    }
    
    void loop() {
      digitalWrite(13, HIGH);  // Turn LED ON
      delay(1000);             // Wait for 1 second
      digitalWrite(13, LOW);   // Turn LED OFF
      delay(500);              // Wait for 0.5 seconds
    }
    

    This program turns the LED on for 1 second, then off for half a second, repeatedly.

    Connecting the Logic Analyzer

    Pin of Logic Analyzer

    To see what’s happening on pin 13, I connected the Saleae Logic Analyzer probe to Arduino pin 13 and ground. This allows the Logic Analyzer to measure the voltage changes as the LED turns on and off.

    What I Learned from the Logic Analyzer

    When I opened the Saleae software and started capturing data, I saw a clean square wave pattern on channel 0 corresponding to pin 13. The signal was HIGH for about 1 second and LOW for about 0.5 seconds, exactly as my code intended.

    This visual confirmation helped me understand:

    • How digital signals appear as voltage changes (HIGH = ~5V, LOW = 0V).
    • Timing between signal changes, like the 1-second ON and 0.5-second OFF.
    • The importance of accurate timing in embedded programming.

    Why Use a Logic Analyzer?

    • Debugging: It helps find errors in signal timing or logic.
    • Learning: Visualizing signals makes digital electronics easier to understand.
    • Complex Projects: When dealing with communication protocols like I2C or SPI, it’s invaluable.

    Final Tips for Beginners

    • Always connect the ground of the Logic Analyzer to the Arduino ground.
    • Start with simple code like blinking an LED before moving to complex signals.
    • Use the Saleae software features like zoom and cursors to measure signal duration.
    • Don’t be afraid to experiment and observe how changes in code affect the signal.

    Using a Saleae Logic Analyzer with an Arduino Uno is a fantastic way to bring digital signals to life and deepen your understanding of embedded electronics. Happy learning

    You can also Visit other tutorials of Embedded Prep 

    Special thanks to @mr-raj for contributing to this article on EmbeddedPrep

  • Master ARM Cortex-M4 Core Registers (Explained Simply 2026)

    General-Purpose Registers

    These are used to store values during program execution.

    🔹 Low Registers (R0–R7)

    • Commonly used for function arguments, return values, and temporary storage.
    • Can be accessed quickly and directly.
    R0, R1, R2, R3, R4, R5, R6, R7
    

    🔸 High Registers (R8–R12)

    • Also general-purpose but used less frequently.
    • Needed more in complex calculations or interrupt handling.
    R8, R9, R10, R11, R12
    

    ⚙️ Special-Purpose Registers

    🔵 R13 – Stack Pointer (SP)

    • Points to the top of the stack memory.
    • Cortex-M4 has two stack pointers:
      • MSP (Main Stack Pointer) – Default after reset.
      • PSP (Process Stack Pointer) – Used in OS tasks or threads.

    🟠 R14 – Link Register (LR)

    • Holds the return address when a function is called.
    • When the function ends, CPU uses LR to return.

    🔴 R15 – Program Counter (PC)

    • Points to the next instruction the CPU will execute.

    🧾 Status Register

    ⚫ xPSR – Program Status Register

    Includes:

    • APSR (Application PSR) – condition flags (N, Z, C, V)
    • IPSR (Interrupt PSR) – current exception number
    • EPSR (Execution PSR) – Thumb state, IT state

    🚨 Special Control Registers

    These are used to manage CPU privileges, interrupt masking, and protection levels.

    RegisterDescription
    PRIMASKDisables all interrupts except NMI when set. Used for critical sections.
    FAULTMASKDisables all exceptions including faults, except NMI.
    BASEPRISets a priority threshold – blocks interrupts of lower priority.
    CONTROLControls stack pointer selection (MSP/PSP) and privilege level (Privileged/Unprivileged).

    🔐 CONTROL Register (Bits)

    • Bit 0 – nPRIV:
      0: Privileged
      1: Unprivileged
    • Bit 1 – SPSEL:
      0: Use MSP
      1: Use PSP
    • Bit 2 – FPCA (If FPU is enabled):
      Floating-point context active

    🧠 Summary Diagram

    +------------------------+
    | R0 - R12               | General-purpose registers
    | R13 (SP)               | Stack Pointer (MSP or PSP)
    | R14 (LR)               | Link Register (return address)
    | R15 (PC)               | Program Counter
    | xPSR                   | Program status flags
    | MSP / PSP              | Stack pointers (Main / Process)
    | PRIMASK                | Mask all interrupts except NMI
    | FAULTMASK              | Mask all faults & interrupts except NMI
    | BASEPRI                | Priority threshold for interrupts
    | CONTROL                | Privilege + SP selection
    +------------------------+
    

    Use Case Example

    void my_function(int a, int b) {
        int c = a + b;
    }
    

    While executing:

    • a, b, and c will likely be in R0, R1, R2
    • LR (R14) holds return address
    • SP (R13) holds the stack
    • PC (R15) tracks next instruction
    • xPSR gets updated based on the result

    Let’s break down the Stack Pointer (SP), R13, and the banked versions of the Stack Pointer—MSP (Main Stack Pointer) and PSP (Process Stack Pointer)—in a detailed, beginner-friendly way, especially with relevance to ARM Cortex-M architectures.


    🔹 1. What is R13 / SP?

    • R13 is one of the 16 general-purpose registers in the ARM architecture.
    • However, R13 is reserved as the Stack Pointer (SP).
    • So, when we say SP, it’s just an alias for R13.

    💡 The stack is a region of memory used for function calls, storing local variables, return addresses, etc. The SP (R13) keeps track of the top of the stack.


    🔹 2. Stack Pointer Behavior

    In general:

    • The stack grows downward (from higher memory to lower memory).
    • Each time you push (store) data, SP decreases.
    • Each time you pop (load) data, SP increases.

    🔹 3. Banked Stack Pointers: MSP and PSP

    ❓ Why two stack pointers?

    ARM Cortex-M processors support two stack pointers for separating privileged and unprivileged stack operations:

    Stack PointerNamePurpose
    MSPMain Stack PointerUsed by the OS, system handlers, and in privileged mode by default
    PSPProcess Stack PointerUsed by user/application-level code (can run in unprivileged mode)

    🧠 Key Idea:

    • Only one stack pointer is active at a time.
    • The CONTROL register decides whether SP (R13) refers to MSP or PSP.

    🔹 4. CONTROL Register and SP Selection

    CONTROL register (in Cortex-M):

    BitNameMeaning
    0nPRIV0 = privileged, 1 = unprivileged
    1SPSEL0 = use MSP, 1 = use PSP

    So, if:

    • CONTROL.SPSEL = 0: SP uses MSP
    • CONTROL.SPSEL = 1: SP uses PSP

    Example in C (CMSIS-style):

    __set_CONTROL(__get_CONTROL() | (1 << 1));  // Select PSP
    

    🔹 5. Initialization and Usage Flow

    Boot time:

    • MSP is used by default on reset.
    • The value of MSP is set from the first word of the vector table.

    RTOS context:

    • RTOS usually:
      • Keeps MSP for the kernel and system calls
      • Assigns PSP to individual threads/tasks

    Example scenario:

    Upon reset:
      SP = MSP (default)
      OS starts
      OS creates thread
      OS assigns PSP to thread
      Switch CONTROL register SPSEL to use PSP
      Thread runs with PSP (user mode)
    
    Interrupt occurs:
      Switch to MSP (automatically)
      Handle interrupt in privileged mode
      Return from interrupt: restore PSP
    

    🔹 6. How to Read/Write SP, MSP, PSP (Assembly or CMSIS)

    Read current SP (R13):

    MOV R0, SP   ; Get current SP (could be MSP or PSP based on CONTROL)
    

    Set MSP/PSP directly:

    __set_MSP(0x20001000);  // Set Main Stack Pointer
    __set_PSP(0x20002000);  // Set Process Stack Pointer
    

    🔹 7. Summary Table

    TermRegisterFunction
    SPR13General name for stack pointer (MSP or PSP depending on context)
    MSPBanked R13Used by default, for kernel/system
    PSPBanked R13Used for threads/user mode
    CONTROL.SPSELBit 1Selects between MSP (0) and PSP (1)

    🔹 8. Visualization

    +---------------------+
    |     Stack Memory    |
    |---------------------|
    |  High Address       |
    |  ...                |
    |  PSP (User Stack)   | --> Used by user tasks
    |  ...                |
    |  MSP (Main Stack)   | --> Used by system/IRQ
    |  ...                |
    |  Low Address        |
    +---------------------+
    

    🔹 9. Use Cases

    • RTOS-based systems: Each task/thread uses a PSP, while the kernel uses the MSP.
    • Security: Keeps user and kernel stacks separate.
    • Interrupt handling: Always uses MSP for consistency and security.

    🔚 Conclusion

    • R13 is the generic register for the stack pointer.
    • In Cortex-M, it’s banked into MSP and PSP.
    • The CONTROL register selects which one is active.
    • Separation of MSP and PSP improves security and supports multitasking (RTOS).

    You want to:

    1. Use MSP by default after reset (standard behavior).
    2. Set up a new stack region for a user task.
    3. Switch to PSP before running that task.
    4. Ensure CONTROL register uses PSP.

    Prerequisites

    Assume:

    • The user task stack is at 0x20002000 (adjust as per your RAM size).
    • Using CMSIS or direct ARM assembly.

    Method 1: C (CMSIS-style)

    #include "stm32f4xx.h"  // or the CMSIS header for your chip
    
    void switch_to_psp(void) {
        uint32_t psp_stack = 0x20002000;  // Example PSP location (top of task stack)
    
        __set_PSP(psp_stack);             // Set the PSP
        __set_CONTROL(__get_CONTROL() | (1 << 1));  // Set CONTROL.SPSEL = 1 -> Use PSP
        __ISB();                          // Instruction Synchronization Barrier
    }
    
    int main(void) {
        switch_to_psp();  // Switch to Process Stack Pointer
    
        while (1) {
            // Code running with PSP
        }
    }
    

    Method 2: Pure ARM Assembly (Thumb mode)

        LDR R0, =0x20002000     ; Load new PSP address
        MSR PSP, R0             ; Move to PSP register
        MRS R0, CONTROL         ; Read CONTROL register
        ORR R0, R0, #2          ; Set bit 1 to use PSP
        MSR CONTROL, R0         ; Write back to CONTROL
        ISB                     ; Instruction Synchronization Barrier
    

    You can embed this inline in a C function using __asm__.


    Explanation of Each Step

    StepExplanation
    __set_PSP() / MSR PSP, R0Load new PSP stack address
    __get_CONTROL() / MRS CONTROLRead CONTROL register
    Set bit 1 of CONTROLTell CPU to use PSP instead of MSP
    __ISB() / ISBEnsures pipeline flush to apply changes

    🧪 How to Verify?

    You can check current SP using:

    uint32_t sp_val;
    __asm volatile ("MOV %0, SP" : "=r" (sp_val));
    

    You can also check:

    uint32_t psp = __get_PSP();
    uint32_t msp = __get_MSP();
    uint32_t ctrl = __get_CONTROL();
    

    ⚠️ Tips

    • Be careful not to overwrite the MSP unless you’re booting custom firmware.
    • Make sure 0x20002000 is a valid region in your RAM (check your linker script).
    • This switch is especially useful in RTOS, privilege separation, and secure context management.

    Here’s a beginner-friendly tutorial on the Link Register (R14) in ARM Cortex-M4:


    🌟 What is the Link Register (R14) in Cortex-M4?

    The Link Register (LR) is R14, one of the special-purpose registers in the ARM Cortex-M4 processor.

    It is used to store the return address when a function or an interrupt is called — so the CPU knows where to go back after executing that function.


    🧠 Simple Analogy:

    Think of it like this:

    You go from Room A to Room B but want to return back to Room A later. So, before leaving, you write down “Room A” on a sticky note (that’s the Link Register storing the return address).


    📦 Role of LR (R14) in Function Calls:

    🔁 Function Call (e.g., BL func)

    • The BL (Branch with Link) instruction:
      • Jumps to the function.
      • Stores the return address (next instruction after BL) into R14 (LR).

    🔚 Function Return

    • The BX LR instruction is used at the end of the function:
      • It reads the address in LR and jumps back to it.
    main:
        BL my_function      ; Call function, save return addr in LR (R14)
        ; Continue here after my_function returns
    
    my_function:
        ; Do something
        BX LR               ; Return to main (address stored in LR)
    

    💥 What If LR is Lost?

    If you accidentally overwrite LR before using BX LR, the processor won’t know where to return — this causes a crash or unpredictable behavior.

    To prevent this, compilers or you (in assembly) save LR on the stack at the start of a function and restore it before returning.


    🧰 How LR Works with Stack:

    Typical function prologue and epilogue:

    ; Prologue (start of function)
    PUSH {LR}     ; Save LR on stack
    
    ; ... function body ...
    
    ; Epilogue (end of function)
    POP {LR}      ; Restore LR
    BX LR         ; Return
    

    🚨 LR in Interrupts and Exceptions:

    In interrupts, the processor automatically saves LR (and other registers) on the stack.

    But it sets LR to a special EXC_RETURN value — not a typical return address.

    This tells the processor how to return from the exception (e.g., using BX LR with this value).


    🛠️ Summary:

    FeatureDetails
    Register NameR14 (Link Register / LR)
    PurposeHolds return address of functions or exceptions
    Used byBL, BX LR, and exception return
    Should be saved?Yes, in nested calls or interrupts
    Important inFunction calls, RTOS task switching, ISRs

    ✅ Tips for Beginners:

    • Think of LR as a “bookmark” for the CPU.
    • Always preserve LR if you’re writing low-level assembly functions.
    • Learn how the stack and LR work together.
    • Try writing simple ARM assembly examples to observe LR behavior.

    🧠 Understanding PC (R15) in Cortex-M4: A Beginner-Friendly Guide

    In ARM Cortex-M4 processors, R15 is a special-purpose register known as the Program Counter (PC). It’s one of the most important registers in any processor because it tells the CPU where to fetch the next instruction from.


    What is R15 / Program Counter (PC)?

    • The Program Counter (PC) is register R15 in the Cortex-M4 register set.
    • It holds the address of the next instruction to execute.
    • As each instruction is executed, the PC is automatically updated to point to the next instruction.

    🔍 Where is PC (R15) used?

    Every instruction cycle involves the PC:

    1. Fetch: CPU fetches the instruction at the address in PC.
    2. Execute: The instruction is decoded and executed.
    3. Update: PC is incremented to point to the next instruction.

    For example:

    MOV R0, #1   ; PC = 0x08000000
    ADD R0, R0, #1 ; PC = 0x08000004
    

    The PC increases by 4 bytes after each 32-bit instruction in Thumb-2.


    📍 How is PC (R15) different from other registers?

    RegisterPurpose
    R0–R12General-purpose
    R13Stack Pointer (SP)
    R14Link Register (LR)
    R15Program Counter (PC)

    Unlike general-purpose registers (R0–R12), you should not manipulate the PC arbitrarily unless you are doing branching, calling functions, or returning.


    🔁 Branching and PC

    Whenever we jump to a different part of the code, the PC is changed manually:

    Example:

    B   label   ; Branch to 'label', PC is updated
    BL  func    ; Branch with Link (calls a function), PC is updated
    BX  LR      ; Return from function, PC = LR
    

    🧪 Fun Fact: You Can Read the PC

    You can even read the PC value in code:

    uint32_t current_pc;
    __asm volatile("mov %0, pc" : "=r" (current_pc));
    

    This will store the current program counter into a variable.


    ⚠️ Caution: Writing to PC Directly

    Directly writing to PC can change the control flow:

    LDR PC, =0x08000400 ; Jump to 0x08000400
    

    Use this only when you’re intentionally jumping to a specific memory location (e.g., starting a bootloader or handling an exception).


    🧩 In Debugging

    When you debug Cortex-M4 code:

    • The PC register helps you see what instruction is being executed.
    • You can change PC to skip over code or re-run a part.

    🛠️ In Exception Handling

    When an interrupt or exception occurs:

    • The hardware pushes the current PC value onto the stack.
    • This is how the processor knows where to return after handling the interrupt.