
Category: Embedded

  • What is a Clock in Digital Electronics | Master Beginner’s Guide (2026)

    What is a Clock : When working with embedded systems, one of the most important but often overlooked topics is the clock system. Just like our body has a heartbeat that keeps everything in sync, a microcontroller also relies on a clock to function properly.

    In this post, we’ll break down the clock system in simple terms perfect for beginners looking to build a solid foundation in embedded development.

    What is a Clock ?

    In simple terms, a clock is a type of signal used to keep digital systems in sync. It’s like a heartbeat for electronic circuits, telling different parts when to start and stop tasks.

    Technically, a clock is a square wave signal that switches between two logic levels:

    • High (H) – represents logic 1
    • Low (L) – represents logic 0

    These transitions happen at regular intervals, creating a steady rhythm. This rhythm is crucial for coordinating operations in digital systems like microcontrollers, processors, and other integrated circuits.

    To generate this clock signal, we use a component called an oscillator.
    Think of the oscillator as the “clockmaker” —> it’s the device responsible for producing the precise timing signals that drive the entire circuit.

    What Does the MCU Do with the Clock Signal?

    On your microcontroller board (MCU), there’s a small device called an oscillator.
    This oscillator sends out a steady stream of pulses—like ticking sounds of a clock.
    For example, it might be sending 20 million ticks per second (20 MHz).

    Now the question is:
    What does the MCU actually do with those ticks?

    1. The Clock Keeps the CPU Running

    Inside the MCU, there’s a tiny computer brain called the CPU (Central Processing Unit).
    This CPU runs the program you’ve written—whether it’s blinking an LED or controlling a robot.

    But the CPU doesn’t work randomly. It moves in steps, and each step is timed using the clock.
    For every tick (or pulse) from the oscillator, the CPU performs a small part of its job.

    To run any program, the CPU repeats a 3-step cycle:

    1. Fetch – Get the instruction from memory (like reading a recipe).
    2. Decode – Understand what the instruction means (what kind of task it is).
    3. Execute – Perform the task (do the actual work like math or moving data).

    Every single line of code you write goes through these 3 steps, over and over again.
    And all of it happens in sync with the clock.

    So, faster clock = faster program execution.
    That’s why high-performance MCUs can run at clock speeds like 200–300 MHz.

    2. The Clock Also Powers the Peripherals

    An MCU isn’t just a CPU—it also includes peripherals like timers, ADCs, UARTs, and more.

    These peripherals also need the clock to function properly.
    For example:

    • A Timer uses the clock to count time and generate delays or periodic events (like a 1ms interrupt).
    • A Serial Port uses the clock to know when to send or receive data bits.

    So the clock isn’t just the CPU’s heartbeat—it’s the lifeline of the whole system.

    Boosting Clock Speed Using PLL

    Here’s an interesting twist:
    Even though the oscillator provides only 20 MHz, many MCUs can run much faster.

    How?

    They use a special module called a PLL (Phase-Locked Loop).
    PLL takes the base clock (20 MHz) and multiplies it to reach higher speeds like 200 MHz.

    So, the clock that finally runs the CPU is not always the same as what the oscillator gives.
    It’s first amplified using PLL, and then distributed to the CPU and peripherals.

    In a Nutshell:

    • The clock tells the CPU when to run each part of your program.
    • It also powers the peripherals so they work properly.
    • Faster clocks = faster MCU performance.
    • The PLL boosts the clock to reach higher speeds.

    You can think of the clock as the energy that drives everything inside the MCU.

    Here’s a more human-friendly version:

    Types of Clocks in a System:

    1. System Clock: This is the heartbeat of your system, setting the pace for how fast the processor and all other parts of your device run.
    2. Peripheral Clocks: These clocks are specialized for specific tasks. For example, they control things like timers, sensors, and communication ports (like UART or SPI) to keep everything running smoothly.
    3. Real-Time Clock (RTC): This clock is used to keep track of the actual time, like a regular calendar. It’s low power, so it can keep running even when the rest of the system is powered down, which is handy for things like logging events or setting alarms.

    Why is the Clock Important?

    Every task inside a microcontroller — from blinking an LED to sending data over UART — depends on precise timing. Without a clock, nothing would run in sync.

    Here’s why the clock is essential:

    • It defines the speed of the CPU.
    • It controls the timing of peripherals like timers, communication ports, and ADCs.
    • It affects power consumption and system performance.

    Basic Components of a Clock System

    Let’s look at the basic parts that make up a clock system:

    1. Clock Source

    This is where the clock signal originates. Common sources include:

    • Internal RC Oscillator – Built into the microcontroller, good for low-cost, less precise tasks.
    • External Crystal Oscillator – Very accurate, used when timing needs to be precise (e.g., real-time clocks or communication).

    2. System Clock (SYSCLK)

    This is the main clock used by the CPU and most of the system. It often comes from the selected clock source after processing (like through a PLL).

    3. PLL (Phase-Locked Loop)

    The PLL is used to multiply the base clock to get higher frequencies. For example, a 8 MHz crystal can be boosted to 72 MHz using a PLL.

    4. Prescalers

    Prescalers divide the clock frequency to provide slower clocks for specific modules like timers or ADCs.

    5. Clock Tree

    The clock tree distributes the clock to different parts of the microcontroller. Each branch can have different settings depending on the peripheral’s needs.

    How to Choose the Right Clock?

    Choosing the right clock source depends on:

    • Accuracy needed (crystal vs. internal).
    • Power consumption goals (lower frequency = less power).
    • Application requirements (e.g., high-speed data processing may need a faster clock).

    For example:

    • A battery-powered sensor might use a low-frequency internal oscillator to save power.
    • A USB device needs a precise 48 MHz clock, typically achieved using a PLL with an external crystal.

    Common Mistakes Beginners Make

    • Ignoring clock settings in code or configuration tools.
    • Choosing an unstable or inaccurate clock for communication protocols.
    • Not understanding how prescalers affect timing and delays.

    Pro Tip for Beginners

    When starting with a microcontroller, use the default clock settings first. Once you’re comfortable, experiment with different sources and frequencies to see how they impact the system.

    Tools like STM32CubeMX, Atmel START, or ESP-IDF menuconfig can help configure clock systems without writing low-level code.

    Follow-up interview questions based on your understanding of what is clocks ?

    Clock & MCU Related Interview Questions

    Basic Level

    1. What is the purpose of a clock signal in a microcontroller?
    2. What is the fetch-decode-execute cycle? Can you explain each step in simple terms?
    3. Why does the CPU need to be synchronized with a clock signal?
    4. What happens if the clock signal stops or becomes unstable?
    5. How does increasing the clock frequency affect the performance of the MCU?

    Intermediate Level

    1. What is the role of an oscillator in a microcontroller system?
    2. What is the difference between an internal and external clock source? When would you use each?
    3. How does a PLL (Phase-Locked Loop) work and why is it used in MCUs?
    4. What are the limitations of just increasing the clock speed in a microcontroller?
    5. Explain how a peripheral like a Timer uses the clock to generate periodic interrupts.

    Advanced Level

    1. How would you configure the clock tree in an STM32 or similar MCU using CubeMX or directly in code?
    2. Describe the impact of clock jitter on system performance, especially in ADCs or communication modules.
    3. How do power consumption and clock speed relate in embedded systems?
    4. Can you explain clock gating and how it helps in power optimization?
    5. What’s the difference between synchronous and asynchronous clocks? When would asynchronous clocks be used inside an MCU?

    Basic Level Answer :

    What is the purpose of a clock signal in a microcontroller?

    The purpose of a clock signal in a microcontroller is to provide a regular timing reference that synchronizes the operations of all internal components.
    In simple terms, the clock acts like a metronome, setting the pace for when the microcontroller fetches instructions, processes data, and communicates with peripherals.

    More specifically:

    • It controls the speed at which the microcontroller executes instructions (called the clock frequency, usually measured in MHz).
    • It coordinates timing between the CPU, memory, and peripherals so they can work together properly.
    • It ensures deterministic behavior — meaning actions happen in predictable, timed cycles, which is very important in real-time systems.

    Without a clock signal, the microcontroller wouldn’t know when to move from one operation to the next, and the system would not function correctly.

    2.What is the fetch-decode-execute cycle? Can you explain each step in simple terms?

    Ans : The fetch-decode-execute cycle is the basic process that a microcontroller (or any CPU) uses to run programs.
    You can think of it like a simple loop that happens over and over for each instruction.

    Here’s a simple explanation of each step:

    1. Fetch

    • The microcontroller reads (fetches) the next instruction from memory (usually from flash or RAM).
    • It uses a special pointer called the Program Counter (PC), which tells it where in memory the next instruction is.

    Think of it like the microcontroller picking up the next task from a to-do list.

    2. Decode

    • Once it has fetched the instruction, it figures out (decodes) what the instruction is asking it to do.
    • For example, is it an addition, a comparison, a memory load, or something else?

    This is like the microcontroller reading the task and understanding what it needs to do.

    3. Execute

    • The microcontroller carries out (executes) the instruction.
    • If the instruction says “add two numbers,” it adds them.
    • If it says “move data,” it moves it.
    • If it says “jump to a different part of the program,” it changes the Program Counter.

    This is like the microcontroller actually doing the task, like calculating a result or turning on an LED.

    Summary:
    Fetch → Get the instruction.
    Decode → Understand the instruction.
    Execute → Do the instruction.

    Then it repeats for the next instruction… and that’s how your program runs!

    3.Why does the CPU need to be synchronized with a clock signal?

    The CPU needs to be synchronized with a clock signal because it ensures that all operations happen in a controlled, predictable, and orderly manner.

    Here’s the simple idea:

    • A CPU is made of millions (or billions) of small circuits.
    • These circuits can’t all act randomly — they need to know exactly when to start and stop an operation.
    • The clock signal acts like a drumbeat, giving a steady rhythm.
    • On each clock pulse (rising or falling edge), the CPU knows it’s time to move to the next step: fetch an instruction, decode it, execute it, etc.

    If there were no clock, or if parts of the CPU moved at different timings, it would cause:

    • Incorrect operations (data might not be ready yet).
    • Race conditions (two parts fighting over the same data).
    • System crashes (because sequences would happen out of order).

    In short:

    The clock keeps everything in sync, making sure the CPU works like a perfectly timed machine.

    Real-world example:
    Imagine a group of dancers performing.
    If they don’t hear the same music beat, some will move early, some will move late — the whole performance will be a mess.
    The clock is like the music beat that keeps all dancers (circuits) in perfect harmony.

    Would you also like me to explain how different clock speeds (like 8 MHz vs 100 MHz) affect CPU performance? ⏲️🚀

    4.What happens if the clock signal stops or becomes unstable?

    If the clock signal stops or becomes unstable, here’s what happens:

    1. If the clock stops completely:

    • The CPU immediately freezes.
    • It can’t fetch, decode, or execute any more instructions.
    • The whole system halts — it’s like pressing pause on a video.
    • If it’s an embedded system (like a washing machine controller or a car ECU), the device will stop working instantly.

    Simple way to think about it:
    If the drummer in a band stops beating the drum, the whole band will be confused and stop playing.

    2. If the clock becomes unstable (irregular, noisy, glitchy):

    • Instructions might be fetched incorrectly or halfway.
    • Timing problems can cause:
      • Corrupted data.
      • Wrong instructions being executed.
      • Random system crashes (sometimes very hard to debug).
    • In embedded systems, this can lead to dangerous failures (like an airbag deploying at the wrong time or a motor running out of control).

    Simple way to think about it:
    If the drummer starts beating randomly — sometimes too fast, sometimes too slow — the band members will get out of sync, play wrong notes, and the performance will collapse.

    Summary:

    Clock ConditionResult on CPU/System
    Clock stopsSystem freezes
    Clock unstableSystem behaves unpredictably (crashes, errors, corruption)

    In real devices:

    • Designers often use watchdog timers or clock monitors to reset the system automatically if the clock fails or becomes unstable.

    5.How does increasing the clock frequency affect the performance of the MCU?

    When you increase the clock frequency of a microcontroller (MCU):

    ➔ What happens?

    • The MCU can execute more instructions per second.
    • It fetches, decodes, and executes operations faster.
    • Overall performance improves — tasks are completed more quickly.

    ✅ Example:
    If an MCU runs at 8 MHz, it can (theoretically) process 8 million cycles per second.
    If you increase it to 16 MHz, it can process 16 million cycles per second — almost double the speed.

    ➔ But there are trade-offs:

    BenefitDrawback
    Faster task executionMore power consumption
    Quicker response timeMore heat generation
    Can handle more complex programsMay cause stability issues if clocking beyond design limits

    ➔ Simple analogy:

    Clock frequency is like the heartbeat of the microcontroller.
    A faster heartbeat lets it work quicker, but tires it out faster (uses more energy and can overheat).

    ➔ Important notes:

    • In battery-powered devices (like sensors or wearables), lower frequencies are often used to save power.
    • Some MCUs allow dynamic frequency scaling — they increase speed when needed and lower it when idle to balance performance and power.

    Summary:
    🔵 Higher clock frequency = Faster MCU, but more power and heat.
    🔵 Lower clock frequency = Slower MCU, but more energy-efficient.

    You can also Visit other tutorials of Embedded Prep 

    Special thanks to @embedded-prep for contributing to this article on Embedded Prep
  • Master Microcontroller vs Microprocessor vs SoC: What’s the Difference? [2026 Guide]

    Microcontroller vs Microprocessor vs SoC : Whether you’re a beginner stepping into embedded systems or an experienced engineer brushing up on core concepts, understanding the difference between a Microcontroller (MCU), Microprocessor (MPU), and System on Chip (SoC) is crucial. These are the brains behind every smart gadget—from your smartwatch to a satellite!

    In this post, we’ll break it down simply with clear definitions, use cases, and a side-by-side comparison.

    Microcontroller vs Microprocessor vs SoC

    What is a Microcontroller (MCU)?

    A Microcontroller is a compact integrated circuit designed to perform a specific control task in embedded systems.

    Key Features:

    • Includes CPU + RAM + ROM + I/O peripherals on a single chip
    • Meant for real-time control
    • Low power, cost-effective
    • Runs simple firmware or embedded applications

    Use Cases:

    • Washing machines, microwave ovens
    • Wearables like fitness trackers
    • Automotive dashboard systems
    • Arduino-based hobby projects

    Note: Microcontrollers are ideal for small, low-power, task-specific systems.

    What is a Microprocessor (MPU)?

    A Microprocessor is a general-purpose CPU integrated into a single chip, but without built-in memory or peripherals.

    Key Features:

    • Just the CPU
    • Needs external RAM, ROM, I/O
    • Designed for high performance and complex computing
    • Used in general-purpose computing

    Use Cases:

    • Personal computers
    • Servers
    • Laptops
    • Desktop applications

    Note : Microprocessors power general computing systems requiring external memory and peripherals.

    What is a System on Chip (SoC)?

    A System on Chip combines all components of a computer—CPU, GPU, RAM, storage, wireless modules, and I/O—on a single chip.

    Key Features:

    • Combines MCU/MPU + peripherals + connectivity
    • Compact and power-efficient
    • Highly integrated
    • Custom-built for specific devices

    Use Cases:

    • Smartphones and tablets
    • IoT devices
    • Smart TVs
    • Raspberry Pi

    ✅ Note : SoCs are the powerhouse of modern smart devices combining performance and efficiency.

    Quick Comparison Table on Microcontroller vs Microprocessor vs SoC

    FeatureMicrocontroller (MCU)Microprocessor (MPU)System on Chip (SoC)
    IntegrationCPU + RAM + ROM + I/OCPU onlyCPU + GPU + Memory + I/O
    Application TypeSpecific tasks (real-time)General computingVersatile, integrated systems
    Cost & PowerLowHigherMedium to low
    PerformanceModerateHighHigh
    MemoryBuilt-inExternalBuilt-in
    Typical UseEmbedded devicesComputers, serversSmartphones, IoT, tablets

    Conclusion for Microcontroller vs Microprocessor vs SoC

    Understanding the difference between a Microcontroller, Microprocessor, and SoC helps you pick the right solution for your embedded project or product. Here’s a quick rule of thumb:

    • 🧩 Use MCU when you need low cost, low power, and a focused task
    • 💻 Use MPU when you need high computation with external resources
    • 📱 Use SoC when you want an all-in-one compact powerhouse

    Follow-up interview questions Interviewer might ask on Microcontroller vs Microprocessor vs SoC

    🔧 Microcontroller-Specific Questions:

    1. Can you name a few popular microcontrollers you’ve worked with?
    2. What are the advantages of using an MCU in real-time embedded systems?
    3. How do you program a microcontroller, and which tools have you used?
    4. What’s the difference between Harvard and Von Neumann architecture in the context of MCUs?

    🖥️ Microprocessor-Focused Questions:

    1. Why would you choose a microprocessor over a microcontroller in a design?
    2. How do you handle memory management in systems using microprocessors?
    3. What kind of operating systems typically run on microprocessor-based systems?

    📱 SoC-Related Questions:

    1. Can you give an example of a SoC you’ve worked with and what peripherals it included?
    2. What challenges have you faced while developing software for SoCs?
    3. How do SoCs support power optimization in battery-powered devices?

    🤖 System Design and Application:

    1. Suppose you have to design a smart home device. Will you choose an MCU, MPU, or SoC? Why?
    2. Have you worked on bare-metal programming or RTOS on any MCU? Explain.
    3. What are the criteria you consider while selecting between MCU, MPU, or SoC for an embedded product?

    🧠 Conceptual or Deep-Dive Questions:

    1. How does interrupt handling differ in MCUs vs MPUs?
    2. Explain the boot process for an SoC-based system.
    3. What’s the role of MMU in a microprocessor, and is it present in microcontrollers?
    4. Can you compare an SoC running Android vs an MPU running embedded Linux?

    You can also Visit other tutorials of Embedded Prep 

    Special thanks to @embedded-prep for contributing to this article on Embedded Prep
  • Master Embedded Software Roadmap for Beginners (2026 Guide)

    Embedded Software Roadmap is a clear, step-by-step guide for beginners and professionals who want to build a strong career in embedded systems.

    Are you eager to dive into the world ofembedded systems but don’t know where to start? This beginner-friendly roadmap will guide you step-by-step, from basic concepts to real-time projects, helping you build a strong foundation and become a successful embedded software engineer in 2025.

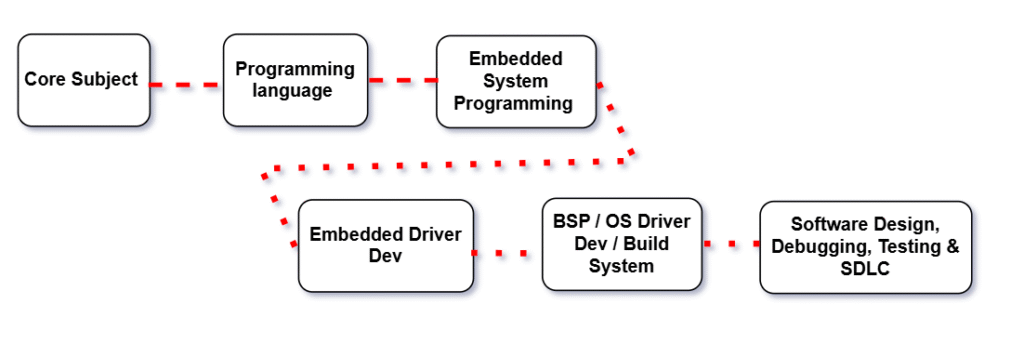
    Embedded Software Roadmap

    Embedded Software Roadmap

    Step 1: Master the Core Subjects of Embedded Systems

    1.1 Digital Electronics

    Digital Electronics is the foundation of modern computing and embedded systems. It harnesses the power of binary logic—0s and 1s—to design systems that are precise, reliable, and scalable. As the first step in the Embedded Software Roadmap, mastering digital electronics is essential. From microprocessors to embedded controllers, digital electronics enables the creation of intelligent hardware through logic gates, Boolean algebra, and state-driven systems. This knowledge sets the stage for developing efficient and robust embedded software.

    At its core, digital electronics replaces analog ambiguity with digital precision, making it the heart of systems like communication devices, automation units, robotics, and consumer electronics. By combining combinational and sequential circuits, engineers can design everything from simple adders to complex programmable logic devices like FPGAs.

    With digital design, we build the brains of technology—machines that think, decide, and act based on logic and encoded instructions. It’s not just about electronics—it’s about empowering innovation through logical architecture.

    Understand how electronic signals represent data:

    • Number systems: Binary, Hexadecimal, BCD
    • Logic Gates: AND, OR, NOT, NAND, NOR, XOR
    • Flip-Flops and Registers
    • Combinational vs Sequential Circuits
    • Multiplexers, Encoders, Decoders

    Popular Microcontrollers to Explore:

    • AVR: ATmega328P (used in Arduino)
    • ARM: STM32, ESP32, nRF52

    1.2 Operating Systems (OS)

    Digital Electronics is the foundation of modern computing and embedded systems. It harnesses the power of binary logic—0s and 1s—to design systems that are precise, reliable, and scalable. As the first step in the Embedded Software Roadmap, mastering digital electronics is essential. From microprocessors to embedded controllers, digital electronics enables the creation of intelligent hardware through logic gates, Boolean algebra, and state-driven systems. This knowledge sets the stage for developing efficient and robust embedded software.

    As we move forward in the Embedded Software Roadmap, we encounter the critical role of Operating Systems.

    An Operating System (OS) is the unseen force that transforms hardware into a functional and responsive digital environment. Acting as the central coordinator, it manages everything—from running applications and allocating memory to handling user input and controlling hardware components.

    It provides an abstraction layer, allowing developers and users to interact with complex machines through simple, intuitive interfaces. Whether it’s scheduling tasks, managing filesystems, or ensuring secure multitasking, the OS silently enforces structure and efficiency beneath every click and tap.

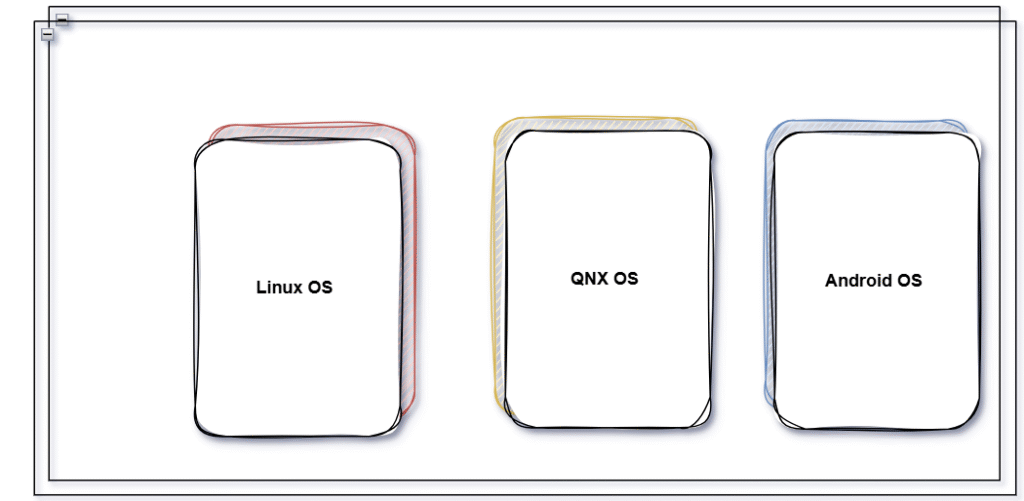
    From real-time embedded platforms like FreeRTOS, QNX, and VxWorks to general-purpose systems like Linux, Windows, and macOS, Operating Systems are not just software—they are digital ecosystems that balance performance, reliability, and usability.

    Why it’s important: Many embedded systems run on RTOS (like FreeRTOS, VxWorks) or Embedded Linux. Understanding OS concepts helps you manage processes, memory, and scheduling efficiently.

    Topics to Cover:

    • Process vs Thread
    • Memory Management (Heap, Stack, Paging)
    • CPU Scheduling Algorithms
    • Interprocess Communication (IPC): semaphores, mutex, pipes
    • Real-Time Operating Systems (RTOS): concepts of tasks, preemption, priority inversion
    • Embedded Linux basics: init system, daemons, file system layout

    1.3 Computer Architecture

    Computer Architecture defines the conceptual design and operational framework of a computer system. It is the strategic art of organizing hardware components and establishing how they interact to execute instructions efficiently and reliably.

    In the Embedded Software Roadmap, understanding computer architecture is a critical step—especially for developers working close to the hardware. This architectural blueprint includes the internal structure of the CPU—such as the control unit, ALU, and registers—as well as memory hierarchy, I/O mechanisms, and instruction sets. It governs how software communicates with hardware, how data moves through the system, and how performance can be improved using techniques like pipelining, caching, and parallel processing.

    Why it matters: Embedded development often involves bare-metal programming, writing assembly code, or optimizing C/C++ for resource-constrained environments. A solid grasp of computer architecture empowers developers to write efficient code, debug at the hardware level, and fine-tune performance for real-time applications.

    In essence, computer architecture transforms raw silicon into a purposeful computing engine—balancing speed, power, and scalability to meet the demands of modern embedded systems..

    Topics to Cover:

    • Instruction Set Architecture (ISA): RISC vs CISC
    • ARM Cortex-M and ARMv7 architecture
    • Registers, ALU, Control Unit
    • Pipelining and hazards
    • Caches (L1/L2), memory hierarchy
    • Memory-mapped I/O
    • Endianness

    1.4 Computer Networks

    As embedded systems evolve, connectivity becomes increasingly vital. Computer Networks form the backbone of modern communication, enabling devices to share data, resources, and services—whether they’re part of a smart home, a vehicle, or a global cloud infrastructure.

    In the Embedded Software Roadmap, understanding computer networks is crucial for building connected and intelligent embedded systems. Networks are built on layered protocols, starting from physical connections and data link layers to higher-level transport and application services. These layers work together to define how information is packaged, transmitted, routed, and received reliably and securely.

    From wired LANs in industrial automation to wireless technologies powering IoT ecosystems, networks allow embedded devices to interact in real-time, share sensor data, receive firmware updates, and integrate with cloud platforms.

    Why it’s important: Many modern embedded systems are no longer standalone. Devices often operate as part of a larger connected environment, making it essential to understand networking protocols like TCP/IP, UDP, MQTT, HTTP, and Bluetooth. This knowledge allows developers to implement secure, scalable, and efficient communication in embedded applications.

    More than just infrastructure, computer networks serve as the digital nervous system of embedded and IoT applications—ensuring smooth, synchronized, and intelligent operations across distributed systems.

    Topics to Cover:

    • OSI Model and TCP/IP
    • IP, UDP, TCP – Packet structures, handshakes
    • HTTP/HTTPS protocols
    • MQTT and CoAP (for IoT)
    • Bluetooth, Wi-Fi, ZigBee (basic wireless comm.)
    • Socket programming basics

    Step 2: Master the Programming Language

    At the heart of embedded software development lies programming languages—tools that transform ideas into functional systems. In the Embedded Software Roadmap, mastering the right programming languages is a fundamental step. These languages enable developers to write efficient, optimized code that directly controls hardware and processes data in real-time.

    For embedded systems, C and C++ are the most widely used languages due to their efficiency, low-level hardware access, and performance. C is often preferred for bare-metal development because it allows precise control over system resources, while C++ introduces object-oriented features that enhance code structure, maintainability, and scalability.

    In addition to C/C++, many embedded developers also explore Python for higher-level tasks like testing, automation, and scripting, as well as Assembly for low-level performance tuning. Understanding these languages provides the flexibility to tackle various embedded development challenges, whether you’re programming microcontrollers, designing device drivers, or developing real-time applications.

    Why it’s important: Mastery of these languages allows embedded engineers to write efficient, low-level code that interacts directly with hardware, ensuring fast execution and minimal resource consumption. Additionally, knowledge of object-oriented programming in C++ supports building modular and maintainable systems, which is crucial for complex embedded projects.

    In essence, mastering programming languages empowers embedded software engineers to translate hardware requirements into functional code—balancing performance, resource utilization, and reliability in every line of code.

    2.1 Start with Embedded C Programming

    Why C?
    C is the de facto standard for embedded development because of its:

    • Low-level access to memory (pointers)
    • Speed and minimal overhead
    • Hardware-level register manipulation
    • Portability across microcontrollers

    Topics to Master in C:

    Basics:

    • Data types (uint8_t, uint16_t, etc. from <stdint.h>)
    • Operators, Control flow, Functions

    Intermediate:

    • Pointers, Arrays, Strings
    • Bitwise operations (|, &, ^, ~, <<, >>)
    • Structs, Enums, Typedef
    • Header files and Modular programming
    • Makefiles and Compilation

    Advanced:

    • Memory management: Stack vs Heap
    • const, volatile, static, extern
    • Inline functions, Macros, Preprocessor directives
    • Interrupt Service Routines (ISRs) in C
    • Working with hardware registers (*(volatile uint32_t*)0x40021000 = 0x01;)
    Category Topics Notes / Relevance
    Basics of C Introduction to C
    Data Types, Variables, Constants
    Operators: Arithmetic, Relational, Logical, Bitwise, Assignment
    Expressions & Precedence
    Input/Output functions (printf, scanf)
    Comments & Coding Standards
    Foundation for Embedded C programming
    Control Statements if, if-else, nested if
    switch-case
    Loops: for, while, do-while
    break, continue, goto statements
    Essential for program flow and decision-making
    Functions Function declaration & definition
    Parameter passing: by value, by reference
    Recursion
    Inline functions
    Library functions & custom headers
    Code modularity and reusability in embedded projects
    Arrays & Strings Single & Multidimensional arrays
    String handling & manipulation
    Memory considerations in embedded systems
    Used for data storage and sensor/memory interfacing
    Pointers & Memory Management Pointer basics & arithmetic
    Pointers with arrays, strings, and functions
    Dynamic memory allocation: malloc, calloc, free
    Memory-mapped I/O in embedded systems
    Critical for efficient memory use and hardware interfacing
    Structures & Unions struct declaration & usage
    Nested structs
    Union & enum usage
    Bit-fields for memory optimization
    Typedef usage
    Used for organizing sensor data, registers, and peripherals
    Preprocessor Directives #define, #include
    Conditional Compilation: #ifdef, #ifndef, #endif
    Macro functions
    Used for portable embedded code and configuration
    Bitwise Programming Bitwise Operators: &, |, ^, ~, <<, >>
    Bit masking, setting, clearing, toggling bits
    Shifting for efficient operations
    Flags & status registers handling
    Essential for registers, GPIO, and low-level MCU control
    Embedded-Specific Topics Volatile keyword & its importance
    Register-level programming
    Interrupt Service Routines (ISR) basics
    GPIO, ADC, DAC, PWM interfacing
    Timer & counter programming
    Memory-mapped I/O
    Watchdog timer usage
    Direct MCU programming and real-time embedded applications
    File Handling & EEPROM/Flash File handling in C (for RTOS/host environment)
    Reading/writing persistent memory
    EEPROM/Flash interfacing
    Persistent storage for embedded systems
    Advanced Embedded C Concepts Memory alignment & padding
    Inline assembly in C
    Using const, static, extern effectively
    Real-Time Operating System (RTOS) integration basics
    Modular programming & header/source file structure
    Advanced control over performance, memory, and RTOS integration
    Debugging & Testing Using GDB for embedded systems
    Unit testing with Google Test or Ceedling
    Using serial debugging (UART)
    LED and buzzer debugging
    Watchpoints, breakpoints, and logging
    Critical for reliable embedded software development

    Step 2.1: C++

    Once you’ve got a handle on C, it’s time to go deeper into C++, which is widely used in automotive, RTOS-based, and IoT embedded systems.

    a)Learn Basic C++

    Keywords: basic C++ tutorial, C++ syntax, C++ for beginners

    Start with the fundamentals:

    • Data types & variables
    • Conditionals and loops
    • Functions and recursion
    • Arrays and strings
    • Pointers and references
    • Dynamic memory (new, delete)
    • Namespaces, inline functions, function overloading

    🎯 Practice via platforms like LeetCode, HackerRank, or using mini console-based apps.

    b) Understand OOPs Concepts

    In the world of embedded software development, Object-Oriented Programming (OOP) is a powerful design paradigm that structures code around real-world entities. Instead of focusing solely on procedures or functions, OOP organizes software into objects—modular, reusable units that encapsulate both data and behavior. This approach makes the code more intuitive, maintainable, and scalable.

    In the Embedded Software Roadmap, understanding OOP concepts like encapsulation, inheritance, polymorphism, and abstraction is essential for developing robust embedded systems, especially as applications grow in complexity. By focusing on what things are (objects) and what they do (methods), developers can model real-world systems more naturally, improving both code readability and flexibility.

    Why it’s important: For embedded systems, OOP allows you to write cleaner, more organized code. It enables better reuse of software components, which can be critical when developing complex systems with limited resources. By applying OOP principles, embedded developers can design more scalable and maintainable systems, while also reducing errors and simplifying debugging.

    In essence, mastering OOP in embedded software development provides the tools to design systems that are not only functional but also easier to manage and extend over time—ensuring long-term efficiency and adaptability.

    Object-Oriented Programming is what gives C++ its real power.

    • Classes and Objects
    • Encapsulation, Abstraction
    • Inheritance (single, multiple, hybrid)
    • Polymorphism (compile-time & runtime)
    • Constructors and Destructors
    • this pointer, friend functions, operator overloading
    • const, static, virtual, pure virtual functions

    Note: In embedded, avoid dynamic memory allocation and deep inheritance trees.

    c)Learn STL (Standard Template Library)

    The Standard Template Library (STL) is a powerful feature of C++ that brings the elegance of generic programming to everyday development. It offers a rich set of predefined classes and functions—ready to manage data structures and algorithms with optimal efficiency and minimal effort.

    STL is useful even in high-end embedded systems or while writing test utilities.

    Key STL components to learn:

    • Containers: vector, list, deque, stack, queue, set, map
    • Algorithms: sort, find, count, accumulate, for_each
    • Iterators: Input, Output, Forward, Bidirectional, Random access
    • Function Objects & Lambda Expressions
    • Templates: Function and class templates

    d)Practice DSA (Data Structures & Algorithms)

    Data Structures and Algorithms (DSA) form the strategic core of software development, providing the tools and techniques needed to organize data and solve problems efficiently. While data structures define how information is stored, algorithms dictate the logic to process and transform it.

    From managing dynamic memory with linked lists and trees to optimizing decisions through sorting, searching, and graph traversal, DSA equips developers to think critically and code smartly. It transforms brute-force solutions into optimized, scalable approaches—essential in everything from system design to real-time applications.

    Mastering DSA isn’t just about writing code—it’s about developing a problem-solving mindset that balances time, space, and logic to build high-performance software in the real world.

    Embedded engineers may not need complex DSA every day, but knowing it improves problem-solving and code quality.

    Topics to master:

    • Arrays, Strings, Linked Lists
    • Stacks, Queues
    • Trees, Graphs, Tries
    • Sorting Algorithms: Quick, Merge, Insertion, Selection
    • Searching: Binary search, Linear search
    • Hashing
    • Recursion and Dynamic Programming

    🎯 Practice on Codeforces, LeetCode, and GeeksforGeeks.

    💛 Support Embedded Prep

    If you find our tutorials helpful and want to support our mission of sharing high-quality embedded system knowledge, you can contribute by buying us a coffee. Every small contribution helps us keep creating valuable content for learners like you. ☕

    Thank you for your support — it truly keeps Embedded Prep growing. 💻✨

    e)Build a C++ Project Using Qt

    Creating a C++ project with Qt is the perfect fusion of high-performance backend logic and a powerful cross-platform GUI framework. Qt empowers developers to bring their C++ code to life with intuitive interfaces, event-driven programming, and modular architecture.

    In this approach, core functionality is implemented using the robustness of C++, while Qt handles the presentation layer through its flexible widgets, signals and slots mechanism, and UI design tools. Whether it’s a data visualization dashboard, a custom tool, or a real-time system monitor, Qt makes it easy to integrate rich user experiences with efficient native code.

    Building a project with Qt not only sharpens object-oriented programming skills but also teaches practical concepts like multi-threading, event handling, resource management, and cross-platform deployment—all in a unified development environment.

    Qt is widely used in embedded GUIs (especially for infotainment, industrial devices, dashboards).

    Steps:

    • Install Qt Creator and set up a CMake-based project
    • Learn Qt Widgets or QML for UI
    • Connect buttons, sliders, and sensors using signals and slots
    • Use multithreading with QThread or QtConcurrent
    • Integrate serial communication with QSerialPort (to talk to microcontrollers)
    • Apply OOP design patterns (Observer, Singleton, etc.)

    Project Ideas:

    • Sensor Dashboard using Serial + Plot
    • Embedded Device Simulator (LEDs, buttons)
    • Audio Player UI (with QMediaPlayer)
    • Home automation GUI to control ESP32/Arduino via serial

    🛠 Bonus: Try to cross-compile the Qt app for ARM/Linux target (e.g., Raspberry Pi or BeagleBone).on bare-metal safe subsets.

    2.3 Assembly Language (Bonus)

    Assembly Language is the closest human-readable form of programming that directly interacts with a system’s hardware. It acts as a thin layer between machine code and high-level programming, providing fine-grained control over a processor’s operations.

    Each instruction in Assembly corresponds to a single machine-level command, allowing developers to manipulate registers, memory addresses, I/O ports, and control flow with exact precision. This low-level access makes Assembly indispensable for performance-critical, time-sensitive, and resource-constrained environments such as embedded systems, operating systems, and device drivers.

    Learning Assembly Language offers deep insights into CPU architecture, instruction sets, and how software translates into actual machine operations. It is not just a programming tool—it’s a window into the very core of computing.

    When ultra-precise control is needed:

    • Learn basic ARM Cortex-M Assembly (or AVR)
    • Understand registers, stack frames
    • Learn how to optimize critical sections

    2.4 Python for Embedded Automation and Tools

    Python has become an indispensable tool in the embedded systems world, offering a high-level language that enhances productivity while maintaining the low-level precision required for embedded automation. By leveraging Python in embedded environments, developers can rapidly prototype, automate processes, and streamline toolchains without sacrificing performance.

    Python excels in creating custom automation scripts, interacting with hardware interfaces, and building tooling that simplifies development workflows. Whether it’s controlling GPIO pins, interfacing with sensors, or automating testing procedures, Python brings simplicity and flexibility to embedded systems, making tasks like data logging, hardware testing, and system monitoring much more efficient.

    With libraries such as RPi.GPIO, PySerial, and PyTest, Python enables seamless integration between embedded platforms and the tools used for development, testing, and debugging. It’s the perfect language for rapid development and automation, bridging the gap between embedded hardware and sophisticated software control.

    Python isn’t usually used directly on MCUs but is great for:

    • Writing test scripts for embedded hardware
    • Serial communication (pyserial)
    • Parsing logs, files, and test reports
    • GUI with Tkinter or PyQt
    • Data plotting with matplotlib

    Embedded Use Cases:

    • Automate firmware flashing over USB/UART
    • Data logger scripts
    • Backend control panel for IoT devices
    • Unit test automation

    2.5 Shell Scripting (Bash) for Embedded Linux

    Shell scripting, particularly with Bash, is a powerful and flexible tool for managing and automating tasks in Embedded Linux environments. It allows developers to streamline system administration, automate device configurations, and control the boot process—all through simple, concise commands.

    In the realm of embedded systems, Bash scripts serve as the bridge between hardware and software, facilitating tasks like system startup configuration, file manipulation, hardware diagnostics, and process management. The efficiency of Bash lies in its ability to manipulate files, manage system resources, and interact with the Linux kernel—all without needing to write complex C code.

    A must-have for embedded Linux developers:

    • Basics: if, for, while, variables, functions
    • File operations, logging, redirections
    • Using grep, awk, sed, cut
    • Automate build, flash, and deploy pipelines
    • Write scripts to configure GPIO, I2C, or SPI on Linux boards

    Used heavily in Yocto, Buildroot, init scripts, and service management.

    Step 3: Systems Programming and Embedded Driver Development with ARM Cortex M3/M4

    Microcontroller & Peripheral Programming

    Basic Embeddded Topic

    Note : To gain a deeper understanding of Systems Programming on ARM Cortex-M3/M4 MPU, it is highly recommended to engage in hands-on practical exercises

    Communication Protocol

    • I2C
    • SPI
    • UART / USART
    • I2S
    • TC/IP
    • UDP
    • Ethernet
    • CAN
    • LIN
    • BT / WIFI / USB

    Note : For an in-depth understanding, consider mastering microcontroller development with a focus on embedded driver development, including I2C, GPIO, USART, timers, PWM, CAN, RTC, STM32-LTDC, LCD-TFT, and LVGL.

    Popular MCUs to practice:

    • Atmega328p (Arduino Uno)
    • STM32F103, STM32F4 series
    • ESP32 (for Wi-Fi + BLE)
    • NXP, Renesas, TI MCUs

    Complete Electronics Core Topics Every Embedded Software Engineer Must Know (ECE/EEE)

    Category Topics Notes / Relevance
    Basic Electrical & Electronics Voltage, Current, Resistance, Power, Energy
    Ohm’s Law & Kirchhoff’s Laws
    Series & Parallel Circuits
    AC & DC Fundamentals, RMS & Peak values
    Passive Components: Resistors, Capacitors, Inductors
    Semiconductors: Diodes, LEDs, BJTs, MOSFETs
    Voltage dividers, RC/RL/RLC circuits
    Foundation for understanding circuits and embedded interfacing
    Digital Electronics & Logic Design Number Systems: Binary, Octal, Hexadecimal, BCD
    Logic Gates: AND, OR, NOT, NAND, NOR, XOR, XNOR
    Boolean Algebra, Truth Tables
    Combinational Logic: MUX, DEMUX, Encoders, Decoders
    Sequential Logic: Flip-Flops, Latches, Counters, Registers
    Timers & Oscillators (e.g., 555 Timer)
    Core for MCU programming, GPIO, interrupts, and logic circuits
    Microcontrollers & Microprocessors MCU vs MPU Architecture
    GPIO, Input/Output Interfacing
    Timers & PWM
    Interrupts: External & Internal
    Communication Protocols: UART, SPI, I2C, CAN, USB, Ethernet
    Embedded-specific hardware control and communication
    Analog Electronics Operational Amplifiers (Buffer, Comparator)
    Filters: Low-pass, High-pass, Band-pass
    Signal Conditioning: Amplification, Level Shifting
    ADC & DAC basics
    Sensor interfacing, analog signal processing, and data conversion
    Power & Electronics Power Supplies: Linear & Switching
    Voltage Levels: 3.3V, 5V, 12V
    Battery Basics (Li-ion, NiMH, Lead-Acid)
    Power Sequencing & Protection: Fuses, ESD, Decoupling Capacitors
    Ensures safe operation of embedded hardware
    Sensors & Actuators Sensors: Temperature, Humidity, Motion, Gas, Light, Pressure
    Actuators: Motors (DC, Stepper, Servo), Relays, Solenoids
    Interfacing: GPIO, ADC, PWM, Signal Levels
    Essential for real-world embedded projects and IoT applications
    Communication & Signal Theory Modulation Basics: AM, FM, Pulse
    Serial Communication: RS232, RS485, UART, SPI, I2C, CAN
    Data Conversion: ADC/DAC
    EMI/EMC Basics
    Reliable communication and understanding noise in embedded systems
    Embedded-Specific Topics Switch Debouncing (Hardware & Software)
    Level Shifting (3.3V ↔ 5V)
    Low Power Electronics & Sleep Modes
    PCB Reading & Pinout Understanding
    Critical for MCU design, debugging, and power-efficient applications

    Step 4: Driver Development on the Operating System (OS) and Build System

    Driver Development on the Operating System

    Linux System Programming , Kernel Programming and Drivers devlopment

    • Linux Kernel Architecture
    • Kernel Modules
    • Device Drivers Overview
    • Character Device Drivers
    • Block Device Drivers
    • Interrupt Handling in Linux
    • GPIO Driver Development
    • I2C Driver Development
    • SPI Driver Development
    • UART Driver Development
    • PWM Driver Development
    • DMA in Linux Drivers
    • Power Management in Linux Drivers
    • File Operations in Device Drivers
    • Linux Kernel Debugging (using dmesg, gdb, etc.)
    • System Calls & User Space Communication
    • PCIe Device Drivers
    • USB Device Drivers
    • Networking Drivers
    • Device Tree & DTS files

    RTOS (Real-Time Operating System) [FreeRTOS or QNX]

    • RTOS Architecture & Basics
    • Task Scheduling in RTOS
    • Interrupt Handling in RTOS
    • RTOS Memory Management
    • Semaphore, Mutex, and Event Flags
    • RTOS Timers
    • RTOS for Embedded Systems
    • Bare-Metal vs RTOS Applications
    • RTOS Device Drivers
    • RTOS-Specific I/O Driver Development
    • RTOS with FreeRTOS / embOS / Micrium
    • Inter-Process Communication in RTOS
    • RTOS Power Management
    • RTOS Porting to Custom Hardware
    • RTOS and Network Stack Integration (e.g., lwIP)

    QNX Interview Question Link : Master QNX OS Interview Questions

    Bootloaders

    • Boot Process Overview
    • U-Boot Basics
    • Customizing U-Boot for Embedded Systems
    • Bootloader Initialization
    • Bootloader Device Drivers
    • Bootloader and Kernel Image Management
    • Bootloader for Flash Memory
    • Bootloader Debugging and Troubleshooting

    Compiler & Toolchain (GCC)

    • GCC Command-line Options
    • GCC Compilation Stages (Preprocessing, Compilation, Assembly, Linking)
    • Cross Compilation
    • Linking and Object Files (.o, .a, .so)
    • Optimization Flags
    • Debug Flags & Symbols (-g, -O0 to -O3)
    • Linker Scripts (Basics)
    • Toolchain Components: as, ld, objdump, nm, readelf

    Build System

    • Makefile Basics
    • Makefile Variables, Targets, and Rules
    • Makefile for Embedded Projects
    • CMake Basics
    • Writing CMakeLists.txt
    • CMake vs Make
    • Cross-compilation with CMake

    Bash Scripting

    • Shell Scripting Basics
    • Conditional Statements and Loops
    • Functions in Shell
    • Script for Build Automation
    • Script for Device Flashing
    • Logging and Error Handling in Scripts

    Docker

    • Docker Basics & Architecture
    • Creating Dockerfiles
    • Docker Images vs Containers
    • Building and Running Embedded Dev Environments
    • Docker Volumes and Networking
    • Using Docker for Cross-compilation
    • Docker Compose (Optional)

    Yocto Project

    • Yocto Basics & Directory Structure
    • BitBake and Recipes
    • Layers, Metadata, and Machine Config
    • Writing a Simple BitBake Recipe
    • Adding a Custom Layer
    • Building a Minimal Linux Image
    • Adding Kernel Modules or Drivers
    • Deploying to Hardware
    • Yocto with U-Boot & Device Tree
    • Debugging Yocto Builds

    Step 5: Software Design, Debugging, Testing & SDLC

    Design & Architecture

    • UML Diagrams (Use Case, Class, Sequence, Activity)
    • UML State Machine Diagrams
    • Finite State Machines (FSM)
    • Software Architecture Patterns (Layered, Modular, etc.)
    • Real-Time System Design Concepts

    Version Control

    • Git Basics (clone, commit, push, pull)
    • Branching & Merging
    • Git Workflow (Feature Branch, Git Flow)
    • Conflict Resolution
    • Git Rebase vs Merge
    • Git Tags and Releases

    Debugging Tools

    • SWD (Serial Wire Debug)
    • JTAG (Joint Test Action Group)
    • GDB Basics and Commands
    • Remote Debugging with GDB
    • Breakpoints, Watchpoints, Backtrace
    • Disassembly and Register Inspection
    • Debugging on Bare-Metal & RTOS

    SDLC (Software Development Life Cycle)

    • Requirements Analysis
    • Design Phase
    • Implementation Phase
    • Testing & Integration
    • Maintenance Phase
    • Agile Model
    • Waterfall Model (for comparison)

    Testing & Quality

    • Test Driven Development (TDD)
    • Unit Testing Frameworks (Google Test, Unity)
    • Integration Testing Basics
    • System Testing
    • Static Code Analysis Tools (Cppcheck, Clang-Tidy, PC-lint)
    • MISRA-C / MISRA-C++ Guidelines
    • Code Coverage Tools
    • Continuous Integration Basics (Jenkins, GitHub Actions)

    Test Equipment Usage

    • Using a Multimeter (Voltage, Current, Continuity)
    • Using a Logic Analyzer (Protocol Decoding: UART, SPI, I2C)
    • Using an Oscilloscope (Waveform Analysis, Triggering, Noise Detection)
    • Using Power Supply and Lab Tools Safely

    Board Bring-up Skills

    • Power-On Checks and Voltage Rails
    • Clock Signal Verification
    • Reset Circuit Validation
    • Boot Logs & Serial Debugging
    • Flashing Bootloaders and Firmware
    • Verifying Peripheral Functionality
    • Connectivity Tests (USB, Ethernet, CAN)
    • Interface Testing (UART, I2C, SPI, GPIO)

    Step 6: Embedded System Job Roles

    Core Embedded Development

    • Embedded Software Engineer
    • Firmware Engineer
    • Embedded Systems Developer
    • Bare-metal Embedded Developer
    • RTOS Developer

    Application & Middleware

    • Embedded C++ Application Developer
    • Middleware Software Engineer
    • Qt Application Developer (for GUI on embedded devices)
    • HMI Developer (Human Machine Interface)

    Driver and OS Layer

    • Linux Device Driver Developer
    • Kernel Developer (Linux/RTOS)
    • Board Support Package (BSP) Engineer
    • Embedded Linux Engineer
    • RTOS Kernel/Porting Engineer

    Communication & Protocols

    • Protocol Stack Developer (CAN, UDS, TCP/IP, etc.)
    • IoT Firmware Developer
    • Connectivity Engineer (Bluetooth, Zigbee, Wi-Fi, LoRa)
    • Wireless Communication Engineer

    Testing and QA

    • Embedded Test Engineer
    • Validation & Verification Engineer
    • Hardware-in-the-Loop (HIL) Test Engineer
    • Automation Test Engineer (Python, Robot Framework)
    • Software Quality Engineer (Static/Dynamic Analysis)

    Debug & Diagnostics

    • Embedded Debugging Engineer
    • Field Application Engineer (FAE)
    • Diagnostics Software Engineer (UDS, ISO 14229)

    Hardware-Software Co-design

    • Embedded Hardware Engineer
    • FPGA Developer (Verilog/VHDL)
    • SoC Integration Engineer
    • PCB Bring-up and Debug Engineer

    AI/ML and Embedded Intelligence

    • Embedded AI/ML Developer (TinyML)
    • Edge Computing Engineer
    • Vision-based Embedded Developer (OpenCV, TensorFlow Lite)

    Build, Release, and Automation

    • Yocto Build Engineer
    • DevOps for Embedded Systems
    • CI/CD Engineer (for Embedded Projects)
    • Toolchain & Compiler Specialist

    Project Management & Process

    • Embedded Project Manager
    • Scrum Master (for Embedded Teams)
    • ASPICE/AUTOSAR Compliance Engineer

    Special thanks to @mr-raj for contributing to this article on Embedded Prep

    S.No Question
    1What is embedded C?
    2What is an embedded system?
    3Differentiate between a microprocessor and a microcontroller.
    4Explain the various data types in C used for embedded systems.
    5What are the basic differences between C and embedded C?
    6How do you declare a constant in embedded C?
    7What is the keyword “volatile” used for in embedded C?
    8Explain the difference between static and dynamic memory allocation in embedded C.
    9What is an interrupt and how is it handled in embedded C?
    10Explain the concept of polling versus interrupt-driven I/O.
    11How do you perform bitwise operations in embedded C?
    12Describe the process of creating a delay in embedded C.
    13What is the significance of the “restrict” keyword in embedded C?
    14Explain the purpose of the “const” keyword in embedded C.
    15How do you declare and use a pointer in embedded C?
    16What is a structure in embedded C and how is it used?
    17Describe the role of the “typedef” keyword in embedded C.
    18Explain the concept of bit fields in embedded C.
    19What is a union and how is it used in embedded C?
    20What are the advantages of using bit manipulation in embedded C?
    21Describe the “volatile” keyword and its importance in embedded C.
    22Explain the concept of portability in embedded C programming.
    23How do you implement a circular buffer in embedded C?
    24What is the difference between little-endian and big-endian byte ordering in embedded systems?
    25How do you implement a finite state machine in embedded C?
    26Describe the process of handling errors in embedded C programming.
    27Explain the role of the linker in embedded C programming.
    28What is the significance of the “extern” keyword in embedded C?
    29How do you perform input/output operations in embedded C?
    30Describe the concept of real-time operating systems (RTOS) in embedded C.
    31How do you handle multi-threading in embedded C?
    32What is the purpose of the “inline” keyword in embedded C?
    33Explain the concept of interrupt latency in embedded systems.
    34How do you implement a watchdog timer in embedded C?
    35Describe the process of programming timers in embedded C.
    36What are the different types of memory available in embedded systems?
    37How do you perform memory-mapped I/O in embedded C?
    38Explain the concept of DMA (Direct Memory Access) in embedded systems.
    39How do you handle endianness issues in embedded C?
    40Describe the process of implementing a software stack in embedded C.
    41What is the role of a bootloader in embedded systems?
    42How do you debug embedded C code?
    43Explain the concept of cache memory and its impact on embedded systems.
    44How do you handle floating-point arithmetic in embedded C?
    45Describe the process of implementing a communication protocol in embedded C.
    46What is the role of the startup code in embedded systems?
    47How do you perform memory alignment in embedded C?
    48Explain the concept of memory-mapped peripherals in embedded systems.
    49How do you handle power management in embedded C?
    50Describe the process of implementing a state machine in embedded C.
    51What is a pointer-to-function in embedded C?
    52How do you perform code optimization in embedded C?
    53Explain the concept of real-time scheduling in embedded systems.
    54How do you implement a circular linked list in embedded C?
    55Describe the process of implementing a hardware driver in embedded C.
    56What is the role of the stack pointer in embedded systems?
    57How do you perform memory pooling in embedded C?
    58Explain the concept of hardware-software co-design in embedded systems.
    59How do you handle multi-tasking in embedded C?
    60Describe the process of implementing a state transition table in embedded C.
    61What is the role of the program counter in embedded systems?
    62How do you perform fixed-point arithmetic in embedded C?
    63Explain the concept of real-time constraints in embedded systems.
    64How do you implement a priority queue in embedded C?
    65Describe the process of implementing a device driver in embedded C.
    66What is the role of the status register in embedded systems?
    67How do you perform memory-mapped file I/O in embedded C?
    68Explain the concept of multi-core processing in embedded systems.
    69How do you handle concurrency issues in embedded C?
    70Describe the process of implementing a message passing mechanism in embedded C.
    71What is the role of the interrupt vector table in embedded systems?
    72How do you perform fixed-size memory allocation in embedded C?
    73Explain the concept of real-time task synchronization in embedded systems.
    74How do you implement a priority-based scheduler in embedded C?
    75Describe the process of implementing a file system in embedded C.
    76What is the role of the system control register in embedded systems?
    77How do you perform memory-mapped I/O with direct addressing in embedded C?
    78Explain the concept of hardware acceleration in embedded systems.
    79How do you handle resource contention in embedded C?
    80Describe the process of implementing a power management scheme in embedded C.
    81What is the role of the interrupt service routine in embedded systems?
    82How do you perform dynamic memory allocation in embedded C?
    83Explain the concept of real-time task synchronization using semaphores in embedded systems.
    84How do you implement a round-robin scheduler in embedded C?
    85Describe the process of implementing a communication protocol stack in embedded C.
    86What is the role of the memory management unit in embedded systems?
    87How do you perform memory-mapped I/O with indirect addressing in embedded C?
    88Explain the concept of hardware/software partitioning in embedded systems.
    89How do you handle inter-process communication in embedded C?
    90Describe the process of implementing a real-time operating system kernel in embedded C.
    91What is the role of the system timer in embedded systems?
    92How do you perform memory-mapped I/O with bank switching in embedded C?
    93Explain the concept of hardware verification in embedded systems.
    94How do you handle synchronization issues in embedded C?
    95Describe the process of implementing a memory management scheme in embedded C.
    96What is the role of the interrupt controller in embedded systems?
    97How do you perform memory-mapped I/O with memory-mapped registers in embedded C?
    98Explain the concept of hardware-in-the-loop testing in embedded systems.
    99How do you handle real-time constraints in embedded C?
    100Describe the process of implementing a task scheduler in embedded C.
    101What is the role of the watchdog timer in embedded systems?
    102How do you perform memory-mapped I/O with memory-mapped files in embedded C?
    103Explain the concept of hardware debugging in embedded systems.
    104How do you handle exception handling in embedded C?
    105Describe the process of implementing a device driver framework in embedded C.
    106What is the role of the reset vector in embedded systems?
    107How do you perform memory-mapped I/O with memory-mapped peripherals in embedded C?
    108Explain the concept of hardware emulation in embedded systems.
    109How do you handle real-time task synchronization using message queues in embedded C?
    110Describe the process of implementing a real-time scheduler in embedded C.
    111What is the role of the memory protection unit in embedded systems?
    112How do you perform memory-mapped I/O with memory-mapped ports in embedded C?
    113Explain the concept of hardware co-simulation in embedded systems.
    114How do you handle real-time task synchronization using event flags in embedded C?
    115Describe the process of implementing a fault-tolerant system in embedded C.
    116What is the role of the power management unit in embedded systems?
    117How do you perform memory-mapped I/O with memory-mapped devices in embedded C?
    118Explain the concept of hardware validation in embedded systems.
    119How do you handle real-time task synchronization using mutexes in embedded C?
    120Describe the process of implementing a real-time communication protocol in embedded C.
    121What is the role of the memory controller in embedded systems?
    122How do you perform memory-mapped I/O with memory-mapped buffers in embedded C?
    123Explain the concept of hardware synthesis in embedded systems.
    124How do you handle real-time task synchronization using condition variables in embedded C?
    125Describe the process of implementing a real-time file system in embedded C.
    126What is the role of the peripheral controller in embedded systems?
    127How do you perform memory-mapped I/O with memory-mapped displays in embedded C?
    128Explain the concept of hardware modelling in embedded systems.
    129How do you handle real-time task synchronization using semaphores and priority inversion in embedded C?
    130Describe the process of implementing a real-time network stack in embedded C.
    131What is the role of the DMA controller in embedded systems?
    132How do you perform memory-mapped I/O with memory-mapped sensors in embedded C?
    133Explain the concept of hardware simulation in embedded systems.
    134How do you handle real-time task synchronization using spinlocks in embedded C?
    135Describe the process of implementing a real-time file system journal in embedded C.
    136What is the role of the interrupt controller in embedded systems?
    137How do you perform memory-mapped I/O with memory-mapped timers in embedded C?
    138Explain the concept of hardware acceleration using FPGA in embedded systems.
    139How do you handle real-time task synchronization using priority inheritance in embedded C?
    140Describe the process of implementing a real-time memory management scheme in embedded C.
    141What is the role of the interrupt vector table in embedded systems?
    142How do you perform memory-mapped I/O with memory-mapped ADCs in embedded C?
    143Explain the concept of hardware co-design using high-level synthesis in embedded systems.
    144How do you handle real-time task synchronization using priority ceiling protocol in embedded C?
    145Describe the process of implementing a real-time communication protocol stack in embedded C.
    146What is the role of the system timer in embedded systems?
    147How do you perform memory-mapped I/O with memory-mapped DACs in embedded C?
    148Explain the concept of hardware-in-the-loop testing using virtual prototypes in embedded systems.
    149How do you handle real-time task synchronization using reader-writer locks in embedded C?
    150Describe the process of implementing a real-time fault-tolerant system in embedded C.
    151What is the role of the watchdog timer in embedded systems?
    152How do you perform memory-mapped I/O with memory-mapped PWMs in embedded C?
    153Explain the concept of hardware debugging using JTAG in embedded systems.
    154How do you handle real-time task synchronization using priority ceiling emulation in embedded C?
    155Describe the process of implementing a real-time virtual file system in embedded C.
    156What is the role of the reset vector in embedded systems?
    157How do you perform memory-mapped I/O with memory-mapped UARTs in embedded C?
    158Explain the concept of hardware emulation using virtual platforms in embedded systems.
    159How do you handle real-time task synchronization using message-passing rendezvous in embedded C?
    160Describe the process of implementing a real-time distributed system in embedded C.
    161What is the role of the memory protection unit in embedded systems?
    162How do you perform memory-mapped I/O with memory-mapped SPIs in embedded C?
    163Explain the concept of hardware co-simulation using System C in embedded systems.
    164How do you handle real-time task synchronization using priority-based spinlocks in embedded C?
    165Describe the process of implementing a real-time fault-tolerant communication protocol in embedded C.
    166What is the role of the power management unit in embedded systems?
    167How do you perform memory-mapped I/O with memory-mapped I2Cs in embedded C?
    168Explain the concept of hardware validation using formal methods in embedded systems.
    169How do you handle real-time task synchronization using priority-based semaphores in embedded C?
    170Describe the process of implementing a real-time secure file system in embedded C.
    171What is the role of the memory controller in embedded systems?
    172How do you perform memory-mapped I/O with memory-mapped GPIOs in embedded C?
    173Explain the concept of hardware synthesis using high-level languages in embedded systems.
    174How do you handle real-time task synchronization using priority-based condition variables in embedded C?
    175Describe the process of implementing a real-time embedded database system in embedded C.
    176What is the role of the peripheral controller in embedded systems?
    177How do you perform memory-mapped I/O with memory-mapped PWMs in embedded C?
    178Explain the concept of hardware modeling using hardware description languages in embedded systems.
    179How do you handle real-time task synchronization using priority-based mutexes in embedded C?
    180Describe the process of implementing a real-time secure communication protocol stack in embedded C.
    181What is the role of the DMA controller in embedded systems?
    182How do you perform memory-mapped I/O with memory-mapped UARTs in embedded C?
    183Explain the concept of hardware acceleration using GPU in embedded systems.
    184How do you handle real-time task synchronization using priority-based reader-writer locks in embedded C?
    185Describe the process of implementing a real-time embedded web server in embedded C.
    186What is the role of the interrupt controller in embedded systems?
    187How do you perform memory-mapped I/O with memory-mapped SPIs in embedded C?
    188Explain the concept of hardware co-design using IP cores in embedded systems.
    189How do you handle real-time task synchronization using priority-based rendezvous in embedded C?
    190Describe the process of implementing a real-time distributed communication protocol stack in embedded C.

    1. What is embedded software?

    Embedded software is a specialized type of software designed to run on hardware devices like microcontrollers, sensors, or boards such as Arduino, STM32, or Raspberry Pi. It controls specific functions within a larger system, often in real-time.

    2. Is this roadmap suitable for complete beginners?

    Yes! This roadmap is designed for absolute beginners with no prior experience in embedded systems. Whether you’re a student or a career switcher, you’ll find easy-to-follow steps, project ideas, and learning paths.

    3.Do I need to know C or C++ to get started?

    Knowing C is highly recommended, as it’s the foundation of embedded programming. However, our roadmap starts from scratch and will guide you to learn C and eventually C++ at a comfortable pace.

    4.What hardware do I need as a beginner?

    You can start with basic, affordable boards like:
    Arduino Uno
    ESP32 or ESP8266 (for IoT projects)
    STM32 (for advanced learning)
    These boards are beginner-friendly and widely supported by tutorials.

    5.Do I need electronics knowledge to start embedded programming?

    Only basic electronics knowledge is needed. The roadmap includes beginner-friendly explanations of resistors, capacitors, GPIOs, sensors, and circuits with diagrams and examples.

    6.Can I follow this roadmap while working or studying full-time?

    Absolutely! The guide is broken down into Step wise milestones, so you can learn at your own pace — even if you have just a few hours per week.

    7.What tools and software are covered in the roadmap?

    You’ll learn how to use:
    Arduino IDE
    PlatformIO
    STM32CubeIDE
    QEMU (for emulation)
    Git & GitHub
    Linux terminal basics
    GCC compiler and Makefiles

    8.Does the roadmap include real-world projects?

    Yes! You’ll work on practical projects like:
    LED blinking
    Temperature & humidity monitor
    IoT gas alert system
    Audio player with amplifier
    Real-time sensor dashboard with Python and web interface

    9.Is Linux knowledge required?

    Basic Linux knowledge is helpful but not mandatory. The roadmap includes a beginner section to get you comfortable with Linux commands, scripting, and embedded Linux fundamentals.

    10.What’s the goal of this roadmap?

    The roadmap aims to help you:
    ✅ Build a strong foundation in embedded systems
    ✅ Learn to work with real hardware
    ✅ Understand drivers, RTOS, and protocols
    ✅ Create portfolio-worthy projects
    ✅ Prepare for embedded job interviews

    11.Where can I find the full roadmap?

    The complete guide is available on our website/blog: Embedded Prep Master – Make sure to bookmark it and follow us for updates!

    You can also Visit other tutorials of Embedded Prep 

    Special thanks to @mr-raj for contributing to this article on Embedded Prep
  • Bubble Sort Algorithm Tutorial in C and C++ | Learn It the Easy Way [2026]

    What is Bubble Sort?

    Bubble Sort Algorithm: Bubble Sort is one of the most fundamental and widely recognized sorting algorithms in computer science. Its simplicity and educational value make it a popular choice for introducing beginners to the concept of algorithmic thinking and sorting mechanisms. Though not the most efficient for large datasets, Bubble Sort’s step-by-step operation provides an excellent foundation for understanding how comparison-based sorting works.

    Bubble Sort Key Features

    • In-place sorting algorithm
    • Stable sorting technique
    • Works in O(n²) time complexity
    • Best sorting algorithm for small data sets

    Bubble Sort Algorithm Explained

    Bubble Sort goes through the list, swapping neighboring elements that are out of order, and keeps repeating this process until the entire list is sorted.

    How does bubble sort work ?

    1. Start from the beginning of the array
    2. Compare each pair of adjacent elements
    3. If two neighboring elements aren’t in the correct order, simply swap them to move closer to the desired sequence.
    4. Repeat until no swaps are needed

    Bubble Sort Code in C

    #include <stdio.h>
    
    void bubbleSort(int arr[], int n) {
        for (int i = 0; i < n - 1; i++) {
            for (int j = 0; j < n - i - 1; j++) {
                if (arr[j] > arr[j + 1]) {
                    // Swap
                    int temp = arr[j];
                    arr[j] = arr[j + 1];
                    arr[j + 1] = temp;
                }
            }
        }
    }
    

    Bubble Sort Code in C++

    #include <iostream>
    using namespace std;
    
    void bubbleSort(int arr[], int n) {
        for (int i = 0; i < n - 1; i++) {
            for (int j = 0; j < n - i - 1; j++) {
                if (arr[j] > arr[j + 1]) {
                    swap(arr[j], arr[j + 1]);
                }
            }
        }
    }
    

    What is the best case time complexity of bubble sort?

    CaseTime Complexity
    Best CaseO(n)
    Average CaseO(n²)
    Worst CaseO(n²)
    • Space Complexity: O(1) – No extra space used
    • Best for educational purposes, interview preparation, and embedded systems sorting problems

    Can bubble sorter used in alphabetical order?

    we can compare strings using comparison operators like > or <, or use string comparison functions depending on the programming language.

    Exmaple in C

    #include <iostream>
    #include <string>
    using namespace std;
    
    void bubbleSort(string arr[], int n) {
        for (int i = 0; i < n-1; ++i) {
            for (int j = 0; j < n-i-1; ++j) {
                if (arr[j] > arr[j+1]) {
                    // Swap if out of order
                    string temp = arr[j];
                    arr[j] = arr[j+1];
                    arr[j+1] = temp;
                }
            }
        }
    }
    
    int main() {
        string names[] = {"banana", "apple", "grape", "cherry"};
        int n = sizeof(names)/sizeof(names[0]);
    
        bubbleSort(names, n);
    
        cout << "Sorted names:\n";
        for (int i = 0; i < n; ++i)
            cout << names[i] << endl;
    
        return 0;
    }
    

    Can bubble sort be used for descending order ?

    Bubble sort can be easily modified to sort in descending order by just changing the comparison condition.

    Key Difference:

    • Ascending order: if (arr[j] > arr[j+1])
    • Descending order: if (arr[j] < arr[j+1])

    Example: Descending Order (C++)

    #include <iostream>
    using namespace std;
    
    void bubbleSortDescending(int arr[], int n) {
        for (int i = 0; i < n - 1; ++i) {
            for (int j = 0; j < n - i - 1; ++j) {
                if (arr[j] < arr[j + 1]) {
                    // Swap for descending order
                    int temp = arr[j];
                    arr[j] = arr[j + 1];
                    arr[j + 1] = temp;
                }
            }
        }
    }
    
    int main() {
        int numbers[] = {10, 4, 7, 1, 9};
        int n = sizeof(numbers) / sizeof(numbers[0]);
    
        bubbleSortDescending(numbers, n);
    
        cout << "Sorted in descending order:\n";
        for (int i = 0; i < n; ++i)
            cout << numbers[i] << " ";
    
        return 0;
    }
    

    Output:

    Sorted in descending order:
    10 9 7 4 1

    You can do the same thing with strings for reverse alphabetical order:

    if (arr[j] < arr[j+1]) // for strings

    Benefits of Bubble Sort

    • Easy to implement
    • Perfect for beginner programmers
    • Helps understand the concept of element swapping and iteration
    • Frequently asked in coding interviews and technical exams

    Applications of Bubble Sort

    • Embedded software systems
    • Microcontroller data sorting
    • Sorting sensor values
    • Small dataset processing in IoT

    💛 Support Embedded Prep

    If you find our tutorials helpful and want to support our mission of sharing high-quality embedded system knowledge, you can contribute by buying us a coffee. Every small contribution helps us keep creating valuable content for learners like you. ☕

    Thank you for your support — it truly keeps Embedded Prep growing. 💻✨

    Final Thoughts

    Use Bubble Sort to master the basics of sorting algorithms. With its simple logic and straightforward code, it’s ideal for learning, teaching, and solving real-world problems in C and C++.

    What is Bubble Sort in C and C++

    Bubble Sort is a simple sorting algorithm used in C and C++ that repeatedly compares and swaps adjacent elements if they are in the wrong order. It continues this process until the entire array is sorted in ascending or descending order.

    Why is it called Bubble Sort?

    It’s called Bubble Sort because the largest (or smallest) elements “bubble up” to the end (or beginning) of the array after each iteration, just like bubbles rising to the surface of water.

    Can I use Bubble Sort for large datasets?

    While Bubble Sort works for small arrays, it is inefficient for large datasets due to its O(n²) time complexity. For larger datasets, more advanced algorithms like Quick Sort or Merge Sort are recommended.

    Is Bubble Sort stable and in-place?

    Yes, Bubble Sort is a stable sorting algorithm (it maintains the order of equal elements) and it is in-place, meaning it does not require extra memory space.

    You can also Visit other tutorials of Embedded Prep 

    Special thanks to @embedded-prep for contributing to this article on Embedded Prep
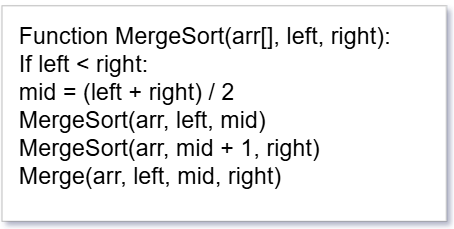
  • Master the Selection Sort Algorithm in 5 Simple Steps (2026)

    If you’re diving into sorting algorithms, the selection sort algorithm is one of the simplest and most intuitive methods to start with. Despite being basic, it’s a great way to understand the fundamentals of sorting logic. In this blog post, we’ll walk through what selection sort is, how it works, its time complexity, and a sample code in C++.

    What is selection sort ?

    What is selection sort : Selection sort is a kind of sorting method based on comparisons technique. It separates the array into a sorted parts and an unsorted parts, then repeatedly selects the smallest element from the unsorted parts and places it at the end of the sorted parts

    How the Selection Sort Algorithm Works

    Here’s a step-by-step working techinuque of selection sort explanation:

    1. Start from the first element of the array.
    2. Search the smallest element in the unsorted portion.
    3. Swap the smallest element with the first element.
    4. Shift the dividing line between the sorted and unsorted parts one position forward (next).
    5. Repeat until the array is sorted.

    Example of Selection Sort Algorithm

    Let’s say we have an below array:

    [45, 22, 89, 33, 10]

    How selection sort works ?

    Let’s gone through below steps how selection sort would organize it:

    • First, examine the entire list [45, 22, 89, 33, 10].
      The smallest value is 10. Swap it with the first element 45 → [10, 22, 89, 33, 45]
    • Next, look at the subarray [22, 89, 33, 45].
      The smallest number is 22, which is already in place. No swap needed.
    • Now move to [89, 33, 45].
      The minimum here is 33. Swap it with 89 → [10, 22, 33, 89, 45]
    • Then, in [89, 45], the smallest is 45.
      Swap it with 89 → [10, 22, 33, 45, 89]

    The array is now sorted using selection sort algorithm.

    Is selection sort stable ?

    Selection sort is stable or not : Selection Sort is inherently unstable — but not because it swaps elements, rather because it does not respect the original order of equivalent elements when finding the minimum.

    Let’s reimagine this through a theater analogy:

    Imagine you’re organizing people (elements) by height (value) for a stage performance. You always pick the shortest person (minimum) and move them to the front — but without caring whether two people of the same height had different roles (original positions). You just swap whoever is found first in your search, even if it pushes someone with an earlier role to the back.

    So in essence:

    • Selection Sort does not maintain “role memory” for equal values.
    • It simply grabs the minimum, regardless of earlier appearances.
    • This causes instability, because if two equal elements are separated by a swap, the relative order is broken.

    However — and here’s the twist Google doesn’t tell you:

    Selection Sort can be made stable with a simple tweak: instead of swapping, insert the minimum in-place while shifting others to the right.

    But that tweak costs performance. So while basic Selection Sort is not stable, a thoughtful rewrite can make it so, at the cost of efficiency.so now we able to understand why selection sort is not stable .

    What is selection sort in c ++?

    #include <iostream>
    using namespace std;
    
    void selectionSort(int arr[], int n) {
        for (int i = 0; i < n - 1; i++) {
            int minIdx = i;
            
            for (int j = i + 1; j < n; j++) {
                if (arr[j] < arr[minIdx])
                    minIdx = j;
            }
    
            swap(arr[minIdx], arr[i]);
        }
    }
    
    void printArray(int arr[], int size) {
        for (int i = 0; i < size; i++)
            cout << arr[i] << " ";
        cout << endl;
    }
    
    int main() {
        int arr[] = {45,22,89,33,10};
        int n = sizeof(arr) / sizeof(arr[0]);
        
        cout << "Original array of array is : ";
        printArray(arr, n);
        
        selectionSort(arr, n);
    
        cout << "Sorted array: ";
        printArray(arr, n);
    
        return 0;
    }

    Output :

    💛 Support Embedded Prep

    If you find our tutorials helpful and want to support our mission of sharing high-quality embedded system knowledge, you can contribute by buying us a coffee. Every small contribution helps us keep creating valuable content for learners like you. ☕

    Thank you for your support — it truly keeps Embedded Prep growing. 💻✨

    What is the best case and worst case complexity of selection sort ?

    CaseTime Complexity
    Best case O(n²)
    Avg case O(n²)
    Worst case O(n²)

    Space Complexity: O(1)
    Because selection sort sorts elements directly within the original array, it maintains a constant space complexity throughout the process.

    What is selection sort in c ?

    #include <stdio.h>
    
    int digitSum(int n) {
        int sum = 0;
        while(n) {
            sum += n % 10;
            n /= 10;
        }
        return sum;
    }
    
    void selectionSortByDigitSum(int arr[], int n) {
        for(int i = 0; i < n - 1; i++) {
            int min = i;
            for(int j = i + 1; j < n; j++) {
                if(digitSum(arr[j]) < digitSum(arr[min])) {
                    min = j;
                }
            }
            int temp = arr[i];
            arr[i] = arr[min];
            arr[min] = temp;
        }
    }
    
    int main() {
        int arr[] = {91, 34, 23, 82, 17};
        int n = sizeof(arr)/sizeof(arr[0]);
    
        selectionSortByDigitSum(arr, n);
    
        for(int i = 0; i < n; i++)
            printf("%d ", arr[i]);
            
        return 0;
    }
    

    When to Choose Selection Sort?

    Selection sort may not be the most efficient option for large datasets, but it excels in the following scenarios:

    • Simple to grasp
    • Ideal for small arrays
    • Excellent for teaching and learning purposes

    Conclusion

    The selection sort algorithm is a simple yet powerful concept that helps build a strong foundation in sorting logic. Though it’s not the fastest for large arrays, its ease of implementation and step-by-step nature make it ideal for beginners.

    Thank you for exploring Selection sort algorithm tutorials ! Stay ahead in embedded systems with expert insights, hands-on projects, and in-depth guides. Follow Embedded Prep for the latest trends, best practices, and step-by-step tutorials to enhance your expertise. Keep learning, keep innovating!

    What is Selection Sort?

    Answer: Selection Sort is a simple sorting algorithm that works by repeatedly finding the smallest element and swapping it with the current element.

    How does Selection Sort work?

    Answer: The algorithm divides the array into two parts: sorted and unsorted. It selects the minimum element from the unsorted part and swaps it with the leftmost unsorted element.

    What is the time complexity of Selection Sort?

    Answer: The time complexity of Selection Sort is O(n^2) in all cases (best, worst, and average).

    Is Selection Sort stable?

    Answer: No, Selection Sort is not a stable sorting algorithm, as it may change the relative order of equal elements.

    You can also Visit other tutorials of Embedded Prep 

    Special thanks to @embedded-prep for contributing to this article on Embedded Prep
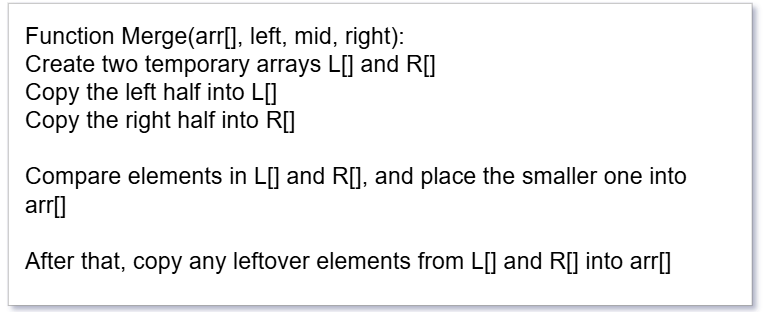
  • Merge sort algorithm: A Powerful and Easy Guide with Code (2026)

    Merge sort algorithm: Sorting is a fundamental concept in computer science, and one of the most efficient and widely used sorting techniques is Merge Sort. Whether you’re preparing for coding interviews or building real-world software, understanding Merge Sort can boost your algorithmic thinking.

    What is Merge Sort?

    Merge Sort is a divide-and-conquer algorithm that works by breaking down a list into smaller chunks, sorting those pieces individually, and then merging them back together in the correct order. It’s known for its reliable performance, even with large datasets.

    Key Characteristics:

    • Stable Sort: Maintains the relative order of equal elements.
    • Time Complexity: O(n log n) in all cases (best, average, worst).
    • Space Complexity: O(n) due to the temporary arrays used for merging.

    How Does Merge Sort Work?

    Imagine you have a messy pile of cards. Instead of sorting them all at once, you divide them into smaller piles, sort each pile, and then combine the sorted piles into one organized deck. Merge Sort does exactly that, but with numbers (or any sortable data).

    Step-by-Step Process:

    1. Divide the array into two halves.
    2. Recursively sort each half.
    3. Merge the sorted halves into a single sorted array.

    Sorting plays a crucial role in organizing data efficiently. Among the various algorithms, Merge Sort stands out for its efficiency and reliability. Let’s break it down in the simplest way possible.

    Example

    Let’s say you have the following array:

    [38, 27, 43, 3, 9, 82, 10]

    Your goal is to sort this array in ascending order using Merge Sort.

    Step-by-step:

    1. Divide:
      Split the array until each part has a single element:
      [38] [27] [43] [3] [9] [82] [10]
    2. Sort and Merge:
    • Merge [38] and [27] → [27, 38]
    • Merge [27, 38] and [43] → [27, 38, 43]
    • Merge [3] and [9] → [3, 9], then merge with [82] → [3, 9, 82], and finally merge with [10] → [3, 9, 10, 82]
    1. Final Merge:
      Merge [27, 38, 43] and [3, 9, 10, 82] →
      [3, 9, 10, 27, 38, 43, 82]

    Intuition

    Imagine you are sorting playing cards. It’s easier to sort two small piles and then combine them than to sort a large pile all at once. That’s what Merge Sort does.

    • It divides the problem into smaller sub-problems.
    • Solves each smaller problem (sorts each half).
    • Then combines the solutions (merges sorted halves).

    This divide-and-conquer strategy makes Merge Sort powerful and predictable.

    Approach

    Merge Sort follows a recursive strategy:

    1. Divide the array into two halves.
    2. Recursively apply merge sort to each half.
    3. Merge the two sorted halves into one.

    Key Points:

    • Uses extra space (temporary arrays).
    • Always has time complexity of O(n log n).
    • Performs well with large datasets and linked lists.

    Pseudocode

    Here’s the simplified pseudocode for Merge Sort:

    Merge Sort Pseudocode

    What’s the Goal?

    We want to take an unsorted array and sort it in ascending order. Merge Sort does this by splitting the array, sorting the parts, and then merging them.

    MergeSort(arr, left, right)

    Explanation:

    • arr[] – This is the array we want to sort.
    • left – The starting index of the array.
    • right – The ending index of the array.

    Step-by-step:

    1. If left is smaller than right, it means we still have more than one element in the array.
    2. Find the middle point (to divide the array into two halves).
    3. Recursively sort the first half.
    4. Recursively sort the second half.
    5. Merge the two sorted halves.

    It keeps calling itself (recursion) until each half has only one element. That’s when sorting begins.

    Merge(arr, left, mid, right)

    Explanation:

    This function merges two already sorted halves of the array into one sorted array.

    Step-by-step:

    1. Make two temporary arrays – one for the left part and one for the right part.
    2. Copy elements from the original array into these two parts.
    3. Start comparing the first elements from both halves:
      • Put the smaller one back into the original array.
    4. Keep comparing and placing until one of the arrays is empty.
    5. If anything is left over in L or R, just copy it into the original array.

    💛 Support Embedded Prep

    If you find our tutorials helpful and want to support our mission of sharing high-quality embedded system knowledge, you can contribute by buying us a coffee. Every small contribution helps us keep creating valuable content for learners like you. ☕

    Thank you for your support — it truly keeps Embedded Prep growing. 💻✨

    Real-Life Analogy

    Think of Merge Sort like sorting pages of a book:

    1. You split the book in half.
    2. Ask two people to sort each half separately.
    3. Then you take both sorted stacks and combine them one page at a time in the correct order.

    Visual Example

    Suppose we want to sort the array:
    [38, 27, 43, 3, 9, 82, 10]

    1. Split into two halves: [38, 27, 43] and [3, 9, 82, 10]
    2. Keep splitting until you reach single-element arrays:
      • [38] [27] [43] [3] [9] [82] [10]
    3. Merge step-by-step:
      • [27, 38], [3, 43], [9, 10], [9, 10, 82]
      • Final result: [3, 9, 10, 27, 38, 43, 82]

    Merge Sort in Java

    public class MergeSort {
        public static void mergeSort(int[] arr, int left, int right) {
            if (left < right) {
                int mid = (left + right) / 2;
    
                mergeSort(arr, left, mid);
                mergeSort(arr, mid + 1, right);
    
                merge(arr, left, mid, right);
            }
        }
    
        public static void merge(int[] arr, int left, int mid, int right) {
            int n1 = mid - left + 1;
            int n2 = right - mid;
    
            int[] L = new int[n1];
            int[] R = new int[n2];
    
            for (int i = 0; i < n1; i++)
                L[i] = arr[left + i];
            for (int j = 0; j < n2; j++)
                R[j] = arr[mid + 1 + j];
    
            int i = 0, j = 0, k = left;
    
            while (i < n1 && j < n2) {
                if (L[i] <= R[j]) {
                    arr[k++] = L[i++];
                } else {
                    arr[k++] = R[j++];
                }
            }
    
            while (i < n1)
                arr[k++] = L[i++];
    
            while (j < n2)
                arr[k++] = R[j++];
        }
    
        public static void main(String[] args) {
            int[] arr = {38, 27, 43, 3, 9, 82, 10};
            mergeSort(arr, 0, arr.length - 1);
    
            for (int num : arr)
                System.out.print(num + " ");
        }
    }
    

    Merge Sort in C++

    #include <iostream>
    using namespace std;
    
    void merge(int arr[], int left, int mid, int right) {
        int n1 = mid - left + 1;
        int n2 = right - mid;
    
        int L[n1], R[n2];
    
        for (int i = 0; i < n1; i++) L[i] = arr[left + i];
        for (int j = 0; j < n2; j++) R[j] = arr[mid + 1 + j];
    
        int i = 0, j = 0, k = left;
    
        while (i < n1 && j < n2) {
            arr[k++] = (L[i] <= R[j]) ? L[i++] : R[j++];
        }
    
        while (i < n1) arr[k++] = L[i++];
        while (j < n2) arr[k++] = R[j++];
    }
    
    void mergeSort(int arr[], int left, int right) {
        if (left < right) {
            int mid = (left + right) / 2;
    
            mergeSort(arr, left, mid);
            mergeSort(arr, mid + 1, right);
    
            merge(arr, left, mid, right);
        }
    }
    
    int main() {
        int arr[] = {38, 27, 43, 3, 9, 82, 10};
        int n = sizeof(arr) / sizeof(arr[0]);
    
        mergeSort(arr, 0, n - 1);
    
        for (int i = 0; i < n; i++)
            cout << arr[i] << " ";
        return 0;
    }
    

    Merge Sort in C

    #include <stdio.h>
    
    void merge(int arr[], int left, int mid, int right) {
        int i, j, k;
        int n1 = mid - left + 1;
        int n2 = right - mid;
    
        int L[n1], R[n2];
    
        for (i = 0; i < n1; i++) L[i] = arr[left + i];
        for (j = 0; j < n2; j++) R[j] = arr[mid + 1 + j];
    
        i = 0; j = 0; k = left;
    
        while (i < n1 && j < n2) {
            if (L[i] <= R[j]) arr[k++] = L[i++];
            else arr[k++] = R[j++];
        }
    
        while (i < n1) arr[k++] = L[i++];
        while (j < n2) arr[k++] = R[j++];
    }
    
    void mergeSort(int arr[], int left, int right) {
        if (left < right) {
            int mid = (left + right) / 2;
    
            mergeSort(arr, left, mid);
            mergeSort(arr, mid + 1, right);
    
            merge(arr, left, mid, right);
        }
    }
    
    int main() {
        int arr[] = {38, 27, 43, 3, 9, 82, 10};
        int n = sizeof(arr) / sizeof(arr[0]);
    
        mergeSort(arr, 0, n - 1);
    
        for (int i = 0; i < n; i++)
            printf("%d ", arr[i]);
        return 0;
    }
    

    Merge Sort in Python

    def merge_sort(arr):
        if len(arr) > 1:
            mid = len(arr) // 2
    
            left = arr[:mid]
            right = arr[mid:]
    
            merge_sort(left)
            merge_sort(right)
    
            i = j = k = 0
    
            # Merge the two halves
            while i < len(left) and j < len(right):
                if left[i] <= right[j]:
                    arr[k] = left[i]
                    i += 1
                else:
                    arr[k] = right[j]
                    j += 1
                k += 1
    
            # Remaining elements
            while i < len(left):
                arr[k] = left[i]
                i += 1
                k += 1
    
            while j < len(right):
                arr[k] = right[j]
                j += 1
                k += 1
    
    # Example usage
    arr = [38, 27, 43, 3, 9, 82, 10]
    merge_sort(arr)
    print(arr)
    

    Merge Sort in JavaScript

    function mergeSort(arr) {
        if (arr.length <= 1) return arr;
    
        const mid = Math.floor(arr.length / 2);
        const left = mergeSort(arr.slice(0, mid));
        const right = mergeSort(arr.slice(mid));
    
        return merge(left, right);
    }
    
    function merge(left, right) {
        let result = [], i = 0, j = 0;
    
        while (i < left.length && j < right.length) {
            if (left[i] <= right[j]) {
                result.push(left[i++]);
            } else {
                result.push(right[j++]);
            }
        }
    
        return result.concat(left.slice(i)).concat(right.slice(j));
    }
    
    // Example usage
    const arr = [38, 27, 43, 3, 9, 82, 10];
    const sorted = mergeSort(arr);
    console.log(sorted);
    

    Merge Sort vs Bubble Sort

    FeatureMerge SortBubble Sort
    ApproachDivide and ConquerRepeatedly swapping
    Time ComplexityO(n log n)O(n²)
    Best CaseO(n log n)O(n) (if optimized)
    Stable?YesYes
    Recursive?YesNo
    Use CaseLarge datasetsTeaching / simple examples
    Extra Space?Yes (O(n))No

    🔸 Merge Sort is way faster than Bubble Sort for large arrays.

    Merge Sort vs Insertion Sort

    FeatureMerge SortInsertion Sort
    ApproachDivide and ConquerBuilds final array one item at a time
    Time ComplexityO(n log n)O(n²)
    Best CaseO(n log n)O(n) (when array is sorted)
    Stable?YesYes
    Recursive?YesNo
    Use CaseLarge datasetsSmall or nearly sorted arrays
    Extra Space?YesNo

    🔸 Insertion Sort is good for small or nearly sorted arrays. Merge Sort is better for general use.

    Merge Sort vs Selection Sort

    FeatureMerge SortSelection Sort
    ApproachDivide and ConquerFinds minimum each pass
    Time ComplexityO(n log n)O(n²)
    Best CaseO(n log n)O(n²)
    Stable?YesNo
    Recursive?YesNo
    Use CaseGeneral purpose sortingEducational purposes
    Extra Space?YesNo

    🔸 Selection Sort is simple but not efficient. Merge Sort wins in speed.

    Merge Sort vs Quick Sort

    FeatureMerge SortQuick Sort
    ApproachDivide and ConquerDivide and Conquer
    Time ComplexityO(n log n)Average: O(n log n), Worst: O(n²)
    Best CaseO(n log n)O(n log n)
    Stable?YesNo (unless modified)
    Recursive?YesYes
    Use CaseLinked lists or when stability is requiredFaster on arrays, commonly used
    Extra Space?O(n)O(log n) (in-place)

    🔸 Quick Sort is generally faster in practice but not stable. Merge Sort is more predictable.

    Summary Table

    SortTime (Best)Time (Worst)StableSpaceSuitable For
    Merge SortO(n log n)O(n log n)✅O(n)Large, stable sorting
    Quick SortO(n log n)O(n²)❌O(log n)Fast general purpose
    Bubble SortO(n)O(n²)✅O(1)Educational, small sets
    InsertionO(n)O(n²)✅O(1)Nearly sorted data
    SelectionO(n²)O(n²)❌O(1)Simple, not efficient

    Real-World Use Cases of Merge Sort

    • External Sorting: Ideal for sorting huge files on disk where memory is limited.
    • Linked Lists: Performs better than quicksort on linked lists.
    • Parallel Processing: Merge Sort can be efficiently parallelized due to its divide-and-conquer nature.

    Advantages and Disadvantages

    Pros:

    • Predictable time complexity (O(n log n)).
    • Great for sorting linked lists.
    • Stable sort.

    Cons:

    • Uses extra memory.
    • Slower for small datasets compared to quicksort or insertion sort.

    Basic-Level Interview Questions

    1. What is Merge Sort?
      • Can you explain the Merge Sort algorithm in simple terms?
    2. What is the time and space complexity of Merge Sort?
      • Best, worst, average case complexities?
    3. Is Merge Sort a stable sorting algorithm? Why?
    4. What is the difference between Merge Sort and Quick Sort?
      • Which one is preferred and when?
    5. Does Merge Sort work in-place?
      • If not, how much additional memory does it need?
    6. What do you mean by Divide and Conquer approach?
      • Can you give a real-world analogy for it?

    Intermediate-Level Questions

    1. Can you write the Merge Sort algorithm in any language of your choice?
    2. Explain the merge process in Merge Sort.
      • How does the merging step maintain order?
    3. How is Merge Sort implemented on a linked list?
      • Why is it more efficient in that case?
    4. How would you modify Merge Sort to count the number of inversions in an array?
    5. Can you implement Merge Sort iteratively (bottom-up approach)?

    Advanced/Real-World Questions

    1. How would you handle very large datasets that don’t fit into memory using Merge Sort?
    • External sorting techniques?
    1. How can you optimize the space complexity of Merge Sort?
    2. What are the cache performance issues in Merge Sort compared to Quick Sort?
    3. Where is Merge Sort used in real-world systems or libraries?
    • (e.g., Timsort is based on Merge Sort + Insertion Sort)
    1. How would you parallelize Merge Sort in a multi-threaded system?

    Bonus Conceptual Questions

    1. Why does Merge Sort have consistent O(n log n) time complexity regardless of input?
    2. Can you identify when Merge Sort is not the best option to use?
    3. Explain Merge Sort using recursion stack trace.
    • What happens in each call?
    1. Why do some standard libraries prefer Quick Sort or Timsort over Merge Sort?

    Thank you for exploring Merge Sort tutorials ! Stay ahead in embedded systems with expert insights, hands-on projects, and in-depth guides. Follow Embedded Prep for the latest trends, best practices, and step-by-step tutorials to enhance your expertise. Keep learning, keep innovating!

    You can also Visit other tutorials of Embedded Prep 

    Special thanks to @embedded-prep for contributing to this article on Embedded Prep

  • Master Storage Classes in C interview questions 2026

    Master Storage Classes in C with these 2025 interview questions. Learn auto, register, static, and extern usage, scope, lifetime, and best practices to ace C interviews.

    Master Storage Classes in C : Interview Questions 2025

    Are you preparing for your next C programming interview in 2025? Don’t overlook the Storage Classes – a frequently asked yet underrated topic that often catches candidates off guard! In this comprehensive guide, we break down all the essential storage classes in C (auto, register, static, and extern) with practical examples, memory behavior, and real-world use cases.

    Whether you’re a beginner aiming to strengthen your fundamentals or an experienced programmer brushing up for interviews, this post is tailored to help you:

    • Understand the purpose of each storage class
    • Learn their scope, lifetime, and linkage
    • Tackle tricky interview questions with confidence
    • Practice real-time code examples and MCQs

    Bonus: Expert tips, diagrams, and use-case scenarios included!

    Let’s demystify the storage classes and turn this topic into your strength. Start reading and get one step closer to acing your C interview in 2025!

    • auto
    • extern
    • static
    • register

    1. auto Storage Class

    • Definition: auto is the default storage class for local variables.
    • Scope: Local to the block where it is defined.
    • Lifetime: Exists until the block/function ends.
    • Visibility: Not accessible outside the block.
    • Default Value: Garbage (undefined).

    Example of auto Storage classes :

    #include <stdio.h>
    void testFunction() {
        auto int x = 10;  // \'auto\' is optional, same as int x = 10;
        printf(\"Value of x: %d\\n\", x);
    }
    int main() {
        testFunction();
        return 0;
    }
    

    Key Points of auto Storage classes :

    • Automatically allocated when the function/block is called.
    • Destroyed when the function/block exits.
    • Cannot be accessed outside the function/block.

    Interview Questions based on auto Storage classes:

    • What is the default storage class of a local variable in C?
    • Can an auto variable be accessed outside its function?
    • How does an auto variable differ from a static variable?

    2. extern Storage Class

    • Definition: extern is used to declare a global variable in one file and define it in another.
    • Scope: Global (visible throughout the program).
    • Lifetime: Exists as long as the program runs.
    • Visibility: Accessible in all files (if declared with extern).
    • Default Value: Zero (0).

    Example (Multiple Files Usage) for Storage classes :

    File: main.c

    #include <stdio.h>
    // Declaration of external variable (defined in another file)
    extern int count;
    void display() {
        printf(\"Count: %d\\n\", count);
    }
    int main() {
        display();
        return 0;
    }
    

    File: data.c

    // Definition of external variable
    int count = 10;
    

    Compile & Run

    gcc main.c data.c -o output
    ./output
    

    Output: Count: 10

    Key Points of Storage classes :

    • Used for global variables and function definitions across multiple files.
    • Declaration using extern does not allocate memory, only references it.
    • Definition (without extern) allocates memory.

    Interview Questions of Storage classes:

    • What is the difference between declaration and definition of a variable?
    • Can extern be used for functions? (Yes, by default functions are extern)
    • What happens if an extern variable is not defined anywhere?

    3. static Storage Class

    • Definition: static variables retain their values across function calls.
    • Scope:
      • Local Static Variable: Limited to the function/block where it is defined.
      • Global Static Variable: Limited to the file where it is defined.
    • Lifetime: Exists throughout the program execution.
    • Visibility:
      • Local Static: Visible only in the function.
      • Global Static: Not accessible outside the file.
    • Default Value: Zero (0).

    💛 Support Embedded Prep

    If you find our tutorials helpful and want to support our mission of sharing high-quality embedded system knowledge, you can contribute by buying us a coffee. Every small contribution helps us keep creating valuable content for learners like you. ☕

    Thank you for your support — it truly keeps Embedded Prep growing. 💻✨

    Example 1: Local Static Variable

    #include <stdio.h>
    void counter() {
        static int count = 0;  // Retains value between function calls
        count++;
        printf(\"Count: %d\\n\", count);
    }
    int main() {
        counter(); // Output: Count: 1
        counter(); // Output: Count: 2
        counter(); // Output: Count: 3
        return 0;
    }
    

    Example 2: Global Static Variable

    File: static_var.c

    #include <stdio.h>
    static int globalCount = 10;  // This variable is NOT accessible in other files
    void display() {
        printf(\"Global Count: %d\\n\", globalCount);
    }
    

    File: main.c

    #include <stdio.h>
    // extern int globalCount;  // This will cause a linker error!
    int main() {
        // printf(\"Global Count: %d\\n\", globalCount);  // Not accessible
        return 0;
    }
    

    Key Observation: globalCount is limited to static_var.c and cannot be accessed in main.c.

    Key Points of Storage classes:

    • Local Static Variables retain values between function calls.
    • Global Static Variables restrict visibility to the file.
    • Useful in scenarios like counters, cache implementations, and module-specific global variables.

    Interview Questions of Storage classes:

    • What is the difference between static and auto variables?
    • Can we use a static variable inside a function?
    • What happens if we declare a global variable as static?

    4. register Storage Class

    • Definition: Suggests that the variable be stored in CPU registers instead of RAM.
    • Scope: Local to the block where it is defined.
    • Lifetime: Exists until the function/block ends.
    • Visibility: Not accessible outside the function/block.
    • Default Value: Garbage (undefined).
    • Key Restriction: Cannot use & (address-of) operator on register variables.

    Example:

    #include <stdio.h>
    void testFunction() {
        register int x = 5;  // Hints compiler to store in CPU register
        printf(\"Value of x: %d\\n\", x);
    }
    int main() {
        testFunction();
        return 0;
    }
    

    Example: Error Case (& Operator)

    #include <stdio.h>
    int main() {
        register int x = 10;
        printf(\"%p\\n\", &x);  // ❌ Error: Cannot get address of register variable
        return 0;
    }
    

    Error: cannot take the address of register variable x.

    Key Points of Storage classes:

    • register is just a hint; compiler may ignore it.
    • Useful for performance-critical variables like loop counters.
    • No guarantee that the variable will be stored in registers.

    Interview Questions of Storage classes:

    • What is the purpose of the register storage class?
    • Can we declare a pointer to a register variable? (No)
    • What happens if the compiler cannot store a register variable in a CPU register?

    Comparison Table of Storage classes :

    Storage ClassScopeLifetimeDefault ValueSpecial Features
    autoLocalFunction/blockGarbageDefault storage class for local variables
    externGlobalWhole programZero (0)Used for global variables across multiple files
    staticLocal/GlobalWhole programZero (0)Retains value between function calls, file scope for global static variables
    registerLocalFunction/blockGarbageSuggests CPU register usage, address (&) not allowed

    FAQ (Frequently Asked Questions) on Storage Classes in C and C++:

    1. What are storage classes in C/C++?

    Storage classes define the scope, lifetime, and visibility of variables and functions in a program. They determine where and how a variable is stored in memory.

    2. What are the different types of storage classes in C/C++?

    There are four main storage classes:

    • auto – Default for local variables (stored in stack).
    • register – Hints to store the variable in a CPU register for faster access.
    • static – Retains the value of a variable between function calls.
    • extern – Refers to a global variable defined in another file.

    3. What is the default storage class for variables in C?

    By default, local variables have the auto storage class.

    4. What is the difference between auto and register storage classes?

    Featureautoregister
    StorageStackCPU register (if available)
    ScopeLocalLocal
    LifetimeFunction callFunction call
    Access via &YesNo (register variables don’t have a memory address)
    SpeedNormalFaster (if stored in a register)

    5. Can we take the address of a register variable?

    No. The register storage class suggests the variable be stored in a CPU register, which doesn’t have a memory address.

    register int x = 10;
    printf(\"%p\", &x); // ❌ Error: Cannot take address of register variable
    

    6. What is the purpose of static storage class in C/C++?

    The static storage class is used to:

    • Retain a variable’s value across function calls (inside a function).
    • Restrict the scope of a global variable to the same file (internal linkage).

    ✅ Example (Inside a function):

    void counter() {
        static int count = 0; // Value persists
        count++;
        printf(\"%d\\n\", count);
    }
    int main() {
        counter(); // Output: 1
        counter(); // Output: 2
        return 0;
    }
    

    ✅ Example (File Scope – Internal Linkage):

    static int var = 10; // Only accessible within this file
    

    7. What is the difference between static and extern variables?

    Featurestaticextern
    ScopeLimited to the same fileAccessible across multiple files
    LifetimeThroughout the programThroughout the program
    Use CaseKeeps variable private to the fileShares variable across files

    8. Can we use static inside a class in C++?

    Yes. In C++, static can be used inside a class to create class variables (shared across all objects).

    ✅ Example (C++ static member variable):

    class Test {
        static int count; // Shared by all objects
    public:
        void increment() { count++; }
        void show() { std::cout << count << std::endl; }
    };
    int Test::count = 0; // Must be defined outside the class
    

    9. What happens if we declare a variable as extern but don’t define it?

    If a variable is declared with extern but not defined anywhere, the compiler will throw a linking error.

    ✅ Example (Correct Usage across files):
    File 1 (file1.c):

    int num = 10; // Global definition
    

    File 2 (file2.c):

    extern int num; // Declaration
    printf(\"%d\", num); // ✅ Works fine
    

    ❌ Incorrect (Missing Definition):

    extern int num;
    printf(\"%d\", num); // ❌ Linker Error: Undefined reference to \'num\'
    

    10. Can a function be declared as static?

    Yes. A static function has file scope, meaning it can only be accessed within the file where it is declared.

    ✅ Example:

    static void helper() {
        printf(\"This function is only accessible in this file.\");
    }
    

    11. What is the difference between static and global variables?

    Featurestatic (Global Scope)Global Variable
    ScopeLimited to the fileAccessible in all files
    LifetimeProgram lifetimeProgram lifetime
    Use CaseHides from other filesAccessible everywhere

    ✅ Example:

    static int a = 10; // Accessible only in this file
    int b = 20;        // Accessible in all files if declared with `extern`
    

    12. Can a global variable be static and extern at the same time?

    No. static restricts visibility to the file, while extern is used to access a variable globally across multiple files. They conflict with each other.

    13. Where are storage class variables stored in memory?

    Storage ClassStored In
    autoStack
    registerCPU Register (if available)
    staticData Segment (BSS or initialized)
    externData Segment

    14. What is the difference between static and const in C/C++?

    Featurestaticconst
    ScopeCan be global or localLocal by default
    LifetimeThroughout the programDepends on where it is defined
    Modifiable?YesNo (Read-only)

    ✅ Example (Difference):

    static int x = 10;  // Accessible only in this file
    const int y = 20;   // Cannot be modified
    

    15. Can static and volatile be used together?

    Yes. static controls lifetime, while volatile tells the compiler not to optimize the variable.

    ✅ Example (Using static volatile):

    static volatile int flag = 1;
    

    🔹 Useful in embedded systems where the variable is modified by hardware (e.g., interrupts).

    16. Can we use extern with functions?

    Yes. By default, functions in C have external linkage, so extern is redundant but still valid.

    ✅ Example:

    extern void func(); // Declaration
    void func() {
        printf(\"Hello World\");
    }
    

    17. How does extern \"C\" work in C++?

    C++ uses name mangling, so extern \"C\" ensures the function is linked using C-style linkage (useful when calling C functions from C++).

    ✅ Example (C++ Code Calling C Function):

    extern \"C\" void hello(); // Declaring C function

    18. Which storage class should be used for embedded programming?

    • register → Fast access variables.
    • static → Retain values (e.g., sensor data).
    • volatile → Prevent compiler optimizations (e.g., ISR flags).
    • extern → Share global variables across files.

    19. Why is static used in embedded systems?

    • Reduces RAM usage by keeping variables in non-volatile memory (data segment).
    • Avoids unnecessary stack allocation.
    • Improves performance by retaining values across function calls.

    20. What are the best practices for using storage classes?

    ✔️ Use static for file-private variables.
    ✔️ Use register for frequently accessed variables (if needed).
    ✔️ Use extern for global variables shared across files.
    ✔️ Avoid too many global variables (use static instead).

    Here are 20 Multiple Choice Questions (MCQs) on Storage Classes in C and C++:

    1. What is the default storage class for local variables in C?

    a) auto
    b) static
    c) register
    d) extern

    ✅ Answer: a) auto

    2. Which storage class is used to retain a variable’s value across function calls?

    a) auto
    b) static
    c) register
    d) extern

    ✅ Answer: b) static

    3. Where are register variables stored?

    a) Heap
    b) Stack
    c) CPU Register
    d) Data Segment

    ✅ Answer: c) CPU Register

    4. Which storage class makes a global variable accessible across multiple files?

    a) static
    b) extern
    c) register
    d) auto

    ✅ Answer: b) extern

    5. What happens if you take the address of a register variable?

    a) It returns the memory address
    b) It results in a compilation error
    c) It returns NULL
    d) It gives unpredictable behavior

    ✅ Answer: b) It results in a compilation error

    6. What is the lifetime of a static variable declared inside a function?

    a) Until the function exits
    b) Throughout the program execution
    c) Until the next function call
    d) Depends on compiler optimization

    ✅ Answer: b) Throughout the program execution

    7. Which storage class ensures a function is not accessible from other files?

    a) extern
    b) register
    c) static
    d) auto

    ✅ Answer: c) static

    8. Where are static variables stored in memory?

    a) Stack
    b) Heap
    c) Data Segment
    d) CPU Register

    ✅ Answer: c) Data Segment

    9. What is the scope of an auto variable?

    a) Function-level (local scope)
    b) Global scope
    c) File-level
    d) System-wide

    ✅ Answer: a) Function-level (local scope)

    10. What is the primary purpose of the extern keyword?

    a) To make variables private to a file
    b) To declare a variable defined in another file
    c) To store a variable in a CPU register
    d) To keep a variable’s value persistent

    ✅ Answer: b) To declare a variable defined in another file

    11. Which keyword is used to restrict a global variable’s access to the same file?

    a) extern
    b) auto
    c) static
    d) volatile

    ✅ Answer: c) static

    12. Which of the following is true about register variables?

    a) They are guaranteed to be stored in CPU registers
    b) They can be accessed from other files
    c) They have a local scope
    d) They can be modified by external programs

    ✅ Answer: c) They have a local scope

    13. How many times is memory allocated for a static variable in a function?

    a) Every time the function is called
    b) Only once
    c) Never
    d) Once per function call

    ✅ Answer: b) Only once

    14. Can a static variable be initialized inside a function?

    a) No, it must be global
    b) Yes, but it retains its value across calls
    c) No, only extern variables can
    d) Yes, but it is destroyed after function exits

    ✅ Answer: b) Yes, but it retains its value across calls

    15. What will happen if a global variable is declared as static?

    a) It can be accessed from other files
    b) It will be stored in CPU registers
    c) It will be limited to the current file
    d) It will cause an error

    ✅ Answer: c) It will be limited to the current file

    16. Which storage class should be used for sharing global variables across multiple files?

    a) auto
    b) static
    c) register
    d) extern

    ✅ Answer: d) extern

    17. What is the difference between static and extern storage classes?

    a) static restricts variable scope, extern extends it
    b) static is for global variables only
    c) extern variables cannot be modified
    d) static variables cannot be initialized

    ✅ Answer: a) static restricts variable scope, extern extends it

    18. In C++, what does static do when used inside a class?

    a) Creates a variable that belongs to a single instance
    b) Makes the variable global
    c) Creates a class variable shared by all objects
    d) Prevents inheritance

    ✅ Answer: c) Creates a class variable shared by all objects

    19. Where are extern variables stored?

    a) Heap
    b) Stack
    c) Data Segment
    d) Register

    ✅ Answer: c) Data Segment

    20. Which storage class should be used for variables that must be frequently accessed?

    a) static
    b) register
    c) extern
    d) auto

    ✅ Answer: b) register

    Thank you for exploring this Storage classes tutorial ! Stay ahead in embedded systems with expert insights, hands-on projects, and in-depth guides. Follow Embedded Prep for the latest trends, best practices, and step-by-step tutorials to enhance your expertise. Keep learning, keep innovating!

    You can also Visit other tutorials of Embedded Prep :

  • Master Build Process in C from Source Code to Executable (2026)

    Master the Build Process in C from source code to executable. Learn preprocessing, compilation, assembly, and linking for 2025 interviews.

    Master the Build Process in C from source code to executable in this complete 2025 guide. Learn each stage of the Build Process including preprocessing, compilation, assembly, and linking with clear explanations and real interview-oriented insights. Understand how source files are transformed into object files and finally into an executable, along with the role of compilers, assemblers, linkers, and build tools like GCC and Make. This guide is perfect for beginners, embedded engineers, and interview preparation, helping you troubleshoot build errors, optimize builds, and gain a strong foundation in C programming internals. Boost your understanding of the Build Process and confidently answer C interview questions in 2025.

    Build Process in C from ource Code to Executable : Understanding the build process in C is crucial for developers, especially those working with embedded systems, operating systems, or performance-critical applications. The process of transforming human-readable C source code into an executable involves multiple stages. Let’s dive deep into these stages and understand their significance.

    Stages of the Build Process

    The C build process consists of the following major stages:

    • Preprocessing
    • Compilation
    • Assembly
    • Linking

    Each of these stages plays a vital role in generating the final executable file.

    1. Preprocessing (Expanding Macros and Includes)

    The first stage of the build process is preprocessing, where the C preprocessor (cpp) expands macros, processes #include files, and handles conditional compilation directives like #ifdef.

    Key Tasks in Preprocessing:

    • Expands macros (#define)
    • Replaces header file includes (#include)
    • Handles conditional compilation (#ifdef, #ifndef, #endif)

    Example:
    Consider the following program.c:

    #include <stdio.h>  
    #define PI 3.14  
    int main() {  
        printf(\"Value of PI: %f\\n\", PI);  
        return 0;  
    }
    

    After preprocessing, the code will look like this:

    // Expanded version after preprocessing  
    #include <stdio.h>  
    int main() {  
        printf(\"Value of PI: %f\\n\", 3.14);  
        return 0;  
    }
    

    To see the preprocessed output, use:

    gcc -E program.c -o program.i  
    

    2. Compilation (Converting C Code to Assembly)

    In this stage, the compiler (gcc, clang) translates the preprocessed source code into assembly language, which is a low-level representation of the code.

    Example:

    gcc -S program.i -o program.s  
    

    This generates an assembly file (program.s) containing processor-specific instructions.

    Example assembly output (simplified):

    .section .text  
    .globl main  
    main:  
        pushq   %rbp  
        movq    %rsp, %rbp  
        movl    $0, %eax  
        popq    %rbp  
        ret  
    

    3. Assembly (Converting Assembly to Machine Code)

    The assembler (as) takes the assembly code and converts it into machine code, producing an object file (.o file).

    Command to generate object file:

    gcc -c program.s -o program.o  
    

    The .o file contains binary instructions but is not yet a complete executable because it still needs linking.

    4. Linking (Combining Object Files to Create an Executable)

    The linker (ld) combines multiple object files and links necessary system libraries to produce the final executable.

    • Resolves function calls (e.g., linking printf() to libc).
    • Merges object files (.o) into a single executable.
    • Allocates memory for variables and functions.

    Command to link:

    gcc program.o -o program  
    

    After linking, the final executable (program) is created and ready to run:

    ./program  
    

    Complete Build Process in One Command

    Instead of running all steps separately, we can compile and link in one step using:

    gcc program.c -o program  
    

    This internally performs preprocessing → compilation → assembly → linking automatically.

    Understanding Static and Dynamic Linking

    Static Linking:

    • Includes all required libraries in the executable.
    • Larger file size but runs independently.
    • Example: gcc -static program.c -o program

    Dynamic Linking:

    • Links external libraries at runtime (e.g., glibc).
    • Smaller executable but requires shared libraries (.so files).
    • Example: gcc program.c -o program -lm # Links math library dynamically

    Build Automation with Makefiles

    For large projects with multiple files, Makefiles automate the build process efficiently.

    Example Makefile:

    program: main.o helper.o  
        gcc main.o helper.o -o program  
    main.o: main.c  
        gcc -c main.c  
    helper.o: helper.c  
        gcc -c helper.c  
    clean:  
        rm -f *.o program  
    

    To build the program, simply run:

    make  
    

    To clean object files:

    make clean  

    💛 Support Embedded Prep

    If you find our tutorials helpful and want to support our mission of sharing high-quality embedded system knowledge, you can contribute by buying us a coffee. Every small contribution helps us keep creating valuable content for learners like you. ☕

    Thank you for your support — it truly keeps Embedded Prep growing. 💻✨

    Interview Questions of build process

    Build Process Basics

    1. What are the steps involved in the build process of a C/C++ program?
    2. What is the difference between compilation and linking?
    3. What happens during preprocessing? Can you give examples of preprocessing directives?
    4. What is an object file?
    5. Why do we need a linker in the build process?

    Makefile and Build Automation

    1. What is a Makefile and why is it used?
    2. Explain the structure of a Makefile. What are targets, prerequisites, and commands?
    3. How does make know when to rebuild a file?
    4. What is the difference between make and cmake?
    5. What is a phony target in Makefile and why do we use .PHONY?

    Toolchain and Cross-Compilation

    1. What is a cross-compiler and when do you use it?
    2. What’s the difference between gcc and g++?
    3. What are the different stages involved when using a cross-toolchain for embedded development?
    4. How do you build an image for an embedded board using a build system like Yocto or Buildroot?

    Build Configuration and Optimization

    1. What are common compiler optimization flags you use?
    2. What’s the purpose of flags like -Wall, -O2, -g, -std=c99, etc.?
    3. What’s the difference between static and dynamic linking?
    4. How do you debug a build error due to a missing symbol or header file?

    Advanced / Real-World Scenarios

    1. Have you written a custom Makefile or modified a Yocto recipe? Explain.
    2. How do you include third-party libraries in your build process?
    3. Have you used build systems like Yocto, CMake, or Bazel? Compare them.
    4. What’s the role of the linker script in embedded systems?

    Conclusion

    Understanding the build process helps in optimizing code, debugging errors, and improving performance. Whether you\’re debugging linking errors, reducing compilation time, or managing dependencies in large projects, mastering these stages is essential for any C developer.

    Thank you for exploring Build Process in C ! Stay ahead in embedded systems with expert insights, hands-on projects, and in-depth guides. Follow Embedded Prep for the latest trends, best practices, and step-by-step tutorials to enhance your expertise. Keep learning, keep innovating!

    You can also Visit other tutorials of Embedded Prep 

  • Master Memory Layout of C Programs (2026)

    Master the Memory Layout of C Programs in 2026. Learn stack, heap, data, BSS, and text segments with clear explanations for interviews.

    Memory Layout of C Programs : Understanding the memory layout of C programs is crucial for every developer, especially those working with embedded systems, operating systems, or low-level programming. C provides direct access to memory, and knowing how it is structured can help in debugging, optimization, and efficient resource utilization.

    Memory Segments in a C Program

    A C program is typically divided into five major memory segments:

    • Text Segment (Code Segment)
    • Initialized Data Segment
    • Uninitialized Data Segment (BSS)
    • Heap Segment
    • Stack Segment

    Let\’s explore each of these in detail.

    1. Text Segment (Code Segment)

    The text segment stores the executable code of the program. It is usually read-only to prevent accidental modification of instructions, ensuring program stability and security.

    • Contains machine instructions.
    • Typically marked as read-only.
    • Shared among multiple instances of the same program to optimize memory usage.

    Example:

    void function() {
        printf(\"Hello, World!\\n\");
    }
    

    The function() resides in the text segment.

    2. Initialized Data Segment

    This segment contains global and static variables that are explicitly initialized before execution.

    • Divided into read-only and read-write sections.
    • Memory is allocated at compile-time.

    Example:

    int global_var = 10;   // Stored in initialized data segment
    static int static_var = 20;  // Also in initialized data segment
    

    3. Uninitialized Data Segment (BSS)

    This segment stores global and static variables that are uninitialized or initialized to zero.

    • Allocated at runtime and initialized to zero by default.
    • Saves space since uninitialized variables don’t need explicit storage in the binary file.

    Example:

    int uninitialized_global;  // Stored in BSS segment
    static int static_var;     // Stored in BSS segment
    

    4. Heap Segment

    The heap is used for dynamic memory allocation at runtime via functions like malloc(), calloc(), and realloc().

    • Grows dynamically as needed.
    • Must be managed manually (free() should be used to avoid memory leaks).

    Example:

    #include <stdlib.h>
    int main() {
        int *ptr = (int *)malloc(sizeof(int) * 5); // Allocates memory in the heap
        free(ptr);  // Frees allocated memory
        return 0;
    }
    

    5. Stack Segment

    The stack is used for function calls, local variables, and control flow.

    • Follows LIFO (Last In, First Out) principle.
    • Grows downward in memory.
    • Automatically managed (allocation and deallocation are handled by function calls and returns).

    Example:

    void myFunction() {
        int local_var = 5;  // Stored in stack
    }
    

    Each function call creates a new stack frame that includes local variables and return addresses.

    Memory Layout Representation

    A typical C program’s memory layout looks like this:

    --------------------------- (High Memory)
    |      Command-Line Args   |
    ---------------------------
    |      Environment Vars    |
    ---------------------------
    |         Stack           |
    |       (grows down)      |
    ---------------------------
    |         Heap            |
    |      (grows up)         |
    ---------------------------
    |    Uninitialized Data   |
    |         (BSS)           |
    ------------------------------
    |    Initialized Data     |
    -------------------------------
    |       Text Segment      |
    --------------------------- (Low Memory)
    

    Key Considerations

    • Stack Overflow: If too many function calls are made without returning (e.g., infinite recursion), the stack may overflow.
    • Memory Fragmentation: Improper memory management in the heap can lead to fragmentation, reducing efficiency.
    • Data Security: Marking code segments as read-only prevents accidental overwriting and security vulnerabilities.

    What is .rodata

    In the memory layout of C programs, .rodata refers to a section in memory that holds read-only data. This section typically stores constant values or string literals that do not change during the execution of the program.

    Key points about .rodata:

    • Read-Only Data: As the name suggests, data stored in this section is read-only, meaning the program cannot modify it during runtime. Attempting to do so may result in a segmentation fault or other undefined behavior.
    • Common Data Types: The .rodata section generally contains:
      • String literals, e.g., \"Hello, World!\"
      • Constant variables, such as const int x = 42;
      • Other constant data like arrays or static data that are initialized with constant values.
    • Location in Memory Layout: The .rodata section is typically placed after the text section (which contains the program\’s executable code) but before the data section (which contains variables with mutable values). Its exact position can vary depending on the system and compiler, but it is generally placed in the read-only portion of the address space.
    • Why is it Important?
      • Optimization: Storing constant values in a read-only section can improve program optimization by enabling certain compiler or linker optimizations, like de-duplication (if the same constant is used multiple times, it is stored only once).
      • Memory Protection: By placing constant data in a separate section marked as read-only, it helps prevent accidental modification, providing a layer of safety.

    Example:

    #include <stdio.h>
    int main() {
        const int x = 5;            // x might go in .rodata section
        const char *str = \"Hello\";  // String literal goes in .rodata section
        printf(\"%d %s\\n\", x, str);
        return 0;
    }

    In the example above:

    • The string literal \"Hello\" is stored in the .rodata section.
    • The constant integer x may also be placed in .rodata by the compiler (depending on how the compiler optimizes the program).

    💛 Support Embedded Prep

    If you find our tutorials helpful and want to support our mission of sharing high-quality embedded system knowledge, you can contribute by buying us a coffee. Every small contribution helps us keep creating valuable content for learners like you. ☕

    Thank you for your support — it truly keeps Embedded Prep growing. 💻✨

    FAQ for Memory Layout of C Programs

    1. What are the main sections in the memory layout of a C program?

    The memory layout of a C program typically consists of the following sections:

    • Text Segment (Code Segment): Contains the executable code of the program.
    • Data Segment:
      • Initialized Data: Stores global and static variables that are initialized by the programmer.
      • Uninitialized Data (BSS): Stores global and static variables that are uninitialized (i.e., variables with no explicit initial value).
    • Heap: Used for dynamic memory allocation (via malloc, calloc, realloc, etc.). This area grows and shrinks during the program\’s execution.
    • Stack: Stores local variables, function parameters, and return addresses. The stack grows and shrinks as functions are called and return.
    • .rodata (Read-Only Data): Holds constant values, string literals, and other constant data that cannot be modified during execution.

    2. What is the stack used for in memory?

    The stack is used for managing function calls. It stores:

    • Local variables within functions.
    • Function call information (return addresses).
    • Function parameters passed during function calls. The stack grows downwards (from higher memory addresses to lower addresses), and memory is automatically reclaimed when a function returns.

    3. What is the heap used for in memory?

    The heap is used for dynamic memory allocation, where memory is allocated at runtime using functions like malloc, calloc, realloc, or free. It grows upwards (from lower memory addresses to higher ones). Unlike the stack, memory in the heap is not automatically reclaimed when a function returns, so you must manually manage memory (via free).

    4. What is the BSS segment?

    The BSS (Block Started by Symbol) segment stores uninitialized global and static variables. Variables in the BSS segment are automatically initialized to zero or null pointers. The BSS section typically occupies a larger part of the memory compared to initialized data because uninitialized variables do not need to be stored in the program\’s binary.

    5. What is the .rodata section?

    The .rodata section (read-only data) stores constant data like string literals, constant variables, and other values that do not change during the execution of the program. The data in this section is marked as read-only to prevent accidental modification, ensuring safety and preventing bugs.

    6. How does memory layout affect program performance?

    Memory layout can impact program performance in several ways:

    • Cache Locality: The arrangement of data in memory can influence cache efficiency. Placing related data close together can reduce cache misses.
    • Stack and Heap Management: If stack and heap memory grow into each other due to excessive memory allocation or deep recursion, it can cause a stack overflow or heap corruption, resulting in crashes.
    • Memory Fragmentation: Excessive dynamic memory allocation and deallocation in the heap can lead to fragmentation, causing inefficient memory use.

    7. What is memory alignment, and why is it important in C programs?

    Memory alignment refers to the arrangement of data in memory so that data types are placed at addresses that are multiples of their size. For example, a 4-byte int should be placed at an address that is a multiple of 4. Proper alignment ensures efficient memory access, better performance, and avoids potential errors, especially on architectures that impose strict alignment constraints.

    8. What happens if the stack grows too large?

    If the stack grows too large (due to deep recursion, large local variables, etc.), it may overflow, causing a stack overflow. This is a type of runtime error where the stack exceeds its allocated memory, leading to a crash or undefined behavior. It\’s important to manage stack usage carefully.

    9. What is a segmentation fault, and how does it relate to memory layout?

    A segmentation fault (segfault) occurs when a program tries to access a memory location that it isn\’t allowed to, such as reading or writing to memory outside the boundaries of the stack, heap, or data sections. It can happen due to bugs like dereferencing null pointers, accessing out-of-bounds array elements, or modifying read-only memory (like the .rodata section).

    10. What is the difference between the data segment and the BSS segment?

    • Data Segment: This contains initialized global and static variables. The values are set during compilation or initialization.
    • BSS Segment: This contains uninitialized global and static variables, which are initialized to zero at runtime.

    11. How is memory layout related to system architecture?

    The memory layout can differ depending on the system architecture (e.g., x86, ARM, MIPS) and operating system (e.g., Linux, Windows). For example:

    • Some architectures may require stricter alignment than others.
    • The layout of the heap and stack, and how they grow, can be different on different systems.
    • OS-specific features (such as memory protection) can affect the placement of segments like .rodata or .text.

    12. Why is the text section typically read-only?

    The text section, which contains executable code, is usually marked as read-only to prevent accidental modification of the program’s code while running. This also helps with security by making it harder for attackers to inject malicious code into the program\’s execution flow.

    Interview questions related to the memory layout of C programs

    General Memory Layout Questions:

    • What is the memory layout of a C program?
      • Explain the different sections in a typical C program\’s memory layout (text, data, BSS, heap, stack, .rodata, etc.).
    • What is the difference between the data segment and the BSS segment?
      • How are they different in terms of initialization?
    • Can you explain the role of the stack in a C program?
      • What happens when the stack overflows?
    • What is the heap, and how is it used in C programs?
      • How does dynamic memory allocation and deallocation work with malloc, calloc, and free?
    • What is the .rodata section, and why is it used in C programs?
      • What kind of data does it contain, and why is it important for optimization and safety?
    • What is a segmentation fault? How does it relate to the memory layout of a C program?
      • Provide examples where segmentation faults might occur due to incorrect memory handling.
    • Why are the text and data segments separated in memory?
      • Explain the importance of separating code (text) from data.
    • How does memory alignment impact performance in C?
      • What happens if data is not properly aligned? How does alignment differ on different systems or architectures?
    • What is a stack overflow, and how can it happen?
      • Describe a scenario where a stack overflow might occur in a C program.
    • What is the role of the .text section in a C program\’s memory layout?
      • What type of data is stored here, and why is it typically read-only?

    Heap and Stack Management:

    • How does memory fragmentation affect the heap in C?
      • How can fragmentation be mitigated or reduced in C programs?
    • What is the difference between malloc and calloc in terms of memory allocation?
      • Explain how each function behaves and when you might use one over the other.
    • What is a memory leak in C? How do you avoid it?
      • How does improper memory management lead to memory leaks, and how can they be avoided?
    • Explain the concept of memory fragmentation and how it affects the heap.
      • What causes memory fragmentation, and how can it be reduced or eliminated?

    Advanced and System-Level Questions:

    • How does the operating system handle memory protection in a C program?
      • How do operating systems prevent a C program from writing to memory it shouldn’t access?
    • What is the difference between static and dynamic memory allocation in C?
      • Discuss both memory allocation strategies and how they differ in terms of memory management and usage.
    • How does the linker handle different segments in memory?
      • How are global variables, constants, and functions placed in different sections?
    • How does function recursion impact the stack?
      • What happens to the stack during recursive function calls, and how does deep recursion affect memory usage?
    • What is a \”segmentation fault,\” and how can it occur due to improper handling of memory in C programs?
      • Provide a code example that could lead to a segmentation fault.
    • Explain what happens when you call free on a pointer that was not allocated dynamically.
      • What issues can arise from attempting to free a pointer incorrectly?

    Code-Related Questions:

    • What will happen if you try to modify a string literal in C?
      • Explain the outcome and why it happens in the context of memory layout.
    • What are the potential consequences of exceeding the stack size?
      • How does the stack size limit affect function calls and local variable allocation?
    • What are some ways to prevent memory leaks in C?
      • How can you ensure that every dynamically allocated memory is properly freed?
    • Can you explain the difference between a \”dangling pointer\” and a \”null pointer\”?
      • How can each of them cause issues, and how do you prevent them?

    Performance and Optimization:

    • How can you optimize memory usage in a C program?
      • What strategies can you use to optimize memory allocation and reduce waste?
    • What is the role of const in memory layout?
      • How does the const keyword impact memory sections like .rodata or the stack?
    • How does memory layout influence program performance on multi-core systems?
      • How does memory access pattern and layout affect cache efficiency and overall performance?
    • What is the difference between a stack and a heap, and when would you use each for memory allocation?
      • In what scenarios would you prefer stack memory over heap memory, and vice versa?

    Debugging and Analysis:

    • How would you debug a memory corruption issue related to the stack or heap?
      • What tools or methods would you use to identify and fix memory corruption?
    • What is the role of a memory profiler, and how does it help in managing memory in C programs?
      • Can you describe any tools or techniques you use to profile memory usage in C?

    Thank you for exploring Memory Layout of C Programs ! Stay ahead in embedded systems with expert insights, hands-on projects, and in-depth guides. Follow Embedded Prep for the latest trends, best practices, and step-by-step tutorials to enhance your expertise. Keep learning, keep innovating!

    You can also Visit other tutorials of Embedded Prep 

  • Master Top 50 Must-Know Pointers Interview Questions in C and C++ (Ace Your Next Interview!

    Pointers Interview Question on C and C++ : Pointers are one of the most powerful and essential features of C and C++. They allow efficient memory manipulation and direct interaction with hardware. In this blog post, we will explore various types of pointers, their descriptions, and usage examples.

    Here are some important pointer-related interview questions, covering NULL pointers, dangling pointers, wild pointers, function pointers, and more. You can use these to write your blog post.

    Basic Pointer Questions

    1. What is a pointer in C/C++?

    A pointer is a variable that stores the memory address of another variable. It allows direct access and manipulation of memory, making it a powerful feature in C and C++.

    2. How do you declare and initialize a pointer?

    A pointer is declared using the * symbol. Initialization can be done in multiple ways:

    int a = 10;        // Normal variable
    int* ptr = &a;     // Pointer storing the address of \'a\'
    

    Alternatively, you can initialize a pointer to nullptr:

    int* ptr = nullptr;  // Pointer initialized to null (C++11 onwards)
    

    3. What happens if you try to dereference an uninitialized pointer?

    Dereferencing an uninitialized pointer (wild pointer) leads to undefined behavior, which may cause a segmentation fault or crash. Example:

    int* ptr;       // Uninitialized pointer
    std::cout << *ptr;  // Undefined behavior (may crash)
    

    4. What is the difference between a pointer and a reference in C++?

    FeaturePointerReference
    Syntaxint* ptr = &x;int& ref = x;
    NullabilityCan be nullptrCannot be null
    ReassignmentCan change what it points toCannot be changed after initialization
    Memory AddressStores an address explicitlyActs as an alias for the variable

    5. How can you print the address stored in a pointer?

    You can print the address using cout in C++ or printf in C:

    int a = 10;
    int* ptr = &a;
    std::cout << \"Address stored in ptr: \" << ptr << std::endl;
    

    Or in C:

    printf(\"Address stored in ptr: %p\\n\", (void*)ptr);

    NULL Pointers

    1. What is a NULL pointer?

    A NULL pointer is a pointer that does not point to any valid memory location. It is used to indicate that the pointer is not assigned a valid address. In C/C++, it is typically defined as:

    #define NULL 0  // In C
    #define NULL nullptr  // In C++ (C++11 onwards uses \'nullptr\')
    

    Example:

    int* ptr = NULL;  // Pointer initialized to NULL
    

    2. Why should you initialize a pointer to NULL?

    Initializing a pointer to NULL helps prevent it from becoming a dangling or wild pointer. It makes it easier to check whether a pointer is valid before using it.

    Example:

    int* ptr = NULL; // Safe initialization
    if (ptr == NULL) {
        std::cout << \"Pointer is NULL, safe to check before use.\" << std::endl;
    }
    

    3. What happens if you dereference a NULL pointer?

    Dereferencing a NULL pointer leads to undefined behavior, which typically results in a segmentation fault (crash).

    Example:

    int* ptr = NULL;
    std::cout << *ptr;  // Crash! Undefined behavior
    

    4. How do you check if a pointer is NULL before using it?

    Before dereferencing, always check if a pointer is NULL:

    if (ptr != NULL) {
        std::cout << *ptr;  // Safe to use
    } else {
        std::cout << \"Pointer is NULL, cannot dereference!\" << std::endl;
    }
    

    In modern C++ (C++11 and later), it\’s better to use nullptr:

    if (ptr != nullptr) {
        std::cout << *ptr;
    }
    

    5. Is NULL the same as 0 in C++?

    • In C, NULL is typically defined as 0.
    • In C++, NULL is still 0, but nullptr (introduced in C++11) is a better alternative because it is strongly typed and prevents accidental type conversions.

    Example:

    int* p1 = NULL;    // Works, but NULL is just 0
    int* p2 = 0;       // Also works, but less readable
    int* p3 = nullptr; // Preferred in C++ (strongly typed)
    

    Thus, while NULL and 0 are technically the same in older C++, nullptr is the preferred way in modern C++.

    Dangling Pointers

    1. What is a dangling pointer?

    A dangling pointer is a pointer that refers to a memory location that has been freed, deleted, or gone out of scope. Accessing such a pointer leads to undefined behavior and potential program crashes.

    2. How does a dangling pointer occur?

    A dangling pointer can occur in several situations:

    • Deallocation of memory
      • When dynamically allocated memory is freed but the pointer still holds the address.
      int* ptr = new int(10); delete ptr; // Memory is freed std::cout << *ptr; // Dangling pointer access! Undefined behavior
    • Returning address of a local variable
      • A local variable goes out of scope when a function returns, making the pointer invalid.
      int* getPointer() { int x = 10; return &x; // Returning address of local variable (invalid) } int* ptr = getPointer(); std::cout << *ptr; // Dangling pointer access!
    • Pointer to an object that goes out of scope
      • When a pointer points to an object that has gone out of scope.
      int* ptr; { int x = 10; ptr = &x; // x goes out of scope after this block } std::cout << *ptr; // Dangling pointer access!

    💛 Support Embedded Prep

    If you find our tutorials helpful and want to support our mission of sharing high-quality embedded system knowledge, you can contribute by buying us a coffee. Every small contribution helps us keep creating valuable content for learners like you. ☕

    Thank you for your support — it truly keeps Embedded Prep growing. 💻✨

    3. How can you prevent dangling pointers?

    To avoid dangling pointers, follow these practices:

    ✔ Set pointers to NULL after freeing memory

    int* ptr = new int(10);
    delete ptr;
    ptr = nullptr;  // Prevents dangling
    

    ✔ Avoid returning addresses of local variables

    int* getPointer() {
        static int x = 10;  // Static variables persist after function returns
        return &x;
    }
    

    ✔ Use smart pointers (C++11 and later)

    • Smart pointers (std::unique_ptr and std::shared_ptr) manage memory automatically and prevent dangling pointers.
    #include <memory>
    std::unique_ptr<int> ptr = std::make_unique<int>(10);
    

    4. What happens if you use a dangling pointer?

    Using a dangling pointer leads to undefined behavior, which may cause:

    • Segmentation faults (crashes)
    • Corrupt program data
    • Hard-to-debug memory issues

    5. Example of a dangling pointer scenario

    #include <iostream>
    
    void dangerousFunction() {
        int* ptr = new int(20);
        delete ptr;  // Memory is freed
        std::cout << *ptr;  // Accessing freed memory (undefined behavior!)
    }
    
    int main() {
        dangerousFunction();
        return 0;
    }
    

    ✅ Solution: Set ptr = nullptr; after delete ptr; to prevent accidental access.

    Wild Pointers

    1. What is a wild pointer?

    A wild pointer is an uninitialized pointer that holds a garbage (random) memory address. Since it does not point to a valid memory location, dereferencing it leads to undefined behavior, including program crashes.

    Example of a wild pointer:

    int* ptr;  // Wild pointer (uninitialized)
    std::cout << *ptr;  // Undefined behavior! Might crash the program
    

    2. How does a wild pointer differ from a dangling pointer?

    AspectWild PointerDangling Pointer
    DefinitionUninitialized pointer holding garbage valuePointer pointing to memory that has been freed or is out of scope
    CauseDeclared but not assigned a valid memory addressMemory deallocation, object going out of scope, or returning a local address
    EffectCan point to any random memory locationCan cause undefined behavior when accessed after memory is freed
    PreventionAlways initialize pointersSet pointers to nullptr after freeing memory

    3. How can you prevent wild pointers?

    To avoid wild pointers, follow these best practices:

    ✔ Initialize pointers before use

    int* ptr = nullptr;  // Safe initialization
    

    ✔ Allocate memory before dereferencing

    int* ptr = new int(10);  // Allocated memory
    std::cout << *ptr;  // Safe
    delete ptr;
    ptr = nullptr;  // Avoids becoming a dangling pointer
    

    ✔ Use smart pointers in C++ (C++11 and later)

    #include <memory>
    std::unique_ptr<int> ptr = std::make_unique<int>(10);  // No need to manually delete
    

    4. How do you detect wild pointers in a program?

    Detecting wild pointers can be challenging, but here are some techniques:

    ✔ Use Valgrind (Linux/Mac) or AddressSanitizer (GCC/Clang)

    • Valgrind helps detect uninitialized memory access.
    valgrind --leak-check=full ./program
    
    • AddressSanitizer (compile with -fsanitize=address) can detect memory issues.

    ✔ Enable compiler warnings

    • Use -Wall -Wextra -Werror in GCC/Clang to catch uninitialized variables.

    ✔ Use debug tools like GDB

    • Run the program in GDB (gdb ./program) and check pointer values before dereferencing.

    ✔ Use assertions to check for nullptr

    #include <cassert>
    int* ptr = nullptr;
    assert(ptr != nullptr);  // This will terminate the program if ptr is NULL
    

    By following these techniques, you can minimize the risk of wild pointers in your program. 🚀

    Memory Management and Pointers

    1. What is a memory leak in the context of pointers?

    A memory leak occurs when dynamically allocated memory is not freed before the pointer to it is lost. This leads to wasted memory, which can degrade system performance and eventually cause the program to crash if memory runs out.

    Example of a memory leak:

    void memoryLeak() {
        int* ptr = new int(10);  // Memory allocated
        // No delete statement, so memory is never freed (leak)
    }
    

    Each time memoryLeak() is called, more memory is allocated but never freed.

    2. How do you prevent memory leaks when using dynamic memory allocation?

    ✔ Always free allocated memory

    int* ptr = new int(10);
    delete ptr;  // Prevents memory leak
    ptr = nullptr;  // Avoids dangling pointer
    

    ✔ Use Smart Pointers (C++11 and later)
    Smart pointers automatically manage memory, preventing leaks.

    #include <memory>
    std::unique_ptr<int> ptr = std::make_unique<int>(10);  // No need to delete
    

    ✔ Track allocations and deallocations carefully
    Use tools like Valgrind, AddressSanitizer, or GDB to detect leaks.

    ✔ Follow the Rule of Thumb:
    Every new should have a delete, and every malloc() should have a free().

    3. What is the purpose of malloc() and free() in C?

    • malloc(size_t size): Allocates size bytes of memory from the heap and returns a pointer to it. The memory is not initialized.
    • free(void* ptr): Frees the dynamically allocated memory, making it available for reuse.

    Example:

    #include <stdlib.h>
    int* ptr = (int*)malloc(sizeof(int) * 5);  // Allocates memory for 5 integers
    free(ptr);  // Frees the allocated memory
    

    4. What is the difference between malloc() and new in C++?

    Featuremalloc() (C)new (C++)
    Memory AllocationAllocates raw memoryAllocates memory and calls constructor
    InitializationNo initializationInitializes objects if applicable
    Return Typevoid* (requires casting)Returns specific type (no casting needed)
    Usageint* p = (int*)malloc(sizeof(int));int* p = new int;
    Freeing Memoryfree(ptr);delete ptr;

    ✔ Use new in C++ instead of malloc() for object-oriented programming, as it automatically calls constructors.


    5. What happens if you call free() on a NULL pointer?

    • Calling free(NULL) is safe and has no effect in C/C++.
    • The C standard guarantees that free(NULL); does nothing.

    Example:

    int* ptr = NULL;
    free(ptr);  // Safe, no effect
    

    6. What happens if you call delete twice on the same pointer?

    • Calling delete twice on the same pointer causes undefined behavior, which may result in a crash or memory corruption.

    Example of double delete (Undefined Behavior!):

    int* ptr = new int(10);
    delete ptr;  // First delete (valid)
    delete ptr;  // Second delete (undefined behavior!)
    

    ✔ Solution: Set the pointer to nullptr after deleting it.

    int* ptr = new int(10);
    delete ptr;
    ptr = nullptr;  // Prevents double delete
    

    🚀 By following best practices, you can avoid memory leaks and undefined behavior in your programs!

    Pointer Arithmetic

    1. What operations can be performed on pointers?

    Pointers support several operations:

    ✔ Assignment: Assign one pointer to another of the same type.

    int a = 10;
    int* p1 = &a;
    int* p2 = p1;  // Assigning one pointer to another
    

    ✔ Dereferencing (*): Access the value stored at the pointer’s address.

    std::cout << *p1;  // Prints value of \'a\' (10)
    

    ✔ Pointer Arithmetic:

    • Increment (ptr++), decrement (ptr--)
    • Addition (ptr + n), subtraction (ptr - n)
    • Subtracting two pointers (ptr1 - ptr2)

    ✔ Comparison (==, !=, >, <): Compare pointer addresses.

    if (p1 == p2) { std::cout << \"Same address\"; }
    

    2. What happens when you increment a pointer?

    When you increment a pointer (ptr++), it moves to the next memory location based on its data type size.

    Example:

    int arr[3] = {10, 20, 30};
    int* ptr = arr;  // Points to arr[0]
    
    ptr++;  // Moves to arr[1], not just 1 byte but sizeof(int) bytes
    std::cout << *ptr;  // Prints 20
    

    📌 For an int*, ptr++ increases the address by sizeof(int) (usually 4 bytes).

    3. How do pointer arithmetic operations depend on the data type?

    Pointer arithmetic is based on the size of the data type:

    Data TypeSize (sizeof(type))ptr++ moves by
    char*1 byte1 byte
    int*4 bytes (typical)4 bytes
    double*8 bytes8 bytes

    Example:

    char c = \'A\';
    char* p1 = &c;
    p1++;  // Moves by 1 byte
    
    double d = 3.14;
    double* p2 = &d;
    p2++;  // Moves by 8 bytes (on most systems)
    

    4. What is pointer subtraction?

    Pointer subtraction (ptr1 - ptr2) finds the distance (number of elements) between two pointers pointing to the same array.

    Example:

    int arr[] = {10, 20, 30, 40, 50};
    int* p1 = &arr[1];  // Points to 20
    int* p2 = &arr[4];  // Points to 50
    
    std::cout << (p2 - p1);  // Output: 3 (elements apart)
    

    📌 Formula: (p2 - p1) = (Address2 - Address1) / sizeof(type)

    5. Why can\’t you add two pointers?

    Adding two pointers (ptr1 + ptr2) has no logical meaning because:

    • A pointer stores a memory address, and adding two addresses doesn’t make sense.
    • Pointer arithmetic is defined in terms of element sizes, not memory locations.

    ❌ Invalid:

    int* p1, *p2;
    int* p3 = p1 + p2;  // Error: Addition of pointers is not allowed
    

    ✔ Allowed Operations:

    • Pointer + Integer (ptr + n moves the pointer n elements ahead)
    • Pointer – Pointer (finds distance between elements)

    🚀 By understanding these operations, you can use pointers efficiently in C/C++!

    Function Pointers

    1. What is a function pointer?

    A function pointer is a pointer that stores the address of a function, allowing you to call the function indirectly.

    ✔ Functions in C/C++ are stored in memory, and their addresses can be assigned to pointers.

    ✔ Function pointers are useful for callback functions, dynamic function selection, and polymorphism in C.

    2. How do you declare and use a function pointer?

    Declaration:

    returnType (*pointerName)(parameterTypes);
    

    Example: Using a Function Pointer

    #include <iostream>
    
    // Function to be pointed to
    void hello() {
        std::cout << \"Hello, World!\\n\";
    }
    
    int main() {
        void (*funcPtr)();  // Function pointer declaration
        funcPtr = hello;  // Assign function address
        funcPtr();  // Call function through pointer
    
        return 0;
    }
    

    📌 No need for & before function name (hello) because function names decay into pointers.

    3. What is a use case for function pointers?

    Function pointers are commonly used in:

    ✔ Callback functions (e.g., signal handlers, event handling)
    ✔ Dynamic function selection (e.g., strategy patterns)
    ✔ Jump tables (efficient switch-case alternatives)
    ✔ Sorting with custom comparison functions (qsort() in C)

    Example: Function Pointer in qsort()

    #include <stdio.h>
    #include <stdlib.h>
    
    // Comparison function for sorting in ascending order
    int compare(const void* a, const void* b) {
        return (*(int*)a - *(int*)b);
    }
    
    int main() {
        int arr[] = {4, 2, 9, 1, 5};
        int size = sizeof(arr) / sizeof(arr[0]);
    
        qsort(arr, size, sizeof(int), compare);  // Function pointer as argument
    
        for (int i = 0; i < size; i++)
            printf(\"%d \", arr[i]);  // Output: 1 2 4 5 9
    
        return 0;
    }
    

    📌 compare is passed as a function pointer to qsort() for sorting.

    A callback function is a function passed as an argument to another function. This allows for dynamic function execution.

    Example: Function Pointer as a Callback

    #include <iostream>
    
    // Callback function
    void printMessage(const std::string& msg) {
        std::cout << msg << std::endl;
    }
    
    // Function that takes a function pointer as a parameter
    void executeCallback(void (*callback)(const std::string&)) {
        callback(\"Callback executed!\");
    }
    
    int main() {
        executeCallback(printMessage);
        return 0;
    }
    

    📌 The executeCallback() function calls the function passed to it dynamically.

    5. Can a function return a pointer to another function?

    Yes! A function can return a pointer to another function, often used in function factories.

    Example: Returning a Function Pointer

    #include <iostream>
    
    // Functions
    int add(int a, int b) { return a + b; }
    int subtract(int a, int b) { return a - b; }
    
    // Function returning a pointer to another function
    int (*getOperation(char op))(int, int) {
        return (op == \'+\') ? add : subtract;
    }
    
    int main() {
        auto func = getOperation(\'+\');  // Get function pointer
        std::cout << func(5, 3);  // Output: 8
        return 0;
    }
    

    📌 getOperation() returns a pointer to either add or subtract, allowing dynamic function selection.

    🚀 Function pointers are powerful tools for dynamic behavior in C/C++!

    Pointers and Arrays

    1. What is the relationship between arrays and pointers in C?

    • In C, an array name acts as a pointer to its first element.
    • The expression arr is equivalent to &arr[0].
    • The name of an array cannot be modified (it’s a constant pointer), but a pointer variable can be used to traverse an array.

    Example:

    int arr[] = {10, 20, 30};
    int* ptr = arr;  // Equivalent to int* ptr = &arr[0];
    printf(\"%d\", *ptr);  // Output: 10
    

    2. How do you pass an array to a function using pointers?

    Arrays are always passed as pointers to functions to avoid copying large amounts of data.

    Example: Passing an Array Using Pointers

    #include <stdio.h>
    
    void printArray(int* arr, int size) {
        for (int i = 0; i < size; i++) {
            printf(\"%d \", arr[i]);
        }
    }
    
    int main() {
        int numbers[] = {1, 2, 3, 4, 5};
        printArray(numbers, 5);  // Passing array as a pointer
        return 0;
    }
    

    📌 The function receives int* arr, not int arr[], since both are equivalent.

    3. What happens if you increment an array name?

    • You cannot increment an array name (arr++) because it is a constant pointer (arr is fixed at &arr[0]).
    • However, you can increment a pointer variable that points to an array.

    Example:

    int arr[] = {10, 20, 30};
    int* ptr = arr;  // Pointer variable
    
    ptr++;  // Valid: Moves to the next element
    arr++;  // ❌ Invalid: Compiler error (array name is constant)
    

    4. How do you dynamically allocate memory for an array?

    • Use malloc() or calloc() in C.
    • Use new[] in C++.
    • Always free memory using free() in C or delete[] in C++.

    Example in C (malloc)

    #include <stdio.h>
    #include <stdlib.h>
    
    int main() {
        int* arr = (int*)malloc(5 * sizeof(int));  // Allocate memory for 5 integers
        if (!arr) { return 1; }  // Check for allocation failure
    
        for (int i = 0; i < 5; i++) {
            arr[i] = i * 10;
            printf(\"%d \", arr[i]);
        }
    
        free(arr);  // Free allocated memory
        return 0;
    }
    

    Example in C++ (new)

    #include <iostream>
    
    int main() {
        int* arr = new int[5];  // Allocate memory for 5 integers
        for (int i = 0; i < 5; i++) {
            arr[i] = i * 10;
            std::cout << arr[i] << \" \";
        }
    
        delete[] arr;  // Free allocated memory
        return 0;
    }
    

    📌 Always use free() (C) or delete[] (C++) to prevent memory leaks.

    5. How can you use pointers to iterate over an array?

    A pointer can traverse an array just like an index.

    Example: Using Pointer Arithmetic

    #include <stdio.h>
    
    int main() {
        int arr[] = {10, 20, 30, 40, 50};
        int* ptr = arr;  // Points to arr[0]
    
        for (int i = 0; i < 5; i++) {
            printf(\"%d \", *(ptr + i));  // Access array using pointer arithmetic
        }
    
        return 0;
    }
    

    📌 ptr + i moves the pointer by i elements (not bytes).

    🚀 Understanding pointers with arrays makes memory management and performance optimization easier in C/C++!

    Pointers and Structures

    1. How do you declare a pointer to a structure?

    A pointer to a structure is declared using the struct keyword followed by an asterisk (*).

    Example:

    #include <stdio.h>
    
    struct Student {
        int id;
        char name[20];
    };
    
    int main() {
        struct Student s1 = {101, \"Alice\"};
        struct Student* ptr = &s1;  // Pointer to structure
    
        printf(\"ID: %d, Name: %s\\n\", ptr->id, ptr->name);
        return 0;
    }
    

    📌 ptr is a pointer to struct Student and holds the address of s1.

    2. What is the -> operator used for in pointers to structures?

    • The arrow operator (->) is used to access structure members through a pointer.
    • It is a shorthand for (*pointer).member.

    Example:

    ptr->id   // Equivalent to (*ptr).id
    ptr->name // Equivalent to (*ptr).name
    

    Using -> avoids excessive parentheses and improves readability.

    3. How can you allocate memory for a structure dynamically?

    • Use malloc() in C.
    • Use new in C++.

    Example in C (Using malloc())

    #include <stdio.h>
    #include <stdlib.h>
    
    struct Student {
        int id;
        char name[20];
    };
    
    int main() {
        struct Student* ptr = (struct Student*)malloc(sizeof(struct Student));
        if (!ptr) { return 1; }  // Check if memory allocation was successful
    
        ptr->id = 102;
        snprintf(ptr->name, sizeof(ptr->name), \"Bob\");
    
        printf(\"ID: %d, Name: %s\\n\", ptr->id, ptr->name);
    
        free(ptr);  // Free allocated memory
        return 0;
    }
    

    Example in C++ (Using new)

    #include <iostream>
    
    struct Student {
        int id;
        std::string name;
    };
    
    int main() {
        Student* ptr = new Student;
        ptr->id = 103;
        ptr->name = \"Charlie\";
    
        std::cout << \"ID: \" << ptr->id << \", Name: \" << ptr->name << std::endl;
    
        delete ptr;  // Free allocated memory
        return 0;
    }
    

    📌 Always use free() in C and delete in C++ to prevent memory leaks.

    4. Can a structure contain a pointer to itself?

    Yes, a structure can contain a pointer to itself, which is useful for linked lists, trees, and other dynamic data structures.

    Example: Self-referential Structure (Linked List Node)

    #include <stdio.h>
    
    struct Node {
        int data;
        struct Node* next;  // Pointer to the next node (same structure type)
    };
    
    int main() {
        struct Node node1, node2;
        node1.data = 10;
        node2.data = 20;
        node1.next = &node2;  // Linking nodes
    
        printf(\"Node 1 Data: %d, Node 2 Data: %d\\n\", node1.data, node1.next->data);
        return 0;
    }
    

    📌 This is the foundation of linked lists!

    5. What is the difference between . and -> in structure access?

    OperatorUsed withExampleMeaning
    . (dot)Structure variables1.idAccess member of a structure variable
    -> (arrow)Pointer to structureptr->idAccess member through a structure pointer

    Example Demonstrating Both:

    #include <stdio.h>
    
    struct Student {
        int id;
        char name[20];
    };
    
    int main() {
        struct Student s1 = {104, \"David\"};
        struct Student* ptr = &s1;
    
        printf(\"Using . operator: ID = %d, Name = %s\\n\", s1.id, s1.name);
        printf(\"Using -> operator: ID = %d, Name = %s\\n\", ptr->id, ptr->name);
    
        return 0;
    }
    

    📌 Use . for normal variables and -> for pointers!

    Smart Pointers (C++ Specific)

    1. What are smart pointers in C++?

    Smart pointers are RAII-based (Resource Acquisition Is Initialization) wrappers around raw pointers that automatically manage memory in C++. They reside in the <memory> header and help prevent memory leaks and dangling pointers.

    ✅ Types of Smart Pointers in C++:

    • std::unique_ptr → Exclusive ownership (cannot be shared).
    • std::shared_ptr → Shared ownership (reference counting).
    • std::weak_ptr → Weak reference (no ownership, avoids circular references).

    📌 Smart pointers automatically deallocate memory when they go out of scope!

    2. What is std::unique_ptr and how does it work?

    • std::unique_ptr allows only one owner of the resource.
    • It deletes the resource automatically when it goes out of scope.
    • Cannot be copied, but can be moved to transfer ownership.

    Example: Using std::unique_ptr

    #include <iostream>
    #include <memory>  // Include <memory> for smart pointers
    
    class Example {
    public:
        Example() { std::cout << \"Constructor Called\\n\"; }
        ~Example() { std::cout << \"Destructor Called\\n\"; }
    };
    
    int main() {
        std::unique_ptr<Example> ptr = std::make_unique<Example>();  // Creates a unique_ptr
    
        // std::unique_ptr<Example> ptr2 = ptr; ❌ (Copying not allowed)
        std::unique_ptr<Example> ptr2 = std::move(ptr);  // ✅ Transfer ownership
    
        return 0;  // Destructor is called when ptr2 goes out of scope
    }
    

    📌 Best choice when you want sole ownership of a resource.

    3. How does std::shared_ptr differ from std::unique_ptr?

    ✅ std::shared_ptr allows multiple pointers to share ownership of the same object.
    ✅ Uses reference counting: The resource is deleted when the last shared_ptr goes out of scope.

    Example: Using std::shared_ptr

    #include <iostream>
    #include <memory>
    
    class Example {
    public:
        Example() { std::cout << \"Constructor Called\\n\"; }
        ~Example() { std::cout << \"Destructor Called\\n\"; }
    };
    
    int main() {
        std::shared_ptr<Example> ptr1 = std::make_shared<Example>();  // Shared ownership
        std::shared_ptr<Example> ptr2 = ptr1;  // ptr2 shares ownership
    
        std::cout << \"Reference Count: \" << ptr1.use_count() << std::endl;
    
        return 0;  // Destructor is called when the last reference goes out of scope
    }
    

    📌 Best choice when multiple parts of the program need shared access to a resource.

    4. What is a weak pointer (std::weak_ptr)?

    ✅ std::weak_ptr is a non-owning reference to a std::shared_ptr.
    ✅ Used to prevent circular references (memory leaks) in shared pointers.

    Why Use std::weak_ptr?

    • If two std::shared_ptrs reference each other, their reference count never reaches zero, causing a memory leak (circular reference).
    • std::weak_ptr helps break this cyclic dependency.

    Example: Preventing Circular References

    #include <iostream>
    #include <memory>
    
    class B;
    class A {
    public:
        std::shared_ptr<B> b_ptr;
        ~A() { std::cout << \"A Destroyed\\n\"; }
    };
    
    class B {
    public:
        std::weak_ptr<A> a_ptr;  // Use weak_ptr to prevent circular reference
        ~B() { std::cout << \"B Destroyed\\n\"; }
    };
    
    int main() {
        std::shared_ptr<A> a = std::make_shared<A>();
        std::shared_ptr<B> b = std::make_shared<B>();
    
        a->b_ptr = b;
        b->a_ptr = a;  // Using weak_ptr prevents a memory leak
    
        return 0;  // Objects are correctly deleted
    }
    

    📌 Best choice when objects should not keep each other alive indefinitely.

    5. How do smart pointers help prevent memory leaks?

    ✅ Automatic Resource Management → Smart pointers ensure allocated memory is freed automatically.
    ✅ Exception Safety → If an exception occurs, smart pointers automatically clean up resources.
    ✅ No Need for Manual delete → Reduces the risk of forgetting to free memory.
    ✅ Prevents Dangling Pointers → Smart pointers go out of scope gracefully, preventing use-after-free errors.
    ✅ Avoids Circular References → std::weak_ptr prevents memory leaks due to cyclic dependencies in shared pointers.

    Example: Preventing Memory Leaks

    #include <iostream>
    #include <memory>
    
    class Example {
    public:
        Example() { std::cout << \"Resource Acquired\\n\"; }
        ~Example() { std::cout << \"Resource Released\\n\"; }
    };
    
    void create() {
        std::shared_ptr<Example> ptr = std::make_shared<Example>();
    }  // Object is automatically deleted when function exits
    
    int main() {
        create();
        std::cout << \"End of main\\n\";
        return 0;
    }
    

    ✅ No need for delete, memory is freed when ptr goes out of scope!

    1. NULL Pointer

    A NULL pointer is a pointer that is explicitly assigned NULL or nullptr (in C++11 and later). It does not point to any valid memory location.

    Example:

    int* ptr = NULL; // C-style null pointer
    int* ptr2 = nullptr; // Modern C++ null pointer
    

    2. Void Pointer

    A void pointer (generic pointer) can hold the address of any data type but requires explicit type casting before dereferencing.

    Example:

    void* ptr;
    int x = 10;
    ptr = &x; // Storing address of an integer
    

    3. Dangling Pointer

    A dangling pointer occurs when a pointer points to memory that has been freed or deleted.

    Example:

    int* ptr = new int(5);
    delete ptr; // ptr is now dangling
    

    4. Wild Pointer

    A wild pointer is an uninitialized pointer that holds a garbage value, leading to unpredictable behavior.

    Example:

    int* ptr; // Uninitialized, wild pointer
    

    5. Generic Pointer

    A generic pointer (same as void pointer) can store the address of any variable and can be typecast accordingly.

    Example:

    void* ptr;
    int x = 10;
    ptr = &x;
    int* intPtr = (int*)ptr;
    

    6. Near Pointer (Legacy – 16-bit systems)

    A near pointer is a 16-bit pointer that accesses memory within the current segment.

    Example: (Only valid in 16-bit compilers)

    int near *ptr; // Supported in old MS-DOS compilers
    

    7. Far Pointer (Legacy – 16-bit systems)

    A far pointer is a 32-bit pointer with a segment and offset, used for accessing memory beyond the current segment.

    Example: (Only valid in 16-bit compilers)

    int far *ptr;
    

    8. Huge Pointer (Legacy – 16-bit systems)

    A huge pointer is similar to a far pointer but ensures a unique physical address.

    Example: (Only valid in 16-bit compilers)

    int huge *ptr;
    

    9. Function Pointer

    A function pointer stores the address of a function and can be used to call the function dynamically.

    Example:

    #include <iostream>
    void display(int x) { std::cout << \"Value: \" << x << std::endl; }
    int main() {
        void (*funcPtr)(int) = &display;
        funcPtr(10);
    }
    

    10. Array Pointer

    A pointer to an array points to the first element of an array.

    Example:

    int arr[5] = {1, 2, 3, 4, 5};
    int* ptr = arr;
    

    11. Pointer to Pointer

    A pointer to pointer stores the address of another pointer.

    Example:

    int x = 10;
    int* ptr = &x;
    int** ptr2 = &ptr;
    

    12. Smart Pointer (C++11+)

    A smart pointer manages memory automatically, preventing memory leaks.

    Example:

    #include <memory>
    std::unique_ptr<int> ptr = std::make_unique<int>(42);
    

    13. Const Pointer

    A constant pointer cannot change the address it is pointing to.

    Example:

    int x = 10;
    int* const ptr = &x; // Address is constant
    

    14. Pointer to Const

    A pointer to a constant points to a constant value and prevents modification.

    Example:

    const int x = 10;
    const int* ptr = &x; // Cannot modify *ptr
    

    15. Const Pointer to Const

    A constant pointer to a constant means both the address and the value cannot be modified.

    Example:

    const int x = 10;
    const int* const ptr = &x; // Neither value nor address can be changed
    

    16. This Pointer (C++ Specific)

    A this pointer is available in non-static member functions and points to the object that invoked the function.

    Example:

    class MyClass {
    public:
        void display() { std::cout << this; }
    };
    

    17. nullptr Pointer (C++11+)

    nullptr is a modern way to represent null pointers in C++.

    Example:

    int* ptr = nullptr;

    You can also Visit other tutorials of Embedded Prep 

    Special thanks to @embedded-prep for contributing to this article on Embedded Prep