Multithreading in Operating System: When you use a computer or smartphone, you often run many tasks simultaneously — like playing music while browsing the web or downloading files while writing a document. Multithreading is one key concept that allows this seamless multitasking to happen smoothly and efficiently.
In simple terms, multithreading is the technique where a single process is divided into multiple threads, each capable of running independently but sharing the same memory and resources. Threads are like tiny workers inside a program, each handling a different part of the task. This makes programs faster, more responsive, and better at utilizing modern multi-core processors.
Multithreading in operating systems plays a crucial role in managing how these threads are created, scheduled, and executed. The operating system acts like a manager, deciding which thread runs when, on which processor core, and for how long. It ensures that threads don’t interfere with each other in harmful ways, especially when accessing shared data.
Using multithreading, applications can perform multiple operations at once. For example, a web browser might:
Load images and videos in one thread
Render the web page in another thread
Handle user clicks and typing in yet another thread
Download files in the background without freezing the interface
This makes applications smoother and keeps devices responsive, even when running complex or multiple tasks.
However, multithreading isn’t without challenges. When threads share memory and resources, they can run into issues like:
Race conditions — when two threads try to modify the same data simultaneously
Deadlocks — when threads are stuck waiting for each other’s resources
Starvation — when a thread never gets CPU time because others keep running
To prevent such problems, operating systems provide synchronization tools like mutexes, semaphores, and locks, helping developers control how threads access shared resources safely.
In this article, we will explore:
✅ What is multithreading in operating systems? ✅ Benefits of using multithreading ✅ How threads work and how the OS manages them ✅ Common problems in multithreaded applications ✅ Beginner-friendly coding examples to see multithreading in action
Whether you’re a student, beginner programmer, or tech enthusiast, understanding multithreading in operating system is essential for creating efficient, high-performing applications. Dive in and discover how your computer does many things at once — all thanks to multithreading!
What is Multithreading?
Multithreading means running multiple threads — independent sequences of instructions — inside a single program or process at the same time (or seemingly so).
A process is a program in execution, like your browser.
A thread is a smaller unit of work within that process.
Think of a process as a factory, and threads as workers in that factory, each handling a different task.
Why Use Multithreading?
1. Better CPU Usage
Most modern CPUs have multiple cores that can work simultaneously. Multithreading lets a program run multiple parts in parallel to use the CPU efficiently.
2. Improved Responsiveness
Apps with multiple threads remain responsive. For example, your music player can play songs on one thread while another thread handles your commands.
3. Simpler Code Structure for Concurrent Tasks
Breaking big tasks into threads can make the program easier to design and maintain.
Basic C++ Code Example: Creating and Running Threads
Let’s see how to create and run threads in C++ using the standard library.
#include <iostream>
#include <thread>  // For std::thread

// Function to be run by a thread
void printNumbers() {
    for (int i = 1; i <= 5; i++) {
        std::cout << "Thread: " << i << std::endl;
    }
}

int main() {
    std::thread t1(printNumbers);  // Create a thread that runs printNumbers()

    // Meanwhile, main thread runs this loop
    for (int i = 1; i <= 5; i++) {
        std::cout << "Main thread: " << i << std::endl;
    }

    t1.join();  // Wait for thread t1 to finish

    return 0;
}
What happens here?
We create a new thread t1 that runs the function printNumbers.
The main thread runs its own loop printing messages.
Both run concurrently, so the output lines from the two threads interleave.
t1.join() makes the main thread wait for t1 to complete before exiting.
How Does Multithreading Work in an OS?
The OS manages threads through a process called scheduling — deciding which thread runs on which CPU core and when.
Threads go through these states:
New: Thread is created.
Runnable: Ready to run.
Running: Actively executing.
Blocked/Waiting: Paused, waiting for resources or events.
Terminated: Finished execution.
The OS rapidly switches between threads to give the illusion they run simultaneously, especially when CPU cores are fewer than threads.
Thread vs Process
Process: Has its own memory space.
Thread: Shares memory with other threads in the same process.
This sharing allows faster communication but can cause problems if not carefully handled.
Synchronization: Avoiding Race Conditions
When multiple threads share data, they can conflict. For example:
#include <iostream>
#include <thread>
#include <mutex>

int counter = 0;
std::mutex mtx;  // Mutex to protect counter

void increaseCounter() {
    for (int i = 0; i < 10000; i++) {
        mtx.lock();    // Lock before accessing shared data
        counter++;     // Critical section
        mtx.unlock();  // Unlock after done
    }
}

int main() {
    std::thread t1(increaseCounter);
    std::thread t2(increaseCounter);

    t1.join();
    t2.join();

    std::cout << "Final counter value: " << counter << std::endl;
    return 0;
}
Explanation
Two threads increase the same counter.
Without the mutex (mtx), the final value might be incorrect due to race conditions.
The mutex ensures only one thread changes counter at a time, preventing errors.
Common Multithreading Problems
1. Race Conditions
When threads change shared data at the same time without synchronization.
2. Deadlocks
When two or more threads wait for each other’s resources and none can proceed.
3. Starvation
When some threads never get CPU time because others monopolize it.
Real-Life Example: Web Browser
A browser uses multiple threads:
One to load images.
One to render pages.
One to handle user input.
One to download files.
Even if one thread is slow (e.g., waiting for network), others keep running so the app feels responsive.
Summary
Multithreading helps programs run tasks simultaneously, improving speed and responsiveness. However, it requires careful synchronization to avoid problems like race conditions and deadlocks.
Learning multithreading is essential to modern software development, and starting with simple examples like these will help build your foundation.
Multithreading Interview Questions : Multithreading is a crucial topic in modern C++ programming, especially in embedded systems, game development, and high-performance applications. Understanding multithreading concepts and being able to answer common interview questions confidently can set you apart as a skilled C++ developer.
In this article, we cover the essential multithreading interview questions that every beginner and intermediate programmer should know — along with clear explanations and key points.
Basic Multithreading Interview Questions
What is multithreading? How does it differ from multiprocessing?
What is a thread in C++? How do you create and start a thread?
What is the difference between join() and detach() in std::thread?
What is a race condition? How can it be prevented?
What is a deadlock? How can deadlocks occur in multithreaded programs?
What is thread safety? How do you achieve it?
What is a mutex? How is it used in C++?
What are std::lock_guard and std::unique_lock? What is their difference?
How do you pass arguments to a thread function in C++?
What is a thread ID? How can you get the current thread ID in C++?
Intermediate Multithreading Interview Questions
What are condition variables? How do they help in thread synchronization?
What is the difference between std::async, std::thread, and std::future?
How do atomic variables (std::atomic) help in multithreading?
What is thread-local storage? Why is it useful?
How do you avoid deadlocks in your program?
Explain the producer-consumer problem and how you would implement it using C++ threads.
What is false sharing? How can it affect performance?
How can exceptions thrown in a thread be handled?
What are the C++11 features that support multithreading?
What is the difference between cooperative and preemptive multitasking? Which model does C++ multithreading follow?
Advanced Multithreading Interview Questions
What are lock-free and wait-free programming? How do they differ?
Explain the C++ memory model and its relevance to multithreading.
What is memory ordering? How do memory fences/barriers work in C++?
How do you detect and debug deadlocks and race conditions?
What is the difference between a mutex, a semaphore, and a spinlock?
How do you implement a thread-safe singleton pattern in C++?
What are thread priorities? Can you set them in C++ standard threads?
What are futures and promises? How do they work in C++ multithreading?
How can thread starvation occur and how do you prevent it?
What are the risks and considerations when using std::thread::detach()?
Practical Multithreading Questions in C++
Create a program that starts two threads. Each thread prints numbers from 1 to 5 with a short delay. Use join() to wait for both threads to finish.
Write a thread-safe counter class using std::mutex to protect increment and decrement operations. Create multiple threads to test it.
Implement the Producer-Consumer problem using C++ threads, mutexes, and condition variables. Producers add items to a shared buffer, and consumers remove items.
Write a program demonstrating a race condition by having multiple threads increment a shared variable without synchronization. Then fix it using a mutex.
Use std::async and std::future to run a function asynchronously that computes the factorial of a number and retrieves the result.
Create a program that launches multiple threads printing their thread IDs. Make sure threads safely print to the console without mixed output.
Demonstrate the use of std::atomic by implementing a lock-free counter that multiple threads increment concurrently.
Write a program that simulates deadlock by having two threads each locking two mutexes in reverse order. Then modify it to avoid deadlock using std::lock().
Create a thread pool class that maintains a fixed number of worker threads. The thread pool should execute submitted tasks asynchronously.
Write a program that passes multiple arguments to a thread function using std::thread.
Multithreading is a fundamental concept in modern C++ programming that helps you write efficient, responsive, and high-performance applications. Mastering multithreading concepts not only improves your coding skills but also prepares you well for technical interviews, especially in domains like embedded systems, game development, and real-time software.
This tutorial covered a wide range of multithreading interview questions, from basic to advanced, to help you build a strong foundation. Understanding these questions and practicing their answers will boost your confidence and make you stand out as a proficient C++ developer.
Remember, multithreading introduces challenges like race conditions, deadlocks, and synchronization issues, but with the right tools and techniques such as mutexes, condition variables, and atomic operations, you can write safe and effective concurrent code.
Keep practicing by writing your own multithreaded programs, experimenting with different synchronization primitives, and debugging concurrency problems. This hands-on approach will deepen your understanding and prepare you for real-world challenges.
Multithreading is a programming approach where a single program is split into multiple smaller parts called threads. Each thread executes independently but can access shared resources like memory. This allows the program to perform multiple tasks at the same time, which can lead to better performance by making use of multiple CPU cores.
In C++, support for multithreading was added starting from the C++11 standard. This was made possible through the <thread> header, which provides the tools to create and manage threads.
How to Create a Thread in C++
In C++, the std::thread class is used to create and manage threads. When you create an object of this class, a new thread starts running the function or callable you provide.
The basic syntax looks like this:
std::thread threadName(callable);
threadName is the name you give to your thread object.
callable refers to any callable entity like a function pointer, a lambda, or a functor that defines what the thread will execute.
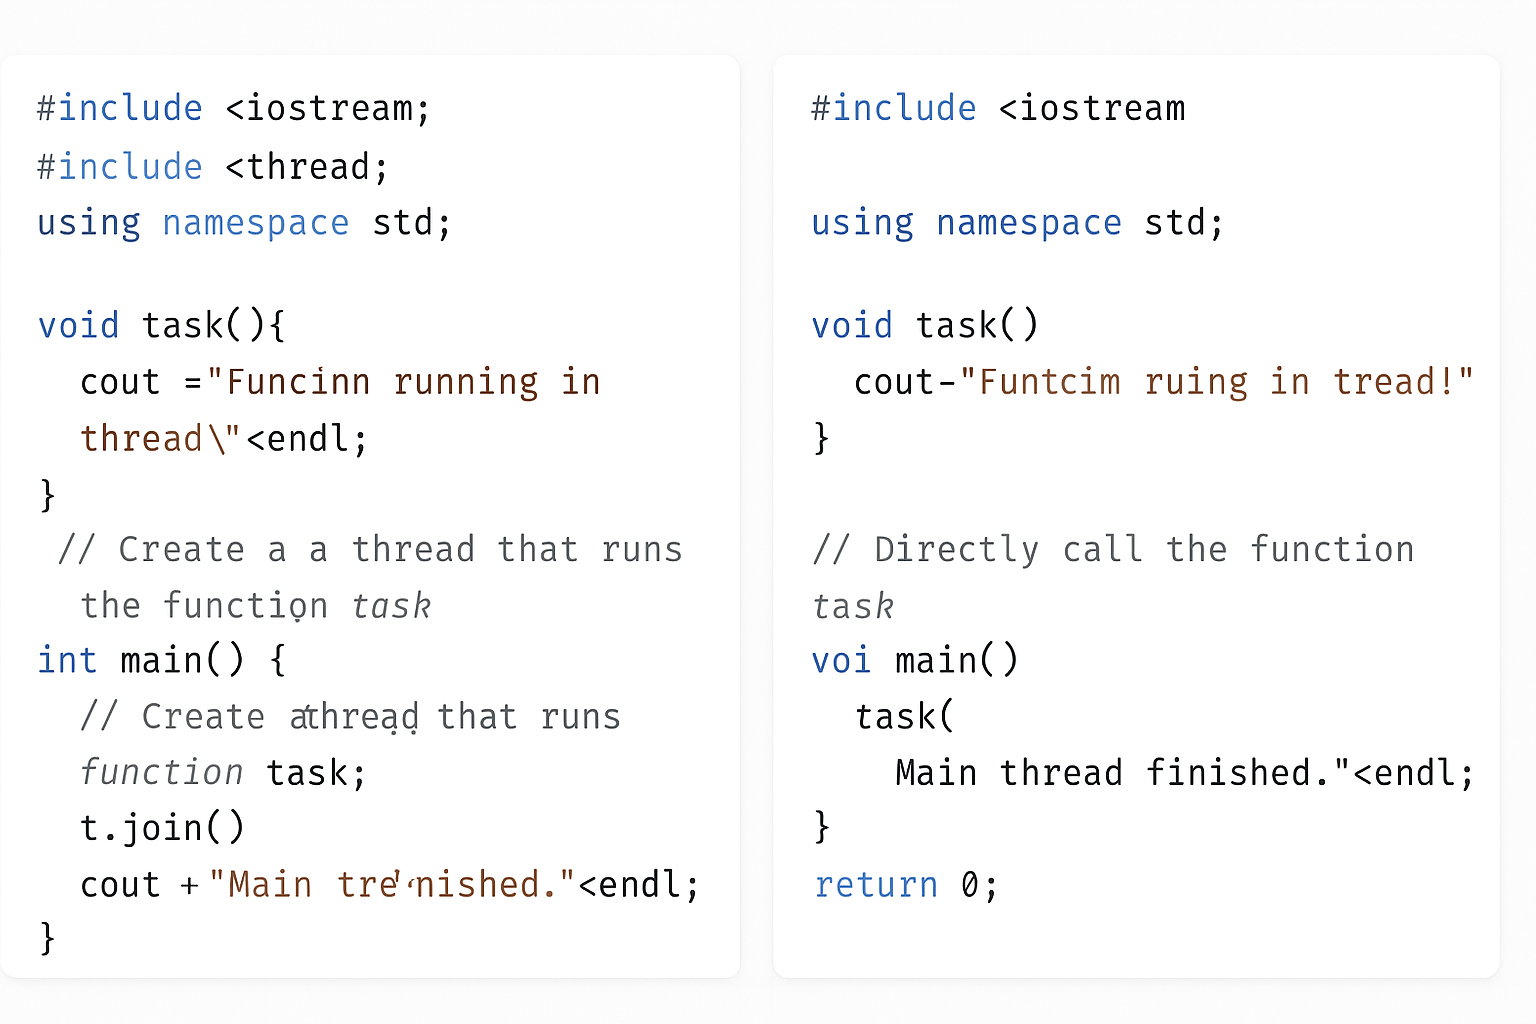
Example of Creating and Running a Thread in C++
#include <iostream>
#include <thread>
using namespace std;

// This function will run in a separate thread
void func() {
    cout << "Hello from the thread!" << endl;
}

int main() {
    // Create a thread that runs the function 'func'
    thread t(func);

    // Wait for the thread 't' to finish before continuing
    t.join();

    cout << "Main thread finished." << endl;

    return 0;
}
What’s happening here?
We define a function func that prints a message.
We create a thread t that runs this function independently.
The t.join() line makes sure the main program waits for the thread to complete before continuing.
Finally, the main thread prints its own message.
Output:
Hello from the thread!
Main thread finished.
Running Code With and Without Threads
You’ll see how the same piece of code behaves when run without using threads and when run inside a separate thread. We will use simple examples to help beginners understand how threads allow your program to do multiple tasks at the same time, making your programs faster and more efficient. By the end, you will know how to create a thread in C++ and see the practical difference between running code sequentially versus concurrently
Code without threading:
#include <iostream>
#include <chrono>
#include <thread>

void task() {
    for (int i = 1; i <= 5; ++i) {
        std::cout << "Task running: " << i << std::endl;
        std::this_thread::sleep_for(std::chrono::milliseconds(500));  // Simulate work
    }
}

int main() {
    std::cout << "Starting task without thread..." << std::endl;
    task();  // Running task function directly (blocking)
    std::cout << "Task completed without thread." << std::endl;
    return 0;
}
Code with threading:
#include <iostream>
#include <chrono>
#include <thread>

void task() {
    for (int i = 1; i <= 5; ++i) {
        std::cout << "Task running: " << i << std::endl;
        std::this_thread::sleep_for(std::chrono::milliseconds(500));  // Simulate work
    }
}

int main() {
    std::cout << "Starting task with thread..." << std::endl;

    std::thread t(task);  // Run task in a separate thread

    // Main thread continues here immediately
    std::cout << "Main thread continues while task runs..." << std::endl;

    t.join();  // Wait for the thread to finish before exiting

    std::cout << "Task completed with thread." << std::endl;
    return 0;
}
What happens:
Without thread: The program waits until task() completes before moving on.
With thread: The program starts task() in a new thread and the main thread continues executing immediately. The join() waits for the thread to finish before the program ends.
Multithreading in C++
What is a Callable in C++ Threads?
When you create a thread in C++, you pass a callable to it. A callable is anything that can be called like a function, and the thread will execute this callable in parallel.
For example:
thread t(func); // Runs the function 'func' in a new thread
You can also pass arguments to the callable when creating the thread:
void printNumber(int num) {
    cout << "Number: " << num << endl;
}

thread t(printNumber, 10);  // Runs printNumber(10) in the thread
Types of Callables You Can Use with Threads in Multithreading
In C++, callables fall into four main categories:
Function: A regular function like func or printNumber.
Lambda Expression: An anonymous function defined inline.
Function Object: An object with the operator() defined, so it behaves like a function.
Member Function: A function that is part of a class, either static or non-static.
Callables in C++ Threads
When you create a thread in C++, you give it something called a callable — this is basically “something you can call like a function.” The thread runs that callable independently.
There are four common types of callables you can use in threads:
1. Function
What is it?
A function is like a small reusable machine inside your program. It is a named block of code that performs a specific task. You write the function once, and then you can call (or use) it anytime by its name instead of rewriting the same code again and again.
Functions help keep your code clean and organized, especially when working with more complex concepts like multithreading. In multithreading programming, you use functions to let multiple parts of your program run at the same time independently. This makes your programs faster and more efficient by doing many tasks simultaneously.
Example
#include <iostream>
#include <thread>
using namespace std;

void sayHello() {
    cout << "Hello from function!" << endl;
}

int main() {
    thread t(sayHello); // Create thread running sayHello()
    t.join();           // Wait for thread to finish
    cout << "Main thread done." << endl;
    return 0;
}
What happens? The thread runs sayHello and prints a message separately while the main thread waits for it to finish.
2. Lambda Expression
What is it?
What is a Lambda Expression?
A lambda expression is an anonymous, inline function that you can write directly where you’d normally pass a function object, pointer, or functor.
capture_list → which external variables you want to use inside the lambda.
parameter_list → arguments (like in any function).
return_type → optional; deduced if omitted.
body → statements executed when called.
Why Lambdas in Multithreading?
When creating threads (e.g. using std::thread in C++), you often want to pass a function for the thread to run. Instead of writing a separate function or a functor class, lambdas let you:
#include <iostream>
#include <thread>

int main() {
    std::thread t([] {
        std::cout << "Hello from thread!" << std::endl;
    });
    t.join();
}
Passing Variables via Capture:
#include <iostream>
#include <thread>

int main() {
    int value = 42;

    std::thread t([value] {
        std::cout << "Value is: " << value << std::endl;
    });

    t.join();
}
If you want to modify a captured variable, capture it by reference:
#include <iostream>
#include <thread>

int main() {
    int value = 0;

    std::thread t([&value] {
        value = 100;
    });

    t.join();

    std::cout << "Value is now: " << value << std::endl;
}
What happens? The lambda function runs in the new thread, printing the message.
3. Function Object (Functor)
What is it?
What is a Function Object (Functor)?
function. This happens when a class defines a special function called operator(). Because of this, you can use an instance of that class just like you would call a normal function.
Function objects are very helpful in multithreading programming. They let you package both code and data inside an object that can be passed to threads easily. This makes your multithreading programs more flexible, organized, and easier to manage.
Example
#include <iostream>
#include <thread>
using namespace std;

// Define a class with operator()
class Functor {
public:
    void operator()() {
        cout << "Hello from function object!" << endl;
    }
};

int main() {
    Functor f;
    thread t(f); // Run the functor in a thread
    t.join();
    cout << "Main thread done." << endl;
    return 0;
}
What happens? The thread calls operator() of the functor, printing the message.
4. Member Function (Static or Non-Static)
What is it?
A member function is a function that belongs to a class. There are two types:
Static member function: This kind of function does not need an object to be called. You can call it directly using the class name.
Non-static member function: This function needs an object of the class to work on because it usually uses the object’s data.
In multithreading programming, threads can run both static and non-static member functions. But when you want to run a non-static member function in a thread, you must give the thread the object it should work on.
Threads can run both types, but for non-static ones, you have to provide the object.
Example — Static Member Function
#include <iostream>
#include <thread>
using namespace std;

class MyClass {
public:
    static void staticFunc() {
        cout << "Hello from static member function!" << endl;
    }
};

int main() {
    thread t(MyClass::staticFunc); // Run static function in thread
    t.join();
    cout << "Main thread done." << endl;
    return 0;
}
Example — Non-Static Member Function
#include <iostream>
#include <thread>
using namespace std;

class MyClass {
public:
    void nonStaticFunc() {
        cout << "Hello from non-static member function!" << endl;
    }
};

int main() {
    MyClass obj;
    thread t(&MyClass::nonStaticFunc, &obj); // Pass function pointer and object
    t.join();
    cout << "Main thread done." << endl;
    return 0;
}
Note: For non-static member functions, you must pass the object pointer as the first argument to the thread.
Summary for Multithreading
Callable Type
How to Use in Thread
Example
Function
thread t(func);
void func()
Lambda Expression
thread t([](){ /* code */ });
Inline anonymous function
Function Object
thread t(functorObj);
Class with operator()
Static Member Func
thread t(ClassName::func);
Static function of class
Non-Static Member Func
thread t(&Class::func, &obj);
Non-static func + object
Let’s create a simple C++ program that demonstrates all four callable types running in separate threads. This will help you see how each callable works side-by-side.
#include <iostream>
#include <thread>
using namespace std;

// 1. Regular Function
void regularFunction() {
    cout << "Hello from regular function!" << endl;
}

// 3. Function Object (Functor)
class Functor {
public:
    void operator()() {
        cout << "Hello from function object!" << endl;
    }
};

// 4. Class with static and non-static member functions
class MyClass {
public:
    static void staticMemberFunction() {
        cout << "Hello from static member function!" << endl;
    }

    void nonStaticMemberFunction() {
        cout << "Hello from non-static member function!" << endl;
    }
};

int main() {
    // 1. Thread running a regular function
    thread t1(regularFunction);

    // 2. Thread running a lambda expression
    thread t2([]() {
        cout << "Hello from lambda expression!" << endl;
    });

    // 3. Thread running a function object
    Functor functorObj;
    thread t3(functorObj);

    // 4a. Thread running a static member function
    thread t4(&MyClass::staticMemberFunction);

    // 4b. Thread running a non-static member function
    MyClass obj;
    thread t5(&MyClass::nonStaticMemberFunction, &obj);

    // Wait for all threads to finish before exiting
    t1.join();
    t2.join();
    t3.join();
    t4.join();
    t5.join();

    cout << "Main thread finished." << endl;

    return 0;
}
What happens here?
t1 runs the regular functionregularFunction.
t2 runs an inline lambda that prints a message.
t3 runs a function object (Functor) using its operator().
t4 runs the static member function of MyClass.
t5 runs the non-static member function of an object obj of MyClass.
All threads run in parallel, and join() waits for each to complete before the program finishes.
Expected Output (order may vary due to threads running concurrently):
Hello from regular function!
Hello from lambda expression!
Hello from function object!
Hello from static member function!
Hello from non-static member function!
Main thread finished.
Thread Management in Multithreading C++
When working with threads in C++, the standard thread library provides many tools to control and coordinate threads effectively. These tools help you manage thread lifecycles, synchronize access to shared data, and optimize program performance. Let’s explore some important functions and classes used for thread management.
Key Thread Management Functions and Classes
Function / Class
Purpose
join()
Makes the current (calling) thread wait until the target thread finishes its work.
detach()
Separates the thread from the main thread, letting it run independently without waiting.
mutex
A locking mechanism that ensures only one thread accesses shared data at a time, preventing conflicts.
lock_guard
A convenient wrapper around a mutex that locks it when created and automatically unlocks when destroyed (scope-based locking).
condition_variable
Used for making threads wait for certain conditions to be true before continuing execution.
atomic
Provides a way to safely read and modify shared variables between threads without explicit locks.
sleep_for()
Pauses the current thread for a specified duration, like waiting for 1 second.
sleep_until()
Pauses the current thread until a specific time point is reached.
hardware_concurrency()
Returns the number of threads the system can run in parallel (usually equals CPU cores or hardware threads). Helps in optimizing thread usage.
get_id()
Retrieves a unique identifier for the thread, useful for debugging or tracking thread activity.
Detailed Explanation of Each Multithreading
1. join()
When you create a thread, the main program and the new thread run at the same time. If you want the main program to wait for the thread to finish before continuing, you use join().
thread t(func);
t.join();  // Main thread waits until t finishes
Without calling join(), the main program may finish and exit before the thread completes, causing unexpected behavior.
2. detach()
Sometimes, you want a thread to run on its own without the main program waiting for it. Calling detach() lets the thread run independently in the background.
Use this carefully because once detached, you can’t control or join that thread anymore.
3. mutex
When multiple threads access the same data, they might interfere with each other, causing errors (called data races). A mutex(short for mutual exclusion) prevents this by allowing only one thread to access the data at a time.
mutex mtx;
mtx.lock();
// Access shared data safely here
mtx.unlock();
4. lock_guard
Manually locking and unlocking mutexes can lead to mistakes, especially if your code has multiple return points or exceptions. lock_guard helps by automatically locking the mutex when it’s created and unlocking when it goes out of scope.
mutex mtx;
{
    lock_guard<mutex> lock(mtx);
    // Safe access to shared data within this block
}  // Mutex automatically unlocked here
5. condition_variable
Sometimes, one thread needs to wait until another thread signals it to continue, like waiting for a resource or a specific event. condition_variable helps threads to sleep and wake up efficiently based on conditions.
Example usage involves waiting and notifying:
wait() — thread sleeps until notified.
notify_one() or notify_all() — wake one or all waiting threads.
6. atomic
Using mutexes is safe but can sometimes slow down your program due to locking overhead. atomic variables allow threads to safely read and write shared data without locks by ensuring operations are indivisible (atomic).
sleep_until(time_point) pauses the thread until the given time.
auto wake_time = chrono::steady_clock::now() + chrono::seconds(5);
this_thread::sleep_until(wake_time);  // Sleep until 5 seconds from now
8. hardware_concurrency()
This function tells you how many threads your CPU can run in parallel. You can use this to decide how many threads to create for best performance without overloading the system.
unsigned int n = thread::hardware_concurrency();
cout << "Number of hardware threads available: " << n << endl;
9. get_id()
Each thread has a unique ID, which you can get by calling get_id(). This is useful when you want to log or debug to know which thread is doing what.
C++ provides many thread management tools to help you:
Coordinate thread execution (join, detach)
Protect shared data (mutex, lock_guard, atomic)
Synchronize thread behavior (condition_variable)
Control timing (sleep_for, sleep_until)
Get system info for better performance (hardware_concurrency)
Identify threads (get_id)
Using these properly will make your multithreaded programs more reliable and efficient.
Problems with Multithreading in C++
Multithreading helps programs run faster by doing many things at once. But it also introduces some tricky problems that can cause your program to behave incorrectly or even crash. Understanding these problems is important for writing safe, reliable multithreaded code.
1. Deadlock
What is Deadlock?
Deadlock happens when two or more threads get stuck forever, each waiting for the other to release a resource (like a lock or mutex) they need. Because they wait on each other endlessly, none can continue, and the program freezes.
How Deadlock Happens — Example
Imagine two threads, Thread A and Thread B:
Thread A locks Mutex 1 and waits to lock Mutex 2.
Thread B locks Mutex 2 and waits to lock Mutex 1.
Both threads hold one mutex and wait for the other forever — this is a deadlock.
Visualization:
Thread
Holds
Waiting For
A
Mutex 1
Mutex 2
B
Mutex 2
Mutex 1
How to Avoid Deadlock?
Always lock mutexes in the same order across all threads.
Use std::lock which can lock multiple mutexes without deadlock.
Keep critical sections short and release locks quickly.
Avoid nested locks if possible.
2. Race Condition
What is a Race Condition?
A race condition happens when two or more threads access the same shared data at the same time, and at least one thread modifies it without proper synchronization. The result depends on the exact timing of threads, which can change every run.
Why is it a Problem?
The data can become corrupted or inconsistent because the operations overlap unpredictably. This leads to bugs that are hard to reproduce and fix.
Example of Race Condition:
int counter = 0;

void increment() {
    for (int i = 0; i < 1000; i++) {
        counter++;  // Not thread-safe
    }
}

int main() {
    std::thread t1(increment);
    std::thread t2(increment);

    t1.join();
    t2.join();

    std::cout << counter << std::endl;  // Might be less than 2000 due to race condition
}
Here, both threads try to update counter at the same time. Since counter++ is not atomic, some increments get lost.
How to Fix Race Condition?
Use mutexes (std::mutex) to protect shared data.
Use atomic operations (std::atomic<int>) for simple variables.
Design thread-safe data structures.
3. Starvation
What is Starvation?
Starvation happens when a thread waits indefinitely to get access to a resource because other threads keep getting priority or resources first.
Why Does it Happen?
If your synchronization mechanism favors some threads over others (e.g., high priority threads always run first), some threads may never get a chance to run or access needed resources.
Example Scenario:
Several threads with high priority continuously lock a mutex.
A low priority thread waits forever because it keeps getting preempted.
How to Avoid Starvation?
Use fair locking algorithms like fair mutexes.
Use condition variables to signal waiting threads.
Avoid priority inversion by carefully managing thread priorities.
4. Thread Synchronization — The Solution
To solve or minimize these problems, thread synchronization is crucial.
What is Thread Synchronization?
It is a technique to control access to shared resources so that only one thread can use them at a time, preventing conflicts and corruption.
Common Synchronization Tools in C++:
Mutex (std::mutex)
Provides exclusive locking.
Only one thread can lock it at a time.
Other threads wait until the mutex is unlocked.
Lock Guards (std::lock_guard)
A convenient RAII wrapper that locks a mutex when created and unlocks when destroyed.
More flexible than lock_guard, supports manual locking/unlocking and deferred locking.
Works well with condition variables.
Condition Variables (std::condition_variable)
Allow threads to wait for some condition to become true.
Useful for producer-consumer problems and signaling between threads.
Problems & Solutions of Multithreading
Problem
Cause
Result
Solution
Deadlock
Circular waiting for locked resources
Program freezes/stalls
Lock mutexes in order, use std::lock
Race Condition
Unsynchronized access/modification of shared data
Data corruption or incorrect results
Use mutexes or atomic variables
Starvation
Some threads get priority over others
Some threads never run
Use fair locks, manage thread priorities
Tips for Beginners
Always protect shared data with mutexes or atomics.
Keep locks held for the shortest time possible.
Avoid complex locking schemes that can cause deadlocks.
Use tools like thread sanitizers (e.g., in clang/gcc) to detect race conditions.
Write simple multithreaded code first and gradually add complexity.
What is a Context Switch in Multithreading?
A context switch is the process by which the CPU switches from executing one thread to executing another thread. Since the CPU can only run one thread at a time on a single core, it rapidly switches between multiple threads to give the illusion of parallelism.
Why is Context Switching Needed in Multithreading ?
To allow multiple threads to share the CPU fairly.
To handle multiple tasks efficiently, especially when some threads are waiting (e.g., for input/output).
To improve overall system responsiveness.
What Happens During a Context Switch in Multithreading ?
When the CPU decides to switch from the currently running thread (let’s call it Thread A) to another thread (Thread B), it needs to:
Save the State of Thread A: This includes the thread’s CPU registers, program counter (the address of the next instruction to execute), stack pointer, and other critical information that defines exactly where Thread A was in its execution.
Load the State of Thread B: Restore the saved CPU registers, program counter, stack pointer, etc., of Thread B so it can continue from where it left off.
Resume Execution of Thread B: The CPU then starts executing instructions of Thread B.
What is Stored in the Context in Multithreading ?
CPU registers (general purpose registers).
Program counter (instruction pointer).
Stack pointer (to track function calls).
Possibly other hardware-specific information.
Overhead of Context Switching in Multithreading
Context switching is not free — it takes time and CPU cycles.
Frequent context switches can reduce overall performance due to this overhead.
Operating systems and runtime schedulers try to minimize unnecessary context switches.
Summary of Context Switching in Multithreading
Term
Meaning
Context
The saved state of a thread (registers, PC, stack pointer, etc.)
Context Switch
Saving the current thread’s context and loading another thread’s context to resume its execution
How context switching is handled differently in user-level threads vs kernel-level threads, or provide simple code examples demonstrating multithreading behavior!
1. join() Example
#include <iostream>
#include <thread>
using namespace std;

void task() {
    cout << "Thread is running..." << endl;
}

int main() {
    thread t(task);
    t.join();  // Wait for thread to finish
    cout << "Main thread finished after join." << endl;
    return 0;
}
#include <iostream>
#include <thread>
#include <atomic>
using namespace std;

atomic<int> counter(0);

void increment() {
    for (int i = 0; i < 1000; ++i) {
        ++counter;  // Safe without mutex
    }
}

int main() {
    thread t1(increment);
    thread t2(increment);
    t1.join();
    t2.join();

    cout << "Atomic counter value: " << counter << endl;  // Should be 2000
    return 0;
}
6. sleep_for() and sleep_until() Example
#include <iostream>
#include <thread>
#include <chrono>
using namespace std;

int main() {
    cout << "Sleeping for 2 seconds..." << endl;
    this_thread::sleep_for(chrono::seconds(2));

    auto wakeTime = chrono::steady_clock::now() + chrono::seconds(3);
    cout << "Sleeping until 3 seconds from now..." << endl;
    this_thread::sleep_until(wakeTime);

    cout << "Awake now!" << endl;
    return 0;
}
7. hardware_concurrency() Example
#include <iostream>
#include <thread>
using namespace std;

int main() {
    unsigned int n = thread::hardware_concurrency();
    cout << "This system can run " << n << " threads concurrently." << endl;
    return 0;
}
Important String Problems : Strings are everywhere in programming — from user input to text processing and coding interviews. Understanding common string problems will sharpen your problem-solving skills and prepare you for real-world coding challenges. Below are some fundamental string problems explained simply:
Important String Problems :
Reverse a String
Check whether a String is Palindrome or not
Find Duplicate characters in a string
Why strings are immutable in Java?
Write a Code to check whether one string is a rotation of another
Write a Program to check whether a string is a valid shuffle of two strings or not
Count and Say problem
Write a program to find the longest Palindrome in a string (Longest palindromic Substring)
Find Longest Recurring Subsequence in String
Print all Subsequences of a string
Print all the permutations of the given string
Split the Binary string into two substrings with equal 0’s and 1’s
Word Wrap Problem [VERY IMP]
EDIT Distance [Very Imp]
Find next greater number with same set of digits [Very Very IMP]
Linked List Data Structure : Are you new to data structures and wondering what a Linked List is all about? This beginner-friendly guide explains the Linked List data structure in simple terms, with easy examples and clear visuals.
What You’ll Learn Linked List Data Structure :
What a linked list is and how it works
Advantages and disadvantages of using linked lists compared to arrays
How linked lists store data using nodes and pointers
How to create a linked list in C++ step by step
How to traverse (print) a linked list
How to insert new nodes anywhere in the list
How to delete nodes from the list
Types of linked lists like singly, doubly, and circular linked lists
This guide is perfect for students, beginner programmers, or anyone looking to strengthen their data structure skills. Whether you’re preparing for coding interviews or learning for fun, this article makes Linked Lists easy to understand.
Dive in and learn how to build flexible, dynamic data structures that go beyond the limits of arrays. Let’s make Linked Lists simple and fun!
Let’s break it down step by step.
What is a Linked List?
A linked list is a way to store a collection of data.
Imagine a chain of boxes connected by strings.
Each box holds:
A piece of data
A link (or pointer) to the next box in the chain
So, instead of storing everything next to each other in memory like an array, linked lists store data scattered around, connected by these links.
Why Use Linked Lists?
Linked lists are useful because:
Flexible Size: They can grow or shrink easily. You don’t need to decide how big it should be ahead of time.
Easy Insertions/Deletions: You can add or remove items in the middle without shifting everything around, like in arrays.
But:
They use more memory (because of the extra links)
Accessing items is slower (you have to follow the links one by one)
Key features of QNX : The QNX Neutrino microkernel architecture is designed for high reliability, modularity, and real-time performance, making it well-suited for embedded systems. Here are the key features of its architecture:
Key Features of QNX Neutrino Microkernel Architecture
Microkernel Design
Only the most essential services run in kernel space: CPU scheduling, IPC (Interprocess Communication), low-level memory management, and interrupt handling.
All other components (filesystems, drivers, network stacks, etc.) run in user space as separate processes.
Message Passing IPC
Processes communicate via a synchronous message-passing mechanism, which is fast and thread-safe.
This enables modularity, security, and fault isolation.
Fault Resilience and Isolation
If a user-space driver or service fails, it does not crash the entire system.
Services can be restarted dynamically without rebooting the system.
Deterministic Real-Time Performance
Designed for hard real-time systems with predictable latency.
Supports priority-based preemptive scheduling and priority inheritance.
Scalability and Modularity
Components can be included or excluded based on application needs.
Supports running on single-core, multi-core, and SMP systems efficiently.
Resource Manager Model
Filesystems, devices, and services are implemented as resource managers that respond to POSIX-style messages.
Allows seamless interaction with custom services as if they were regular files/devices.
POSIX Compliance
High degree of POSIX API support for portability and familiarity.
Supports multithreading with POSIX threads.
Security and Privilege Separation
Fine-grained permission model and the separation of services enhances system security.
Runs critical services with least privilege principle.
Support for Multi-Protocol and Multi-Architecture
Supports ARM, x86, PowerPC, MIPS, etc.
Provides protocol stacks for networking (TCP/IP, etc.), CAN, USB, and more.
Dynamic System Management
Services can be dynamically added, removed, or updated at runtime without reboot.
Useful in mission-critical systems like automotive, medical, and industrial applications.
Monolithic Kernel
Definition: A monolithic kernel is a single large process running entirely in a single address space (kernel space). All core services (e.g., device drivers, file systems, memory management, system calls) run inside the kernel.
Key Features:
All services run in kernel mode.
Fast performance due to direct communication.
Adding new features often requires recompiling the entire kernel.
A bug in one component (e.g., a driver) can crash the whole system.
Examples: Linux, Windows NT (older versions), UNIX
Microkernel
Definition: A microkernel keeps only the most essential functions (e.g., inter-process communication, basic scheduling, low-level address space management) in the kernel space. Other services (file systems, device drivers, etc.) run in user space as separate processes.
Key Features:
Emphasizes modularity and isolation.
Fault in a user-space service doesn’t crash the entire system.
Slower due to message passing overhead between services.
Easier to maintain and extend (e.g., add or update services without kernel recompilation).
Examples: QNX, MINIX, L4, seL4
Comparison Table
Feature
Monolithic Kernel
Microkernel
Structure
Single large program
Minimal kernel, services in user space
Performance
Fast
Slower due to IPC overhead
Stability
Less stable (one crash can affect all)
More stable (service crashes isolated)
Extensibility
Difficult to extend
Easier to extend/modify
Security
Less secure (shared memory)
More secure (isolated services)
Debugging
Harder
Easier (user-space services)
You can also Visit other tutorials of Embedded Prep
If you’re diving into embedded systems, you’ve probably heard of QNX. But what is QNX, and how does it stand apart from other real-time operating systems (RTOSs) like FreeRTOS or VxWorks? In this post, we’ll explain what QNX is, explore its unique microkernel architecture, and compare its features with other popular RTOSs to help you understand where and why it shines.
What is RTOS?
RTOS stands for Real-Time Operating System. It’s a special kind of operating system designed to manage hardware resources, run applications, and process data in real-time — meaning it can guarantee that certain tasks are completed within strict timing constraints.
Unlike general-purpose operating systems like Windows or Linux, which focus on maximizing throughput or user experience, an RTOS prioritizes predictability and timing accuracy so critical tasks run on time, every time.
What is QNX?
QNX is a commercial real-time operating system (RTOS) developed by BlackBerry Limited. It’s designed specifically for embedded systems that require high reliability, safety, and deterministic performance.
Here’s a quick overview:
Type: Real-Time Operating System (RTOS)
Kernel Architecture: Microkernel
Main Use Cases: Automotive systems (e.g. ADAS, digital cockpits, infotainment), industrial automation, medical devices, networking equipment, aerospace, and defense
Key Features of QNX
POSIX-Compliant – Supports standard POSIX APIs for easier development and portability
High Reliability & Fault Tolerance – Isolates faults so a crashing driver or application doesn’t bring down the entire system
Fast Boot Times – Essential for automotive and embedded applications
Modular and Scalable – Load only what you need for your system
Deterministic Performance – Guarantees predictable response times for critical applications
These features make QNX a strong choice for mission-critical systems where safety and uptime are paramount.
How is QNX Different from Other RTOSs?
To see how QNX differs from other RTOSs, let’s compare it against alternatives like FreeRTOS, VxWorks, and RTEMS across key dimensions:
Feature
QNX
Other RTOSs (e.g. FreeRTOS, VxWorks, RTEMS)
Kernel Type
Microkernel
Mostly monolithic or hybrid
Process Isolation
Full MMU-based memory protection (like Linux)
Often limited; tasks may share memory
Fault Tolerance
High; one crashed driver doesn’t affect others
Lower; faults can crash the whole system
Scalability
Highly modular; load only needed components
Varies; not all are modular
Development Model
Commercial with strong vendor support
Mix of open-source (FreeRTOS) and proprietary
Multicore Support
Full Symmetric Multi-Processing (SMP) support
Varies; some lack proper multicore support
Real-time Behavior
Hard real-time with nanosecond latency
Varies; some RTOSs may not guarantee hard real-time behavior
Security & Certification
Widely used in ISO 26262, DO-178C, IEC 61508 systems
Some RTOSs not certified or harder to certify
Why Choose QNX?
So when should you consider QNX over other RTOSs?
Choose QNX if your system needs:
✅ High reliability – Faults in one component won’t crash the entire OS ✅ True process isolation – Critical for safety and security certifications ✅ Hard real-time performance – Nanosecond-level deterministic response ✅ Safety certifications – Used in ISO 26262 (automotive), DO-178C (aerospace), and IEC 61508 (industrial)
While it’s a more heavyweight, commercial option than lightweight RTOSs like FreeRTOS, the tradeoff brings robust safety, isolation, and reliability — critical for mission-critical embedded systems.
QNX vs. FreeRTOS: A Quick Note
Many engineers wonder about QNX vs. FreeRTOS. Here’s a simple rule of thumb:
Use FreeRTOS for small, cost-sensitive projects where basic multitasking and simplicity are enough (e.g. IoT devices, wearables).
Use QNX when you need strict safety certifications, process isolation, or hard real-time behavior for complex, mission-critical systems.
Final Thoughts
QNX continues to be a leading choice in industries like automotive, industrial, and medical, where system failures simply aren’t an option. Its microkernel design and rich set of features make it stand apart from many traditional RTOSs.
Whether you’re developing an automotive infotainment system or a life-critical medical device, knowing how QNX compares to other RTOSs helps you make the right decision for your embedded software architecture.
Excellent! Let’s take it further. I’ll provide you with sample interview questions and brief model answers, tailored for someone preparing for mid-level or senior interviews involving QNX or RTOS concepts.
QNX & RTOS Interview Q&A
✅ Q1. What is QNX, and why is it considered a microkernel OS?
Answer: QNX is a commercial real-time operating system (RTOS) developed by BlackBerry. It’s called a microkernel OS because only essential services like scheduling, IPC (inter-process communication), and interrupt handling run in the kernel space. All other services—including device drivers, file systems, and protocol stacks—run in user space as separate processes. This design improves fault tolerance and system stability.
✅ Q2. How is QNX different from other RTOSs like FreeRTOS or VxWorks?
Answer:
Kernel Type: QNX uses a microkernel, while many RTOSs like FreeRTOS have monolithic or hybrid kernels.
Process Isolation: QNX offers full MMU-based process isolation, while other RTOSs often share memory among tasks.
Fault Tolerance: A fault in one QNX driver doesn’t crash the entire system, while monolithic kernels can fail entirely.
Certifications: QNX is widely used in safety-critical systems (ISO 26262, DO-178C) and offers commercial support, whereas some RTOSs are lightweight but lack such certifications.
✅ Q3. What are the main advantages of a microkernel architecture in QNX?
Answer:
Fault isolation: A failing driver or service won’t crash the kernel.
Better security: Processes are isolated in separate address spaces.
Scalability: Systems can be customized by loading only the required components.
Maintainability: Easier to update or replace services without modifying the kernel.
✅ Q4. Can you explain message passing in QNX?
Answer: In QNX, processes and threads communicate via message passing. A client sends a message to a server process using functions like MsgSend(). The server receives the message, processes it, and replies using MsgReply(). This synchronous IPC ensures that the sender waits for a reply, enabling coordinated communication without shared memory.
✅ Q5. How does QNX achieve fault tolerance?
Answer: Since device drivers and system services run as user-space processes, faults are contained within those processes. If a driver crashes, it can be restarted without affecting the kernel or other services. This architecture makes QNX suitable for mission-critical systems where uptime is crucial.
✅ Q6. What is the QNX Momentics IDE?
Answer: QNX Momentics is an Eclipse-based integrated development environment. It provides tools for developing, debugging, and profiling applications on QNX Neutrino RTOS. It includes tools for memory analysis, performance profiling, and visualization of system events.
✅ Q7. Why is QNX often chosen for automotive systems?
Answer:
Predictable real-time behavior for safety-critical tasks.
Fast boot times required for modern vehicles.
Certified for ISO 26262 (functional safety standard).
Supports process isolation, crucial for running safety and infotainment software on the same hardware.
Strong commercial support and proven track record in automotive.
✅ Q8. How does QNX handle multicore systems?
Answer: QNX supports SMP (Symmetric Multi-Processing), allowing the OS to run threads across multiple cores. The microkernel manages scheduling and load balancing to optimize real-time performance while maintaining isolation between processes.
✅ Q9. What are resource managers in QNX?
Answer: Resource managers in QNX abstract hardware or services and present them as file system entries (e.g. /dev/). They handle open, read, write, and other POSIX calls. This unified model simplifies device driver development and inter-process communication.
✅ Q10. Would you choose QNX for a simple IoT sensor node? Why or why not?
Answer: Probably not. QNX is heavyweight compared to lightweight RTOSs like FreeRTOS. For a simple IoT sensor, you typically want minimal memory footprint and cost, which FreeRTOS provides. QNX is better for complex systems needing process isolation, certification, and robust fault tolerance.
Behavioral / Experience-Based
✅ Q11. Have you worked on QNX? What challenges did you face?
Sample Answer: “Yes, I worked on an automotive infotainment project using QNX. One challenge was understanding message passing and designing proper IPC between multiple services. Debugging crashes was also different because drivers run in user space, so I had to analyze core dumps and logs carefully. However, the system’s fault isolation saved us from many full system reboots, which was a huge advantage.”
✅ Q12. What do you think are the biggest benefits of using QNX over Linux for embedded systems?
Sample Answer: “While Linux offers flexibility and open-source advantages, QNX excels in real-time performance, fault isolation, and safety certifications. If my system requires strict timing guarantees and safety standards like ISO 26262, QNX would be my choice.”
You can also Visit other tutorials of Embedded Prep
UART USART Interview Questions : Understand the difference between UART (Universal Asynchronous Receiver Transmitter) and USART (Universal Synchronous/Asynchronous Receiver Transmitter). You’ll learn that both are serial communication protocols, but USART can work in both asynchronous and synchronous modes, while UART works only in asynchronous mode.
Understand the Importance of Serial Communication: You will grasp why UART and USART are widely used for communication between microcontrollers and other devices like sensors, actuators, and peripherals, making it essential for embedded systems design.
2. Fundamental Components of UART and USART
Start, Data, and Stop Bits: You will learn about the data frame structure in UART/USART communication, which includes start bits, data bits, and stop bits. You’ll gain knowledge of how data is transmitted serially, one bit at a time.
Baud Rate, Parity, and Flow Control: Understand key communication parameters like baud rate, parity bit, and flow control mechanisms such as RTS/CTS (hardware flow control) and XON/XOFF (software flow control).
Baud Rate determines the speed of communication.
Parity provides a method to detect errors in data transmission.
Flow control prevents data loss by ensuring that the receiving end is ready to accept more data.
3. Data Transmission in UART/USART
Transmission Modes – Asynchronous vs. Synchronous: Learn the core difference between asynchronous communication (in UART) and synchronous communication (in USART) and when each mode is used.
In asynchronous mode, there is no clock signal. Data is sent using start and stop bits.
In synchronous mode, there is a shared clock signal, which allows for faster communication.
Learn About Full-Duplex and Half-Duplex: You’ll understand how full-duplex communication (where data can be transmitted and received simultaneously) works, as well as half-duplex (where data flows in only one direction at a time).
4. Configuring UART and USART Communication
Pin Configurations (TX/RX, RTS/CTS): Learn how to configure the essential pins of UART/USART like TX (Transmit) and RX (Receive) for basic communication. You’ll also learn about RTS and CTS pins used for hardware flow control.
Baud Rate Configuration: Learn how to configure the baud rate for accurate data transmission between two devices. You will understand how baud rates are calculated based on system clock settings.
Parity and Stop Bits: Learn how to set parity (even, odd, none) and configure the number of stop bits to ensure correct data transmission and error detection.
5. Error Handling in UART/USART
Framing Errors: Learn what framing errors are and how they occur when the receiver doesn’t receive the correct number of bits for each data frame.
Overrun Errors: Understand overrun errors that happen when the receiver’s buffer is full, and new data arrives before the previous data is processed.
Parity Errors: Learn how parity errors occur when the parity bit doesn’t match the expected value, signaling corrupted data.
6. Practical Applications of UART and USART
Communication Between Microcontrollers: Learn how to use UART/USART for communication between microcontrollers in a system.
Interfacing with Peripherals: Gain knowledge of how UART is commonly used to interface with peripherals like GPS modules, Bluetooth modules, and other devices for wireless communication, debugging, and more.
Debugging Embedded Systems via UART: Discover how serial debugging works, where UART is used to send debug messages from microcontrollers to a terminal for monitoring and troubleshooting.
7. Practical Considerations for UART/USART Implementation
Voltage Level Considerations: Learn about the voltage levels required for UART communication (e.g., 3.3V or 5V), and understand the importance of ensuring compatible voltage levels between devices or using level shifters.
Cable Length and Transmission Distance: Understand the limitations of UART communication, such as transmission distance, and the use of buffer amplifiers or signal conditioning for longer cable runs.
Setting Up a UART Communication Link: You will learn how to physically wire up UART links, configure microcontroller peripherals for UART operation, and troubleshoot issues like incorrect wiring, mismatched baud rates, or pin configurations.
8. Hands-On Learning
Writing Code to Initialize UART/USART: Learn how to write embedded code to initialize UART/USART on a microcontroller, configure parameters like baud rate, data bits, and flow control, and set up an interrupt-based UART communication system.
Sending and Receiving Data: Gain hands-on experience with sending and receiving data via UART using software libraries, handling the data in your code, and ensuring reliable communication.
Implementing Flow Control in UART Communication: You will learn how to implement hardware or software flow control to prevent data loss in high-speed communication scenarios.
9. Debugging and Troubleshooting UART/USART
Use of Serial Monitors and Logic Analyzers: Learn how to use tools like serial monitors to visualize data sent over UART. You’ll also discover how to use logic analyzers to troubleshoot UART/USART signals by capturing and decoding the data stream.
Testing Communication Between Devices: Learn how to test the UART communication link between two devices, identify common problems like baud rate mismatches, incorrect wiring, or noise in the data transmission.
What Skills You Will Gain:
UART/USART Protocols: A strong understanding of both asynchronous (UART) and synchronous (USART) communication, including how to configure them on embedded devices.
Error Handling: Practical knowledge of handling communication errors like framing, overrun, and parity errors.
Flow Control Management: How to implement flow control techniques (RTS/CTS and XON/XOFF) to ensure reliable communication in high-speed applications.
Embedded Programming Skills: Learn how to write embedded code for configuring, sending, and receiving data over UART/USART on microcontrollers and other devices.
Practical Troubleshooting: Master debugging techniques and use of tools like serial monitors and logic analyzers for troubleshooting UART/USART communication.
Learning Outcomes
By the end of your learning journey on UART and USART communication, you will:
Be able to configure UART/USART on embedded devices and interfaces.
Understand how data frames are structured and how transmission occurs bit by bit.
Be equipped with the skills to handle baud rate, flow control, and error management.
Gain hands-on experience in sending and receiving data in real-world embedded systems.
Learn to troubleshoot and debug UART communication using various tools and techniques.
Be proficient in implementing UART communication between multiple devices, including microcontrollers and peripherals.
What is UART/USART?
UART stands for Universal Asynchronous Receiver Transmitter.
USART stands for Universal Synchronous/Asynchronous Receiver Transmitter.
💡 Simple difference:
UART = Only Asynchronous communication.
USART = Can do both Synchronous and Asynchronous.
Basic Interview Questions
1. What is UART?
UART is a hardware communication protocol used to send and receive data serially (bit-by-bit) over two lines:
TX (Transmit)
RX (Receive)
It does not require a clock signal and is hence asynchronous.
2. What is the difference between UART and USART?
Feature
UART
USART
Clock
No clock
Can use clock (synchronous)
Mode
Asynchronous
Synchronous & Asynchronous
Speed
Slower
Faster in synchronous mode
3. What are the main pins in UART?
TX (Transmit) – sends data
RX (Receive) – receives data Optional:
GND – common ground between devices
4. How does UART communication work?
When UART sends data:
It adds a Start Bit (0)
Sends data bits (typically 8)
Adds an optional Parity Bit
Ends with one or more Stop Bits (1)
💡 Example Frame: [Start][D0][D1][D2]...[D7][Parity][Stop]
5. What is baud rate?
Baud rate is the speed of communication.
It defines the number of bits sent per second (bps).
Common values: 9600, 115200, etc.
Example: 9600 baud = 9600 bits per second.
6. Is UART full-duplex or half-duplex?
Full-duplex.
Can send and receive data simultaneously using separate TX and RX lines.
7. What is the difference between SPI, I2C, and UART?
Feature
UART
SPI
I2C
Wires
2 (TX, RX)
4 (MOSI, MISO, SCK, SS)
2 (SDA, SCL)
Speed
Medium
Fast
Slower
Master-Slave
Peer-to-peer
Master-Slave
Master-Slave
Complexity
Low
Medium
High
8. What is a parity bit in UART?
Used for error detection.
Even parity: number of 1s including the parity bit is even.
Odd parity: number of 1s including the parity bit is odd.
9. What happens if baud rates don’t match?
If two devices use different baud rates:
Data will be misaligned.
Receiver may see garbage data or framing errors.
10. How can you implement UART in embedded systems?
Two common ways:
Using built-in UART hardware module (e.g., STM32, Atmega)
Software UART (bit-banging) – manually control GPIOs using code (less reliable)
Effective Date: June 21, 2025 App Name: SSC GK MCQ in Hindi 2025 Developer: Exam Guide
1. Introduction
This privacy policy explains how SSC GK MCQ in Hindi 2025 (“we”, “our”, or “us”) handles user data and protects your privacy while using our app. By using the app, you agree to the terms of this privacy policy.
2. Information We Do Not Collect
We do not collect, store, or share any personal information such as:
Your name, email address, or contact details
Your device ID or IP address
Your location or browsing history
This app is designed for educational purposes and works completely offline (if true). It does not require any login or registration.
3. Permissions
Our app may request standard permissions (such as internet access) only to:
Load web-based content (e.g., if there are any WebView quiz features)
Show ads (if AdMob or other ad services are integrated)
We do not use permissions to access any sensitive user data.
4. Third-Party Services
If our app displays advertisements or analytics, third-party services like Google AdMob or Google Analytics for Firebase may collect limited non-personal data such as:
Anonymous device information
Ad performance statistics
5. Children’s Privacy
Our app is suitable for users of all ages and does not knowingly collect personal information from children under the age of 13.
6. Changes to This Privacy Policy
We may update this privacy policy from time to time. We encourage you to review this page periodically for any changes. The updated policy will be effective as of the date it is posted.
7. Contact Us
If you have any questions or suggestions about this Privacy Policy, please contact us:
Object Detection Using Raspberry Pi : In this project, we’ll build a simple object detection system using a Raspberry Pi. When the ultrasonic sensor detects an object within a certain distance (e.g., less than 10 cm), it will turn on an LED and sound a buzzer.
Perfect for beginners, this project combines basic GPIO usage with real-world hardware.
Components Required for Object Detection Using Raspberry Pi
Component
Quantity
Raspberry Pi (any model with GPIO)
1
HC-SR04 Ultrasonic Sensor
1
Breadboard
1
Jumper Wires
~10
LED
1
Resistor (220Ω for LED)
1
Active Buzzer
1
Optional: Resistors for voltage divider (1kΩ + 2kΩ)
2
Raspberry Pi GPIO Pin Mapping (BCM Mode)
Purpose
GPIO Pin
Physical Pin
Component Pin
Trigger (Ultrasonic)
GPIO 23
Pin 16
HC-SR04 TRIG
Echo (Ultrasonic)
GPIO 24
Pin 18
HC-SR04 ECHO
LED Control
GPIO 18
Pin 12
LED (via resistor)
Buzzer Control
GPIO 25
Pin 22
Buzzer (+ve)
5V Power
5V
Pin 2 or 4
HC-SR04 VCC, Buzzer
Ground
GND
Pin 6 or 9
All GND pins
Wiring Instructions
1. HC-SR04 Ultrasonic Sensor
HC-SR04 Pin
Connect To
VCC
5V (Pin 2/4)
GND
GND (Pin 6)
TRIG
GPIO 23 (Pin 16)
ECHO
GPIO 24 via voltage divider
⚠️ Important: The ECHO pin outputs 5V, but Raspberry Pi GPIO only supports 3.3V. Use a voltage divider:
1kΩ resistor between Echo and Pi GPIO24
2kΩ resistor between Echo and GND
Tap from junction to GPIO24
2. LED
LED Pin
Connect To
Anode (+)
GPIO 18 via 220Ω resistor
Cathode (-)
GND
3. Buzzer (Active Type)
Buzzer Pin
Connect To
+ve
GPIO 25
-ve
GND
If you’re using a passive buzzer, use a transistor (NPN) to drive it safely.
Python Code
Here’s the complete Python script to read the ultrasonic sensor, and control the LED and buzzer based on object detection: