Interrupt handling in I2C communication: a beginner-friendly guide to I2C interrupts, ISR setup, non-blocking transfers, error handling, and practical .
If you’ve ever used an I²C bus on a microcontroller, you know it’s convenient: just two lines (SDA and SCL) to talk to a bunch of sensors or peripherals. But when things get a little more complex—when you don’t want to block everything waiting for a transfer—interrupt handling in I2C communication becomes super useful. Let’s break it down together.
What is I²C and why use interrupts?
The I²C protocol (Inter-Integrated Circuit) uses a master and one or more slaves sharing SDA (data) and SCL (clock) lines. (Texas Instruments)
By default, many I²C drivers operate in a blocking or polling mode: you tell the master “send this byte, wait until done”, and you sit there until it’s finished. But here’s the thing: if your microcontroller has other tasks (reading sensors, updating displays, handling UI…), you don’t want to stall everything waiting on I²C. That’s where interrupt handling in I2C communication comes in.
With interrupt mode (or non-blocking mode) you initiate the I²C transfer and then go off and do other stuff. When the transfer completes (or an error happens) the hardware triggers an interrupt and your handler picks it up. This keeps things responsive. For example, on an ST STM32 microcontroller the HAL library supports “_IT” functions: HAL_I2C_Master_Transmit_IT() etc.
So in plain terms: one, you set up the I²C peripheral to generate interrupts. Two, you write an interrupt service routine (ISR) that deals with completion or errors. Three, you let your main code keep doing whatever else it needs to.
Why we talk about interrupt handling in I2C communication
Because it gives you several real-world advantages:
- Non-blocking transfers: You start a send or receive operation and go back to doing other tasks.
- Better CPU efficiency: Instead of polling status flags in a tight loop, the CPU can rest or handle other processes until an interrupt fires.
- Responsive systems: When a sensor or device signals new data, your system reacts instantly through interrupts.
- Cleaner embedded design: Rather than using endless
while(i2cBusy)waits, you use callbacks or ISRs (Interrupt Service Routines) for neat and efficient flow control.
However — and this is important — interrupt handling in I2C communication also introduces new challenges. You must carefully manage synchronization, avoid race conditions, and ensure your ISRs remain short and efficient.
If you want to understand how to analyze and debug I2C behavior more effectively, check out this detailed guide on I²C Debugging with Saleae Logic. It shows how to visualize signal timing, identify errors, and validate your interrupt-driven I2C transfers in real hardware.
That’s why mastering interrupt handling in I2C communication isn’t just about enabling a feature — it’s about designing smooth, non-blocking, and reliable embedded systems that react in real time.ver—and this is important—you also need to handle it correctly. Mistakes in interrupt handling in I2C communication can lead to weird timing issues, bus lockups, missed data, or crashes.
How to implement interrupt handling in I2C communication (step-by-step)
Here’s a friendly walkthrough of how you’d do it on a typical microcontroller. We’ll keep it generic and simple.
1. Configure the I²C peripheral for interrupt mode
- Enable the I²C peripheral clock.
- Configure the pins (SDA, SCL) with open-drain, pull-ups (as required by I²C) per spec. (Texas Instruments)
- Set the I²C mode (master/slave), speed (standard, fast), 7-bit vs 10-bit addressing, etc.
- Enable the I²C interrupts: typically “transfer complete”, “byte received”, “error” flags.
- In the NVIC (or whatever MCU interrupt controller) enable the I²C IRQ and set its priority.
2. Write your interrupt service routine (ISR)
In the ISR you’ll examine the interrupt flags to see what happened: did a byte transmit complete? Did a receive finish? Was there a NACK or error/timeout?
Because you’re doing interrupt handling in I2C communication, your job is to:
- Clear the interrupt flag(s).
- Handle the event: e.g., if transfer complete, set a flag/semaphore or call a callback indicating your buffer is ready.
- If error, handle recovery: maybe reset the bus, reinit I²C, or log the error.
- Optionally, trigger the next step in a multi-step sequence.
3. Start the I²C transfer in non-blocking mode
In your main code or a task you’ll do something like: “start I²C master transmit, interrupt mode”. Then you go off and do other things. When the ISR signals completion (via flag/semaphore or callback), you “know” the transfer is done.
4. Use state machines or flags in main code
Because you aren’t blocking, you’ll often have a little state machine: “idle → start transfer → waiting for interrupt → done → process data → idle”. This is good practice for interrupt handling in I2C communication because you keep things clear.
5. Handle corner cases and errors
- What if the bus is stuck (SCL or SDA low)?
- What if a slave doesn’t ACK?
- What if an interrupt happens but you missed it due to priority or nesting?
- What if you call I²C routines inside another ISR? (That’s tricky) (Arduino Forum)
Handling these robustly is part of proper interrupt handling in I2C communication.
Example pseudo-code
Here’s a simple pseudo code snippet to illustrate:
volatile bool i2c_transfer_done = false;

void I2C_IRQHandler(void) {
    if (I2C_GetFlag(TRANSFER_COMPLETE)) {
        I2C_ClearFlag(TRANSFER_COMPLETE);
        i2c_transfer_done = true;
    } else if (I2C_GetFlag(ERROR)) {
        I2C_ClearFlag(ERROR);
        handle_error();
    }
}

void start_i2c_transfer(uint8_t slaveAddr, uint8_t *data, size_t len) {
    i2c_transfer_done = false;
    I2C_Master_Transmit_IT(slaveAddr, data, len);
}

void main_loop(void) {
    // other tasks...
    start_i2c_transfer(0x50, tx_buffer, 10);

    while (!i2c_transfer_done) {
        // do other stuff (sensor read, UI update)
    }

    // now transfer done: process response
    process_data(rx_buffer);
}
In this example you see how interrupt handling in I2C communication keeps the code non-blocking and smooth.
Common pitfalls in interrupt handling in I2C communication
- Calling blocking I²C routines inside an ISR: you should not do that. The ISR should be short. (Arduino Forum)
- Not clearing the interrupt flags properly → you get stuck.
- Attempting I²C + other interrupts at same priority and ending in race conditions.
- Forgetting to enable pull-ups or proper bus timing: even with interrupts, bus issues remain. (Interrupt)
- Ignoring the fact that some I²C slave devices signal via extra IRQs (GPIOs) to the master, which then triggers an I²C read. That is still interrupt handling in I2C communication but involves external interrupts. (Interrupt)
When should you use interrupt handling in I2C communication?
- When your microcontroller has many tasks and you don’t want to stall everything waiting for I²C.
- When you want to respond to asynchronous events (e.g., a sensor raises an alert) and then fetch data via I²C.
- When you have multiple I²C transfers and want to chain them without blocking.
- When you care about power efficiency: being able to sleep/wake for I²C transfers helps.
If you only have a simple one-sensor read every second and nothing else happening, polling may suffice—but as soon as complexity grows, interrupt handling in I2C communication pays off.
Link to your embedded projects
Given your background (you’ve worked with microcontrollers, RTOS, drivers…) you can apply interrupt handling in I2C communication in your embedded systems:
- On your STM32F4 (Cortex-M4) you might set up HAL or LL (low-level) I²C in interrupt mode.
- On an RTOS like QNX, you might combine I²C interrupt events with your driver thread: ISR signals a message or event and your thread wakes to handle data.
- You could build a non-blocking driver for an I²C sensor (e.g., temperature/humidity) that uses interrupt mode rather than blocking read, freeing your Cortex-M4 for other tasks.
Advantages of Interrupt Handling in I2C Communication
When you start using interrupt handling in I2C communication, you quickly notice how much smoother your embedded system becomes. Here are the biggest benefits:
- Non-blocking data transfers:
Your CPU doesn’t have to sit and wait for I2C operations to finish. Once a transfer starts, the CPU can do other work until an interrupt notifies completion. - Better CPU efficiency:
Unlike polling, where the CPU repeatedly checks a flag, interrupt handling in I2C communication wakes the processor only when necessary — saving power and cycles. - Real-time responsiveness:
Ideal for sensors or asynchronous devices. If your I2C sensor sends new data suddenly, the interrupt triggers instantly, ensuring you never miss updates. - Cleaner code design:
Interrupts separate logic and event handling. Instead of using busy-wait loops likewhile(i2cBusy), you use Interrupt Service Routines (ISRs) and callbacks for elegant flow control. - Scalable in RTOS environments:
Works perfectly with real-time operating systems (FreeRTOS, QNX, etc.) where interrupt-driven I2C tasks can notify threads or queues efficiently.
Want to learn how to debug I2C signals and verify interrupt triggers visually? Check out I²C Debugging with Saleae Logic — a great step-by-step resource.
Disadvantages of Interrupt Handling in I2C Communication
While the advantages are huge, interrupt handling in I2C communication also introduces some design challenges. Here’s what to watch out for:
- Complex debugging:
Debugging interrupt-driven systems is tougher than polling. Timing issues or missed flags can cause data corruption or bus errors. - ISR mistakes can hang the system:
Long or blocking code inside the Interrupt Service Routine can freeze your microcontroller or delay critical events. - Priority conflicts:
If multiple interrupts fire at once (like UART + I2C), you must configure interrupt priorities carefully to avoid missed communication. - Synchronization issues:
Shared data between main tasks and ISRs can lead to race conditions if you don’t use proper locking or volatile variables. - Platform-specific behavior:
Each microcontroller family (STM32, ESP32, PIC, etc.) has slightly different I2C interrupt registers and vector names — meaning code isn’t always portable.
Still, once you master these points, interrupt handling in I2C communication becomes one of the most reliable and efficient methods in embedded systems.
C Code Example: Interrupt Handling in I2C Communication
Here’s a simple example using an STM32-style approach (works similarly on many MCUs):
#include "stm32f4xx.h"

volatile uint8_t i2c_data_received = 0;

void I2C1_EV_IRQHandler(void) {
    if (I2C_GetITStatus(I2C1, I2C_IT_RXNE)) { // Data received interrupt
        uint8_t data = I2C_ReceiveData(I2C1);
        i2c_data_received = data;
        I2C_ClearITPendingBit(I2C1, I2C_IT_RXNE);
    }

    if (I2C_GetITStatus(I2C1, I2C_IT_TXE)) { // Data transmit interrupt
        I2C_SendData(I2C1, 0x55); // Example data
        I2C_ClearITPendingBit(I2C1, I2C_IT_TXE);
    }
}

void I2C_Config(void) {
    I2C_InitTypeDef I2C_InitStruct;
    NVIC_InitTypeDef NVIC_InitStruct;

    // Enable I2C clock
    RCC_APB1PeriphClockCmd(RCC_APB1Periph_I2C1, ENABLE);

    // Configure I2C parameters
    I2C_InitStruct.I2C_ClockSpeed = 100000;
    I2C_InitStruct.I2C_Mode = I2C_Mode_I2C;
    I2C_InitStruct.I2C_DutyCycle = I2C_DutyCycle_2;
    I2C_InitStruct.I2C_OwnAddress1 = 0x30;
    I2C_InitStruct.I2C_Ack = I2C_Ack_Enable;
    I2C_InitStruct.I2C_AcknowledgedAddress = I2C_AcknowledgedAddress_7bit;
    I2C_Init(I2C1, &I2C_InitStruct);

    // Enable interrupts
    I2C_ITConfig(I2C1, I2C_IT_EVT | I2C_IT_ERR | I2C_IT_BUF, ENABLE);

    // NVIC configuration
    NVIC_InitStruct.NVIC_IRQChannel = I2C1_EV_IRQn;
    NVIC_InitStruct.NVIC_IRQChannelPreemptionPriority = 0;
    NVIC_InitStruct.NVIC_IRQChannelSubPriority = 0;
    NVIC_InitStruct.NVIC_IRQChannelCmd = ENABLE;
    NVIC_Init(&NVIC_InitStruct);

    // Enable I2C
    I2C_Cmd(I2C1, ENABLE);
}

int main(void) {
    I2C_Config();

    while (1) {
        // Main loop doing other tasks
        if (i2c_data_received) {
            // Process received data
            i2c_data_received = 0;
        }
    }
}
Explanation:
- The I2C1_EV_IRQHandler() function acts as the Interrupt Service Routine (ISR).
- The ISR handles both transmit (
TXE) and receive (RXNE) events. - The main loop stays free for other operations — proving how interrupt handling in I2C communication enables non-blocking efficiency.
Summary
So to wrap it up: when you talk about interrupt handling in I2C communication, you mean using the I²C peripheral’s interrupt mode to handle data transfers in a non-blocking way. You configure the peripheral, write the ISR, start a transfer, and let the ISR notify your main code when it’s done. This gives a responsive, efficient embedded system. Done well, it avoids “while busy wait” code and keeps your system modular.
Frequently Asked Questions (FAQ) About Interrupt Handling in I2C Communication
1. What is interrupt handling in I2C communication?
Interrupt handling in I2C communication is a technique where the microcontroller responds automatically when specific I2C events occur, such as data transfer completion or an error. Instead of continuously checking the bus status, the CPU gets interrupted only when needed, making the system faster and more efficient.
2. Why is interrupt handling in I2C communication better than polling?
In polling mode, the CPU constantly checks if the I2C bus is busy or free — which wastes time and processing power. With interrupt handling in I2C communication, the CPU can perform other tasks while waiting. When the I2C event occurs, the hardware triggers an interrupt, and the interrupt service routine (ISR) handles the task immediately. This improves responsiveness and overall CPU efficiency.
3. How does interrupt handling in I2C communication work?
It works through three steps:
- The microcontroller configures the I2C peripheral to generate interrupts on specific events.
- When an event (like transmit complete or receive complete) happens, the I2C hardware triggers an interrupt.
- The Interrupt Service Routine (ISR) executes automatically, processes the event, clears flags, and signals the main application to continue.
This makes I2C communication non-blocking and reliable for multitasking embedded systems.
4. What are the main advantages of interrupt handling in I2C communication?
- Non-blocking data transfers
- Better CPU utilization
- Real-time response to sensor or peripheral signals
- Cleaner software architecture using callbacks or ISRs
- Easier integration with RTOS-based systems
For a deeper look at I2C signal behavior and debugging, you can explore this related guide: I²C Debugging with Saleae Logic.
5. What are common mistakes when using interrupt handling in I2C communication?
- Writing long or blocking code inside the ISR
- Forgetting to clear interrupt flags, which may cause repeated triggers
- Using the same priority level as other critical interrupts
- Calling I2C routines inside another interrupt context
Avoiding these mistakes ensures smooth interrupt-driven I2C communication and prevents bus lock-ups.
6. Can I use interrupt handling in I2C communication with RTOS?
Yes, you can. Most real-time operating systems (like FreeRTOS or QNX) allow combining I2C interrupts with event flags, semaphores, or message queues. The ISR can signal an RTOS task that the I2C transfer is complete, keeping the system responsive and thread-safe.
7. How do I test interrupt handling in I2C communication?
You can test it by:
- Using logic analyzers such as Saleae Logic to monitor I2C signals.
- Checking if your main loop continues running during I2C transfers (non-blocking behavior).
- Verifying ISR triggers correctly for start, stop, and error events.
Tools like Saleae Logic Analyzer help visualize every bit of I2C traffic in real time.
8. What microcontrollers support interrupt handling in I2C communication?
Almost all modern MCUs — STM32, ESP32, Atmega, PIC, and ARM-based processors — support I2C interrupts. Each family has its own I2C interrupt registers and ISR naming conventions, but the concept remains the same: enable interrupts, write an ISR, and handle the event efficiently.
9. What’s the difference between DMA and interrupt handling in I2C communication?
Both reduce CPU load, but they work differently.
- Interrupts: The CPU reacts when an event happens, ideal for smaller or infrequent data transfers.
- DMA (Direct Memory Access): The hardware moves data automatically between memory and the I2C peripheral without CPU intervention, ideal for high-speed or large transfers.
Some systems even combine both for maximum performance.
10. How can beginners learn interrupt handling in I2C communication step-by-step?
Start simple:
- Learn how basic I2C works (start, stop, ACK/NACK).
- Configure your I2C peripheral in blocking mode.
- Enable I2C interrupts and write a simple ISR.
- Test using an LED or UART message to confirm ISR execution.
- Debug your setup with tools like I²C Debugging with Saleae Logic.
Once you master these steps, you can apply interrupt-driven I2C in any embedded project confidently.
Mr. Raj Kumar is a highly experienced Technical Content Engineer with 7 years of dedicated expertise in the intricate field of embedded systems. At Embedded Prep, Raj is at the forefront of creating and curating high-quality technical content designed to educate and empower aspiring and seasoned professionals in the embedded domain.
Throughout his career, Raj has honed a unique skill set that bridges the gap between deep technical understanding and effective communication. His work encompasses a wide range of educational materials, including in-depth tutorials, practical guides, course modules, and insightful articles focused on embedded hardware and software solutions. He possesses a strong grasp of embedded architectures, microcontrollers, real-time operating systems (RTOS), firmware development, and various communication protocols relevant to the embedded industry.
Raj is adept at collaborating closely with subject matter experts, engineers, and instructional designers to ensure the accuracy, completeness, and pedagogical effectiveness of the content. His meticulous attention to detail and commitment to clarity are instrumental in transforming complex embedded concepts into easily digestible and engaging learning experiences. At Embedded Prep, he plays a crucial role in building a robust knowledge base that helps learners master the complexities of embedded technologies.
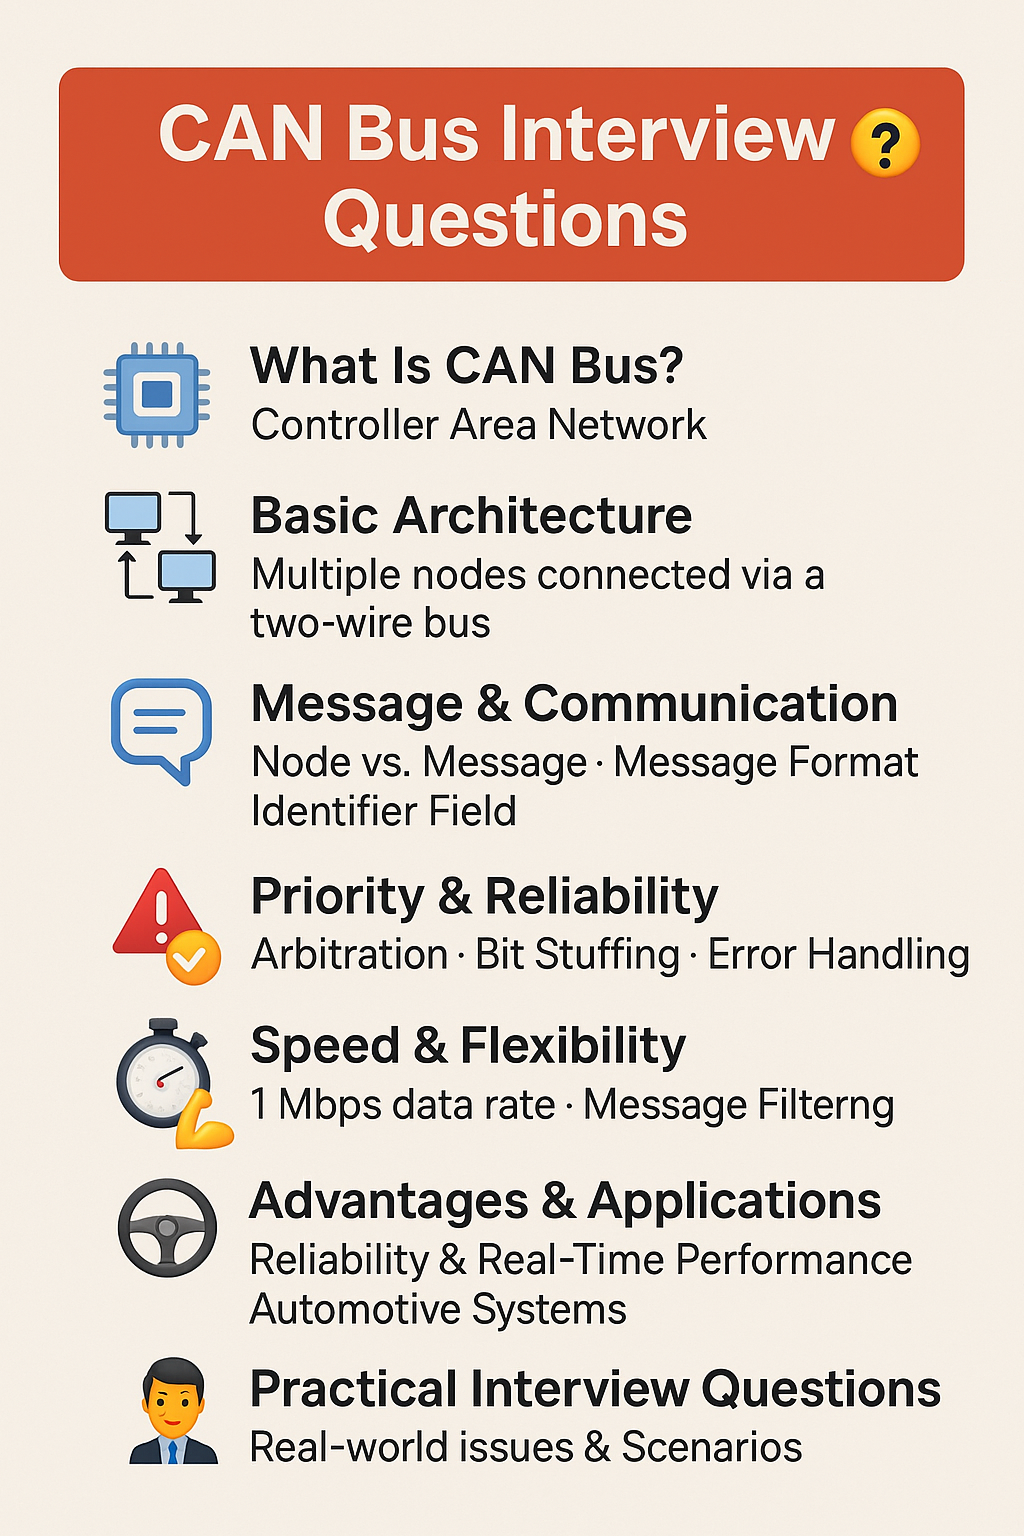

![CAN Interview Questions – Master Beginner-Friendly Tutorial [2025]](https://embeddedprep.com/wp-content/uploads/2025/07/CAN-Interview-Questions-%E2%80%93-Master-Beginner-Friendly-Tutorial-2025.png)