Author: admin

  • Master Structure with Pointers in C 2026

    Structure with Pointers : This beginner-friendly article explains the powerful combination of structures and pointers in C programming. You’ll learn how to define and use pointers to structures, access structure members with the arrow operator (->), dynamically allocate memory for structures using malloc, and pass structures by reference to functions. With easy-to-understand code examples, common interview questions, and practical tips, this guide is perfect for anyone preparing for C programming interviews or trying to strengthen their understanding of pointers and structs. Whether you’re a student or an embedded developer, this article builds a solid foundation in handling structures efficiently using pointers.

    Structure with Pointers

    Basics Recap: Structure with Pointers Definition and Access

    struct Student {
        int id;
        char name[20];
    };
    

    Without Structure with Pointers:

    struct Student s1 = {101, "Alice"};
    printf("%d", s1.id);
    

    With Structure with Pointers:

    struct Student s1 = {101, "Alice"};
    struct Student *ptr = &s1;
    printf("%d", ptr->id);         // Or: (*ptr).id
    

    Accessing Members: Dot (.) vs Arrow (->)

    ExpressionMeaning
    ptr->idPreferred: Dereference and access member
    (*ptr).idAlso valid, but less readable

    Using Pointers to Modify Structure with Pointers

    void update(struct Student *s) {
        s->id = 202;
        strcpy(s->name, "Bob");
    }
    
    int main() {
        struct Student s1 = {101, "Alice"};
        update(&s1);
        printf("%d %s", s1.id, s1.name);
    }
    

    ✅ This modifies the original structure by passing pointer, not a copy.

    Dynamic Memory Allocation for Structure with Pointers

    #include <stdlib.h>
    struct Student *s = (struct Student *)malloc(sizeof(struct Student));
    s->id = 1;
    strcpy(s->name, "Charlie");
    free(s);
    

    Why use dynamic allocation?

    • When the number of objects isn’t known at compile time
    • Saves stack memory
    • Useful in data structures (linked list, tree)

    Array of Structures with Pointers

    struct Student students[3] = {
        {101, "Alice"},
        {102, "Bob"},
        {103, "Eve"}
    };
    
    struct Student *ptr = students;
    
    for (int i = 0; i < 3; i++) {
        printf("ID: %d, Name: %s\n", (ptr + i)->id, (ptr + i)->name);
    }
    

    ✅ ptr + i gives address of each element; use -> to access fields.

    Self-Referencing Structure (Linked List Use Case)

    struct Node {
        int data;
        struct Node *next;
    };
    

    ✅ Used to build:

    • Linked lists
    • Trees
    • Graphs
    struct Node *head = (struct Node *)malloc(sizeof(struct Node));
    head->data = 10;
    head->next = NULL;
    

    Pointer to Array of Structures (Advanced Usage)

    struct Student *arr = malloc(3 * sizeof(struct Student));
    arr[0].id = 1;
    strcpy(arr[0].name, "A");
    

    ✅ Use arr[i] or (*(arr + i)).id

    Key Mistakes to Avoid Structure with Pointers

    MistakeFix
    Using structure pointer without initializationAlways assign memory first
    Forgetting -> when using pointerUse ptr->member, not ptr.member
    Not freeing dynamically allocated structureAlways use free() after malloc()
    Passing structure by value when large in sizeUse pointer to avoid stack overhead
    Accessing freed pointerSet to NULL after freeing

    Summary Table

    ConceptExamplePurpose
    Pointer to structurestruct *ptr = &obj;Efficient access/modification
    Dynamic allocationmalloc(sizeof(struct))Runtime memory usage
    Arrow operator ->ptr->fieldShortcut for pointer access
    Self-referencing structurestruct Node *next;Linked list, tree, stack, queue
    Array of struct pointersstruct *arr[n];Complex data structures
    Memory-mapped I/O with struct(struct *)0xADDREmbedded register mapping

    1. Basic Structure Without Pointer

    #include <stdio.h>
    
    struct Student {
        int id;
        char name[20];
        float marks;
    };
    
    int main() {
        struct Student s1 = {101, "John", 87.5};
    
        printf("ID: %d\n", s1.id);
        printf("Name: %s\n", s1.name);
        printf("Marks: %.2f\n", s1.marks);
    
        return 0;
    }
    

    2. Pointer to Structure: The Basics

    To access members using a pointer to a structure, we use the -> (arrow) operator.

    #include <stdio.h>
    
    struct Student {
        int id;
        float marks;
    };
    
    int main() {
        struct Student s1 = {102, 91.5};
        struct Student *ptr = &s1;
    
        printf("ID: %d\n", ptr->id);       // Equivalent to (*ptr).id
        printf("Marks: %.2f\n", ptr->marks);
    
        return 0;
    }
    

    🔍 Interview Tip: Explain both ptr->id and (*ptr).id. They are functionally the same.

    3. Dynamically Allocating Structure Using malloc()

    #include <stdio.h>
    #include <stdlib.h>
    
    struct Student {
        int id;
        float marks;
    };
    
    int main() {
        struct Student *ptr = (struct Student *)malloc(sizeof(struct Student));
    
        ptr->id = 103;
        ptr->marks = 75.5;
    
        printf("ID: %d\n", ptr->id);
        printf("Marks: %.2f\n", ptr->marks);
    
        free(ptr); // Always free memory
        return 0;
    }
    

    🔍 Interview Tip: You may be asked to dynamically create an array of structures.

    4. Passing Structure Pointer to Function

    #include <stdio.h>
    
    struct Student {
        int id;
        float marks;
    };
    
    void display(struct Student *ptr) {
        printf("ID: %d\n", ptr->id);
        printf("Marks: %.2f\n", ptr->marks);
    }
    
    int main() {
        struct Student s = {104, 89.0};
        display(&s);  // Pass address
        return 0;
    }
    

    🔍 Interview Tip: This is memory-efficient compared to passing the full structure.

    5. Array of Structures with Pointers

    #include <stdio.h>
    
    struct Student {
        int id;
        float marks;
    };
    
    int main() {
        struct Student students[2] = {
            {201, 76.5},
            {202, 88.0}
        };
    
        struct Student *ptr = students; // Point to first element
    
        for (int i = 0; i < 2; i++) {
            printf("ID: %d, Marks: %.2f\n", ptr->id, ptr->marks);
            ptr++;
        }
    
        return 0;
    }
    

    6. Nested Structures with Pointers

    #include <stdio.h>
    
    struct Date {
        int day, month, year;
    };
    
    struct Student {
        int id;
        struct Date dob;
    };
    
    int main() {
        struct Student s = {301, {10, 6, 2000}};
        struct Student *ptr = &s;
    
        printf("DOB: %02d-%02d-%d\n", ptr->dob.day, ptr->dob.month, ptr->dob.year);
        return 0;
    }
    

    Interview Questions on Structure with Pointers

    1. What is the difference between ptr->x and (*ptr).x?
      • Both are the same. ptr->x is syntactic sugar for (*ptr).x.
    2. Why use structure pointers instead of structures in functions?
      • Efficient: avoids copying large structure data.
    3. Can we allocate memory dynamically for structure?
      • Yes, using malloc.
    4. How to create a linked list using structure pointer?
      • Each node has a structure with a pointer to the next node.
    5. What happens if we dereference an uninitialized pointer to struct?
      • It leads to undefined behavior (usually segmentation fault).

    Basic Level

    1. What is a pointer to a structure?
    2. How do you access members of a structure using a pointer?
    3. What is the difference between (*ptr).member and ptr->member?

    Intermediate Level

    1. How do you dynamically allocate memory for a structure?
    2. What happens if you pass a structure to a function by value vs by pointer?
    3. How can you use pointers to modify structure data inside a function?
    4. Explain how you access an array of structures using a pointer.
    5. Can you pass a pointer to a structure as a function parameter? Show an example.

    Advanced Level

    1. What is a self-referential structure? How is it used in linked lists?
    2. How do you handle a structure containing dynamically allocated members?
    3. What happens when you access a structure pointer without initializing it?
    4. What is the memory layout difference between structure and structure pointer?
    5. How do you implement a generic structure pointer that can point to multiple types (with void pointers)?
    6. How is pointer to structure used in memory-mapped I/O (e.g., in embedded systems)?

    Real-World/Embedded Examples

    1. Explain how you would map a peripheral register block to a structure pointer.
    #define UART_BASE 0x40001000
    struct UART {
        volatile uint32_t DATA;
        volatile uint32_t STATUS;
    };
    #define UART0 ((struct UART *)UART_BASE)
    
    1. Why is volatile used with structure pointers in embedded systems?

    Practice Problems

    1. Write a program to create and print an array of n students using dynamic allocation.
    2. Implement a linked list using self-referential structures.
    3. Write a function that swaps two structure variables using pointers.
    4. Write a function that returns a pointer to a dynamically created structure.
    5. Simulate a memory-mapped I/O register set using structure pointers in C.

    You can also Visit other tutorials of Embedded Prep 

    Special thanks to @mr-raj for contributing to this article on EmbeddedPrep
  • Master Embedded C Interview Questions 2026

    Welcome to our comprehensive blog on Embedded C Interview Questions, your one-stop resource to prepare for embedded systems interviews with confidence. Whether you’re a beginner looking to break into embedded development or an experienced engineer brushing up on key concepts, this blog offers a curated list of frequently asked interview questions and expert answers.

    Explore a wide range of topics including memory management, pointers, data structures, bitwise operations, interrupts, real-time operating systems (RTOS), and microcontroller programming. Each question is explained in a clear, beginner-friendly manner with practical code examples and real-world relevance.

    Perfect for students, job seekers, and professionals, this blog helps you build a solid foundation in Embedded C and crack interviews at companies like Bosch, Qualcomm, STMicroelectronics, NXP, and more.

    Stay ahead in your career—start mastering Embedded C today!

    Basic Embedded C Interview Questions

    • What is Embedded C Programming? How is Embedded C different from C
      language?
    • What are the different data types in Embedded C?
    • What is the role of main() in Embedded C programs?
    • What is Void Pointer in Embedded C and why is it used?
    • Why do we use the volatile keyword?
    • What are the differences between the const and volatile qualifiers in embedded
      C?
    • What are preprocessor directives? Name a few.
    • What Is Concatenation Operator in Embedded C?
    • How will you use a variable defined in source file1 inside source file2?
    • What are the differences between Inline and Macro Function?
    • Is it possible for a variable to be both volatile and const?
    • Is it possible to declare a static variable in a header file?
    • What do you understand by the pre-decrement and post-decrement operators?
    • What is a reentrant function?
    • What kind of loop is better – Count up from zero or Count Down to zero?
    • What do you understand by a null pointer in Embedded C?
    • Why is the statement ++i faster than i+1?
    • Is it possible to protect a character pointer from accidentally pointing it to a different address?
    • What do you understand by Wild Pointer? How is it different from Dangling Pointer?
    • What are the differences between the following 2 statements #include “…” and #include <…>?
    • Difference between while(1) and while(0) in C language?
    • Describe the role of the “typedef” keyword in embedded C.
    • Difference Between Structure and Array in C?
    • Difference Between Structure and Union in C?
    • Explain What Are The Different Storage Classes In C?
    • Explain What Are The Different Qualifiers In C?
    • What Is Pass By Value And Pass By Reference?
    • What are the uses of the Keyword Static?
    • What does “const int x;” mean?
    • Where are constant variables stored in memory?
    • How can you protect a character pointer by some accidental modification with the pointer address?
    • What is the keyword “volatile” used for in embedded C?
    • Can a variable be volatile and const both?
    • What is a Null pointer?
    • What is the size of a pointer?
    • What is the difference between little-endian and big-endian byte ordering
    • Explain the difference between static and dynamic memory allocation in embedded C.
    • How do you perform bitwise operations in embedded C?
    • What is the significance of the “restrict” keyword in embedded C?
    • Explain the concept of bit fields in embedded C.
    • What is a union and how is it used in embedded C?
    • Explain the concept of portability in embedded C programming.
    • How do you implement a finite state machine in embedded C?
    • Describe the process of handling errors in embedded C programming.
    • How do you perform input/output operations in embedded C?
    • What is the purpose of the “inline” keyword in embedded C?
    • How do you handle multi-threading in embedded C?
    • How do you handle endianness issues in embedded C?
    • Describe the process of implementing a software stack in embedded C.
    • How do you debug embedded C code?
    • How do you handle floating-point arithmetic in embedded C?
    • What is a pointer-to-function in embedded C?
    • How do you perform code optimization in embedded C?

    Intermediate Embedded C Interview Questions

    1. What are memory-mapped I/O and how is it implemented in Embedded C?
    2. How can you implement circular buffer (ring buffer) in Embedded C?
    3. What is ISR (Interrupt Service Routine) and how do you write one in C?
    4. How do you share data between main code and ISR safely?
    5. What are the race conditions in Embedded C and how do you avoid them?
    6. Explain how stack overflow can occur in embedded systems and how to prevent it.
    7. What is memory leak and how can it happen in embedded firmware?
    8. How do you perform memory alignment in Embedded C?
    9. How would you use __attribute__((section(".name"))) in Embedded C?
    10. What is the difference between using a union and casting in accessing hardware registers?
    11. How would you implement delay without using delay() function or timers?
    12. How do you prevent compiler optimization for a specific variable or function?
    13. What is zero initialization and when does it occur in Embedded C?
    14. What is the difference between memcpy() and memmove()?
    15. How do you ensure atomicity of operations in Embedded C?
    16. What is tail recursion? Is it helpful in embedded development?
    17. How does compiler optimization affect Embedded C behavior?
    18. What is aliasing in Embedded C and how can it lead to undefined behavior?
    19. How do you prevent structure padding and packing issues?
    20. What is bus contention and how can software reduce its occurrence?

    Advanced Embedded C Interview Questions

    1. How do you implement RTOS-level features like task switching using C?
    2. How does the compiler manage interrupt vector tables in Embedded C?
    3. How can function pointers be used to implement polymorphism in Embedded C?
    4. How do you create bootloader code in Embedded C?
    5. What is position-independent code and how do you write it in Embedded C?
    6. Explain memory sections (.text, .data, .bss) and how they are used in linker scripts.
    7. How can Embedded C be used to interface with DMA (Direct Memory Access)?
    8. How do you implement memory pools or custom allocators in Embedded C?
    9. How do you perform low-power optimization in firmware (C-level techniques)?
    10. How do you handle memory-mapped peripherals in systems with shared buses?
    11. What is undefined behavior in C, and how does it manifest in embedded systems?
    12. How does the volatile keyword behave with pointers to structures?
    13. How would you debug stack corruption or heap fragmentation in embedded systems?
    14. What techniques do you use to profile and measure code performance in embedded systems?
    15. How would you implement a watchdog timer service in C?
    16. How can inline assembly be used in Embedded C?
    17. How do you ensure MISRA C compliance in large codebases?
    18. How do you implement lock-free programming techniques in Embedded C?
    19. How do you use linker script to map specific variables/functions to specific addresses?
    20. How do you implement a software-based CRC algorithm in C?
    21. How do you handle large memory access (above 64 KB) in 16-bit microcontrollers?
    22. How do you implement double buffering in Embedded C for smooth data acquisition?
    23. How do you write unit tests for Embedded C code without hardware?
    24. How do you manage firmware upgrades (FOTA) in embedded C systems?
    25. What are trampolines in embedded programming and when are they used?

    Programming Questions – Embedded C Interview Questions 2025

    Basic Level Programming

    1. Write a C program to toggle an LED connected to a GPIO pin every 1 second using delay loops.
    2. Write a function to reverse an array of integers in place.
    3. Implement a function to check if a given number is a power of two using bitwise operations.
    4. Write a C program to count the number of 1s in an 8-bit integer.
    5. Write a function to implement your own strlen() function.
    6. Write a program to swap two variables without using a temporary variable.
    7. Write a program to implement a simple circular buffer with fixed size.
    8. Implement a debounce algorithm in C for a push-button input.

    Intermediate Level Programming

    1. Write a program to implement a software delay function using timers (assume STM32/AVR-like architecture).
    2. Write an ISR (Interrupt Service Routine) to handle external interrupt on a GPIO pin.
    3. Implement a state machine to control an LED that turns on/off with a button press and blinks when held.
    4. Implement a memory copy function similar to memcpy() and ensure it handles overlapping memory regions.
    5. Create a struct-based system to store and manage sensor readings with timestamp support.
    6. Write a function that takes a pointer to a function and executes a list of callback functions.
    7. Create a firmware-like program to blink 3 LEDs in sequence using only one timer.
    8. Write a program to transmit a string via UART using polling (non-interrupt method).

    Advanced Level Programming

    1. Implement a finite state machine (FSM) in C to manage a simple traffic light system.
    2. Simulate a watchdog timer that resets a system if a task fails to report within a certain time window.
    3. Write code to allocate memory from a fixed-size memory pool (custom allocator).
    4. Implement a CRC-8 or CRC-16 checksum algorithm in C.
    5. Write embedded-safe code to compute the average of N ADC values with integer arithmetic only.
    6. Implement an event queue system in Embedded C with event handlers and a dispatcher.
    7. Write a bootloader stub that checks for a firmware update signature and jumps to the main application.
    8. Implement I²C read/write operations with software bit-banging in C.
    9. Write a code to simulate a multi-task scheduler (round-robin) in pure Embedded C.

    You can also Visit other tutorials of Embedded Prep 

    Special thanks to @mr-raj for contributing to this article on EmbeddedPrep
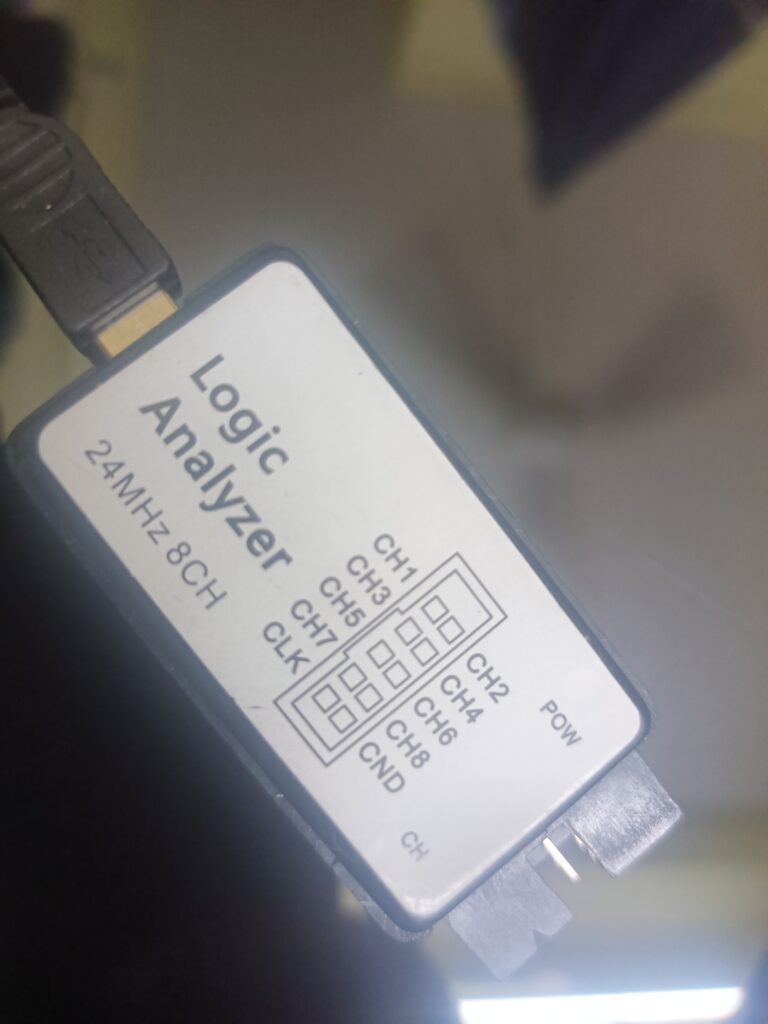
  • Master I²C Debugging with Saleae Logic Analyzer – Top Interview Questions (2026)

    I²C Debugging with Saleae Logic Analyzer : If you’re preparing for an embedded systems or automotive software interview, I²C communication and debugging skills are a must. Especially with tools like the Saleae Logic Analyzer, companies are looking for candidates who can confidently debug hardware communication issues.

    In this post, we’ve compiled the most commonly asked and advanced I²C debugging with Saleae Logic Analyzer. Mastering these questions will set you apart in 2025’s competitive tech landscape.

    I²C Debugging with Saleae Logic Analyzer

    Section 1: Basic I²C & Saleae Understanding

    1. What is I²C and how does it differ from other communication protocols like SPI or UART?
    2. How does a Saleae Logic Analyzer help in debugging I²C communication?
    3. What are the required hardware connections between a Saleae Logic Analyzer and an I²C bus?
    4. How do you set up Saleae software to capture I²C data?
    5. What is protocol decoding in Saleae, and how do you enable it?

    Section 2: Practical Debugging Approach

    1. How would you connect a Saleae Logic Analyzer to an Arduino I²C setup?
    2. What is the process to capture I²C communication on a Saleae Analyzer?
    3. How do you differentiate between master and slave devices on the Saleae waveform?
    4. What visual cues in the Saleae output help identify I²C address, data, and ACK/NACK bits?
    5. How do you verify if the correct I²C address is being sent by the master?

    Section 3: Troubleshooting Scenarios

    1. You see the clock and data lines active, but the slave device does not respond. How do you debug it using Saleae?
    2. What might cause repeated NACK responses from a slave device and how can Saleae help diagnose the issue?
    3. What would you do if the SDA line stays LOW during capture?
    4. How would you debug intermittent I²C communication failures using Saleae?
    5. How do you confirm the slave is acknowledging data correctly?

    Section 4: Signal & Timing Analysis

    1. How can you use Saleae to measure clock speed and ensure it matches the expected I²C frequency (e.g., 100kHz or 400kHz)?
    2. What is clock stretching and how would it appear in a Saleae capture?
    3. How can you detect setup and hold time violations using Saleae?
    4. What sampling rate would you choose in Saleae for reliable I²C capture and why?
    5. Can you identify glitching or bus contention with Saleae? How?

    Section 5: Advanced and Real-World Use Cases

    1. How would you debug a sensor that works in one board but not another using Saleae?
    2. You suspect a race condition or overlapping I²C transactions. How can Saleae help you prove this?
    3. How do you debug repeated START conditions using Saleae?
    4. Your OLED at address 0x3C does not display anything, even though the master is active. What’s your debugging process?
    5. What happens when two masters try to control the bus simultaneously, and how do you detect this in Saleae?

    Section 6: Tool-Specific Mastery

    1. How do you configure trigger conditions in Saleae to capture a specific I²C address?
    2. Can you automate or script data analysis from Saleae captures?
    3. How do you filter large I²C log data in Saleae to find specific transactions?
    4. How do you export Saleae captures for documentation or debugging?
    5. Can Saleae Logic software help identify mismatched voltage levels or missing pull-up resistors?

    Bonus Section: Interview-Ready Case Studies

    1. What’s an example of a real bug you debugged using Saleae Logic Analyzer?
    2. How do you communicate I²C debugging results to a hardware or firmware team?
    3. How would you verify if a microcontroller is stuck waiting for an ACK using Saleae?
    4. What does a proper initialization sequence look like on Saleae when an OLED display powers up?
    5. How do you validate driver-level I²C communication with actual bus signals?

    You can also Visit other tutorials of Embedded Prep 

    Special thanks to @mr-raj for contributing to this article on EmbeddedPrep
  • Master Decode I²C with Saleae Logic Analyzer and Arduino Uno (2026)

    I²C with Saleae Logic Analyzer : I²C (Inter-Integrated Circuit) is a powerful two-wire communication protocol that allows multiple devices—such as sensors, displays, and memory modules—to communicate with a microcontroller like the Arduino using just SDA (Serial Data Line) and SCL (Serial Clock Line).

    In this practical guide, you’ll learn how to decode, monitor, and debug I²C communication using the Saleae Logic Analyzer. Whether you’re dealing with an unresponsive OLED display or trying to understand data flow between your Arduino and I²C peripherals, this tutorial will help you visualize I²C signals, interpret data frames, and detect common issues—all with a user-friendly Saleae interface.

    Perfect for beginners and embedded developers, this hands-on guide simplifies I²C debugging and gives you the confidence to troubleshoot any I²C-based project

    Plan: Simulate I²C Using Arduino + ESP32 + Saleae

    What You’ll Do:

    1. Connect Arduino Uno (Master) and ESP32 (Slave) via I²C.
    2. Upload I²C code to both devices.
    3. Monitor SDA and SCL lines with Saleae.
    4. Decode and analyze I²C protocol in the Saleae software.
    +------------------+       +-----------------+       +-------------------------+
    |    Arduino Uno   |       |     ESP32       |       |   Saleae Logic Analyzer |
    |------------------|       |-----------------|       |-------------------------|
    | A4 (SDA) --------+------>+ GPIO 21 (SDA)    |------>+ CH0                    |
    | A5 (SCL) --------+------>+ GPIO 22 (SCL)    |------>+ CH1                    |
    | GND ------------+-------+ GND              |------>+ GND                     |
    +------------------+       +-----------------+       +-------------------------+
    

    Code Part 1: Arduino Uno as I²C Master

    #include <Wire.h>
    
    void setup() {
      Wire.begin(); // I2C Master
      Serial.begin(9600);
      delay(1000);
    }
    
    void loop() {
      Serial.println("Sending data to ESP32...");
      Wire.beginTransmission(0x08);  // Slave address
      Wire.write("Hi");
      byte status = Wire.endTransmission();
    
      if (status == 0) {
        Serial.println("✅ ESP32 acknowledged the message!");
      } else {
        Serial.print("❌ Error sending to ESP32. Code: ");
        Serial.println(status);
      }
    
      delay(1000);
    }
    

    Code Part 2: ESP32 as I²C Slave

    #include <Wire.h>
    
    void receiveEvent(int bytes) {
      Serial.print("Received: ");
      while (Wire.available()) {
        char c = Wire.read();
        Serial.print(c);  // Show character
      }
      Serial.println();
    }
    
    void setup() {
      Serial.begin(115200);
      Wire.begin(0x08);  // ESP32 as Slave at address 0x08
      Wire.onReceive(receiveEvent);  // Set receive handler
    }
    
    void loop() {
      delay(100);
    }
    

    What You Need | I²C with Saleae Logic

    • Arduino Uno
    • ESP32 Dev Board
    • Saleae Logic Analyzer
    • Jumper Wires
    • Arduino IDE

    Wiring Between Arduino and ESP32

    Arduino UnoESP32Saleae Logic
    A4 (SDA)GPIO 21 (SDA)CH0 (SDA)
    A5 (SCL)GPIO 22 (SCL)CH1 (SCL)
    GNDGNDGND

    Use Saleae Logic Analyzer

    1. Connect Channel 0 to SDA (A4/GPIO21), Channel 1 to SCL (A5/GPIO22), and GND.
    2. In the Saleae Logic software:
      • Set sampling rate: 1MHz or higher
      • Add I²C Analyzer (Channel 0 = SDA, Channel 1 = SCL)
    3. Hit Start, and observe the communication!

    What You’ll See in Saleae

    You’ll decode messages like:

    [0x08] WRITE → 0x48 0x69
    Which corresponds to ASCII:
    
    H  i
    " That’s the "Hi" sent from Arduino to ESP32 "
    

    Tips & Gotchas

    • If the ESP32 doesn’t show messages: check address match and wiring.
    • Pull-up resistors (4.7kΩ) might be needed if you get unreliable signals.
    • You can use Wire.onReceive() on ESP32 to handle multiple bytes and print them.

    You can also Visit other tutorials of Embedded Prep 

    Special thanks to @mr-raj for contributing to this article on EmbeddedPrep

  • Master How to Use a Saleae Logic Analyzer with Arduino Uno (2026)

    How to Use a Saleae Logic Analyzer : If you’re new to Arduino and curious about how digital signals really work under the hood, a Saleae Logic Analyzer is the perfect tool to start exploring. In this beginner-friendly guide, I’ll walk you through my learning journey of using the Saleae Logic Analyzer with a simple Arduino Uno sketch.

    You’ll learn how to capture, visualize, and interpret digital signals in real time—making it easier to debug issues, understand timing, and get deeper insight into your embedded projects. Whether you’re monitoring a blinking LED or analyzing serial communication, this tutorial will help you unlock the full power of digital signal analysis.

    Perfect for makers, students, and embedded enthusiasts looking to build a strong foundation in hardware debugging and signal analysis.

    What is a Saleae Logic Analyzer?

    A Saleae Logic Analyzer is a tool that lets you capture and visualize digital signals from your circuits. It’s like an oscilloscope but specialized for digital data. It helps you see when signals go HIGH (on) or LOW (off) over time.

    The Arduino Sketch

    For my experiment, I wrote a very simple program to blink the built-in LED on pin 13 of the Arduino Uno:

    void setup() {
      pinMode(13, OUTPUT);  // Set pin 13 as an output
    }
    
    void loop() {
      digitalWrite(13, HIGH);  // Turn LED ON
      delay(1000);             // Wait for 1 second
      digitalWrite(13, LOW);   // Turn LED OFF
      delay(500);              // Wait for 0.5 seconds
    }
    

    This program turns the LED on for 1 second, then off for half a second, repeatedly.

    Connecting the Logic Analyzer

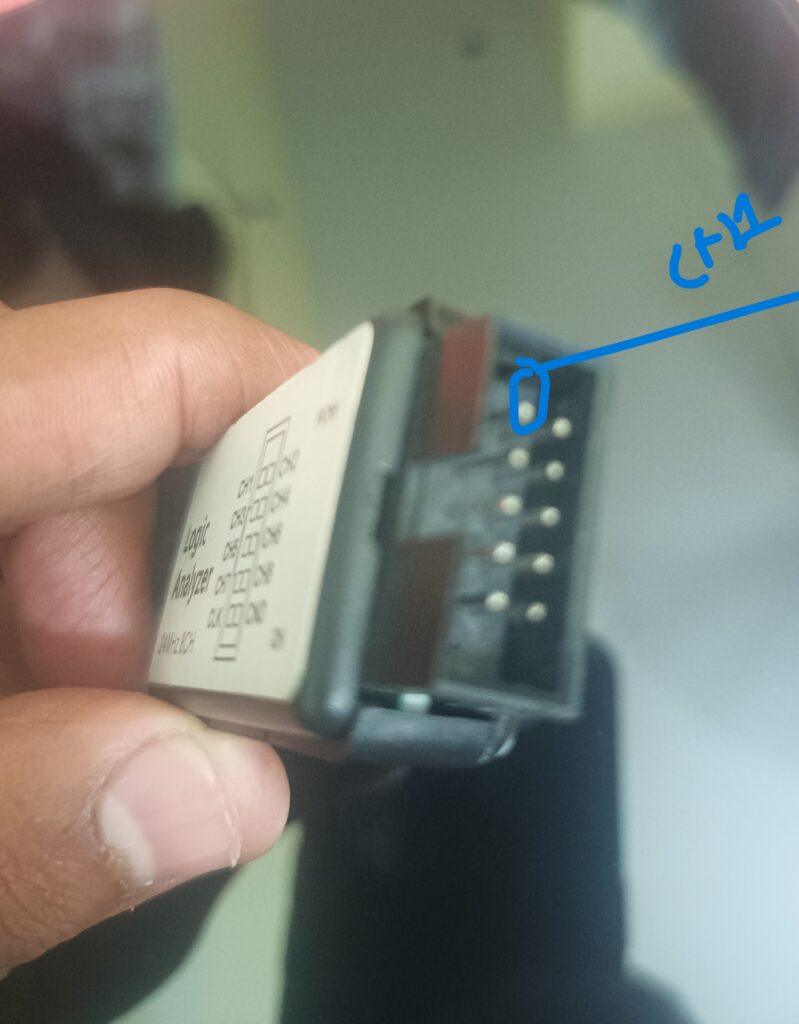
    Pin of Logic Analyzer

    To see what’s happening on pin 13, I connected the Saleae Logic Analyzer probe to Arduino pin 13 and ground. This allows the Logic Analyzer to measure the voltage changes as the LED turns on and off.

    What I Learned from the Logic Analyzer

    When I opened the Saleae software and started capturing data, I saw a clean square wave pattern on channel 0 corresponding to pin 13. The signal was HIGH for about 1 second and LOW for about 0.5 seconds, exactly as my code intended.

    This visual confirmation helped me understand:

    • How digital signals appear as voltage changes (HIGH = ~5V, LOW = 0V).
    • Timing between signal changes, like the 1-second ON and 0.5-second OFF.
    • The importance of accurate timing in embedded programming.

    Why Use a Logic Analyzer?

    • Debugging: It helps find errors in signal timing or logic.
    • Learning: Visualizing signals makes digital electronics easier to understand.
    • Complex Projects: When dealing with communication protocols like I2C or SPI, it’s invaluable.

    Final Tips for Beginners

    • Always connect the ground of the Logic Analyzer to the Arduino ground.
    • Start with simple code like blinking an LED before moving to complex signals.
    • Use the Saleae software features like zoom and cursors to measure signal duration.
    • Don’t be afraid to experiment and observe how changes in code affect the signal.

    Using a Saleae Logic Analyzer with an Arduino Uno is a fantastic way to bring digital signals to life and deepen your understanding of embedded electronics. Happy learning

    You can also Visit other tutorials of Embedded Prep 

    Special thanks to @mr-raj for contributing to this article on EmbeddedPrep

  • Master ARM Cortex-M4 Core Registers (Explained Simply 2026)

    General-Purpose Registers

    These are used to store values during program execution.

    🔹 Low Registers (R0–R7)

    • Commonly used for function arguments, return values, and temporary storage.
    • Can be accessed quickly and directly.
    R0, R1, R2, R3, R4, R5, R6, R7
    

    🔸 High Registers (R8–R12)

    • Also general-purpose but used less frequently.
    • Needed more in complex calculations or interrupt handling.
    R8, R9, R10, R11, R12
    

    ⚙️ Special-Purpose Registers

    🔵 R13 – Stack Pointer (SP)

    • Points to the top of the stack memory.
    • Cortex-M4 has two stack pointers:
      • MSP (Main Stack Pointer) – Default after reset.
      • PSP (Process Stack Pointer) – Used in OS tasks or threads.

    🟠 R14 – Link Register (LR)

    • Holds the return address when a function is called.
    • When the function ends, CPU uses LR to return.

    🔴 R15 – Program Counter (PC)

    • Points to the next instruction the CPU will execute.

    🧾 Status Register

    ⚫ xPSR – Program Status Register

    Includes:

    • APSR (Application PSR) – condition flags (N, Z, C, V)
    • IPSR (Interrupt PSR) – current exception number
    • EPSR (Execution PSR) – Thumb state, IT state

    🚨 Special Control Registers

    These are used to manage CPU privileges, interrupt masking, and protection levels.

    RegisterDescription
    PRIMASKDisables all interrupts except NMI when set. Used for critical sections.
    FAULTMASKDisables all exceptions including faults, except NMI.
    BASEPRISets a priority threshold – blocks interrupts of lower priority.
    CONTROLControls stack pointer selection (MSP/PSP) and privilege level (Privileged/Unprivileged).

    🔐 CONTROL Register (Bits)

    • Bit 0 – nPRIV:
      0: Privileged
      1: Unprivileged
    • Bit 1 – SPSEL:
      0: Use MSP
      1: Use PSP
    • Bit 2 – FPCA (If FPU is enabled):
      Floating-point context active

    🧠 Summary Diagram

    +------------------------+
    | R0 - R12               | General-purpose registers
    | R13 (SP)               | Stack Pointer (MSP or PSP)
    | R14 (LR)               | Link Register (return address)
    | R15 (PC)               | Program Counter
    | xPSR                   | Program status flags
    | MSP / PSP              | Stack pointers (Main / Process)
    | PRIMASK                | Mask all interrupts except NMI
    | FAULTMASK              | Mask all faults & interrupts except NMI
    | BASEPRI                | Priority threshold for interrupts
    | CONTROL                | Privilege + SP selection
    +------------------------+
    

    Use Case Example

    void my_function(int a, int b) {
        int c = a + b;
    }
    

    While executing:

    • a, b, and c will likely be in R0, R1, R2
    • LR (R14) holds return address
    • SP (R13) holds the stack
    • PC (R15) tracks next instruction
    • xPSR gets updated based on the result

    Let’s break down the Stack Pointer (SP), R13, and the banked versions of the Stack Pointer—MSP (Main Stack Pointer) and PSP (Process Stack Pointer)—in a detailed, beginner-friendly way, especially with relevance to ARM Cortex-M architectures.


    🔹 1. What is R13 / SP?

    • R13 is one of the 16 general-purpose registers in the ARM architecture.
    • However, R13 is reserved as the Stack Pointer (SP).
    • So, when we say SP, it’s just an alias for R13.

    💡 The stack is a region of memory used for function calls, storing local variables, return addresses, etc. The SP (R13) keeps track of the top of the stack.


    🔹 2. Stack Pointer Behavior

    In general:

    • The stack grows downward (from higher memory to lower memory).
    • Each time you push (store) data, SP decreases.
    • Each time you pop (load) data, SP increases.

    🔹 3. Banked Stack Pointers: MSP and PSP

    ❓ Why two stack pointers?

    ARM Cortex-M processors support two stack pointers for separating privileged and unprivileged stack operations:

    Stack PointerNamePurpose
    MSPMain Stack PointerUsed by the OS, system handlers, and in privileged mode by default
    PSPProcess Stack PointerUsed by user/application-level code (can run in unprivileged mode)

    🧠 Key Idea:

    • Only one stack pointer is active at a time.
    • The CONTROL register decides whether SP (R13) refers to MSP or PSP.

    🔹 4. CONTROL Register and SP Selection

    CONTROL register (in Cortex-M):

    BitNameMeaning
    0nPRIV0 = privileged, 1 = unprivileged
    1SPSEL0 = use MSP, 1 = use PSP

    So, if:

    • CONTROL.SPSEL = 0: SP uses MSP
    • CONTROL.SPSEL = 1: SP uses PSP

    Example in C (CMSIS-style):

    __set_CONTROL(__get_CONTROL() | (1 << 1));  // Select PSP
    

    🔹 5. Initialization and Usage Flow

    Boot time:

    • MSP is used by default on reset.
    • The value of MSP is set from the first word of the vector table.

    RTOS context:

    • RTOS usually:
      • Keeps MSP for the kernel and system calls
      • Assigns PSP to individual threads/tasks

    Example scenario:

    Upon reset:
      SP = MSP (default)
      OS starts
      OS creates thread
      OS assigns PSP to thread
      Switch CONTROL register SPSEL to use PSP
      Thread runs with PSP (user mode)
    
    Interrupt occurs:
      Switch to MSP (automatically)
      Handle interrupt in privileged mode
      Return from interrupt: restore PSP
    

    🔹 6. How to Read/Write SP, MSP, PSP (Assembly or CMSIS)

    Read current SP (R13):

    MOV R0, SP   ; Get current SP (could be MSP or PSP based on CONTROL)
    

    Set MSP/PSP directly:

    __set_MSP(0x20001000);  // Set Main Stack Pointer
    __set_PSP(0x20002000);  // Set Process Stack Pointer
    

    🔹 7. Summary Table

    TermRegisterFunction
    SPR13General name for stack pointer (MSP or PSP depending on context)
    MSPBanked R13Used by default, for kernel/system
    PSPBanked R13Used for threads/user mode
    CONTROL.SPSELBit 1Selects between MSP (0) and PSP (1)

    🔹 8. Visualization

    +---------------------+
    |     Stack Memory    |
    |---------------------|
    |  High Address       |
    |  ...                |
    |  PSP (User Stack)   | --> Used by user tasks
    |  ...                |
    |  MSP (Main Stack)   | --> Used by system/IRQ
    |  ...                |
    |  Low Address        |
    +---------------------+
    

    🔹 9. Use Cases

    • RTOS-based systems: Each task/thread uses a PSP, while the kernel uses the MSP.
    • Security: Keeps user and kernel stacks separate.
    • Interrupt handling: Always uses MSP for consistency and security.

    🔚 Conclusion

    • R13 is the generic register for the stack pointer.
    • In Cortex-M, it’s banked into MSP and PSP.
    • The CONTROL register selects which one is active.
    • Separation of MSP and PSP improves security and supports multitasking (RTOS).

    You want to:

    1. Use MSP by default after reset (standard behavior).
    2. Set up a new stack region for a user task.
    3. Switch to PSP before running that task.
    4. Ensure CONTROL register uses PSP.

    Prerequisites

    Assume:

    • The user task stack is at 0x20002000 (adjust as per your RAM size).
    • Using CMSIS or direct ARM assembly.

    Method 1: C (CMSIS-style)

    #include "stm32f4xx.h"  // or the CMSIS header for your chip
    
    void switch_to_psp(void) {
        uint32_t psp_stack = 0x20002000;  // Example PSP location (top of task stack)
    
        __set_PSP(psp_stack);             // Set the PSP
        __set_CONTROL(__get_CONTROL() | (1 << 1));  // Set CONTROL.SPSEL = 1 -> Use PSP
        __ISB();                          // Instruction Synchronization Barrier
    }
    
    int main(void) {
        switch_to_psp();  // Switch to Process Stack Pointer
    
        while (1) {
            // Code running with PSP
        }
    }
    

    Method 2: Pure ARM Assembly (Thumb mode)

        LDR R0, =0x20002000     ; Load new PSP address
        MSR PSP, R0             ; Move to PSP register
        MRS R0, CONTROL         ; Read CONTROL register
        ORR R0, R0, #2          ; Set bit 1 to use PSP
        MSR CONTROL, R0         ; Write back to CONTROL
        ISB                     ; Instruction Synchronization Barrier
    

    You can embed this inline in a C function using __asm__.


    Explanation of Each Step

    StepExplanation
    __set_PSP() / MSR PSP, R0Load new PSP stack address
    __get_CONTROL() / MRS CONTROLRead CONTROL register
    Set bit 1 of CONTROLTell CPU to use PSP instead of MSP
    __ISB() / ISBEnsures pipeline flush to apply changes

    🧪 How to Verify?

    You can check current SP using:

    uint32_t sp_val;
    __asm volatile ("MOV %0, SP" : "=r" (sp_val));
    

    You can also check:

    uint32_t psp = __get_PSP();
    uint32_t msp = __get_MSP();
    uint32_t ctrl = __get_CONTROL();
    

    ⚠️ Tips

    • Be careful not to overwrite the MSP unless you’re booting custom firmware.
    • Make sure 0x20002000 is a valid region in your RAM (check your linker script).
    • This switch is especially useful in RTOS, privilege separation, and secure context management.

    Here’s a beginner-friendly tutorial on the Link Register (R14) in ARM Cortex-M4:


    🌟 What is the Link Register (R14) in Cortex-M4?

    The Link Register (LR) is R14, one of the special-purpose registers in the ARM Cortex-M4 processor.

    It is used to store the return address when a function or an interrupt is called — so the CPU knows where to go back after executing that function.


    🧠 Simple Analogy:

    Think of it like this:

    You go from Room A to Room B but want to return back to Room A later. So, before leaving, you write down “Room A” on a sticky note (that’s the Link Register storing the return address).


    📦 Role of LR (R14) in Function Calls:

    🔁 Function Call (e.g., BL func)

    • The BL (Branch with Link) instruction:
      • Jumps to the function.
      • Stores the return address (next instruction after BL) into R14 (LR).

    🔚 Function Return

    • The BX LR instruction is used at the end of the function:
      • It reads the address in LR and jumps back to it.
    main:
        BL my_function      ; Call function, save return addr in LR (R14)
        ; Continue here after my_function returns
    
    my_function:
        ; Do something
        BX LR               ; Return to main (address stored in LR)
    

    💥 What If LR is Lost?

    If you accidentally overwrite LR before using BX LR, the processor won’t know where to return — this causes a crash or unpredictable behavior.

    To prevent this, compilers or you (in assembly) save LR on the stack at the start of a function and restore it before returning.


    🧰 How LR Works with Stack:

    Typical function prologue and epilogue:

    ; Prologue (start of function)
    PUSH {LR}     ; Save LR on stack
    
    ; ... function body ...
    
    ; Epilogue (end of function)
    POP {LR}      ; Restore LR
    BX LR         ; Return
    

    🚨 LR in Interrupts and Exceptions:

    In interrupts, the processor automatically saves LR (and other registers) on the stack.

    But it sets LR to a special EXC_RETURN value — not a typical return address.

    This tells the processor how to return from the exception (e.g., using BX LR with this value).


    🛠️ Summary:

    FeatureDetails
    Register NameR14 (Link Register / LR)
    PurposeHolds return address of functions or exceptions
    Used byBL, BX LR, and exception return
    Should be saved?Yes, in nested calls or interrupts
    Important inFunction calls, RTOS task switching, ISRs

    ✅ Tips for Beginners:

    • Think of LR as a “bookmark” for the CPU.
    • Always preserve LR if you’re writing low-level assembly functions.
    • Learn how the stack and LR work together.
    • Try writing simple ARM assembly examples to observe LR behavior.

    🧠 Understanding PC (R15) in Cortex-M4: A Beginner-Friendly Guide

    In ARM Cortex-M4 processors, R15 is a special-purpose register known as the Program Counter (PC). It’s one of the most important registers in any processor because it tells the CPU where to fetch the next instruction from.


    What is R15 / Program Counter (PC)?

    • The Program Counter (PC) is register R15 in the Cortex-M4 register set.
    • It holds the address of the next instruction to execute.
    • As each instruction is executed, the PC is automatically updated to point to the next instruction.

    🔍 Where is PC (R15) used?

    Every instruction cycle involves the PC:

    1. Fetch: CPU fetches the instruction at the address in PC.
    2. Execute: The instruction is decoded and executed.
    3. Update: PC is incremented to point to the next instruction.

    For example:

    MOV R0, #1   ; PC = 0x08000000
    ADD R0, R0, #1 ; PC = 0x08000004
    

    The PC increases by 4 bytes after each 32-bit instruction in Thumb-2.


    📍 How is PC (R15) different from other registers?

    RegisterPurpose
    R0–R12General-purpose
    R13Stack Pointer (SP)
    R14Link Register (LR)
    R15Program Counter (PC)

    Unlike general-purpose registers (R0–R12), you should not manipulate the PC arbitrarily unless you are doing branching, calling functions, or returning.


    🔁 Branching and PC

    Whenever we jump to a different part of the code, the PC is changed manually:

    Example:

    B   label   ; Branch to 'label', PC is updated
    BL  func    ; Branch with Link (calls a function), PC is updated
    BX  LR      ; Return from function, PC = LR
    

    🧪 Fun Fact: You Can Read the PC

    You can even read the PC value in code:

    uint32_t current_pc;
    __asm volatile("mov %0, pc" : "=r" (current_pc));
    

    This will store the current program counter into a variable.


    ⚠️ Caution: Writing to PC Directly

    Directly writing to PC can change the control flow:

    LDR PC, =0x08000400 ; Jump to 0x08000400
    

    Use this only when you’re intentionally jumping to a specific memory location (e.g., starting a bootloader or handling an exception).


    🧩 In Debugging

    When you debug Cortex-M4 code:

    • The PC register helps you see what instruction is being executed.
    • You can change PC to skip over code or re-run a part.

    🛠️ In Exception Handling

    When an interrupt or exception occurs:

    • The hardware pushes the current PC value onto the stack.
    • This is how the processor knows where to return after handling the interrupt.
  • Master Fault Handling in Arm Cortex Mx Processor (2026)

    Fault Handling in Arm Cortex Mx Processor : Master Fault Handling in ARM Cortex-Mx processors is a crucial mechanism that helps ensure system reliability and stability by detecting, reporting, and managing faults such as memory access errors, illegal instructions, or bus errors. When a fault occurs, specialized hardware fault status registers capture detailed information about the cause and location of the fault. The processor then transfers control to fault handlers—dedicated routines designed to analyze the fault, report diagnostic information, and take remedial actions like system recovery or reset.

    This fault management system includes several layers of faults, such as Hard Faults, Usage Faults, Bus Faults, and Memory Management Faults, each with specific status registers and address registers that provide rich diagnostic data. Effective fault handling in Cortex-Mx processors enables embedded developers to build robust and fault-tolerant applications critical for modern real-time and safety-critical systems.

    What is a Fault in a Processor?

    In embedded systems or microcontrollers (like ARM Cortex-M), a fault is a type of exception generated by the processor itself when something goes wrong during code execution. This is also called a system exception.

    Think of a fault like an emergency signal that tells the processor:

    “Something’s not right — we need to pause and handle this issue properly!”

    Why Do Faults Happen?

    Faults usually happen when:

    • A programmer violates the processor’s rules, like trying to divide by zero.
    • The processor faces a problem while dealing with external interfaces, like memory.

    What happens when a fault occurs?

    When a fault happens:

    1. The processor updates internal registers with important info:
      • What kind of fault happened?
      • At which address did it occur?
    2. If the fault exception is enabled, the processor will jump to the exception handler — a special block of code written by the programmer.
    3. The exception handler can:
      • Report the error (e.g., log it)
      • Try to fix it (if possible)
      • Or stop the faulty task

    Example:

    If your code does this:

    int a = 5 / 0;
    

    → It causes a divide-by-zero fault, and the Usage Fault Exception Handler (if enabled) is triggered.
    Inside the handler, you can decide what action to take (like terminating the task).

    Types of Fault Exceptions

    There are four major fault exceptions:

    Exception TypeEnabled by Default?PriorityCan Be Disabled?
    Hard Fault✅ YesFixed (-1)❌ No (only maskable using FAULTMASK)
    Usage Fault❌ NoConfigurable✅ Yes
    MemManage Fault❌ NoConfigurable✅ Yes
    Bus Fault❌ NoConfigurable✅ Yes

    Causes of Faults

    Here are common reasons faults can occur:

    • ❌ Divide by zero (if divide-by-zero trap is enabled)
    • ❌ Undefined instruction
    • ❌ Executing code from forbidden memory region (marked as Execute Never, or XN)
    • ❌ Violating Memory Protection Unit (MPU) rules
    • ❌ Unaligned memory access (if unaligned access trap is enabled)
    • ❌ Returning to thread mode with interrupts still active
    • ❌ Bus errors (e.g., no response from SDRAM)
    • ❌ Calling an SVC instruction from within SVC handler
    • ⚙️ Improper debug configurations

    Hard Fault Exception

    • What is it?
      A HardFault is a serious error that happens when:
      • A configurable fault (like usage, bus, or memory faults) cannot be handled.
      • Something goes wrong while processing another exception.
    • Why it occurs?
      1. A lower-priority fault couldn’t be handled (escalation).
      2. Bus error during vector table fetch.
      3. Breakpoint instruction is executed when debugging is off.
      4. SVC instruction executed inside SVC handler.
    • Priority: 3rd highest after Reset and NMI (non-maskable interrupt).
    • Debugging:
      Use the Hard Fault Status Register (HFSR) to find out what triggered the fault.

    MemManage Fault Exception

    • Purpose: Handles memory access violations.
    • How to Enable:
      Set appropriate bits in System Handler Control and State Register (SHCSR).
    • Causes:
      • Unprivileged code (like an RTOS task) accessing privileged memory.
      • Writing to read-only memory regions.
      • Executing code from peripheral memory region (often marked XN).

    Bus Fault Exception

    • Purpose: Raised when there is a bus error, usually while accessing memory.
    • How to Enable:
      Set the appropriate bit in SHCSR.
    • Causes:
      • Error during instruction fetch or data read/write.
      • Faulty or invalid memory device (e.g., SDRAM not responding).
      • Accessing protected memory regions.
      • Unprivileged access to restricted peripheral regions.

    📝 Note: If a bus fault happens during vector fetch, it’s automatically escalated to a hard fault, even if bus fault is enabled.

    Usage Fault Exception

    • Purpose: Triggered by incorrect CPU instructions or settings.
    • How to Enable:
      Configure the SHCSR register.
    • Causes:
      • Running undefined instruction.
      • Using floating point instructions with FPU disabled.
      • Trying to switch to ARM instruction set (Cortex-M only supports Thumb).
      • Returning to thread mode with interrupt still active.
      • Using unaligned memory access (if traps are enabled).
      • Divide by zero (if trap is enabled).
      • Function pointer not aligned to Thumb instruction format.

    Summary

    Fault TypeTypical CauseHandler Name
    Hard FaultUnhandled faults, vector fetch errorsHardFault_Handler
    MemManage FaultMPU violations, memory access errorsMemManage_Handler
    Bus FaultMemory bus errors, invalid memory accessBusFault_Handler
    Usage FaultIllegal instructions, divide by zero, etc.UsageFault_Handler

    Final Thoughts

    Faults are important safety mechanisms in embedded processors.
    They help you detect programming mistakes, interface issues, or system misbehavior early.

    By writing proper exception handlers, you can detect, report, and recover from faults — which is essential for building robust and reliable embedded systems.

    Detecting Cause of a Fault – Beginner Friendly Guide

    Fault Status and Address Information

    When a fault (unexpected error) happens in your program, it’s important to know why and where it happened.

    To do this, inside the fault handler (a special function that runs when a fault occurs), you can check some special registers that give you more details.

    These registers tell:

    • What caused the fault
    • At which instruction address the fault happened

    This is very helpful for debugging your program.

    Important Registers for Fault Information

    📘 Hard Fault Status Register (HFSR)

    • Tells about a Hard Fault (a serious system error).

    Configurable Fault Status Register (CFSR)

    • This register tells you the specific cause of a:
      • MemManage Fault (memory access error)
      • Bus Fault (bus error during instruction/data access)
      • Usage Fault (illegal operation like divide-by-zero)

    Fault Address Information Registers

    These registers store the memory addresses where the fault occurred:

    • MemManage Fault Address Register
      → Holds the address that caused a memory management fault
    • Bus Fault Address Register (BFAR)
      → Holds the address that caused a bus fault

    Fault Handling and Analysis

    To understand and fix faults, follow these steps:

    • ✅ Implement a Hard Fault Handler
      → This is a special function to catch and handle hard faults.
    • ✅ Analyze and Print the cause of the hard fault
      → Helps understand what went wrong.
    • ✅ Print Register Contents
      → Print values from HFSR, CFSR, etc.
    • ✅ Print the Last Stacked Stack Frame
      → Shows the program state at the time of the fault (helpful for debugging).

    Error Reporting When Fault Happens

    You can make your system more robust by handling faults smartly:

    • ✅ Implement a Handler
      → Do something meaningful when a fault happens (like logging or safe shutdown).
    • ✅ Implement a User Callback
      → Let the user define a custom error-reporting function.
    • 🔁 Reset the Microcontroller/Processor
      → Restart the system if recovery isn’t possible.
    • 🧵 In OS Environment
      → The task that caused the fault can be terminated and restarted.
    • ✅ Report Register Values
      → Send out values from fault status and fault address registers.
    • 🧾 Report Extra Info via Debug Tools
      → Print stack frame, etc., using tools like printf.
  • Master Exception For System Level Services in Arm Cortex Processor (2026)

    Exception For System Level Services in Arm Cortex Processor : When you’re working with ARM Cortex processors, especially in embedded systems, you’ll hear a lot about exceptions. But what are they, and how do they help your system run more smoothly — especially at the system level?

    Let’s break it down simply.

    Exception For System Level Services in Arm Cortex Processor

    What is an Exception?

    An exception is a special kind of signal that tells the processor to stop what it’s doing and do something more important first. Think of it like this:

    “Hey CPU, pause your current work. There’s something urgent to handle!”

    This could be an interrupt from hardware, a system fault, or even a software request like a system call.

    Why Are Exceptions Important in ARM Cortex?

    ARM Cortex-M processors are designed for embedded and real-time systems. Exceptions allow the processor to respond quickly to:

    • 🔌 Hardware interrupts (like GPIO or Timer events)
    • 🧱 Faults (like trying to access invalid memory)
    • 🧬 System-level services (like context switching in an RTOS)

    They help keep the system responsive, safe, and organized.

    Types of Exceptions in Cortex-M

    There are two main categories:

    1. System Exceptions (Predefined by ARM)

    These are built into the Cortex-M core itself. Examples:

    • Reset – Triggered when the system starts or restarts.
    • NMI (Non-Maskable Interrupt) – High-priority interrupt that can’t be disabled.
    • HardFault – Happens when something goes very wrong (e.g., divide by zero).
    • SVCall (Supervisor Call) – Used by the OS to switch between user/system mode.
    • PendSV – Used for context switching in RTOS (e.g., FreeRTOS).
    • SysTick – A system timer interrupt, often used for OS ticks.

    2. External Interrupts (IRQs)

    These come from outside peripherals — like buttons, UART, I2C, etc.

    System-Level Services Using Exceptions

    Here’s how exceptions help in system-level operations like OS scheduling:

    SVCall (Supervisor Call)

    When a user app needs the OS to perform a system-level task (like memory allocation), it can make a supervisor call. This triggers the SVCall exception.

    Think of it like:

    “Hey OS, please do something privileged for me.”

    PendSV (Pendable Service Call)

    The RTOS uses this to perform context switches. When it’s time to switch tasks, the OS sets PendSV as “pending”. When the CPU is ready, it runs the PendSV handler to switch tasks.

    SysTick (System Timer)

    This fires at regular intervals (e.g., every 1ms). It’s often used to keep track of time and schedule tasks in real-time operating systems.

    Simple Real-World Use Case

    Let’s say you’re building a smart fan with FreeRTOS running on a Cortex-M4:

    1. SysTick triggers every 1ms and updates the system tick.
    2. Based on tick count, the OS decides to switch to another task.
    3. It sets the PendSV exception.
    4. The processor runs the PendSV handler, which saves the current task context and switches to the next.
    5. A user app asks for memory — it triggers SVCall to request memory allocation from the kernel.

    All these system-level services run smoothly using exceptions!

    Bonus: What Happens on Errors?

    If your program does something wrong, the processor triggers:

    • HardFault
    • MemManage Fault
    • BusFault
    • UsageFault

    These exceptions protect your system and help with debugging.

    Summary

    ExceptionPurpose
    ResetSystem starts
    NMIHigh-priority external signal
    HardFaultSerious error handling
    SVCallRequest system-level services
    PendSVContext switching in RTOS
    SysTickSystem timekeeping

    ARM Cortex-Mx processors, focusing on SVC and PendSV:

    Exceptions for System-Level Services (Cortex-Mx)

    The ARM Cortex-Mx processors support various exceptions, but two key system-level service exceptions used in operating systems are:

    1. SVC (Supervisor Call) Exception

    • Purpose: Used to request privileged operations or access to system-level services from a less privileged task.
    • When Used: A user-mode application or thread generates an SVC exception using the SVC instruction.
    • Common Use Case:
      • Requesting services from the OS kernel such as:
        • Accessing peripherals
        • Managing device drivers
        • Allocating memory
    • Why Needed: Ensures that only authorized and controlled code (OS) can access critical system resources.

    📌 Example:
    User task calls SVC 0x01 → triggers an SVC exception → OS handler processes it → returns result to user task.

    2. PendSV (Pendable Service Call) Exception

    • Purpose: Designed specifically for context switching between tasks in an OS.
    • When Used: When a context switch is required, the OS sets the PendSV interrupt to pending.
    • Pendable: It is a low-priority, software-triggered exception that can be delayed until no higher-priority exceptions are active.
    • Common Use Case:
      • Task switching in RTOS (e.g., switching from Task A to Task B)
    • Why Needed: Ensures context switching doesn’t interfere with high-priority interrupts or exceptions.

    📌 Example:
    Task A finishes → OS schedules Task B → PendSV is triggered → saves Task A context & restores Task B context.

    Summary Table

    ExceptionPurposeTrigger SourceUse Case in OS
    SVCRequest system servicesSVC instructionAccessing device drivers, memory
    PendSVPerform context switchingSoftwareSwitching between tasks

    What is SVC (Supervisor Call)?

    SVC is a special instruction in the Thumb Instruction Set Architecture (ISA) of ARM Cortex-M processors.

    • When a CPU executes SVC, it causes a special exception called the SVC exception.
    • This transfers control from user code (unprivileged mode) to kernel code (privileged mode).
    • It’s like raising your hand to ask the operating system (OS) to do something you’re not allowed to do directly.

    Why Do We Use SVC?

    In embedded systems or RTOS, we often run:

    • User tasks in unprivileged mode (to protect the system)
    • Kernel code in privileged mode (can access hardware, critical memory, etc.)

    Since user code cannot access critical resources (like hardware registers or memory-mapped peripherals) directly, it uses SVC to request the OS to do so on its behalf.

    Example Uses:

    • Creating/deleting tasks
    • Accessing hardware (GPIO, UART)
    • Requesting memory allocation
    • Starting/stopping timers

    How SVC Works — Step by Step:

    Let’s break it down:

    1. The User Code Issues an SVC Instruction

    __asm("SVC #0");   // Inline Assembly — calls SVC with number 0
    
    • The #0 is the SVC number — a value used to indicate which service you’re requesting (like a function ID).
    • This instruction triggers the SVC exception.

    2. Processor Automatically Saves Context

    When the SVC is executed:

    • The processor switches to handler mode (privileged mode).
    • It pushes some registers (R0–R3, R12, LR, PC, xPSR) onto the stack to save the current context.
    • This is similar to how interrupts are handled.

    3. Processor Jumps to the SVC Handler

    The processor now jumps to the address of the SVC handler, defined in the vector table:

    void SVC_Handler(void) {
       // Kernel code handles the request here
    }
    

    4. The SVC Handler Decodes the Request

    The handler checks the SVC number used in the instruction to determine what service is requested.

    How to extract the SVC number:

    Because the number is embedded in the instruction (not passed in R0–R3), the handler must read the instruction that caused the exception:

    void SVC_Handler(void) {
        uint32_t *stack_ptr;
        uint8_t svc_number;
    
        // Get stack pointer (usually MSP or PSP depending on context)
        __asm("TST lr, #4\n"
              "ITE EQ\n"
              "MRSEQ %0, MSP\n"
              "MRSNE %0, PSP\n"
              : "=r" (stack_ptr));
    
        // Find the instruction that caused the SVC
        uint16_t *svc_instr_addr = ((uint16_t*)stack_ptr[6]) - 1;
        uint16_t svc_instr = *svc_instr_addr;
    
        // Extract the SVC number (last 8 bits)
        svc_number = (uint8_t)(svc_instr & 0xFF);
    
        switch (svc_number) {
            case 0:
                // Handle SVC #0 request
                break;
            case 1:
                // Handle SVC #1 request
                break;
            // and so on...
        }
    }
    

    5. Kernel Code Executes the Requested Service

    • After identifying the request (like start a task, turn on LED), the kernel performs the task in privileged mode.

    6. Return to User Code

    • Once the handler completes, the context is restored, and execution resumes at the next instruction after SVC.

    Key Points

    ConceptExplanation
    SVC InstructionCauses a software exception (like a controlled interrupt)
    Used ByUnprivileged user code to request services from kernel
    SVC NumberA number (0–255) passed with the SVC instruction to indicate what service is needed
    Handler NameSVC_Handler() — OS or firmware must implement this
    Privilege EscalationSwitches temporarily from user mode to privileged mode
    SecurityEnsures user tasks don’t access critical resources directly

    Analogy

    Think of it like this:

    • You are in a library (user task), and you need access to a restricted book (privileged resource).
    • You cannot go to the restricted section.
    • So, you ring a bell (SVC instruction) with a code number saying which book you want.
    • The librarian (SVC handler) checks your request and fetches the book on your behalf.

    When Is It Used in RTOS?

    • Thread switching or task management
    • Requesting kernel services from user apps
    • Accessing hardware securely
    • System calls in embedded systems without a full-fledged OS

    Summary

    ✅ SVC is a software interrupt used to safely access system-level services
    ✅ Switches from unprivileged user mode to privileged kernel mode
    ✅ The SVC handler reads the SVC number and executes the requested action
    ✅ Helps in security, task isolation, and controlled hardware access

    The SVC (Supervisor Call) exception is a mechanism used in ARM Cortex-M processors to transition from unprivileged to privileged mode or to request OS services (like system calls) from the application layer. There are two methods to trigger an SVC exception:

    1. Direct Execution of the SVC Instruction

    This is the standard and most efficient way to trigger an SVC exception.

    How it works:

    • The CPU executes an SVC instruction with an immediate value (which usually indicates the specific service requested).
    • This causes the processor to immediately enter the SVC handler, switching to Handler mode.

    Example:

    SVC #0x04   ; Assembly instruction to trigger SVC exception with immediate value 0x04
    

    In C (using inline assembly or CMSIS):

    __asm("SVC #0x04");
    

    Use Cases:

    • Used in RTOS for system calls
    • Switching from Thread mode (unprivileged) to Handler mode (privileged)

    Advantages:

    • Low latency
    • Immediate and deterministic triggering
    • Directly supported by the CPU instruction set

    2. Setting the Exception Pending Bit in SHCSR (System Handler Control and State Register)

    This is a less common and non-standard method used mainly for testing or simulation.

    How it works:

    • The System Handler Control and State Register (SHCSR) contains a bit for SVC pending (SVCALLPENDED).
    • Manually setting this bit to 1 via software tricks the processor into thinking an SVC is pending.
    • When conditions allow, the SVC handler will be called.

    Example:

    #define SCB_SHCSR (*((volatile uint32_t*)0xE000ED24))
    SCB_SHCSR |= (1 << 15);  // Set SVCALLPENDED bit manually
    
    • Bit 15 in SHCSR is SVCALLPENDED.

    Important Notes:

    • This does not immediately trigger the SVC handler.
    • The exception must be enabled, and priority levels must allow it to be serviced.
    • Not a common practice — typically used in test environments, fault injection, or debugging.

    Summary Table:

    MethodDescriptionEfficiencyUse CaseNotes
    SVC #immDirect instruction✅ HighSystem calls, privilege switchStandard and efficient
    SHCSR bitSet pending bit❌ LowTesting, debugUncommon and delayed execution

    What is SVC?

    • SVC is an instruction used in ARM Cortex-M to request a privileged system service.
    • The syntax is: SVC #<number> Example: SVC #0x20 ; Here, 0x20 is the SVC number

    Goal

    When an SVC instruction is executed, it causes a SVC exception, and the processor jumps to the SVC_Handler.
    Your task is to:

    1. Get the address of the SVC instruction that caused the exception.
    2. Read the SVC opcode at that address.
    3. Extract the SVC number from that opcode.

    What Happens During SVC?

    1. The CPU runs a line like SVC #0x05.
    2. This triggers an SVC exception.
    3. The CPU automatically saves some context (like registers) on the stack — this includes the Program Counter (PC) where it stopped, i.e., the instruction after the SVC.

    Step-by-Step Breakdown

    Step 1: Understand Stack Frame Format

    When an exception like SVC occurs, ARM Cortex-M pushes the following registers onto the stack in this order:

    OffsetRegister
    0x00R0
    0x04R1
    0x08R2
    0x0CR3
    0x10R12
    0x14LR
    0x18PC (🟢 Points to next instruction after SVC)
    0x1CxPSR

    Step 2: Get the Stack Pointer in the Handler

    void SVC_Handler(void)
    {
        __asm volatile
        (
            "TST lr, #4 \n"               // Test bit 2 of LR to know which stack (MSP or PSP)
            "ITE EQ \n"
            "MRSEQ r0, MSP \n"           // If 0: Main Stack Pointer
            "MRSNE r0, PSP \n"           // If 1: Process Stack Pointer
            "B SVC_Handler_C \n"         // Branch to C handler and pass r0
        );
    }
    

    Step 3: In C, Extract the SVC Number

    Here is the C function that receives the stack frame pointer:

    void SVC_Handler_C(uint32_t *stack_frame)
    {
        // PC is at offset 6 (index 6), because each register is 4 bytes
        uint32_t return_address = stack_frame[6];
    
        // SVC instruction is at (return_address - 2)
        // because PC points to instruction AFTER SVC
        uint16_t *svc_instruction_address = (uint16_t *)(return_address - 2);
    
        uint8_t svc_number = (uint8_t)(*svc_instruction_address & 0xFF); // SVC number is in the lower byte
    
        // Now you can use svc_number for your logic
    }
    

    Why return_address - 2?

    • On Thumb instruction set (which Cortex-M uses), SVC is a 16-bit instruction.
    • The saved PC points to the next instruction, so subtract 2 to get the SVC instruction itself.

    Example

    Suppose user code runs:

    SVC #0x23
    

    Then in the handler:

    • PC = address after SVC = 0x08000102
    • SVC instruction is at 0x08000100
    • At that memory: 0xDF23
      • 0xDF is opcode for SVC
      • 0x23 is the SVC number
    • Extract using: uint8_t svc_number = *svc_instruction_address & 0xFF; // svc_number = 0x23

    Final Summary

    StepAction
    1Determine active stack (MSP/PSP) in assembly
    2Pass stack frame pointer to C function
    3Extract PC from stack (offset 6)
    4Subtract 2 to get SVC instruction address
    5Read 16-bit value, extract lower byte for SVC number

    Full Example: Execute SVC, extract number, increment by 4 and return

    #include <stdio.h>
    #include <stdint.h>
    
    uint32_t svc_result = 0;
    
    void SVC_Handler_Main(uint32_t *stack_frame);
    
    __attribute__((naked)) void SVC_Handler(void) {
        __asm volatile (
            "TST lr, #4 \n"             // Test bit 2 of LR to find stack pointer (MSP or PSP)
            "ITE EQ \n"
            "MRSEQ r0, MSP \n"          // If 0, use MSP
            "MRSNE r0, PSP \n"          // Else, use PSP
            "B SVC_Handler_Main \n"     // Branch to handler in C
        );
    }
    
    // This function is called with the pointer to the stack frame
    void SVC_Handler_Main(uint32_t *stack_frame) {
        // Stack frame: R0, R1, R2, R3, R12, LR, PC, xPSR
        uint16_t *pc_ptr = (uint16_t *)stack_frame[6]; // PC points to next instruction after SVC
        uint8_t svc_number = ((uint8_t *)pc_ptr)[-1];  // SVC immediate is 1 byte before PC
    
        printf("SVC number: %d\n", svc_number);
    
        svc_result = svc_number + 4;
    }
    
    uint32_t call_svc(uint8_t svc_num) {
        __asm volatile (
            "mov r0, %[num]     \n"   // Move svc_num to r0 (optional for general use)
            "svc %[immediate]   \n"   // Trigger SVC
            :
            : [num] "r" (svc_num), [immediate] "I" (0x05) // SVC #5 hardcoded for demo
            : "r0"
        );
        return svc_result;
    }
    
    int main(void) {
        printf("Calling SVC now...\n");
        uint32_t result = call_svc(5);
        printf("Returned value from SVC handler: %u\n", result);
        return 0;
    }
    

    Explanation:

    • SVC_Handler: Naked function with inline assembly that determines which stack pointer was used (MSP or PSP), then passes stack pointer to SVC_Handler_Main.
    • SVC_Handler_Main: Extracts SVC number from instruction that caused the exception (using PC - 1), prints it, increments by 4, and stores in svc_result.
    • call_svc(5): Executes the svc #0x5 instruction and later returns the modified result from the handler.

    Output:

    Calling SVC now...
    SVC number: 5
    Returned value from SVC handler: 9
    

  • Entry and Exit of Exception for ARM Cortex-M4 Processor | Master Beginner’s Guide 2026

    Entry and Exit of Exception for ARM Cortex-M4 : The ARM Cortex-M4 processor is a popular microcontroller core used in embedded systems. One of its powerful features is how it handles exceptions—events that disrupt the normal flow of a program, such as interrupts, faults, or system calls.

    Understanding how the Cortex-M4 enters and exits exceptions is crucial for writing reliable embedded software. This guide will walk you through the basics in a simple way.

    Entry and Exit of Exception for ARM Cortex-M4

    What Is an Exception?

    An exception is a special event that temporarily interrupts the normal execution of a program to handle something urgent or important. Examples include:

    • Interrupts (external signals, like a button press or sensor input)
    • Faults (like memory access errors)
    • System calls (requests for OS services)

    When an exception occurs, the processor needs to:

    1. Save the current program state
    2. Jump to the exception handler code
    3. Run the handler
    4. Restore the saved state and resume normal execution

    Cortex-M4 Exception Entry: What Happens When an Exception Occurs?

    When an exception is triggered, the Cortex-M4 does the following steps automatically in hardware:

    1. Complete the Current Instruction

    The processor finishes executing the current instruction before responding to the exception.

    2. Save Context on the Stack (Automatic Stacking)

    To safely pause your program, the processor saves some important registers on the current stack (either Main Stack Pointer (MSP) or Process Stack Pointer (PSP)):

    • R0 to R3 (general-purpose registers)
    • R12
    • LR (Link Register)
    • PC (Program Counter)
    • xPSR (Program Status Register)

    This saved context is called the Exception Stack Frame. Saving these registers means the processor remembers exactly where it left off.

    3. Load the Exception Handler Address

    The processor reads the address of the exception handler (from the Vector Table) and jumps to it. The handler is just a special function in your code that deals with the exception.

    4. Change Processor State

    The processor sets some internal flags to indicate it’s now running in Handler Mode (instead of Thread Mode).

    Cortex-M4 Exception Exit: Returning to Normal Execution

    When the exception handler finishes, it needs to return control back to the original program. This happens by executing the BX LR or returning from the handler function.

    Here’s what happens during exit:

    1. Restore Context (Automatic Unstacking)

    The processor automatically restores the saved registers (R0-R3, R12, LR, PC, xPSR) from the stack. This means the program state is back exactly as it was before the exception.

    2. Return to Thread Mode

    The processor switches back from Handler Mode to Thread Mode, resuming normal program execution.

    Key Points to Remember

    StepWhat HappensCortex-M4 Feature
    Exception EntrySave CPU registers on stackAutomatic stacking mechanism
    Jump to exception handler addressVector Table lookup
    Switch to Handler ModeHardware-controlled
    Exception Handler RunExecute the exception service routineSoftware-defined
    Exception ExitRestore CPU registers from stackAutomatic unstacking
    Return to the exact instruction in programResume Thread Mode

    Visual Overview

    Normal Program Execution
            ↓
       Exception Occurs
            ↓
    [Automatic save registers on stack]
    [Jump to Handler]
       Exception Handler runs
            ↓
    [Automatic restore registers from stack]
    [Return to Normal Execution]
    

    Why Is This Important?

    • Automatic stacking/unstacking saves you from writing complex assembly code.
    • You can rely on hardware to preserve the state of your program.
    • Understanding this flow helps you write safe and efficient interrupt handlers.
    • Helps in debugging exceptions and faults by knowing what the processor does internally.

    Complete basic example of handling an external interrupt on an STM32F4

    • GPIO configuration for a button input
    • EXTI (external interrupt) setup on that GPIO pin
    • NVIC interrupt enabling
    • The actual interrupt handler code

    Complete Example: GPIO Button Interrupt on STM32F4 (Cortex-M4)

    Assumptions:

    • You have STM32Cube HAL library or similar to handle low-level register operations (for simplicity).
    • Button connected to GPIOA Pin 0.
    • LED connected to GPIOG Pin 13 (just for indication).

    1. Include headers and define pins:

    #include "stm32f4xx.h"      // Device header, adjust for your MCU
    #include "stm32f4xx_hal.h"  // HAL header for STM32
    

    2. GPIO and EXTI Initialization:

    void GPIO_EXTI_Init(void)
    {
        // Enable GPIOA and GPIOG clocks
        __HAL_RCC_GPIOA_CLK_ENABLE();
        __HAL_RCC_GPIOG_CLK_ENABLE();
        
        // Configure PA0 as input with pull-up (Button pin)
        GPIO_InitTypeDef GPIO_InitStruct = {0};
        GPIO_InitStruct.Pin = GPIO_PIN_0;
        GPIO_InitStruct.Mode = GPIO_MODE_IT_RISING;  // Interrupt on rising edge (button press)
        GPIO_InitStruct.Pull = GPIO_PULLUP;
        HAL_GPIO_Init(GPIOA, &GPIO_InitStruct);
        
        // Configure PG13 as output (LED pin)
        GPIO_InitStruct.Pin = GPIO_PIN_13;
        GPIO_InitStruct.Mode = GPIO_MODE_OUTPUT_PP; // Push-pull output
        GPIO_InitStruct.Pull = GPIO_NOPULL;
        GPIO_InitStruct.Speed = GPIO_SPEED_FREQ_LOW;
        HAL_GPIO_Init(GPIOG, &GPIO_InitStruct);
        
        // Enable and set EXTI line 0 Interrupt to the lowest priority
        HAL_NVIC_SetPriority(EXTI0_IRQn, 2, 0);
        HAL_NVIC_EnableIRQ(EXTI0_IRQn);
    }
    

    3. Interrupt Handler Function

    void EXTI0_IRQHandler(void)
    {
        // Check if EXTI line 0 caused the interrupt
        if(__HAL_GPIO_EXTI_GET_IT(GPIO_PIN_0) != RESET)
        {
            __HAL_GPIO_EXTI_CLEAR_IT(GPIO_PIN_0);  // Clear the interrupt flag
            
            // Toggle LED on PG13
            HAL_GPIO_TogglePin(GPIOG, GPIO_PIN_13);
        }
    }
    

    4. Main Function Example

    int main(void)
    {
        HAL_Init();                 // Initialize HAL Library
        SystemClock_Config();       // Configure system clock (user-defined, MCU specific)
        GPIO_EXTI_Init();           // Initialize GPIO and EXTI
        
        while(1)
        {
            // Main loop can do other stuff
        }
    }
    

    Explanation:

    • GPIO_EXTI_Init() configures the button pin as an input interrupt source and sets up the LED pin as output.
    • HAL_NVIC_EnableIRQ(EXTI0_IRQn) enables the EXTI0 interrupt in the Nested Vector Interrupt Controller.
    • When the button connected to PA0 is pressed (rising edge), the Cortex-M4 automatically:
      • Pushes registers on the stack (exception entry)
      • Jumps to EXTI0_IRQHandler
    • The handler clears the interrupt flag and toggles the LED.
    • On return, the processor restores the registers and resumes normal execution.

    What is EXC_RETURN?

    In ARM Cortex-M (e.g., Cortex-M4), when an exception (like an interrupt or fault) occurs, the processor automatically saves some registers and branches to an exception handler.

    When the handler finishes, the processor restores context using a special magic value called EXC_RETURN, which is loaded into the Program Counter (PC). This value tells the processor how to restore context and return to the previous state.

    Breakdown of EXC_RETURN Values (from the image)

    ValueMeaning
    0xFFFFFFF1Return to Handler Mode, use Main Stack Pointer (MSP), no FPU context
    0xFFFFFFF9Return to Thread Mode, use MSP, no FPU context
    0xFFFFFFFDReturn to Thread Mode, use Process Stack Pointer (PSP), no FPU context
    0xFFFFFFE1Return to Handler Mode, use MSP, with FPU context
    0xFFFFFFE9Return to Thread Mode, use MSP, with FPU context
    0xFFFFFFEDReturn to Thread Mode, use PSP, with FPU context

    Bitwise Meaning (EXC_RETURN is 32-bit value)

    Only the lower 5 bits are meaningful:

    BitMeaning
    0Always 1
    21 = Return to Thread mode, 0 = Handler mode
    31 = Use PSP, 0 = Use MSP
    41 = FPU context present, 0 = No FPU context

    Example

    If EXC_RETURN = 0xFFFFFFFD (binary ends in 11111111111111111111111111111101):

    • Bit 2 = 1 → Return to Thread mode
    • Bit 3 = 1 → Use PSP
    • Bit 4 = 0 → No FPU context

    Why is this important?

    When writing custom context switchers, RTOS code, or exception handlers (like SVC or PendSV), the correct EXC_RETURN value ensures the system:

    • Restores the right registers
    • Returns to the correct mode
    • Uses the correct stack
    • Handles FPU state (if available and used)

    What is EXC_RETURN?

    • EXC_RETURN is a special constant value loaded into Link Register (LR) during exception entry.
    • This value tells the processor how to restore the previous context when returning from the exception (which stack to use, which mode to return to, whether FPU state is involved).

    When is EXC_RETURN Generated?

    It is not stored in the LR by your C code—it is done automatically by the processor.

    🔹 During exception entry, the processor puts an EXC_RETURN value into LR instead of the return address (like normal function calls do).

    So, when the handler finishes, and you do BX LR, the processor interprets LR as EXC_RETURN and uses that info to exit the exception properly.

    Full Exception Entry Sequence (Step-by-Step)

    1. Pending Bit is Set

    • An interrupt/exception is pending (from NVIC or system fault).

    2. Stacking and Vector Fetch

    • Processor automatically saves the current execution context (R0–R3, R12, LR, PC, xPSR) onto the current stack (MSP or PSP).
    • Then, it fetches the exception vector from the vector table.

    3. Entry into the Handler and Active Bit Set

    • Processor enters the exception handler.
    • The corresponding Active bit is set (in the Interrupt Control State Register, ICSR).

    4. EXC_RETURN Value is Placed in LR

    • Instead of storing the normal return address, the processor stores a special EXC_RETURN value in LR to indicate how to resume execution. For example: LR = 0xFFFFFFFD // Return to Thread mode, use PSP, no FPU

    🔸 5. Pending Bit is Cleared Automatically

    • As soon as the processor starts executing the exception handler, the Pending bit is cleared (except for some faults like NMI).

    🔸 6. Processor Mode is Now Handler Mode

    • The CPU switches from Thread mode to Handler mode.
    • Execution privileges may change (Handler is usually in privileged mode).

    🔸 7. MSP is Used

    • The Main Stack Pointer (MSP) is automatically selected and used for stack operations during the handler, unless you manually configured to use PSP.

    🔚 What Happens at Exception Return?

    • The handler ends by executing: BX LR
    • The processor checks the EXC_RETURN value in LR and:
      • Determines which mode to return to (Thread or Handler)
      • Decides which stack to use (MSP or PSP)
      • Checks whether to restore FPU state (if applicable)
    • The processor pops the stack to restore R0-R3, R12, LR, PC, and xPSR.

    Summary Table: Common EXC_RETURN Values

    ValueMode ReturnStack UsedFPU Context
    0xFFFFFFF1HandlerMSPNo
    0xFFFFFFF9ThreadMSPNo
    0xFFFFFFFDThreadPSPNo
    0xFFFFFFE1HandlerMSPYes
    0xFFFFFFE9ThreadMSPYes
    0xFFFFFFEDThreadPSPYes
  • Master ARM Cortex-M4 Interrupt Handling (2026)

    ARM Cortex-M4 Interrupt Handling : In embedded systems, handling asynchronous events like incoming data from external devices is crucial for responsive and efficient software design. One powerful mechanism used for this purpose is interrupts. Instead of continuously polling a peripheral, the microcontroller (MCU) can be configured to automatically respond to specific events, such as data arrival in a UART (USART) buffer.

    This article walks you through the step-by-step interrupt handling process using a USART peripheral as an example. You’ll learn how the data flow, NVIC (Nested Vectored Interrupt Controller), and CPU work together to handle interrupts — from the moment a data packet arrives, to executing the interrupt service routine (ISR) that processes the data.

    Whether you’re working with ARM Cortex-M microcontrollers or just beginning your journey into embedded development, this guide will help you build a clear mental model of how peripheral interrupts operate under the hood.

    ARM Cortex-M4 Interrupt Handling

    Core Peripheral Register Regions (ARM Cortex-M)

    Address RangeCore PeripheralDescription
    0xE000E008 – 0xE000E00FSystem Control Block (SCB)Contains control and status registers like ACTLR, used for system configuration.
    0xE000E010 – 0xE000E01FSystem Timer (SysTick)A 24-bit timer that provides a simple way to generate delays or time slices.
    0xE000E100 – 0xE000E4EFNested Vectored Interrupt ControllerManages external and internal interrupt handling with programmable priorities.
    0xE000ED00 – 0xE000ED3FSystem Control Block (Extended)Additional system control and status registers including CPUID, ICSR, etc.
    0xE000ED90 – 0xE000ED93MPU Type RegisterUsed to detect if MPU is implemented. If value reads 0, then MPU is not present.
    0xE000ED90 – 0xE000EDB8Memory Protection Unit (MPU)Defines memory regions and their attributes to prevent invalid memory access.
    0xE000EF00 – 0xE000EF03NVIC (Software Trigger Interrupt Reg)Used to trigger interrupts through software.
    0xE000EF30 – 0xE000EF44Floating Point Unit (FPU)Registers and controls for the floating-point coprocessor (if supported).

    NVIC (Nested Vectored Interrupt Controller) registers in ARM Cortex-M microcontrollers.

    Explanation of Each Row

    FieldMeaning
    AddressMemory range for the register(s)
    NameName of the register
    TypeRW = Read/Write, WO = Write-Only
    Required privilegeAccess level needed (Privileged or Configurable)
    Reset valueDefault value after reset (usually all 0s = disabled)
    DescriptionPurpose and detailed usage of the register

    Registers and Their Roles

    Register NameFunction
    NVIC_ISER0 – NVIC_ISER7 (Interrupt Set-Enable Registers)Enables interrupts. Writing a 1 to a bit enables the corresponding interrupt.
    NVIC_ICER0 – NVIC_ICER7 (Interrupt Clear-Enable Registers)Disables interrupts. Writing a 1 clears (disables) the corresponding interrupt.
    NVIC_ISPR0 – NVIC_ISPR7 (Interrupt Set-Pending Registers)Sets an interrupt as pending (as if it was triggered). Used for software-triggered interrupts.
    NVIC_ICPR0 – NVIC_ICPR7 (Interrupt Clear-Pending Registers)Clears the pending status of interrupts.
    NVIC_IABR0 – NVIC_IABR7 (Interrupt Active Bit Registers)Shows which interrupts are currently active (being serviced).
    NVIC_IPR0 – NVIC_IPR59 (Interrupt Priority Registers)Sets priority for each interrupt (lower number = higher priority).
    STIR (Software Trigger Interrupt Register)Lets software trigger an interrupt manually. Write the interrupt number to trigger it.

    Privilege Levels

    • Privileged: Requires the code to run in privileged mode (usually kernel/system code).
    • Configurable: Can be accessible depending on system setup and access permissions.

    Example Use Case (Enable Interrupt #5):

    NVIC_ISER[0] = (1 << 5);  // Enable interrupt 5
    

    Example Use Case (Set Interrupt 5 as Pending):

    NVIC_ISPR[0] = (1 << 5);  // Set pending flag
    

    Example Use Case (Set Priority of Interrupt 5):

    NVIC_IPR[1] = (3 << 6);  // Priority level (varies by implementation)

    Steps to Program an MCU Peripheral Interrupt

    1. Identify the IRQ Number

    • Look up the IRQ number of the peripheral in the MCU’s vector table.
    • Example: For USART3, the IRQ number might be 39 (vendor-specific).

    📌 This IRQ number maps to an entry in the NVIC interrupt table, and it’s essential to configure it correctly.

    2. Enable the IRQ in the Processor

    • Use the NVIC_ISERx (Interrupt Set-Enable Register) to enable the IRQ number.
    • Optionally, use the NVIC_IPRx (Interrupt Priority Register) to set its priority.
    NVIC_ISER1 |= (1 << (39 % 32));       // Enable IRQ39
    NVIC_IPR9 = (3 << 6);                 // Optional: Set priority for IRQ39 (lower value = higher priority)
    

    📘 The processor won’t recognize interrupts unless they’re enabled in NVIC.

    3. Configure the Peripheral

    • Set up the peripheral (e.g., USART3) to generate an interrupt.
    • This is done through its own control/status registers (e.g., USART_CR1 for enabling RXNEIE — RX Not Empty Interrupt Enable).
    USART3->CR1 |= USART_CR1_RXNEIE;      // Enable RX interrupt for USART3
    

    4. Pending Register Behavior

    • When USART3 receives data, it automatically issues an interrupt on IRQ 39.
    • This interrupt gets logged (pended) in the NVIC_ISPRx (Interrupt Set-Pending Register).

    5. NVIC Checks Priority Before Serving

    • NVIC checks:
      • Is the IRQ enabled?
      • Is the priority of this interrupt higher than the one currently being served?
    • If yes, it triggers the Interrupt Service Routine (ISR).
    • If no, the interrupt stays pending until it becomes the highest-priority pending interrupt.

    6. Interrupt Behavior When IRQ is Disabled

    • Even if you haven’t enabled the IRQ in NVIC, the peripheral can still issue the interrupt.
    • It gets stored in the pending state.
    • When you later enable the IRQ:
      • If its priority is high enough, the ISR will execute immediately.

    Summary Flow:

    Peripheral event (e.g., USART3 receives data) -->
    Peripheral asserts IRQ (e.g., IRQ39) -->
    NVIC pends the IRQ (ISPRx) -->
    If enabled and high-priority, NVIC dispatches ISR -->
    Your code executes the ISR (Interrupt Service Routine)
    

    Interrupt Handling Flow for USART RX Data

    Step 1: Data Arrival

    • What happens: A data packet comes in from the external world and is received by the USART RX buffer.
    • Where: In the USART peripheral (e.g., USART3).
    • Why: Because a device (e.g., another MCU, terminal, etc.) is sending data over the serial line.

    Step 2: Interrupt Request Issued

    • What happens: The USART peripheral detects new data in its RX buffer and triggers an interrupt.
    • How: It asserts its IRQ line (in this case, IRQ number 39) to notify the processor.

    📌 This step depends on the fact that RX interrupt is enabled in the peripheral control register (USART_CR1).

    Step 3: NVIC Registers the Interrupt

    • What happens:
      • The IRQ 39 becomes pending in the NVIC’s pending register (ISPRx).
      • If the IRQ is enabled and has sufficient priority, NVIC prepares to handle it.
    • Visual: This is shown as the yellow box inside NVIC with a 39 marked line going into the pending register.

    Step 4: CPU Handles Interrupt

    • What happens:
      1. CPU fetches the ISR address from the vector table based on IRQ number 39.
      2. CPU jumps to the ISR (Interrupt Service Routine).
    • Note: The Program Counter (PC) is updated with the ISR address.

    Step 5: ISR Executes

    • What happens: The ISR (Interrupt Service Routine) runs.
    • What it does: It typically copies the received data from the USART RX buffer into SRAM (main memory) or processes it accordingly.

    Summary Flowchart:

    External Data → USART RX Buffer
           ↓
    USART Issues IRQ (e.g., 39)
           ↓
    NVIC Marks IRQ as Pending (if enabled)
           ↓
    CPU Fetches ISR from Vector Table
           ↓
    ISR Executes (e.g., copy data to SRAM)
    

    Developer Notes:

    • This entire flow is hardware-assisted and efficient, allowing the CPU to react quickly to events without polling.
    • You must:
      1. Enable RX interrupt in USART.
      2. Enable IRQ in NVIC.
      3. Write the correct ISR function in your firmware.

    Interrupt Priority, Preempt Priority & Sub Priority

    In embedded systems, interrupts help your program quickly respond to important events (like a button press or sensor signal) even while it’s doing something else. But what happens when two or more interrupts occur at the same time?

    That’s where priority comes in!

    What is Interrupt Priority?

    Every interrupt is assigned a priority to help the microcontroller decide which interrupt to serve first.

    👉 Higher priority interrupts get serviced before lower priority ones.

    For example:

    • If Timer1 (priority 2) and USART1 (priority 1) occur at the same time, USART1 will be handled first.

    What is Preempt Priority?

    Preempt Priority decides whether one interrupt can interrupt another that’s already running.

    🔁 If a new interrupt with higher preempt priority comes while another is running, it will preempt (pause) the running one and start executing.

    👉 Think of it like a teacher calling a more urgent student to speak even if another student is already speaking.

    What is Sub Priority?

    Sub Priority helps decide which interrupt runs first when two interrupts have the same preempt priority.

    ⚠️ Sub-priority does not cause preemption — it only helps resolve the order when two interrupts are pending with the same level.

    Example Analogy:

    InterruptPreempt PrioritySub PriorityMeaning
    USART111Medium importance
    Timer200Highest importance
    EXTI0 (button)10Medium but slightly more urgent

    Example Code: STM32 Interrupt Priority

    Let’s use STM32CubeIDE and configure priorities for 3 interrupts:

    • EXTI0 (button)
    • TIM2 (timer)
    • USART1 (serial communication)

    NVIC Priority Configuration

    // main.c or user init function
    HAL_NVIC_SetPriorityGrouping(NVIC_PRIORITYGROUP_2); // 2 bits for preemption, 2 for sub-priority
    
    // Set TIM2 interrupt: Highest priority
    HAL_NVIC_SetPriority(TIM2_IRQn, 0, 0); // Preempt: 0, Sub: 0
    HAL_NVIC_EnableIRQ(TIM2_IRQn);
    
    // Set EXTI0 interrupt: Mid priority
    HAL_NVIC_SetPriority(EXTI0_IRQn, 1, 0); // Preempt: 1, Sub: 0
    HAL_NVIC_EnableIRQ(EXTI0_IRQn);
    
    // Set USART1 interrupt: Lowest priority
    HAL_NVIC_SetPriority(USART1_IRQn, 1, 1); // Preempt: 1, Sub: 1
    HAL_NVIC_EnableIRQ(USART1_IRQn);
    

    ISR (Interrupt Service Routines)

    void TIM2_IRQHandler(void)
    {
        HAL_TIM_IRQHandler(&htim2);
        HAL_GPIO_TogglePin(GPIOC, GPIO_PIN_13); // Toggle LED
    }
    
    void EXTI0_IRQHandler(void)
    {
        HAL_GPIO_EXTI_IRQHandler(GPIO_PIN_0);
        HAL_UART_Transmit(&huart1, (uint8_t*)"EXTI0 triggered\n", 16, HAL_MAX_DELAY);
    }
    
    void USART1_IRQHandler(void)
    {
        HAL_UART_IRQHandler(&huart1);
        // Maybe echo back received data
    }
    

    Summary

    TermControlsCan Interrupt Others?Purpose
    Preempt PriorityWhether one ISR interrupts another✅ YesPreemption behavior
    Sub PriorityOrder if same preempt level❌ NoResolves conflict silently

    Notes

    • HAL_NVIC_SetPriority uses (preempt, sub) as inputs.
    • Lower number = Higher priority.
    • Priority grouping sets how bits are divided between preempt and sub.

    NVIC Interrupt Priority Configuration and Manual Triggering on STM32

    #if !defined(__SOFT_FP__) && defined(__ARM_FP)
      #warning "FPU is not initialized, but the project is compiling for an FPU. Please initialize the FPU before use."
    #endif#define IRQNO_TIMER2  28
    #define IRQNO_I2C1    31
    
    #include <stdint.h>
    #include <stdio.h>
    
    // NVIC Register Base Addresses (Cortex-M processor specific)
    uint32_t *pNVIC_IPRBase  = (uint32_t*)0xE000E400; // Priority Register
    uint32_t *pNVIC_ISERBase = (uint32_t*)0xE000E100; // Interrupt Set-Enable
    uint32_t *pNVIC_ISPRBase = (uint32_t*)0xE000E200; // Interrupt Set-Pending
    
    // Function to configure priority for a given IRQ number
    void configure_priority_for_irqs(uint8_t irq_no, uint8_t priority_value)
    {
        uint8_t iprx = irq_no / 4;
        uint32_t *ipr = pNVIC_IPRBase + iprx;
    
        uint8_t pos = (irq_no % 4) * 8;
    
        *ipr &= ~(0xFF << pos);                // Clear existing priority
        *ipr |=  ((priority_value & 0xFF) << pos);  // Set new priority
    }
    
    int main(void)
    {
        // Configure priorities
        configure_priority_for_irqs(IRQNO_TIMER2, 0x80);
        configure_priority_for_irqs(IRQNO_I2C1,  0x70);
    
        // Set TIM2 interrupt as pending
        *pNVIC_ISPRBase |= (1 << IRQNO_TIMER2);
    
        // Enable IRQs
        *pNVIC_ISERBase |= (1 << IRQNO_I2C1);
        *pNVIC_ISERBase |= (1 << IRQNO_TIMER2);
    
        while(1); // Wait here forever
    }
    
    // Timer 2 Interrupt Handler
    void TIM2_IRQHandler(void)
    {
        printf("[TIM2_IRQHandler] - Triggering I2C1 IRQ...\n");
    
        // Manually pend I2C1 interrupt from within TIM2 handler
        *pNVIC_ISPRBase |= (1 << IRQNO_I2C1);
    
        while(1); // Stay here to simulate nested interrupt scenario
    }
    
    // I2C1 Event Interrupt Handler
    void I2C1_EV_IRQHandler(void)
    {
        printf("[I2C1_EV_IRQHandler] - Nested interrupt handled.\n");
    }