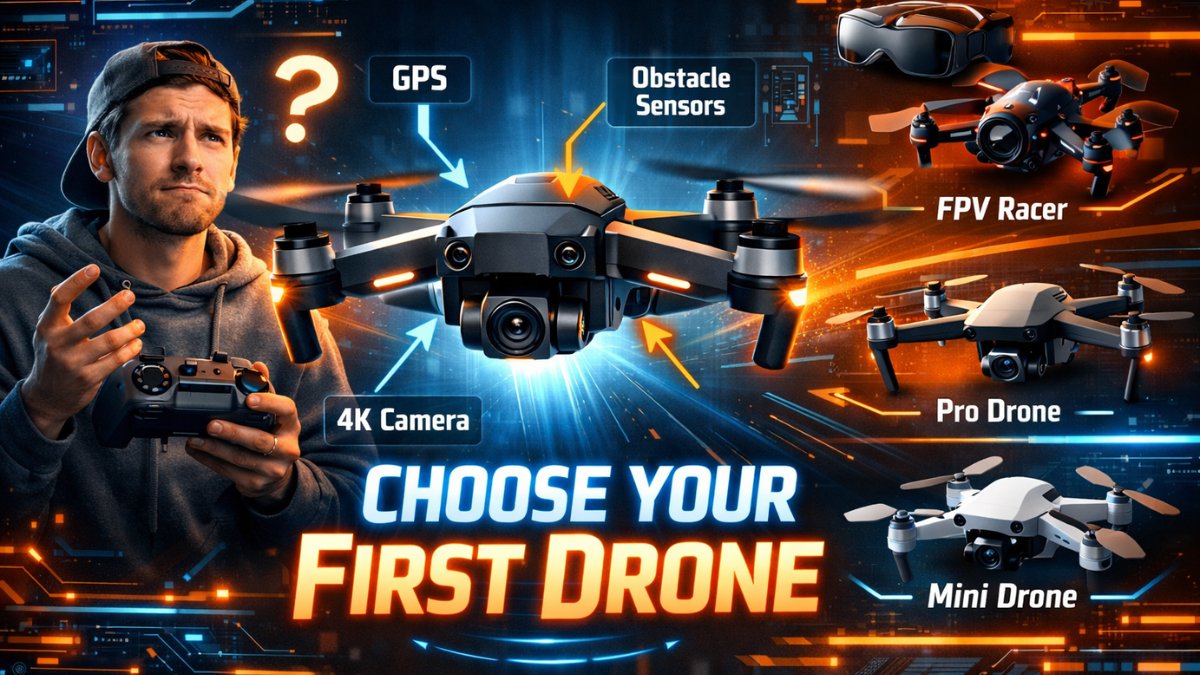
Choosing your first drone platform made easy. Compare features, costs, flight control systems, and use cases to pick the perfect drone for beginners.
So you’ve decided you want a drone. Maybe you watched a friend’s aerial footage on YouTube and your jaw dropped. Maybe you hiked somewhere stunning and wished you had a camera in the sky. Or maybe you just love gadgets and the idea of flying something with your hands sounds like the most fun you can have on a Saturday afternoon.
Whatever got you here, welcome. You’re about to make a decision that, done right, will give you years of enjoyment. Done wrong, you’ll spend $400 on a plastic paperweight that crashes into a tree on day two and never gets turned on again.
Choosing your first drone platform is genuinely one of the trickier consumer tech decisions out there, and that’s not because drones are complicated in themselves. It’s because the market is flooded with options ranging from $30 toys to $10,000 cinematic rigs, and the marketing around all of them is aggressively optimistic. Every box says “easy to fly.” Every listing says “perfect for beginners.” Most of them are lying, at least a little.
This guide is going to cut through all of that. We’ll talk about what actually matters when you’re picking your first drone, what the different categories mean in practice, which platforms are genuinely worth your money in 2025, and what nobody in the marketing material ever tells you about flying one.
Why Your First Drone Platform Decision Actually Matters
Here’s the thing most beginner drone guides gloss over: the platform you start on shapes your entire experience with the hobby, at least for the first year or two.
If you buy something too simple, you’ll hit its ceiling within a month and feel bored. If you buy something too advanced, you’ll spend more time troubleshooting and crashing than actually flying, and you’ll either give up or burn through money on replacements. If you buy the wrong category entirely, you’ll end up with a drone that can’t do what you actually wanted.
The best first drone for someone who wants to shoot travel videos is completely different from the best first drone for someone who wants to race through gates in a field. Those are different sports that happen to share some technology.
So before we talk about any specific model, we need to talk about what you actually want to do. That question sounds obvious, but a surprising number of people skip it and just buy whatever has the most impressive spec sheet.
Step One: Be Honest About What You Actually Want to Do
This is the most important section in this entire article. Read it before you look at a single product listing.
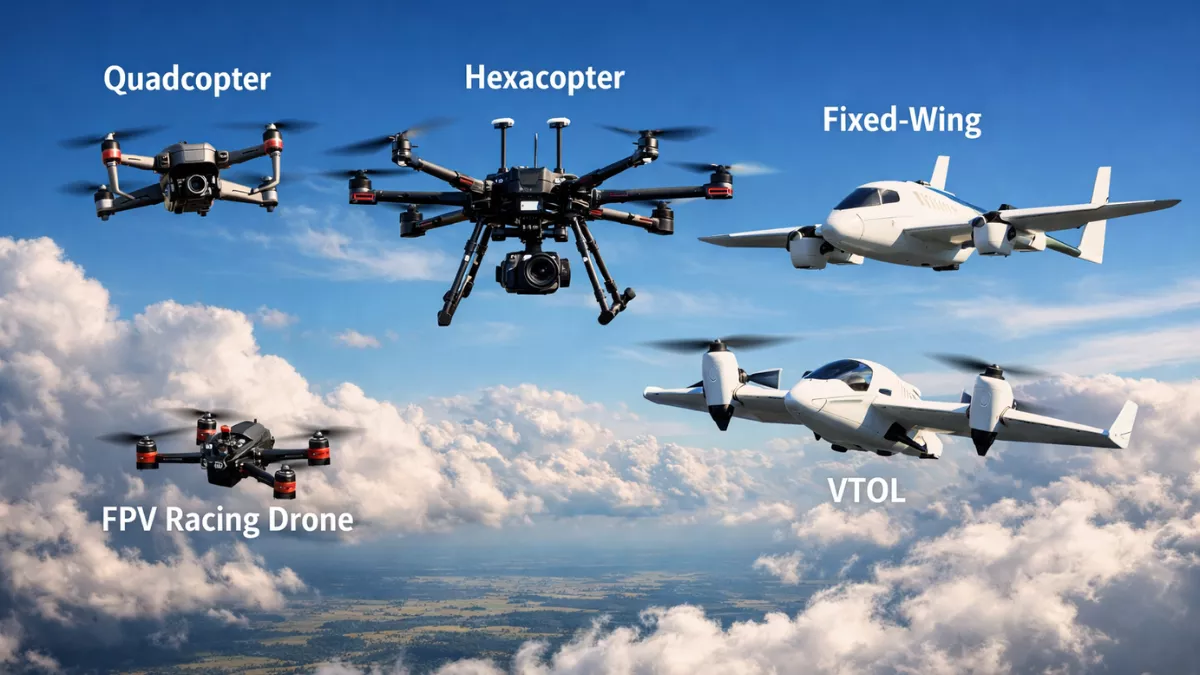
There are three distinct worlds within consumer drones, and they don’t overlap as much as you’d think.
Camera Drones are what most people picture when they think of a drone. A small flying machine with a stabilized camera hanging underneath it. You take off, fly it somewhere interesting, shoot video or photos, land it, and use the footage. These are GPS-stabilized, usually come with automated flight modes, and are designed to be flown by people who are primarily interested in the footage rather than the flying. DJI dominates this category with models like the Mini 4 Pro and the Air 3.
FPV Drones (First Person View) are completely different. You wear goggles and you see what the drone sees in real time, flying from the drone’s perspective like you’re actually inside it. These are fast, agile, and demand real skill. The flying itself is the point, not just the footage. FPV is an actual skill-based sport, and the learning curve is steep. The footage can be breathtaking, but you will crash a lot before you get there.
Toy and Micro Drones are the $30 to $100 plastic quadcopters you see at electronics stores. They’re fine for indoor flying and learning the basic concept of how controls work, but they have almost no real-world capability. Wind is their enemy. Cameras, if they have one, are usually terrible. These aren’t really a platform, they’re a stepping stone or a kids’ toy.
Most beginners who want to actually do something with their drone, whether that’s photography, videography, travel content, real estate work, or just outdoor flying fun, belong in the camera drone category. That’s where most of this guide will focus. We’ll also cover FPV specifically because there’s a growing audience of beginners who want to get into it.
If you’re reading this because you want to take nice footage of your camping trips, your kids’ sports games, or your travels abroad, a camera drone is what you want. Keep reading.
Understanding Drone Categories and What They Actually Mean for Beginners
Camera Drones: The Practical Choice for Most People
The camera drone market in 2025 is largely split into tiers by weight and capability, and this matters more than you might expect because drone regulations worldwide are structured around weight classes.
Sub-250g Drones are the sweet spot for beginners, and for good reason. In most countries including the United States, European Union, Canada, and Australia, drones under 250 grams face significantly lighter regulatory requirements than heavier aircraft. In the US, you can fly a sub-250g drone recreationally without FAA registration (though you still need to follow flight rules). In the EU, sub-250g drones often fall into the most permissive C0 class. This means you can fly more places with fewer legal headaches.
The DJI Mini series dominates this category. The Mini 4 Pro weighs in just under 249 grams and shoots 4K video with a 1/1.3-inch sensor. That’s a genuinely capable camera in a form factor that fits in your jacket pocket. For a first drone, it’s hard to argue against it.
250g to 600g Drones offer larger sensors and more advanced features but come with more regulatory requirements. The DJI Air 3 lives here, with a dual-camera setup and a larger 1/1.3-inch main sensor. If you’re serious about aerial photography and want that step up in image quality, this is the tier to consider, but understand you’re taking on more paperwork and more locations where you’ll need to check permissions.
600g and Above is where you find prosumer and professional tools. The DJI Mavic 3 series, the Autel EVO II Pro, and similar platforms. These have large sensors, exceptional image quality, and long flight times, but they’re not beginner territory. They’re also expensive enough that crashing one is genuinely painful.
For your first drone, the answer for most people is: buy in the sub-250g category. You’ll have fewer legal barriers, the drones are physically smaller and easier to transport, and the technology has gotten good enough that you won’t feel like you’re making a meaningful sacrifice in image quality.
FPV Drones: A Completely Different Animal
If you want to get into FPV flying, understand going in that this is more like learning to ride a motorcycle than learning to drive a car. It requires dedicated practice, there will be crashes, and you’ll probably need to repair or rebuild your quad at some point.
The standard advice for FPV beginners is to start in a simulator before you ever buy real hardware. FPV simulators like Velocidrone and Liftoff are available on PC and they accurately simulate the physics of FPV flight. Spend 20 to 30 hours in a sim before spending money on hardware. This alone will save you hundreds of dollars in crash repairs.
For your actual first FPV build or prebuilt, the options have gotten much better for beginners. The DJI Neo and Avata 2 are DJI’s entry points into assisted FPV, where you get some of the FPV experience with safety nets like obstacle avoidance and stabilized flight modes. These are genuinely a good starting point if you want the FPV experience without going full manual immediately.
For traditional “freestyle” FPV, the Geprc Cinelog 25 and similar 2.5-inch quads are popular beginner choices because they’re small enough to crash without catastrophic damage but capable enough to grow with you.
We’ll come back to FPV later in the guide. For now, let’s go deep on camera drones since that’s what most people asking about choosing their first drone platform actually want.
Key Specs That Actually Matter (And Ones That Don’t)
Drone product listings are full of numbers. Most of them matter less than the marketing suggests. Here’s what’s actually worth paying attention to.
Camera Sensor Size
This matters more than megapixels. A larger sensor captures more light, which means better image quality in anything other than perfect daytime conditions. When you’re shooting at sunrise, in shade, or in any kind of low light, sensor size becomes the deciding factor between footage that looks professional and footage that looks grainy and noisy.
For reference: a 1/2-inch sensor is decent for a beginner drone. A 1/1.3-inch sensor is noticeably better. A 4/3-inch sensor (found in the Mavic 3 series) is excellent. The difference between 1/2-inch and 1/1.3-inch is clearly visible in challenging light. The difference between 12MP and 48MP matters far less than sensor size.
Video Resolution and Frame Rate
4K is now basically standard at any price point above $200, so don’t let it dazzle you. What matters more is whether the drone can shoot 4K at 60fps (useful for slow-motion) and what the color profile options are. Drones with a D-Log or similar flat color profile give you much more flexibility in post-production. If you plan to do any color grading, look for a drone that supports LOG footage.
Flight Time
This is one of the most aggressively optimistic numbers in drone marketing. When a manufacturer says a drone has a 34-minute flight time, they mean in perfect conditions, no wind, optimal speed, fresh battery, mild temperature. In real-world conditions, knock 20 to 30 percent off that number. Also remember you should land with some battery remaining, and the last 20 percent of charge often gets consumed faster than the rest.
Practically speaking: 20 to 25 minutes of real-world flight time is solid for a beginner camera drone. 15 minutes is workable. Anything under 12 minutes starts to become frustrating.
Range and Transmission System
The range listed on drone specs assumes ideal conditions with no interference. In urban environments with lots of Wi-Fi signals, your range will be lower. That said, for most beginner flying, range beyond about 1 kilometer isn’t practically useful anyway. What matters more is the quality of the video transmission link, how stable it is, and how well it handles interference.
DJI’s O3 and O4 transmission systems are genuinely best-in-class at this point. The difference between DJI’s video link and competitors shows up in real-world reliability.
Obstacle Avoidance
For beginners, this is worth paying for. Obstacle avoidance uses sensors (often infrared or camera-based) to detect objects in the drone’s path and stop or redirect. It doesn’t catch everything, and it doesn’t work in all conditions, but it will save you from many of the embarrassing beginner crashes where you didn’t see the tree branch behind you.
The DJI Mini 4 Pro has omnidirectional obstacle avoidance, meaning it can sense obstacles in all directions including below and above. The older Mini 3 Pro only has forward, backward, and downward sensing. If obstacle avoidance matters to you, it’s worth paying for the fuller implementation.
GPS and Stabilization
This is non-negotiable for a beginner camera drone. GPS allows the drone to hold its position in the air when you let go of the sticks. Without GPS, the drone will drift with the wind and require constant correction. For beginners, flying without GPS is an exercise in frustration.
Every drone in the $200-and-up camera drone category will have GPS. Just make sure it also has GLONASS support (more satellites, better positioning) and ideally Galileo or BeiDou support as well. More satellite systems equals faster lock and more stable positioning.
Wind Resistance
This matters more than beginners expect. A drone rated for Level 5 wind resistance can handle winds up to about 38 km/h (approximately 24 mph). Level 4 handles up to about 29 km/h. In practice, you can fly in wind conditions up to the drone’s rated level, but the footage will be shakier and flight time drops significantly in wind.
Heavier drones generally handle wind better than lighter ones. The sub-250g class, by being lighter, is more susceptible to wind. You’ll notice this the first time you try to fly your Mini series drone on a gusty afternoon.
Budget Breakdown: What You Actually Get at Each Price Point
Let’s be direct about money because this is where a lot of beginners go wrong, either by underspending and getting frustrated, or overspending on features they don’t need yet.
Under $100: Toy Drones
These are primarily indoor flying toys. They have cameras ranging from genuinely terrible to mediocre. They are not stable outdoors in any real wind. They are fine for learning the basic concept of how a quadcopter responds to stick inputs, especially for kids or as a gift, but they are not a platform for doing anything meaningful with aerial photography.
The Ryze Tello (made by DJI, programmed for education) is the best in this range and is worth mentioning specifically because of its flight stability and programming capabilities, but even it has severe limitations outdoors.
If your budget is genuinely under $100, buy the Tello or save up. Don’t spend $60 on a random no-name quadcopter expecting a real flying experience.
$100 to $250: Entry-Level Platforms with Real Capability
This tier is where you start to get actual value for outdoor flying. The Holy Stone HS720E and similar GPS-enabled camera drones offer real GPS stabilization, 4K cameras (often with smaller sensors but decent video in good light), and flight times around 20 minutes. These are legitimate starter platforms.
For FPV beginners, this budget range also opens up options like the DJI Neo, which brings DJI build quality and transmission technology to an accessible price point with beginner-friendly flight modes.
The limitation of this tier is image quality. Sensors in this range are small, and footage in anything other than bright daylight shows noise and limited dynamic range. If casual flying and basic aerial shots are your goal, this is fine. If you want footage you’re proud of, you’ll feel the ceiling.
$250 to $500: Where Serious Beginners Should Start
This is the sweet spot for most people reading this guide. The DJI Mini 3 (not the Pro) sits at around $299 to $399 depending on where you buy and which bundle you choose. You get DJI’s excellent O3 video transmission, a genuinely capable camera, GPS with solid stabilization, and the full DJI Fly app experience including automated flight modes.
The DJI Mini 3 Pro (now slightly reduced in price) adds forward and backward obstacle avoidance and a better camera for another $100 to $150. If you can stretch to the Mini 3 Pro over the base Mini 3, do it.
In this range you’ll also find the Autel EVO Nano+, which is a direct competitor to the Mini 3 with slightly different feature tradeoffs. Autel’s SkyPixel app is less polished than DJI Fly, but the hardware is solid.
$500 to $800: Best First Drone Platforms for Serious Aerial Photography
If your goal is to produce footage you’re genuinely proud of, the DJI Mini 4 Pro is where serious beginners with a real interest in aerial photography should be looking. At around $760 for the Fly More combo (which includes extra batteries and a bag, things you definitely want), it’s a meaningful investment but one that gives you a drone with genuinely professional-grade features.
The Mini 4 Pro shoots 4K at up to 100fps, has a 1/1.3-inch sensor with D-Log M support for color grading, omnidirectional obstacle avoidance, and ActiveTrack 360 for tracking subjects automatically. It’s the drone professional travel creators and real estate photographers actually reach for.
Above $800: Probably Not Your First Drone
The DJI Air 3, DJI Mavic 3 Classic, and Autel EVO Lite+ all live above $800. These are excellent platforms but they’re not where you should spend your first drone budget. Buy a Mini 4 Pro, learn on it, crash it a few times (hopefully minor crashes), figure out what you actually want to do with aerial footage, and then upgrade if you decide you need more. Buying a $1,500 drone as your first purchase and then discovering you only fly it twice a year is a common and expensive mistake.
Top Beginner Drone Platforms Compared: 2025 Honest Review
Let’s get into specific recommendations.
DJI Mini 4 Pro — Best All-Around First Drone
Who it’s for: Travel content creators, beginner aerial photographers, people who want footage they’re proud of without a steep learning curve.
What makes it great: The Mini 4 Pro gets almost everything right for a first serious drone. The 1/1.3-inch sensor produces footage that looks genuinely cinematic in the right conditions. Omnidirectional obstacle avoidance means it’s actively working to keep itself in one piece while you’re learning. The DJI Fly app is well-designed and the automated modes like Hyperlapse, Mastershots, and QuickShots give you impressive footage even before you learn to fly manually.
The sub-249g weight is the other major advantage. You’ll face fewer regulatory barriers, it’s small enough to pack in a regular daypack, and the propellers are less dangerous if something goes wrong.
What to know: Even with obstacle avoidance, you can still crash this drone. Obstacle avoidance doesn’t work in low light, doesn’t detect wires well, and won’t save you from dumb decisions. Fly cautiously while you learn.
Pricing note: Buy the Fly More Combo. The extra batteries make a massive difference in your actual flying sessions. One battery gives you maybe 25 minutes of real-world flight time. Three batteries gets you closer to an hour.
DJI Mini 3 — Best Value First Drone
Who it’s for: Beginners who want a capable first drone without spending $760.
What makes it great: The base Mini 3 costs significantly less than the Mini 4 Pro while still offering 4K video, solid GPS stabilization, the full DJI ecosystem experience, and that valuable sub-249g weight class. It’s a genuinely capable beginner platform.
What to know: The Mini 3 lacks obstacle avoidance (forward and side sensors only on the Pro version, nothing on the base). Its sensor is slightly smaller than the Mini 4 Pro’s. You’ll feel the difference in low-light shooting. But for daytime flying and casual aerial content, you might never notice.
Autel EVO Nano+ — Best Alternative to DJI
Who it’s for: People who specifically want an alternative to DJI, or anyone who has existing Autel gear.
What makes it great: The EVO Nano+ packs a competitive camera with a 1/1.28-inch sensor into the sub-249g form factor. It has obstacle avoidance on three sides. Autel’s color science is excellent, particularly for still photography. And buying Autel means you’re diversifying away from DJI’s sometimes-complicated relationship with export regulations and app restrictions.
What to know: The SkyPixel app isn’t as polished as DJI Fly. The transmission system is good but doesn’t quite match DJI O3’s reliability at range. Accessories and batteries are less widely available than DJI options. But if you have specific reasons to avoid DJI, the EVO Nano+ is a legitimate choice.
DJI Avata 2 — Best First FPV Drone
Who it’s for: Beginners specifically interested in the FPV experience who want guard rings and safety features.
What makes it great: The Avata 2 is DJI’s attempt to make FPV accessible. It has protective guard rings around the propellers, making it safer for indoor flying and closer proximity work. It has three flight modes including a “Normal” mode that behaves more like a regular camera drone and a “Sport” mode before you get into full manual. The DJI Goggles 3 paired with the Avata 2 give you a genuinely immersive FPV experience.
What to know: The Avata 2 isn’t what traditional FPV pilots fly. It’s a gateway drug, an introduction to the experience. Many Avata pilots end up wanting to transition to proper freestyle quads after six months. That’s fine, the skills transfer. But go in knowing you’re buying a training wheel FPV platform.
Holy Stone HS720E — Best Budget Camera Drone
Who it’s for: True beginners on a tight budget who want GPS stabilization and a real outdoor flying experience without spending $400.
What makes it great: At around $150 to $200, the HS720E gives you GPS hold, a 4K camera (small sensor but functional in daylight), and flight times around 23 minutes. It’s a genuine outdoor camera drone at an accessible price point.
What to know: Everything about this drone is a tier below the DJI and Autel options. The camera quality in anything other than perfect daylight is mediocre. The app is clunky. There’s no obstacle avoidance. Repairs and parts are harder to find. But if $200 is your budget and you want a real GPS drone, this is a legitimate starting point.
GPS vs. Non-GPS Drones: Why This Matters So Much for Beginners
This distinction deserves its own section because it’s the single most important feature for beginner safety and enjoyment.
A GPS drone holds its position automatically. When you take your hands off the sticks, the drone hovers in place. If it loses signal with the controller, it will usually Return to Home automatically, flying back to where it took off and landing itself. This is an enormous safety net for beginners.
A non-GPS drone (often called optical flow only if it has downward cameras for indoor stabilization) will drift with the wind the moment you let go of the sticks. You have to constantly make small corrections to keep it where you want it. This is a learnable skill, but it requires real attention and practice. In outdoor conditions with any wind, flying without GPS is stressful for beginners.
For your first outdoor drone, GPS is non-negotiable. Don’t let anyone convince you otherwise. Every camera drone above $200 that’s worth buying has GPS. If a listing says “optical flow only” with no mention of GPS, keep scrolling.
The only context where non-GPS flying makes sense for beginners is FPV, where it’s part of the challenge and the tradition. Even then, many new FPV pilots start in Angle mode (a stabilized flight mode that behaves similarly to GPS drones) before progressing to Acro mode.
Drone Laws for Beginners: What You Actually Need to Know
This section is important, and honestly, most drone guides either skip it entirely or bury it at the end. We’re putting it front and center because flying illegally, even accidentally, can result in real fines and legal trouble.
In the United States (FAA Rules)
The FAA governs drone flying in the US, and the rules depend on your drone’s weight and your intended use.
Recreational Flyers: If you fly purely for fun and personal use, you’re a recreational flyer. Here’s what you need to know:
- Drones 250 grams and above must be registered with the FAA. Registration costs $5 and lasts three years. You register the drone, label it with your registration number, and you’re legal.
- Drones under 250 grams do not need registration for recreational use. This is another reason the DJI Mini series is so popular with beginners.
- You must pass The Recreational UAS Safety Test (TRUST), which is a free online test available from FAA-approved organizations. It takes about 30 minutes and the certificate has no expiration date.
- You must fly below 400 feet in uncontrolled airspace.
- You cannot fly over people or moving vehicles.
- You cannot fly within 5 miles of an airport without checking airspace authorization through the FAA’s LAANC system (which is free and often gives near-instant authorization for certain areas).
- You cannot fly at night without proper lighting on the drone.
Commercial Operations: If you fly for any commercial purpose, even just posting your footage on a monetized YouTube channel, technically you are a commercial operator. This requires a Part 107 Remote Pilot Certificate, which involves passing a real knowledge test at an FAA-approved testing center. The test costs around $175 and requires studying FAA regulations, weather, airspace, and other topics.
Many content creators and real estate photographers get their Part 107 specifically because it also opens up access to more airspace and allows waiver applications for specific operations.
Apps to Know: The B4UFLY app (official FAA app) shows you airspace restrictions for your location. The AirMap app gives similar information. These are free and you should have at least one on your phone before every flight.
In the European Union
The EU has a common drone regulation system that applies across member states with some local variations.
- All drones 250 grams and above must be registered with your national aviation authority. Most EU countries have online registration systems.
- Sub-250g drones without cameras can be flown without registration. Sub-250g drones with cameras fall into the Open Category A1, which allows flight over uninvolved people in most conditions.
- The Open Category A2 applies to drones in the 250g to 900g class. These require a self-declaration quiz and more careful operation planning.
- Night flying, flying over crowds, and flying beyond visual line of sight all require additional authorizations.
- The EU Drone Regulation website has detailed country-specific information.
In Canada
Transport Canada requires registration for drones 250 grams and above, and requires pilots to pass a knowledge test. The Small Advanced Operations and Small Basic Operations categories have different requirements based on where and how you fly.
General Rules That Apply Almost Everywhere
- Never fly near emergency operations (accidents, fires, police activity).
- Never fly over crowds of people.
- Always keep the drone within your visual line of sight unless specifically authorized.
- Respect private property and don’t fly over private property without permission.
- National parks in most countries have specific and often strict drone restrictions. Always check before flying in any protected area.
Essential Accessories for Your First Drone
Drone accessories are another area where marketing runs ahead of reality. Here’s what you actually need versus what’s nice to have.
Actually Essential
Extra Batteries: This is the most important accessory for any drone. One battery gives you maybe 20 to 25 minutes of real flying. Buy at least two extra batteries before your first real flying trip. Most manufacturers sell a “Fly More Combo” that includes extra batteries and a carrying case at a price that works out significantly cheaper than buying accessories separately.
ND Filters: These are tinted filters that screw onto your drone’s camera lens and reduce the amount of light entering the sensor. For video shooting, you want to follow the 180-degree shutter rule, which means your shutter speed should be approximately double your frame rate. At 30fps, you want a 1/60 shutter. In bright daylight, an ND filter is how you achieve that without overexposing your footage. An ND 4/8/16/64 set is a good starting kit. These run $30 to $80 depending on quality.
Carrying Case: Your drone is a precision instrument. Transporting it loose in a bag is asking for damage. Most Fly More combos include a shoulder bag. If yours doesn’t, buy a purpose-made case.
SD Cards: Most drones need a high-speed microSD card. Get a card rated at V30 or above for 4K recording. The SanDisk Extreme line and Samsung Pro Endurance line are reliable choices. Buy at least 64GB, preferably 128GB.
Nice to Have
Landing Pad: A foldable landing pad gives you a clean, visible surface to take off from and land on. This is especially useful on grass or dirt where debris can get sucked into motors or camera lenses. They cost about $15 to $30 and fold down to nothing.
Controller Holder for Phone: Most beginner drones use your smartphone as a screen. A controller that has a built-in phone holder is included, but if you’re using a tablet or larger phone, check that it fits the stock holder before assuming you need an upgrade.
Propeller Guards: If you’re flying indoors or in close proximity to obstacles while learning, prop guards reduce damage from minor collisions. They add weight and reduce flight efficiency slightly, so most people take them off once they’re comfortable flying.
Don’t Bother
Drone Backpacks: Most are unnecessary bulk if your drone comes with a case. An exception is if you’re hiking significant distances to flying locations, in which case a drone-specific backpack distributes weight better.
Third-Party Batteries: Tempting because they’re cheaper, but drone batteries communicate with the drone’s power management system. Third-party batteries can cause flight instability warnings or refuse to charge properly. Stick to manufacturer batteries, at least for your first drone.
How to Learn to Fly: A Practical Approach for Beginners
Buying the drone is the easy part. Actually learning to fly well takes time and intention. Here’s a structured approach that will save you frustration and money.
Before Your First Flight: Homework Required
- Read the manual. This sounds obvious, but a huge percentage of beginners skip this and then wonder why their drone behaves unexpectedly. The manual covers the Return to Home behavior, low battery warnings, GPS lock requirements, and the specific behavior of different flight modes. Read it.
- Practice in the DJI Fly app simulator (or equivalent for your drone). Most modern drones have a simulator built into the app that uses the actual controller. Spend a few hours here before your first real flight.
- Check the airspace. Use B4UFLY or AirMap before every flight, especially when you’re getting started. Flying in controlled airspace without authorization is a real legal risk.
- Find an open space. Your first flights should happen in a large open area with no obstacles, preferably on a calm day. A soccer field, an empty parking lot, or a park with no trees nearby are ideal.
Your First Real Flight Session
Start with hover practice. Take off, let the drone hover at about five feet off the ground, and just watch it. Get comfortable with the idea that it’s going to hold position and not fall out of the sky. Most beginners are anxious the first time they fly and tend to over-correct. Give the drone a chance to show you what GPS stabilization actually does.
Then practice very slow, deliberate movements. Move forward slowly, stop. Move left slowly, stop. Practice pivoting the drone to face different directions and then moving in those directions. The camera is your forward reference, and learning to think in the drone’s orientation rather than your own is one of the first real skills in drone flying.
Practice landing. Landing is where most crashes happen. Bring the drone directly over the landing pad, descend slowly, and don’t rush it. Learn to use the automatic landing function and also how to land manually.
Building Skills Over Time
Once you’re comfortable with basic movement, start flying in sport mode for short periods to understand how the drone behaves at higher speeds. Learn to use the automated modes like QuickShots and Hyperlapse, which will give you impressive footage while you’re still building your manual skills.
After a month of regular flying, try flying in a gentle crosswind. This is where you’ll really learn how to compensate for conditions. Then try flying in stronger wind. Understanding your drone’s limits and your own limits in different conditions is part of being a responsible pilot.
FPV-Specific Learning Path
If your goal is FPV, the path is different. Start in a simulator. Velocidrone, Liftoff, and DRL Simulator are all excellent options. Spend genuine hours here before touching hardware. Join local FPV communities; almost every city has an FPV racing or freestyle club and they’re usually happy to help beginners. Watch tutorials from experienced FPV pilots on YouTube. JoshardFPV, Mr. Steele, and Rotor Riot all have beginner-friendly content.
When you do buy your first FPV hardware, consider starting with a whoops-class tiny whoop (a small, protected indoor quad) before moving to outdoor freestyle.
Common Beginner Mistakes When Choosing and Flying Your First Drone
Let’s talk about the mistakes people make, because learning from others’ expensive errors is genuinely valuable.
Buying Without Knowing the Rules
Flying a drone in a national park, over a crowd, or near an airport without authorization isn’t just illegal, it’s dangerous and it gives drone pilots everywhere a bad reputation. Don’t be the person who gets their drone confiscated by a ranger. Know the rules for your area before you fly.
Buying the Wrong Category for Their Goals
We covered this at the start, but it bears repeating. If you want to shoot cinematic footage and you buy an FPV racing quad, you’re going to be very frustrated. If you want to learn to race and you buy a camera drone, you’ll hit its ceiling fast. Be honest about what you want to do.
Flying Without GPS Lock
Your drone will tell you when it has a strong GPS lock, usually through the app showing the number of satellites and a solid positioning indicator. Don’t take off until you have GPS lock. Flying without it means you lose all the stabilization and Return to Home safety features. Beginners who ignore this end up chasing a drifting drone across a field.
Ignoring Low Battery Warnings
Every drone has multiple battery warning levels. When you get the first warning, start thinking about landing. When you get the critical warning, land immediately. The temptation to squeeze another two minutes out of a session has killed many drones. Lithium batteries don’t like being fully depleted; it degrades them quickly and can cause failures.
Flying in Conditions Beyond Your Skill Level
A 20 mph crosswind is manageable for an experienced pilot. For a beginner, it’s an invitation to a crash. Start flying in calm conditions, understand your own limits, and add challenge gradually. Most beginners push their skills and their drone further than they should in the first month.
Not Calibrating Before Flights
Most modern drones don’t require manual compass calibration before every flight, but when a new location is significantly different from where you last flew (especially magnetically, near large metal structures), calibration can help. Learn what your drone’s app tells you about calibration and pay attention to any warnings.
Skipping the Fly More Combo
This is a small but common financial mistake. If you buy a drone and then realize you need extra batteries and a bag, you’ll pay significantly more buying them separately than if you’d just bought the Fly More Combo from the start. Do the math before you check out.
Choosing Your First Drone Platform Based on Your Specific Goals
Let’s bring this together with specific recommendations based on what you actually want to do.
You want to take beautiful travel videos and photos: Get the DJI Mini 4 Pro Fly More Combo. It’s the most capable beginner camera drone in a legal and practical package. If the budget is tight, the DJI Mini 3 is the next best choice.
You’re on a strict budget under $300: The DJI Mini 3 (base model) is the first recommendation. If even that’s too much, look at the Holy Stone HS720E for a real GPS camera drone experience, understanding the image quality tradeoff.
You want to get into FPV but you’re a complete beginner: Buy Velocidrone or Liftoff on Steam first. Spend a month in the simulator. Then buy the DJI Avata 2 for an FPV experience with training wheels, or jump straight to a 2.5-inch freestyle quad like the Geprc Cinelog 25 if you’re committed to learning proper manual flight.
You want to do real estate aerial photography professionally: Get your FAA Part 107 certificate first, then buy the DJI Mini 4 Pro or Air 3 depending on your budget. If you’re going pro, treat this like buying a professional camera, invest in quality.
You’re buying a drone for a kid: The DJI Mini 3 is actually appropriate for mature teenagers who will take it seriously. For younger kids or uncertain circumstances, the Ryze Tello is a better starting point because it’s safer and cheaper to crash.
You want to fly indoors primarily: The DJI Avata 2 with its prop guards, a Ryze Tello, or a tiny whoop FPV quad are all better indoor choices than a standard camera drone. Standard camera drones in tight indoor spaces are just difficult to control without reliable GPS.
What Nobody Tells You About Owning a Drone
A few honest notes from people who’ve been flying for years and wished someone had told them these things upfront.
The first crash will happen. Even with obstacle avoidance. Even with GPS. You will at some point misjudge, misread the environment, have a weird signal glitch, or just make a beginner’s mistake. Budget emotionally for this. The DJI Mini series is reasonably robust for minor crashes. DJI also offers DJI Care Refresh, an insurance plan that lets you replace a crashed drone for a significantly reduced fee. It’s worth considering if you’re worried about accidents, which all beginners should be.
The battery situation is real. You’ll never feel like you have enough batteries. Even with three batteries and a charging hub, serious flying sessions feel too short. This is just the nature of the technology right now.
You’ll become more aware of airspace. Within a few weeks of flying, you’ll start noticing restricted zones everywhere you go. You’ll look at every interesting location and think about whether you can fly there. The airspace awareness doesn’t go away; it becomes part of how you see the world.
Great footage requires more than great hardware. The drone is a tool. Composition, timing, light, movement, and storytelling are what make drone footage actually compelling. Spend as much time thinking about how to shoot as you do thinking about what drone to buy.
The community is genuinely great. There are local drone clubs in most cities. Online communities on Reddit (r/drones, r/fpv, r/djimini4pro) are active and helpful. If you get into this hobby, connecting with other pilots will accelerate your learning and make the hobby more enjoyable.
Frequently Asked Questions About Choosing Your First Drone Platform
Do I need a license to fly a drone? In the US, recreational flyers need to pass the free TRUST test and register drones over 250g. Commercial pilots need a FAA Part 107 certificate. Requirements vary by country, so always check your local aviation authority’s current rules.
What’s the best first drone for beginners in 2025? The DJI Mini 4 Pro is the best all-around first drone for most people. The DJI Mini 3 is the best value option if budget is a consideration.
How long does it take to learn to fly a drone? Basic competency comes within a few hours. Flying well enough to get consistently good footage takes weeks to months of regular practice. FPV flying takes longer, especially if you want to fly in Acro (manual) mode.
Is DJI the only brand worth buying? DJI is the dominant choice for good reasons, but Autel makes genuinely competitive hardware, particularly the EVO Nano+ and EVO Lite+ series. For FPV components, brands like Betaflight, Foxeer, Caddx, and Geprc are widely respected.
Can I fly a drone at the beach? Usually yes, but check local regulations. Many popular beaches are in controlled airspace or near restricted zones. Salt air is also hard on drones, so rinse with care and avoid flying in breaking surf.
Should I buy a drone with or without a controller screen? The DJI RC series controllers have a built-in screen, which eliminates the need for your smartphone and avoids issues with phone holders, app notifications interrupting your flying session, and battery drain on your phone. For serious flying, a built-in screen controller is worth it.
How do I protect my drone from crashes? DJI Care Refresh is the closest thing to real insurance. Fly cautiously especially while learning. Enable Return to Home. Keep your drone in visual line of sight. Enable obstacle avoidance features. And accept that occasional minor crashes are part of the learning process.
What’s the difference between a camera drone and an FPV drone for beginners? Camera drones are GPS-stabilized, fly in a traditional third-person-view style, and are designed primarily for getting aerial footage. FPV drones are flown with goggles from a first-person perspective and prioritize agility and pilot skill over stability. They’re fundamentally different experiences requiring different skills.
Final Thoughts: Making the Right Choice for You
Choosing your first drone platform doesn’t have to be complicated if you start with the right questions. What do you actually want to do with it? How much are you willing to spend? What’s your tolerance for a learning curve?
For the vast majority of people who want to capture aerial footage of their travels, their outdoor adventures, or just experience the joy of flying a real aircraft with their hands, the answer lands somewhere in the DJI Mini family. The technology has gotten genuinely good, the regulatory situation favors the sub-250g category, and the ecosystem of apps, tutorials, and community support makes learning accessible.
If you want the FPV experience, plan for a longer journey, start in a simulator, and be patient with yourself. The payoff is extraordinary once you get there, but it takes more dedication upfront.
Whatever you choose, go in with realistic expectations, respect the airspace and the people around you when you fly, and give yourself permission to take it slow at first. The drone hobby rewards patience and punishes overconfidence pretty reliably.
Now go enjoy the sky. There’s nothing quite like the first time you hover a drone two hundred feet above a landscape you’ve only ever seen from the ground, and suddenly realize you can go anywhere.
For detailed understanding of Platform Devices and Drivers on Linux, refer to the Linux documentation on Platform Devices and Drivers .
Mr. Raj Kumar is a highly experienced Technical Content Engineer with 7 years of dedicated expertise in the intricate field of embedded systems. At Embedded Prep, Raj is at the forefront of creating and curating high-quality technical content designed to educate and empower aspiring and seasoned professionals in the embedded domain.
Throughout his career, Raj has honed a unique skill set that bridges the gap between deep technical understanding and effective communication. His work encompasses a wide range of educational materials, including in-depth tutorials, practical guides, course modules, and insightful articles focused on embedded hardware and software solutions. He possesses a strong grasp of embedded architectures, microcontrollers, real-time operating systems (RTOS), firmware development, and various communication protocols relevant to the embedded industry.
Raj is adept at collaborating closely with subject matter experts, engineers, and instructional designers to ensure the accuracy, completeness, and pedagogical effectiveness of the content. His meticulous attention to detail and commitment to clarity are instrumental in transforming complex embedded concepts into easily digestible and engaging learning experiences. At Embedded Prep, he plays a crucial role in building a robust knowledge base that helps learners master the complexities of embedded technologies.