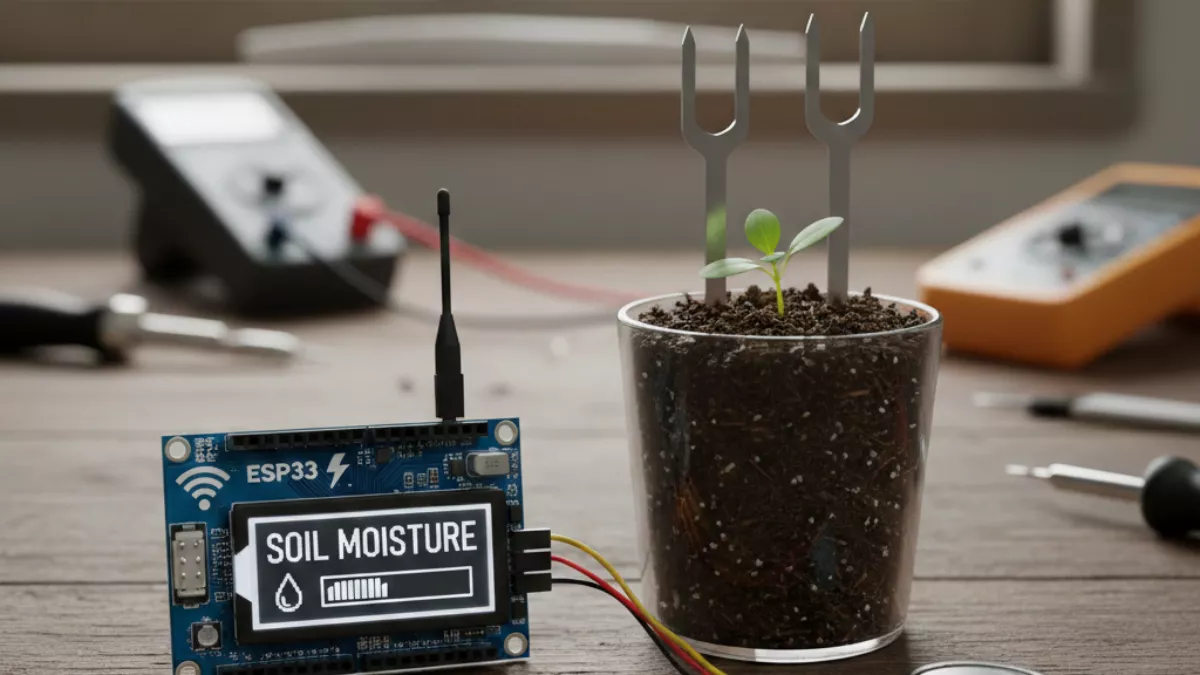
Learn how to use ESP32 with BMP280 for accurate temperature and pressure readings. Complete guide with wiring, code, setup, troubleshooting, and real IoT examples.
If you’ve ever wanted to build a reliable weather station, a smart home environment monitor, or even a small IoT dashboard that tracks atmospheric pressure and temperature in real time, then the ESP32 with BMP280 is one of the best combinations you can start with. The ESP32 gives you Wi-Fi, Bluetooth, powerful GPIOs, and great processing power, while the BMP280 adds accurate temperature and barometric pressure data with a very small footprint.
Let’s walk through everything: what the BMP280 does, how to connect it, working code, MicroPython examples, SPI and I2C connections, ESP32-S3 usage, webserver setup, OLED display integration, and real-world applications.
What Is the BMP280 Sensor?
The BMP280 is a small, affordable environmental sensor from Bosch that measures:
- Temperature
- Atmospheric pressure
It’s more accurate and more stable than older options like the BMP180. If you ever see BME/BMP280 ESP32, that usually refers to sensor breakout boards that support both BME280 (which includes humidity) and BMP280.
Most commonly, the BMP280 runs on I2C or SPI, making it extremely flexible when connecting to an ESP32.
Why Use ESP32 with BMP280?
Pairing the BMP280 sensor with ESP32 gives you some immediate advantages:
- You can publish data online using Wi-Fi.
- You can build a weather station that uploads data to a webserver.
- You can visualize temperature and pressure on a local web dashboard.
- You can log the data to cloud services.
- You can integrate an OLED display for live readings.
- You can use it with ESP32-CAM, ESP32-S3, and even MicroPython.
Because the ESP32 is fast and supports both I2C and SPI, you can choose whichever mode fits your project best.
Understanding I2C vs SPI for BMP280
Before jumping into wiring, let’s break down your two communication options.
I2C (Most Common)
- Uses only 2 data wires: SDA and SCL
- Supports many sensors on the same bus
- Beginner-friendly
- Works smoothly with Arduino IDE, MicroPython, and libraries like Adafruit_BMP280 ESP32
SPI (Faster but more wires)
- Uses 4 wires: SCK, MISO, MOSI, CS
- Good for high-speed reading
- ESP32 has multiple SPI buses available
If you are a beginner, use I2C. It’s simple, reliable, and compatible with all examples in this guide.
BMP280 Connection with ESP32 (I2C Wiring)
One of the most common questions beginners ask is:
How do I connect BMP280 to ESP32?
Here is the simplest wiring diagram.
| BMP280 Pin | ESP32 Pin |
|---|---|
| VCC | 3.3V |
| GND | GND |
| SDA | GPIO 21 |
| SCL | GPIO 22 |
This is the standard I2C setup and works perfectly with almost every breakout board.
BMP280 Connection with ESP32 (SPI Wiring)
If you want to use ESP32 BMP280 SPI, wire it like this:
| BMP280 Pin | ESP32 Pin |
|---|---|
| VCC | 3.3V |
| GND | GND |
| SCK | GPIO 18 |
| MISO | GPIO 19 |
| MOSI | GPIO 23 |
| CS | GPIO 5 |
SPI is optional, but useful when your I2C bus is full with other sensors.
Installing Libraries (Arduino IDE)
To run ESP32 BMP280 code, install:
1. Adafruit BMP280 Library
2. Adafruit Unified Sensor Library
Search them in Arduino IDE Library Manager.
These libraries support:
- esp32 bmp280 example
- adafruit_bmp280 esp32
- bmp280.h based projects
ESP32 BMP280 Code (Arduino I2C Example)
Here is the most beginner-friendly esp32 bmp280 example using I2C:
#include <Wire.h>
#include <Adafruit_Sensor.h>
#include <Adafruit_BMP280.h>

Adafruit_BMP280 bmp;

void setup() {
  Serial.begin(115200);

  if (!bmp.begin(0x76)) {
    Serial.println("BMP280 not found!");
    while (1);
  }

  Serial.println("ESP32 with BMP280 Initialized");
}

void loop() {
  float temperature = bmp.readTemperature();
  float pressure = bmp.readPressure() / 100.0F;

  Serial.print("Temp: ");
  Serial.print(temperature);
  Serial.print(" °C  |  Pressure: ");
  Serial.print(pressure);
  Serial.println(" hPa");

  delay(2000);
}
This simple bmp280 esp32 code gives you stable temperature and pressure output in seconds.
ESP32 BMP280 SPI Code Example
If you’re using SPI mode, here’s your working sketch:
#include <Adafruit_BMP280.h>
#include <SPI.h>

#define BMP_SCK 18
#define BMP_MISO 19
#define BMP_MOSI 23
#define BMP_CS 5

Adafruit_BMP280 bmp(BMP_CS, BMP_MOSI, BMP_MISO, BMP_SCK);

void setup() {
  Serial.begin(115200);
  if (!bmp.begin()) {
    Serial.println("BMP280 not found!");
    while (1);
  }
}

void loop() {
  Serial.print("Temperature = ");
  Serial.print(bmp.readTemperature());
  Serial.print(" °C | Pressure = ");
  Serial.print(bmp.readPressure() / 100);
  Serial.println(" hPa");

  delay(2000);
}
You now have complete esp32 bmp280 spi support.
ESP32 MicroPython BMP280 Example
Running the BMP280 on MicroPython is incredibly easy.
Install module:
bmp280.py
Then on ESP32:
from machine import Pin, I2C
from bmp280 import BMP280
import time

i2c = I2C(0, scl=Pin(22), sda=Pin(21))
bmp = BMP280(i2c)

while True:
    print("Temp:", bmp.temperature)
    print("Pressure:", bmp.pressure)
    time.sleep(2)
This covers all esp32 micropython bmp280 use cases.
ESP32 BMP280 OLED Display Integration
If you want live sensor reading on a display, use a 0.96-inch OLED.
Typical wiring:
| OLED Pin | ESP32 Pin |
|---|---|
| SDA | 21 |
| SCL | 22 |
| VCC | 3.3V |
| GND | GND |
With BMP280 + OLED + ESP32 you can create a compact esp32 bmp280 oled mini weather station.
ESP32 BMP280 Webserver (Real-Time Dashboard)
You can host a small website inside the ESP32 that displays live BMP280 readings.
Common workflow:
- ESP32 reads BMP280
- ESP32 creates a webserver
- Browser loads HTML/JS dashboard
- Data refreshes every 2 seconds via AJAX
This is what people describe as esp32 bmp280 webserver.
Perfect for:
- Home weather station
- Garden environment monitoring
- Smart greenhouse
- IoT labs
Build an ESP32 with MQ135 air-quality monitor using this beginner-friendly guide. Learn wiring, code, calibration, and real IoT uses. More ESP32 tutorials at EmbeddedPrep.
Read more about MQ135 here : ESP32 with MQ135
ESP32-S3 with BMP280
The ESP32-S3 is becoming more popular because it has extra GPIO, built-in USB, and better performance for AI tasks.
The same wiring applies:
- SDA → GPIO 21
- SCL → GPIO 22
All Arduino and MicroPython code works directly with esp32-s3 bmp280 boards.
ESP32-CAM with BMP280
If you want to add environmental monitoring to your camera projects:
- Wire BMP280 to ESP32-CAM using I2C
- Use GPIO 14 for SCL and GPIO 15 for SDA (commonly recommended)
- Build a webpage that shows live camera feed + weather data
This is an excellent project for home surveillance or smart farming.
Using BMP280.h for Custom Code
If you prefer writing low-level code, you can work directly with bmp280.h or custom register definitions.
This requires:
- Reading/writing I2C registers
- Configuring oversampling
- Setting power modes
Most beginners stick with the Adafruit library, but advanced users may want to create custom drivers.
Real-World Projects You Can Build
Here are some fun and practical applications of interfacing BMP280 with ESP32:
1. Weather Dashboard
- Temperature
- Atmospheric pressure
- Trend graphs via webserver
2. Altimeter
Perfect for drones, robotics, and RC aircraft.
3. Smart Home Climate Monitoring
Connect to:
- Home Assistant
- MQTT
- InfluxDB
4. Portable Environmental Monitor
Use ESP32 + BMP280 + OLED as a pocket device.
5. ESP32 IoT Cloud System
Send BMP280 data to:
- Firebase
- Thingspeak
- AWS IoT
- Node-RED dashboards
6. Logging to SD Card
Useful for long-term environmental research.
Troubleshooting: Why Your BMP280 Might Not Work
Even though the setup is simple, beginners commonly face a few issues.
Here are the most common ones:
1. Wrong I2C address
BMP280 uses either 0x76 or 0x77.
Scan I2C bus using an I2C scanner sketch.
2. Faulty jumper wires
Replace all wires before assuming your sensor is dead.
3. 5V power supply
BMP280 must use 3.3V, not 5V.
4. Wrong library installed
Some BMP280 boards are actually BME280.
Use the correct library.
Performance Tips for Better Accuracy
To get more stable results:
- Enable oversampling
- Reduce noise by adding a delay between readings
- Allow the sensor to warm up for 1–2 minutes
- Keep the sensor away from heat sources
These small changes greatly improve long-term reliability.
Comparing BME/BMP280 ESP32 Options
Many boards online are labeled BME/BMP280 ESP32, meaning they support both sensor types.
Difference:
| Feature | BMP280 | BME280 |
|---|---|---|
| Temperature | Yes | Yes |
| Pressure | Yes | Yes |
| Humidity | No | Yes |
If you need humidity monitoring, choose BME280 instead.
If not, BMP280 is cheaper and equally accurate.
Connecting Multiple Sensors on ESP32
Because ESP32 supports multiple I2C buses, you can connect:
- BMP280
- OLED
- MPU6050
- BH1750
- DS3231
All on the same two I2C pins.
This makes the ESP32 a perfect IoT data collector.
FAQ: ESP32 with BMP280
1. What is the ESP32 with BMP280 used for?
Using ESP32 with BMP280 allows you to measure temperature and atmospheric pressure in real time. Because the ESP32 has Wi-Fi and Bluetooth, you can send BMP280 sensor data to dashboards, cloud services, or mobile apps. This combination is commonly used in weather stations, IoT monitoring systems, altimeters, and environmental data loggers.
2. How do I connect the BMP280 sensor with ESP32?
The easiest bmp280 connection with esp32 is through the I2C interface:
- BMP280 SDA → ESP32 GPIO 21
- BMP280 SCL → ESP32 GPIO 22
- VCC → 3.3V
- GND → GND
This is the most stable and beginner-friendly way to connect bmp280 to esp32. If needed, you can also use SPI mode for faster communication.
3. Can I interface BMP280 with ESP32 using SPI?
Yes. The esp32 bmp280 spi interface is supported and is ideal when using several I2C sensors. The SPI wiring is:
- SCK → GPIO 18
- MISO → GPIO 19
- MOSI → GPIO 23
- CS → GPIO 5
SPI gives better speed and timing accuracy, especially in robotics, drones, and high-frequency data logging.
4. Which library should I use for ESP32 BMP280 code?
The most recommended library is Adafruit_BMP280 because it is stable, frequently updated, and directly compatible with ESP32. It includes:
- bmp280.h header
- Preset oversampling modes
- Altitude calculations
- Temperature and pressure calibration
If you are using PlatformIO, ensure you select the adafruit_bmp280 esp32 package for maximum compatibility.
5. Why is my ESP32 not detecting the BMP280 sensor?
This issue is extremely common when interfacing BMP280 with ESP32. Common causes:
- Wrong I2C address (use 0x76 or 0x77).
- Using 5V instead of 3.3V.
- Fake breakout boards marked as “BMP280” but actually BME280 clones.
- Loose jumper wires.
- Incorrect SDA/SCL pins in ESP32 code.
Running an I2C scanner sketch helps identify the correct device address.
6. What is the correct I2C address for BMP280?
The BMP280 supports two addresses:
- 0x76 (most common)
- 0x77 (alternative boards)
Your bmp280 esp32 code must match the correct address. If the sensor is not detected, change the address in the code and try again.
7. Can I use the BMP280 with ESP32 MicroPython?
Absolutely. Esp32 micropython bmp280 support is excellent.
You only need:
from bmp280 import BMP280
MicroPython makes it easy to build lightweight IoT dashboards, especially on ESP32-S3 or ESP32-CAM boards.
8. Can I display BMP280 data on an OLED screen with ESP32?
Yes. Many beginners build esp32 bmp280 oled weather stations using a 0.96-inch OLED.
Both devices run on the I2C bus, so you can connect:
- OLED SDA + BMP280 SDA → GPIO 21
- OLED SCL + BMP280 SCL → GPIO 22
This setup displays real-time temperature and pressure directly on the screen.
9. How can I create a web dashboard using ESP32 BMP280?
You can host a live webpage using esp32 bmp280 webserver code. The ESP32 collects data from BMP280 and updates the webpage using AJAX or JSON. This allows:
- Real-time weather monitoring
- Sharing data over local Wi-Fi
- Mobile-friendly dashboards
It is one of the most popular IoT projects using BMP280.
10. Can I use BMP280 with ESP32-S3?
Yes. ESP32-S3 BMP280 wiring and code are the same as regular ESP32.
Because S3 has better performance and USB support, many developers prefer it for advanced IoT dashboards and data analytics.
11. Is BMP280 compatible with ESP32-CAM?
Yes. You can connect BMP280 to ESP32-CAM using I2C pins:
- SDA → GPIO 15
- SCL → GPIO 14
This allows you to create a combined project that captures images and logs atmospheric data together.
12. What is the difference between BME280 and BMP280 when used with ESP32?
When reading bme/bmp280 esp32 discussions, remember:
| Feature | BMP280 | BME280 |
|---|---|---|
| Temperature | ✔ | ✔ |
| Pressure | ✔ | ✔ |
| Humidity | ✖ | ✔ |
If your project requires humidity (gardens, smart homes, greenhouses), choose BME280.
If not, BMP280 is cheaper and equally accurate.
13. How do I add altitude reading to ESP32 BMP280 code?
You can calculate altitude using:
bmp.readAltitude(1013.25);
The value 1013.25 hPa is sea-level pressure.
Adjust this based on your region for accurate altimeter readings.
14. Why does my temperature reading look incorrect?
BMP280 may heat slightly due to voltage regulator and chip operation. For better accuracy:
- Move the sensor away from ESP32’s heat zones.
- Reduce oversampling.
- Allow the sensor to stabilize for 30–60 seconds.
- Avoid placing the sensor inside a plastic project box without ventilation.
15. Can I log BMP280 data to the cloud with ESP32?
Yes. Common platforms supported through Wi-Fi include:
- Thingspeak
- Firebase
- Blynk
- MQTT brokers
- InfluxDB + Grafana
- Local Node-RED dashboards
This is the main reason why esp32 bmp280 sensor is popular for IoT.
16. Does BMP280 work on both 3.3V and 5V?
Most breakout boards support both, but the sensor internally works at 3.3V.
If using a raw module without regulator, avoid 5V or you may damage the device.
17. Does BMP280 require calibration when used with ESP32?
Basic calibration is automatic.
However, you can improve accuracy by:
- Adjusting sea-level pressure
- Applying temperature correction offsets
- Using averaging filters in code
These adjustments give much smoother long-term results.
18. Is there a difference in performance when using SPI vs I2C?
Yes:
| Mode | Speed | Use-Case |
|---|---|---|
| I2C | Slower, simpler | Beginners, general usage |
| SPI | Faster, stable | Logging, drones, robotics |
Your esp32 to bmp280 connection method should match your project demands.
19. Does ESP32-C3 support BMP280?
Yes. The esp32 c3 works just fine with BMP280 through I2C:
- SDA → GPIO 8
- SCL → GPIO 9
The esp32-s3 bmp280 and esp32-c3 bmp280 combinations are both supported without library changes.
20. Why should I use the Adafruit BMP280 library instead of others?
Because it offers:
- Stable drivers
- Easy oversampling adjustment
- Built-in altitude formulas
- Compatibility with all ESP32 versions
Most esp32 bmp280 example projects online use this library, making it easy to get help and support.
21. Why is BMP280 better than older BMP180 modules?
Compared to BMP180:
- Faster sampling
- More accurate pressure reading
- Better resolution
- Lower power consumption
- Supports SPI and I2C
If you’re choosing between esp32 bme bmp280 boards, the BMP280 is simply more modern and reliable.
22. Can I use BMP280 in battery-powered ESP32 projects?
Yes. BMP280 uses very low power, especially in “sleep mode.” Combine it with ESP32 deep sleep to create long-lasting IoT devices such as:
- Outdoor climate loggers
- Solar weather stations
- Remote monitoring devices
23. Can I use BMP280 with ESP-IDF instead of Arduino IDE?
Yes. ESP-IDF supports BMP280 through:
- Custom drivers
- Third-party C libraries
- I2C HAL layer
Advanced developers often use bmp280.h style low-level programming under ESP-IDF.
24. How often should I read BMP280 data?
The ideal reading interval is:
- 1–2 seconds for weather stations
- 500 ms for altimeters
- 5–10 seconds for battery-saving IoT devices
Reading too fast may reduce accuracy due to thermal self-heating.
25. What real-world projects can I create with ESP32 and BMP280?
Some popular projects include:
- Smart home climate tracker
- Portable environmental monitor
- IoT weather station
- Drone altitude measurement
- ESP32 BMP280 OLED mini display
- ESP32 BMP280 web dashboard
- Cloud-connected monitoring system
These are reliable beginner-to-advanced builds.
Mr. Raj Kumar is a highly experienced Technical Content Engineer with 7 years of dedicated expertise in the intricate field of embedded systems. At Embedded Prep, Raj is at the forefront of creating and curating high-quality technical content designed to educate and empower aspiring and seasoned professionals in the embedded domain.
Throughout his career, Raj has honed a unique skill set that bridges the gap between deep technical understanding and effective communication. His work encompasses a wide range of educational materials, including in-depth tutorials, practical guides, course modules, and insightful articles focused on embedded hardware and software solutions. He possesses a strong grasp of embedded architectures, microcontrollers, real-time operating systems (RTOS), firmware development, and various communication protocols relevant to the embedded industry.
Raj is adept at collaborating closely with subject matter experts, engineers, and instructional designers to ensure the accuracy, completeness, and pedagogical effectiveness of the content. His meticulous attention to detail and commitment to clarity are instrumental in transforming complex embedded concepts into easily digestible and engaging learning experiences. At Embedded Prep, he plays a crucial role in building a robust knowledge base that helps learners master the complexities of embedded technologies.