Learn how to use Claude AI with Raspberry Pi 5 to build smart IoT projects. Step-by-step guide covering API setup, GPIO control, sensor data analysis, and real home automation projects perfect for beginners.
So here’s the thing. You’ve got a Raspberry Pi 5 sitting on your desk, maybe still in the box, or maybe running some basic LED blink project you followed from a YouTube tutorial six months ago. And you keep hearing about AI being able to “do everything” but nobody’s showing you how to actually wire Claude AI into real hardware that controls real stuff in your home.
That’s exactly what this guide covers.
By the time you finish reading this, you’ll know how to connect Claude AI Anthropic’s large language model — to your Raspberry Pi 5 and use it to control IoT devices through plain English commands. Think telling your Pi to “turn on the fan when the temperature goes above 28 degrees” and having it actually work. No pre-programmed if-else trees. Just natural language talking to real hardware.
This is one of the most exciting Raspberry Pi AI projects you can build right now, and the best part is you don’t need a PhD in machine learning to pull it off.
Let’s get into it.
Read also: If you’re new to Raspberry Pi entirely, spend 30 minutes setting up a basic GPIO LED blink project first. Once you understand how Python talks to physical pins, the Claude AI integration in this guide will make a lot more sense.
What Is Claude AI and Why Should You Use It for IoT Projects?
Before we wire anything up, let’s make sure we’re on the same page about Claude AI.
Claude is an AI assistant built by Anthropic, a company founded in 2021 by former OpenAI researchers. What makes Claude stand out compared to other large language models is its focus on safety, its ability to reason through complex instructions, and its very generous context window — up to 200,000 tokens in the Pro and API versions. That’s important for IoT because you can feed it a lot of sensor readings, device states, and instructions at once without losing context.
For IoT work specifically, Claude AI gives your Raspberry Pi three superpowers it didn’t have before:
Natural language understanding. Instead of writing rigid if-else logic for every possible scenario, you describe what you want in plain English and Claude figures out the logic. “If the soil moisture sensor reads below 30% and it’s not raining outside, turn on the irrigation pump” — that’s a Claude prompt, not a 50-line Python function.
Sensor data reasoning. Claude can take raw sensor readings, understand what they mean in context, and make decisions. You can ask it to analyze a week of temperature logs and tell you when your server room is getting dangerously warm — and it’ll give you a useful answer, not just a data dump.
Conversational control. You can build a simple chat interface where family members control your smart home by texting a Raspberry Pi assistant. No app needed. No complex dashboard. Just a conversation.
The Claude API is what makes all of this work from a Raspberry Pi 5. You send a message to Anthropic’s servers via Python, Claude processes it, and sends back a response — usually in under two seconds on a decent home internet connection. Your Pi acts as the local brain that translates Claude’s decisions into actual GPIO signals, MQTT messages, or serial commands.
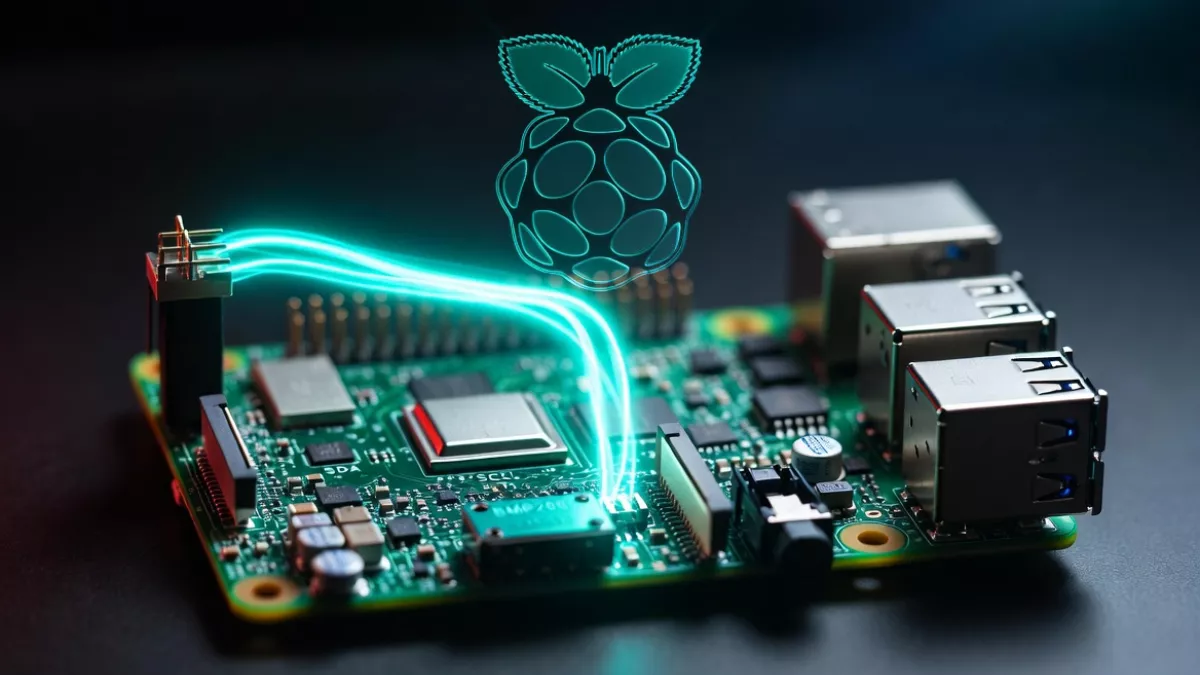
Why Raspberry Pi 5 Is the Right Hardware for This
You could technically run this setup on a Raspberry Pi 4, and many people do. But the Pi 5 makes a noticeable difference for AI-assisted IoT work, and here’s why.
The Raspberry Pi 5 is powered by a Broadcom BCM2712 quad-core Cortex-A76 processor running at 2.4GHz. Compare that to the Pi 4’s Cortex-A72 at 1.8GHz — the Pi 5 is roughly two to three times faster in real-world Python tasks. When you’re running a Python script that’s constantly polling sensors, making API calls to Claude, and controlling GPIO pins simultaneously, that extra headroom matters. You won’t hit the bottleneck where your Pi is too slow to keep up with responses.
The Pi 5 also added PCIe support, which means you can plug in an NVMe SSD. If you’re logging months of sensor data or running a local SQLite database of your home’s IoT states, an NVMe drive makes reads and writes dramatically faster than a microSD card.
And then there’s the Raspberry Pi AI HAT+, announced in late 2024 and updated in January 2026, which adds a Hailo neural processing unit directly to the Pi 5. This lets you run local AI models — like a lightweight vision model for detecting if a door is open — right on the device without touching the internet. You can combine local inference for fast, private decisions with Claude API calls for more complex reasoning. That combination is genuinely powerful.
For memory, the 8GB Pi 5 is the sweet spot for Claude AI IoT projects. You’ll have plenty of room for your Python environment, a few background services, and whatever else you want to run concurrently.
Quick hardware shopping list:
- Raspberry Pi 5 (8GB recommended)
- Official Raspberry Pi 5 active cooling case (or any active cooler — the Pi 5 runs warm under load)
- 27W USB-C power supply (this is not optional; underpowering the Pi 5 causes random crashes)
- 32GB or 64GB microSD card, or an NVMe SSD with a Pi 5 M.2 HAT
- Jumper wires, breadboard, some LEDs, resistors, and whatever sensors you want to connect
- A reliable home internet connection for Claude API calls
Setting Up Raspberry Pi 5 from Scratch
If you already have Raspberry Pi OS running, skip to the next section. If you’re starting fresh, here’s the quick version.
Step 1: Flash Raspberry Pi OS
Download the Raspberry Pi Imager from raspberrypi.com on your laptop or desktop. Insert your microSD card, open the Imager, and choose “Raspberry Pi OS (64-bit)” — the full desktop version if you want a GUI, or the Lite version if you’re comfortable working entirely over SSH.
When the Imager asks about OS customization, click the settings gear icon and fill in:
- Your Wi-Fi network name and password
- A username and password for your Pi
- Enable SSH
This saves you from needing to connect a keyboard and monitor on first boot.
Step 2: First Boot and Update
After flashing, pop the card into your Pi, power it on, and SSH in from your laptop:
ssh pi@raspberrypi.local
Once you’re in, update everything:
sudo apt update && sudo apt upgrade -y
This takes a few minutes. Grab a coffee.
Step 3: Enable GPIO and I2C
Run the Pi’s configuration tool:
sudo raspi-config
Go to Interface Options and enable both I2C and GPIO. If you’re connecting sensors that use SPI (like some temperature sensors), enable that too. Reboot when done.
Step 4: Set Up Python Environment
Raspberry Pi OS 64-bit comes with Python 3 pre-installed, but you should create a virtual environment for your IoT projects to keep dependencies clean:
sudo apt install python3-venv python3-pip -y
mkdir ~/iot-ai-project
cd ~/iot-ai-project
python3 -m venv venv
source venv/bin/activate
You’ll see (venv) appear at the start of your terminal prompt. Every time you come back to this project, activate the virtual environment first with source ~/iot-ai-project/venv/bin/activate.
Getting Your Claude API Key
To use Claude from your Raspberry Pi, you need an Anthropic API key. This is different from a Claude.ai subscription — the API lets you call Claude programmatically from code.
Step 1: Create an Anthropic Account
Head to console.anthropic.com and sign up. You’ll need a phone number for verification.
Step 2: Add API Credits
Once you’re in the console, add some credits to your account. For testing and small IoT projects, $5 to $10 of credits goes a long way. The claude-haiku-3-5 model (Anthropic’s fast, lightweight option) costs about $0.25 per million input tokens, which means you can send thousands of sensor readings and commands before spending even a dollar.
For most beginner IoT projects, you’ll use less than $1 per month in API credits. If you need more intelligent reasoning for complex automation, you can upgrade to claude-sonnet, which costs a bit more but handles multi-step reasoning significantly better.
Step 3: Generate Your API Key
In the Anthropic console, go to API Keys and create a new key. Copy it immediately — you won’t be able to see it again after you close that page.
Step 4: Store It Safely on Your Pi
Never hardcode your API key directly in your Python scripts. Instead, store it as an environment variable on your Pi:
nano ~/.bashrc
Add this line at the bottom:
export ANTHROPIC_API_KEY="your_key_here"
Save and reload:
source ~/.bashrc
Now your Python scripts can access it with os.environ.get("ANTHROPIC_API_KEY") without ever putting the actual key in your code.
Installing Required Libraries on Raspberry Pi 5
With your virtual environment active, install the libraries you’ll need:
pip install anthropic
pip install gpiozero
pip install RPi.GPIO
pip install smbus2
pip install requests
A quick note on GPIO libraries: the Raspberry Pi 5 changed how GPIO works internally compared to older Pi models. The RPi.GPIO library has had some compatibility quirks with Pi 5 in certain OS versions. If you run into issues, gpiozero is a more Pi-5-friendly option that abstracts away the hardware differences, and it’s what we’ll use in most of the examples below. As of Raspberry Pi OS Bookworm (the current release), both libraries work with Pi 5 — just make sure your OS is fully updated.
Verify the Anthropic library installed correctly:
python3 -c "import anthropic; print('Anthropic SDK ready')"
If you see “Anthropic SDK ready”, you’re set.
Your First Claude AI + Raspberry Pi Project: LED Control with Natural Language
Let’s start with something simple but genuinely impressive: controlling an LED through plain English commands, powered by Claude AI.
Hardware Setup
Connect an LED to your Pi:
- Long leg (anode) of LED → 330 ohm resistor → GPIO pin 17 (physical pin 11)
- Short leg (cathode) → Ground (any GND pin)
That’s it. Breadboard, one LED, one resistor, two jumper wires.
The Python Script
Create a new file:
nano ~/iot-ai-project/led_control.py
Paste this in:
import anthropic
import os
from gpiozero import LED
import json

# Set up the LED on GPIO pin 17
led = LED(17)

# Initialize the Anthropic client
client = anthropic.Anthropic(api_key=os.environ.get("ANTHROPIC_API_KEY"))

def ask_claude_for_action(user_command: str) -> dict:
    """Send a user command to Claude and get a structured action back."""

    system_prompt = """You are an IoT controller for a Raspberry Pi.
    When given a user command, respond ONLY with a JSON object like this:
    {"action": "on"} or {"action": "off"} or {"action": "blink"} or {"action": "unknown"}

    Interpret natural language. "Turn on the light", "Switch the LED on", "Light it up" all mean {"action": "on"}.
    "Turn it off", "Switch off", "Kill the light" all mean {"action": "off"}.
    Do not include any other text. Just the JSON object."""

    message = client.messages.create(
        model="claude-haiku-4-5",
        max_tokens=100,
        system=system_prompt,
        messages=[
            {"role": "user", "content": user_command}
        ]
    )

    response_text = message.content[0].text.strip()

    try:
        return json.loads(response_text)
    except json.JSONDecodeError:
        return {"action": "unknown"}

def control_led(action: str):
    """Execute the LED action."""
    if action == "on":
        led.on()
        print("LED is ON")
    elif action == "off":
        led.off()
        print("LED is OFF")
    elif action == "blink":
        led.blink(on_time=0.5, off_time=0.5, n=5)
        print("LED is blinking")
    else:
        print("Sorry, I didn't understand that command.")

def main():
    print("Claude AI LED Controller ready. Type your commands in plain English.")
    print("Type 'quit' to exit.\n")

    while True:
        user_input = input("You: ").strip()

        if user_input.lower() == "quit":
            led.off()
            print("Shutting down.")
            break

        if not user_input:
            continue

        print("Asking Claude...")
        result = ask_claude_for_action(user_input)
        control_led(result.get("action", "unknown"))

if __name__ == "__main__":
    main()
Run it:
python3 led_control.py
Now type things like:
- “Hey can you switch on the light please”
- “The LED should be off now”
- “Make it blink a few times”
Claude interprets each of these correctly and your LED responds. That’s Claude AI controlling physical hardware through natural language — the core concept behind every bigger project in this guide.
Reading Sensor Data and Having Claude Analyze It
Controlling outputs is half the picture. The other half is reading sensors and having Claude make sense of the data. This is where things get genuinely useful for home IoT projects.
DHT22 Temperature and Humidity Sensor Example
The DHT22 is a cheap, reliable sensor for temperature and humidity. Connect it to GPIO pin 4 (physical pin 7) and install the library:
pip install adafruit-circuitpython-dht
sudo apt install libgpiod2 -y
Now let’s write a script that reads the sensor and asks Claude to interpret the readings:
import anthropic
import os
import board
import adafruit_dht
import time

# Initialize sensor on GPIO4
dht_sensor = adafruit_dht.DHT22(board.D4)

client = anthropic.Anthropic(api_key=os.environ.get("ANTHROPIC_API_KEY"))

def read_sensor():
    """Read temperature and humidity, handle occasional read errors."""
    try:
        temperature = dht_sensor.temperature
        humidity = dht_sensor.humidity
        return temperature, humidity
    except RuntimeError as e:
        # DHT sensors occasionally fail reads — just retry
        print(f"Sensor read error (normal): {e}")
        return None, None

def ask_claude_to_analyze(temp, humidity, history: list):
    """Give Claude the sensor readings and ask for actionable advice."""

    history_text = "\n".join(
        [f"  {h['time']}: {h['temp']}°C, {h['humidity']}%" for h in history[-5:]]
    ) if history else "  No previous readings yet."

    prompt = f"""I have a Raspberry Pi IoT sensor in my home. Here are the current readings:

Current temperature: {temp}°C
Current humidity: {humidity}%

Recent reading history (last 5 readings):
{history_text}

Based on these readings:
1. Is the environment comfortable? (ideal range: 20-25°C, 40-60% humidity)
2. Are there any trends I should be concerned about?
3. What simple action should I take if any?

Keep your response under 100 words. Be direct and practical."""

    message = client.messages.create(
        model="claude-haiku-4-5",
        max_tokens=200,
        messages=[{"role": "user", "content": prompt}]
    )

    return message.content[0].text

def main():
    print("AI-Powered Environmental Monitor")
    print("Readings every 30 seconds. Claude analyzes every 5 readings.\n")

    history = []
    reading_count = 0

    while True:
        temp, humidity = read_sensor()

        if temp is not None:
            timestamp = time.strftime("%H:%M:%S")
            print(f"[{timestamp}] Temp: {temp:.1f}°C | Humidity: {humidity:.1f}%")

            history.append({
                "time": timestamp,
                "temp": round(temp, 1),
                "humidity": round(humidity, 1)
            })

            reading_count += 1

            # Ask Claude to analyze every 5 readings
            if reading_count % 5 == 0:
                print("\nClaude's analysis:")
                print("-" * 40)
                analysis = ask_claude_to_analyze(temp, humidity, history)
                print(analysis)
                print("-" * 40 + "\n")

        time.sleep(30)

if __name__ == "__main__":
    main()
This is a real-world useful script. Run it in a server room, a greenhouse, or a baby’s nursery, and you get intelligent commentary on the environment, not just raw numbers. Claude understands context — it knows that 95% humidity in what you’ve described as a storage room is more concerning than 95% humidity in a bathroom.
Building a Smart Home Control System with Claude AI
Now let’s put the pieces together into something you’d actually use every day: a conversational smart home controller running on your Raspberry Pi 5.
The concept is straightforward. You have a dictionary of devices — each mapped to a GPIO pin or an MQTT topic. You talk to a Python script, it sends your command to Claude along with the current state of all your devices, and Claude decides what actions to take and returns them as structured JSON.
The Device Registry
# devices.py — define your home's IoT devices

DEVICES = {
    "living_room_light": {
        "description": "Main ceiling light in the living room",
        "gpio_pin": 17,
        "type": "light",
        "state": "off"
    },
    "bedroom_fan": {
        "description": "Ceiling fan in the master bedroom",
        "gpio_pin": 27,
        "type": "fan",
        "state": "off"
    },
    "garden_pump": {
        "description": "Water pump for the garden irrigation system",
        "gpio_pin": 22,
        "type": "pump",
        "state": "off"
    },
    "porch_light": {
        "description": "Outdoor light at the front door",
        "gpio_pin": 23,
        "type": "light",
        "state": "off"
    }
}
The Main Controller
# smart_home.py

import anthropic
import os
import json
from gpiozero import LED
from devices import DEVICES

client = anthropic.Anthropic(api_key=os.environ.get("ANTHROPIC_API_KEY"))

# Initialize GPIO outputs for each device
gpio_devices = {}
for device_id, device in DEVICES.items():
    gpio_devices[device_id] = LED(device["gpio_pin"])

def get_device_status_text():
    """Generate a plain-text summary of all device states."""
    lines = []
    for device_id, device in DEVICES.items():
        lines.append(f"- {device_id} ({device['description']}): {device['state']}")
    return "\n".join(lines)

def send_to_claude(user_command: str) -> list:
    """Send the user's command and home state to Claude. Get back actions."""

    system_prompt = """You are a smart home controller for a Raspberry Pi.
You receive natural language commands and must respond with a JSON array of actions.

Each action must look like: {"device": "device_id", "action": "on" or "off"}

Only include devices that the user wants to change. If the user says "goodnight" or "I'm going to sleep",
turn off all lights and fans. If they say "good morning", turn on the living room light.

Respond ONLY with a valid JSON array. No other text."""

    status_text = get_device_status_text()

    full_message = f"""Current home status:
{status_text}

User command: {user_command}

What actions should I take?"""

    message = client.messages.create(
        model="claude-sonnet-4-5",
        max_tokens=500,
        system=system_prompt,
        messages=[{"role": "user", "content": full_message}]
    )

    response_text = message.content[0].text.strip()

    try:
        return json.loads(response_text)
    except json.JSONDecodeError:
        print(f"Claude returned unexpected format: {response_text}")
        return []

def apply_actions(actions: list):
    """Execute each action on the real GPIO pins."""
    for action in actions:
        device_id = action.get("device")
        action_type = action.get("action")

        if device_id not in DEVICES:
            print(f"Unknown device: {device_id}")
            continue

        if action_type == "on":
            gpio_devices[device_id].on()
            DEVICES[device_id]["state"] = "on"
            print(f"[ON]  {DEVICES[device_id]['description']}")
        elif action_type == "off":
            gpio_devices[device_id].off()
            DEVICES[device_id]["state"] = "off"
            print(f"[OFF] {DEVICES[device_id]['description']}")

def main():
    print("Claude AI Smart Home Controller")
    print("Your home is ready. Tell me what you want.")
    print("Examples: 'Turn off everything', 'I'm going to bed', 'Turn on the living room'\n")

    while True:
        user_input = input("You: ").strip()

        if user_input.lower() in ("quit", "exit", "bye"):
            print("Turning everything off and shutting down.")
            for gpio_device in gpio_devices.values():
                gpio_device.off()
            break

        if not user_input:
            continue

        actions = send_to_claude(user_input)

        if actions:
            apply_actions(actions)
        else:
            print("No actions taken. Try rephrasing your command.")

if __name__ == "__main__":
    main()
Now you can say things like:
- “I’m going to sleep” — Claude turns off all lights and fans
- “Someone’s at the door” — Claude turns on the porch light
- “Hot in here” — Claude turns on the bedroom fan
- “Movie time” — Claude turns off the living room light (great for dimming before a movie)
The key thing here is that Claude understands intent, not just exact keywords. You don’t have to say the magic words — you just say what you mean.
Adding MQTT for Multi-Device IoT Communication
So far, we’ve been controlling devices directly via GPIO. But in a real smart home, you’ll have sensors and controllers spread across multiple Raspberry Pis, ESP32 microcontrollers, and smart plugs. MQTT is the standard messaging protocol that ties all of these together.
MQTT works like a notification system. Devices “publish” messages to topics, and other devices “subscribe” to those topics to receive them. Your Raspberry Pi 5 running Claude acts as the brain that decides what messages to send.
Install Mosquitto (MQTT Broker) on Your Pi
sudo apt install mosquitto mosquitto-clients -y
sudo systemctl enable mosquitto
sudo systemctl start mosquitto
Install the Python MQTT library:
pip install paho-mqtt
AI-Powered MQTT Controller
import anthropic
import os
import json
import paho.mqtt.client as mqtt
import threading
import time

BROKER_HOST = "localhost"
BROKER_PORT = 1883

client = anthropic.Anthropic(api_key=os.environ.get("ANTHROPIC_API_KEY"))

# Tracks the latest sensor readings received via MQTT
sensor_readings = {}

def on_message(client, userdata, message):
    """Handle incoming MQTT sensor messages."""
    topic = message.topic
    payload = message.payload.decode()

    print(f"Sensor update — {topic}: {payload}")

    try:
        data = json.loads(payload)
        sensor_readings[topic] = data

        # Trigger Claude analysis when critical readings come in
        if topic == "home/sensors/temperature" and float(data.get("value", 0)) > 30:
            print(f"High temperature detected! Asking Claude what to do...")
            analyze_and_act(topic, data)
    except Exception as e:
        print(f"Error processing message: {e}")

def analyze_and_act(trigger_topic: str, trigger_data: dict):
    """Ask Claude to analyze the current sensor state and decide on actions."""

    sensors_summary = json.dumps(sensor_readings, indent=2)

    prompt = f"""I'm monitoring IoT sensors in my home. A sensor just triggered.

Trigger: {trigger_topic} = {json.dumps(trigger_data)}

All current sensor readings:
{sensors_summary}

Based on this, what MQTT commands should I publish to control my devices?

Respond with a JSON array of commands like:
[{{"topic": "home/devices/fan", "payload": "on"}}]

Available device topics:
- home/devices/fan (values: "on", "off", "speed:low", "speed:high")
- home/devices/ac (values: "on", "off", "temp:24")
- home/devices/alert (values: "warning", "critical", "clear")

Only send commands that are necessary. If it's just slightly warm, just turn on the fan.
If it's dangerously hot (above 35°C), also trigger the alert."""

    message = client.messages.create(
        model="claude-sonnet-4-5",
        max_tokens=300,
        messages=[{"role": "user", "content": prompt}]
    )

    response = message.content[0].text.strip()

    try:
        commands = json.loads(response)
        for cmd in commands:
            mqtt_client.publish(cmd["topic"], cmd["payload"])
            print(f"Published: {cmd['topic']} = {cmd['payload']}")
    except Exception as e:
        print(f"Error parsing Claude's response: {e}\nResponse was: {response}")

# Set up MQTT client
mqtt_client = mqtt.Client()
mqtt_client.on_message = on_message
mqtt_client.connect(BROKER_HOST, BROKER_PORT, 60)
mqtt_client.subscribe("home/sensors/#")
mqtt_client.loop_start()

print("AI MQTT Controller running. Monitoring all home/sensors/# topics.")
print("Press Ctrl+C to stop.\n")

try:
    while True:
        time.sleep(1)
except KeyboardInterrupt:
    print("Shutting down.")
    mqtt_client.loop_stop()
This setup is the foundation of a properly scalable smart home. Your ESP32 sensors around the house publish temperature, humidity, motion, and door state data. Your Raspberry Pi 5 receives all of it, runs it through Claude when something interesting happens, and publishes commands back to control your devices.
Building a Claude AI Voice Assistant on Raspberry Pi 5
Here’s where things get really fun. Instead of typing commands, you speak them. Your Pi listens, transcribes what you said, sends it to Claude, and reads back the response. This is the classic “AI assistant” setup — but running on your own hardware, connected to your own IoT devices.
Install Speech Libraries
pip install SpeechRecognition
pip install pyttsx3
sudo apt install python3-pyaudio portaudio19-dev flac -y
pip install pyaudio
You’ll also need a USB microphone or a USB sound card with a microphone input. The Pi 5 doesn’t have a 3.5mm microphone jack.
Voice Controller Script
import anthropic
import os
import speech_recognition as sr
import pyttsx3
import json
from gpiozero import LED

client = anthropic.Anthropic(api_key=os.environ.get("ANTHROPIC_API_KEY"))

# Set up text-to-speech
tts_engine = pyttsx3.init()
tts_engine.setProperty("rate", 160)

# Set up speech recognizer
recognizer = sr.Recognizer()
microphone = sr.Microphone()

# Device registry (same as before)
DEVICES = {
    "living_room_light": {"gpio": 17, "led": LED(17), "state": "off"},
    "bedroom_fan": {"gpio": 27, "led": LED(27), "state": "off"},
}

conversation_history = []

def speak(text: str):
    """Convert text to speech."""
    print(f"Assistant: {text}")
    tts_engine.say(text)
    tts_engine.runAndWait()

def listen() -> str:
    """Listen for a voice command and return the transcribed text."""
    with microphone as source:
        recognizer.adjust_for_ambient_noise(source, duration=0.5)
        print("Listening...")

        try:
            audio = recognizer.listen(source, timeout=10, phrase_time_limit=8)
            text = recognizer.recognize_google(audio)
            print(f"You said: {text}")
            return text
        except sr.WaitTimeoutError:
            return ""
        except sr.UnknownValueError:
            return ""
        except sr.RequestError as e:
            print(f"Speech recognition error: {e}")
            return ""

def ask_claude(user_text: str) -> str:
    """Send user command to Claude with conversation history."""

    device_states = ", ".join([
        f"{d}: {info['state']}" for d, info in DEVICES.items()
    ])

    system_prompt = f"""You are a voice-controlled smart home assistant running on a Raspberry Pi 5.
Current device states: {device_states}

When the user wants to control a device, respond with a JSON object:
{{"type": "device_control", "actions": [{{"device": "device_name", "action": "on/off"}}], "speech": "what you say back to the user"}}

For general conversation, respond with:
{{"type": "conversation", "speech": "your response"}}

Always include a natural, brief speech response. Keep it under 2 sentences."""

    conversation_history.append({"role": "user", "content": user_text})

    response = client.messages.create(
        model="claude-sonnet-4-5",
        max_tokens=300,
        system=system_prompt,
        messages=conversation_history
    )

    reply_text = response.content[0].text
    conversation_history.append({"role": "assistant", "content": reply_text})

    return reply_text

def process_response(response_text: str):
    """Parse Claude's response and take appropriate action."""
    try:
        data = json.loads(response_text)

        if data["type"] == "device_control":
            for action in data.get("actions", []):
                device = action["device"]
                state = action["action"]

                if device in DEVICES:
                    if state == "on":
                        DEVICES[device]["led"].on()
                    else:
                        DEVICES[device]["led"].off()
                    DEVICES[device]["state"] = state

        speak(data.get("speech", "Done."))

    except json.JSONDecodeError:
        # Claude returned plain text instead of JSON
        speak(response_text[:200])

def main():
    speak("Hello! I'm your AI home assistant. How can I help?")

    while True:
        user_text = listen()

        if not user_text:
            continue

        if "goodbye" in user_text.lower() or "shut down" in user_text.lower():
            speak("Goodbye! Turning everything off.")
            for device in DEVICES.values():
                device["led"].off()
            break

        response = ask_claude(user_text)
        process_response(response)

if __name__ == "__main__":
    main()
This maintains a full conversation history, so Claude can understand context across multiple exchanges. If you say “turn on the light” and then “now turn it off again”, Claude knows what “it” refers to.
Real-World Project Ideas to Build Next
Now that you understand the building blocks, here are ten practical Claude AI Raspberry Pi IoT projects you can build with the patterns we’ve covered. These aren’t hypothetical — people in the maker community have built versions of all of these.
1. AI Plant Watering System Soil moisture sensor + Claude + relay controlling a water pump. Claude reads moisture levels over time and decides not just “is it dry now” but “has it been dry for 3 days, suggesting the soil might have a drainage problem?” That’s the kind of contextual reasoning that pure threshold-based systems can’t do.
2. Smart Server Room Monitor Temperature, humidity, and airflow sensors feeding into Claude. If multiple sensors trend in the wrong direction at the same time, Claude triggers an alert and turns on emergency cooling. Claude can also generate daily summary reports that you receive by email.
3. AI Security Camera Analyst Combine a Raspberry Pi Camera Module 3 with Claude’s vision capabilities. When motion is detected, Claude analyzes the frame and decides: is this a person, an animal, or just a shadow from a passing car? Only actual people trigger your alert.
4. Energy Usage Optimizer Current sensors on your main appliances feeding sensor readings to Claude. Claude tracks usage patterns and suggests when to run high-energy appliances to avoid peak electricity rates, and can even automate the scheduling.
5. Greenhouse Climate Controller Temperature, humidity, soil moisture, light level, and CO2 sensors. Claude manages multiple actuators — fans, grow lights, irrigation, heaters — as a unified system rather than each one acting independently on a single threshold.
6. AI Doorbell System Pi with camera and speaker at your front door. When the doorbell is pressed, it takes a photo, sends it to Claude via the API, and generates a response like “It looks like a delivery driver with a package.” Sends that to your phone.
7. Smart Aquarium Controller Water temperature, pH, and turbidity sensors. Claude monitors fish health indicators and adjusts feeding schedules, lighting cycles, and filtration schedules intelligently.
8. Home Energy Dashboard with AI Insights Aggregate smart meter data, solar panel output, and individual device consumption. Claude generates weekly summaries and specific recommendations in plain English.
9. AI Study Timer and Focus Assistant Ambient light and noise sensors in a home study. Claude adapts your Pomodoro timer based on measured focus metrics and environmental conditions, suggesting when to take breaks.
10. Elderly Care Safety Monitor Motion sensors in key areas (kitchen, bathroom, bedroom). Claude learns the normal daily pattern and sends an alert if there’s an unusual deviation — no activity in the kitchen by 11am when there’s normally a clear routine.
Running Claude AI as a Scheduled Automation Engine
One pattern that doesn’t get talked about enough is using Claude as a scheduled decision-maker, not just a real-time command processor. Instead of only querying Claude when a sensor triggers or a user types something, you can also run Claude on a schedule — think of it as a smart cron job.
Here’s a practical example: every morning at 7am, your Pi sends Claude the overnight sensor data (temperature fluctuations, motion patterns, power usage) and asks it to generate a plain-English daily briefing. Claude reviews the data, identifies anything unusual, and suggests what you might want to adjust for the day.
# scheduled_briefing.py
import anthropic
import os
import json
from datetime import datetime

client = anthropic.Anthropic(api_key=os.environ.get("ANTHROPIC_API_KEY"))

def generate_morning_briefing(overnight_data: dict) -> str:
    """Ask Claude to generate a morning home briefing from overnight sensor data."""

    prompt = f"""You are a smart home assistant generating a morning briefing for the homeowner.

Here's the overnight sensor data from their home:
{json.dumps(overnight_data, indent=2)}

Generate a concise morning briefing (under 150 words) covering:
1. Any unusual readings or events overnight
2. Current home conditions (temperature, humidity)
3. One or two practical suggestions for today based on the data

Write in a friendly, conversational tone. No bullet points — just natural prose."""

    message = client.messages.create(
        model="claude-haiku-4-5",
        max_tokens=400,
        messages=[{"role": "user", "content": prompt}]
    )

    return message.content[0].text

# Example overnight data you'd collect from your sensors
sample_data = {
    "date": datetime.now().strftime("%Y-%m-%d"),
    "bedroom_temp_range": {"min": 19.2, "max": 22.8, "unit": "celsius"},
    "living_room_humidity_avg": 58,
    "motion_events": {"hallway": 3, "kitchen": 0, "bedroom": 12},
    "power_usage_kwh": 1.8,
    "doors_opened": {"front_door": 0, "back_door": 2}
}

briefing = generate_morning_briefing(sample_data)
print(f"Good morning! Here's your home summary:\n\n{briefing}")
You can set this up as a cron job on your Pi to run at 7am daily:
crontab -e
Add this line:
0 7 * * * /home/pi/iot-ai-project/venv/bin/python3 /home/pi/iot-ai-project/scheduled_briefing.py >> /home/pi/briefing.log 2>&1
This pattern works for any kind of scheduled analysis: weekly energy reports, monthly device health checks, or nightly security summaries. You’re treating Claude not just as a real-time assistant but as an intelligent reporter that synthesizes your home’s data into something actually readable and actionable.
The beauty of combining Claude’s language abilities with Raspberry Pi’s sensor data collection is that you can take raw numbers that mean nothing on their own and turn them into insights that actually help you make decisions. “Your bedroom temperature dropped to 19°C at 3am three nights this week — you might want to check your heating schedule” is far more useful than a spreadsheet of temperature readings.
How to Handle API Rate Limits and Costs
When you’re building Raspberry Pi AI projects that run continuously, you need to think about how often you’re calling the Claude API. Here’s a practical approach.
Use claude-haiku for simple decisions, claude-sonnet for complex reasoning. If you just need to parse a command into on/off GPIO signals, Haiku is fast and costs about 10x less than Sonnet. Reserve Sonnet for tasks that genuinely need deeper reasoning, like analyzing a week of sensor data or managing a complex multi-device scenario.
Batch your sensor readings. Don’t call Claude every time you take a reading. Collect readings for 5 minutes, then send Claude a summary. For most home IoT applications, a 5-minute lag is completely acceptable and it reduces your API calls by 10x.
Cache common commands. If your family asks “turn off the living room light” every night at 10pm, you don’t need to hit the Claude API for that — you can recognize the pattern and execute it locally after the first few times.
Use the API only for ambiguous or complex situations. Simple, repetitive commands can be handled by local pattern matching. Only escalate to Claude when the command or situation is genuinely ambiguous or requires real reasoning.
A typical active home IoT setup calling Claude 50 times per day with Haiku costs about $0.10 per month. Even with Sonnet and more aggressive polling, you’re usually under $5 per month.
Troubleshooting Common Issues
“ModuleNotFoundError: No module named ‘anthropic'” Make sure your virtual environment is activated: source ~/iot-ai-project/venv/bin/activate. The library needs to be installed in the same environment where you’re running the script.
“AuthenticationError: Invalid API key” Double-check that your environment variable is set correctly with echo $ANTHROPIC_API_KEY. If it’s empty, you need to run source ~/.bashrc again or add the export command to your current session.
GPIO permission denied Run sudo usermod -a -G gpio $USER and then log out and back in. Your user account needs to be in the GPIO group to access the pins without sudo.
Claude response is not valid JSON This happens occasionally when Claude adds extra explanation text around the JSON. Add a more explicit instruction in your system prompt: “Your entire response must be valid JSON. Do not include any text before or after the JSON object.” You can also add a regex to extract the JSON from the response as a fallback.
DHT22 sensor reads fail constantly The DHT22 requires a 4.7k or 10k ohm pull-up resistor between the data pin and 3.3V. Check your wiring. Also, consecutive reads too quickly will fail — add a time.sleep(2) between readings.
API calls are slow (3-5 seconds) This is usually a network issue, not an API issue. Check your Pi’s Wi-Fi signal strength with iwconfig. A weak signal adds latency. If you can use ethernet for the Pi, do it — it makes a noticeable difference for API-heavy projects.
gpiozero device already in use error This happens if you run the script twice without properly closing the first instance. Find and kill the previous process: pkill -f your_script_name.py
Making Your Project Run Automatically on Boot
Once your project is working, you’ll want it to start automatically when the Pi powers on. Use systemd for this:
sudo nano /etc/systemd/system/smart-home.service
Paste this (edit the paths to match yours):
[Unit]
Description=Claude AI Smart Home Controller
After=network.target

[Service]
Type=simple
User=pi
WorkingDirectory=/home/pi/iot-ai-project
Environment="ANTHROPIC_API_KEY=your_key_here"
ExecStart=/home/pi/iot-ai-project/venv/bin/python3 /home/pi/iot-ai-project/smart_home.py
Restart=on-failure
RestartSec=5

[Install]
WantedBy=multi-user.target
Enable and start it:
sudo systemctl enable smart-home
sudo systemctl start smart-home
Check if it’s running:
sudo systemctl status smart-home
Now your AI-powered IoT controller starts automatically whenever the Pi boots, even after a power cut.
Cost Breakdown: Building This Setup from Scratch
Here’s a realistic budget for building a Claude AI Raspberry Pi IoT setup:
Hardware (one-time cost):
- Raspberry Pi 5 8GB: $80
- Official active cooler case: $10
- 27W USB-C power supply: $12
- 64GB microSD card (quality brand like SanDisk): $10
- Breadboard and jumper wire starter kit: $8
- DHT22 temperature/humidity sensor: $4
- Assorted LEDs, resistors, and small components: $5
- USB microphone (for voice control): $12
- Total hardware: approximately $141
Ongoing costs:
- Raspberry Pi electricity: under $2/month
- Anthropic API credits: $1-5/month depending on usage frequency
- Total ongoing: $3-7/month
Compare this to a commercial smart home hub subscription service that charges $10-20/month with far less flexibility. You’re building something more capable for less money, and you own the entire system.
Security Considerations for IoT AI Projects
Running an AI-controlled IoT system in your home means thinking about a few security basics.
Keep your API key off the internet. Your .bashrc environment variable is fine for a personal Pi that nobody else SSH’s into. If you’re sharing the Pi with others, look into using a secrets manager or at minimum file permissions to protect the key.
Don’t expose your MQTT broker to the internet without authentication and TLS encryption. If you need remote access to your home IoT system, use a VPN like Tailscale — it’s free for personal use and works beautifully with Raspberry Pi. It lets you access your home network securely from anywhere without exposing any ports.
Validate Claude’s output before executing it. Always check that the action Claude returns is in your allowed list of commands before executing it. Never eval() or exec() anything Claude returns. Parse structured JSON and only call your own functions with the extracted values.
Rate limit your command endpoint. If you’re building a voice or web interface, add simple rate limiting so one person (or automated attack) can’t spam API calls and run up your bill.
Frequently Asked Questions
Can I use Claude AI on Raspberry Pi without internet? Not for the Claude API itself — it requires internet access to send requests to Anthropic’s servers. However, you can combine Claude API for complex reasoning with local open-source models (via Ollama or llama.cpp) for fast, offline decisions. The Raspberry Pi AI HAT+ makes local inference more practical on the Pi 5.
Which Claude model should I use for IoT projects? Start with claude-haiku-4-5 for most IoT tasks — it’s fast (under 1 second for short responses), cheap, and handles simple command parsing and sensor analysis very well. Upgrade to claude-sonnet-4-5 when you need multi-step reasoning, like managing complex automation rules or analyzing weeks of historical data.
Do I need a Claude Pro subscription or just API credits? For running scripts from your Raspberry Pi, you need API credits (pay-as-you-go from console.anthropic.com), not a Claude Pro subscription. Pro is for the chat.claude.ai interface. The API is separate and billed per token.
Can the Raspberry Pi 5 run a local LLM without the cloud? Yes, with limitations. Using Ollama and a quantized model like Llama 3.2 3B, a Pi 5 8GB can run a small local model at about 3-5 tokens per second. It’s usable for simple commands but significantly slower and less capable than Claude via the API. Good for privacy-sensitive tasks where you don’t want data leaving your home.
Is this project safe for people who are new to electronics? Yes, for the GPIO examples in this guide. Working with 3.3V GPIO signals is very low risk — the worst that can happen is a blown LED if you skip the resistor. Just never connect GPIO pins directly to mains voltage (household electricity) — always use relay modules designed for that purpose, and understand what you’re doing before controlling high-voltage devices.
What happens if the internet goes out? Your Claude API calls will fail, and you’ll need graceful error handling in your code (which the examples above include). A good practice is to have simple fallback behavior — like executing the last known command or defaulting all devices to a safe state — when the API is unreachable.
Where to Go From Here
You now have everything you need to start building real Claude AI IoT projects on Raspberry Pi 5. Here’s a suggested learning path:
Start with the LED control project. Get the API working and see Claude respond to natural language commands in your own terminal. That first “wow this actually works” moment is important.
Then add the DHT22 sensor and see Claude analyze environmental data. This teaches you the pattern of sending sensor context to Claude and getting intelligent responses back.
After that, build the smart home controller with your actual devices. Start with two or three devices and expand from there as you get comfortable with the pattern.
Once you’re comfortable with the basics, explore MQTT to connect ESP32 microcontrollers around your home into the same system. That’s when a single Raspberry Pi 5 becomes the AI brain of a genuinely smart home network.
And if you want to go deeper into the AI side, look into Anthropic’s function calling (tool use) feature in the Claude API. It lets you define Python functions as “tools” that Claude can choose to call when it needs specific information — like checking the current weather before deciding whether to close your garden vents. It’s more powerful than prompt-based action parsing and worth learning once you’ve got the basics down.
The combination of Claude AI and Raspberry Pi 5 is one of the most practical and genuinely useful things you can build right now. You’re not just running demos — you’re building infrastructure for your home that would have cost thousands of dollars and required professional installation just five years ago.
Build something real. Start small. It actually works.
Summary
In this guide, we covered:
- What Claude AI is and why it’s well-suited for IoT projects on Raspberry Pi
- Why the Raspberry Pi 5 is the right hardware choice for AI-assisted IoT work
- Step-by-step setup of Raspberry Pi OS and Python environment
- Getting and securely storing your Anthropic API key
- A beginner LED control project using natural language commands
- Reading and analyzing sensor data with Claude AI
- Building a multi-device smart home controller
- Adding MQTT for scalable multi-device IoT networks
- Voice control with speech recognition and text-to-speech
- Ten real-world project ideas to build next
- Cost management and API usage optimization
- Troubleshooting the most common issues
- Making your project run automatically on boot
- Security best practices for home IoT systems
Have questions about a specific part of this setup? Drop a comment below I read and respond to everything.
Further Reading and Resources
If you want to go deeper after finishing this guide, here are some areas worth exploring:
Anthropic’s official documentation at docs.anthropic.com covers the full Claude API reference, including tool use (function calling), streaming responses, vision capabilities, and the latest model options. The tool use documentation is especially relevant for IoT work once you’re past the basics.
The Raspberry Pi Forums at forums.raspberrypi.com have an active community of people building AI-assisted Pi projects. Search for “Claude” or “LLM” and you’ll find dozens of real project threads with people sharing code, troubleshooting together, and pushing the limits of what the hardware can do.
The MQTT documentation at mqtt.org and the Eclipse Mosquitto documentation cover everything you need to scale from a single Pi to a full multi-device home network. Understanding MQTT quality of service levels (QoS 0, 1, and 2) becomes important once you’re relying on sensor messages for safety-critical decisions.
Ollama at ollama.ai is the easiest way to run local open-source language models on your Raspberry Pi 5 when you don’t want to send data to the cloud. Models like Llama 3.2 3B and Phi-3 Mini run reasonably well on the Pi 5 8GB. You won’t match Claude’s reasoning quality, but for simple command parsing in privacy-sensitive environments, local models are a solid option.
The gpiozero documentation is far more readable than the RPi.GPIO docs and covers all the patterns you’ll need for sensors, motors, buttons, LEDs, and more. It’s the cleanest Python GPIO library available for Raspberry Pi work.
Building IoT systems with AI isn’t the future anymore. It’s happening right now in garages and home offices, on hardware that costs less than a decent dinner out. The tools are mature, the documentation is good, and the community is large and helpful. You have everything you need to get started today.
If that domain interests you, this hands-on guide on how to write a network driver in Linux is one of the clearest beginner walkthroughs available. It explains exactly how the Linux networking stack works under the hood, which directly helps you reason about Python’s socket programming, asyncio event loops, and network I/O behavior.
Mr. Raj Kumar is a highly experienced Technical Content Engineer with 7 years of dedicated expertise in the intricate field of embedded systems. At Embedded Prep, Raj is at the forefront of creating and curating high-quality technical content designed to educate and empower aspiring and seasoned professionals in the embedded domain.
Throughout his career, Raj has honed a unique skill set that bridges the gap between deep technical understanding and effective communication. His work encompasses a wide range of educational materials, including in-depth tutorials, practical guides, course modules, and insightful articles focused on embedded hardware and software solutions. He possesses a strong grasp of embedded architectures, microcontrollers, real-time operating systems (RTOS), firmware development, and various communication protocols relevant to the embedded industry.
Raj is adept at collaborating closely with subject matter experts, engineers, and instructional designers to ensure the accuracy, completeness, and pedagogical effectiveness of the content. His meticulous attention to detail and commitment to clarity are instrumental in transforming complex embedded concepts into easily digestible and engaging learning experiences. At Embedded Prep, he plays a crucial role in building a robust knowledge base that helps learners master the complexities of embedded technologies.