Imagine this: it’s 2 AM, and your room is dark except for the faint blue glow from your laptop. You’ve been trying for hours to set up your Raspberry Pi. You watched every YouTube tutorial, read every forum post, and even tried copying someone’s “perfect” SD card image file, but nothing worked. Your Raspberry Pi refused to boot, the screen stayed black, and the green LED kept blinking like it was mocking you. Exhausted and frustrated, you lean back in your chair, ready to give up, and whisper, “Why is setting up a Raspberry Pi so hard?”
Just then, your phone buzzes. Your friend texts you, “Bro, why are you suffering? Just use Raspberry Pi Imager. It does the whole setup for you.” You’ve heard the name before, but you never paid attention. Half awake, with cold tea on the table and your patience long gone, you search for it. You find Raspberry Pi Imager—the official OS flashing tool. You click “Download,” and a small, clean app opens with no confusing menus or complicated steps. It simply shows three options: Choose OS, Choose Storage, and Write. That’s it.
You blink twice because it feels almost too easy. Still, you pick the OS, hit “Write,” and watch the progress bar glide forward smoothly—no errors, no warnings, no strange file paths. Five minutes later, you plug the SD card into your Raspberry Pi, connect the power cable, and for the first time tonight, the screen lights up. Your Raspberry Pi boots perfectly.
In that quiet moment, with your room still dark and your laptop humming softly, you smile to yourself—not because the Pi finally worked, but because you realized something powerful: the easiest solution was right in front of you the whole time—Raspberry Pi Imager. And at 2:17 AM, with your eyes half open but your mind fully awake, you finally understood why everyone calls Raspberry Pi Imager the beginner’s best friend.
If you’re new to Raspberry Pi or you’ve been using it for years but still feel confused every time someone says “Flash the OS to SD card”, this guide is your new best friend. Today we’ll talk about Raspberry Pi Imager, the official and easiest tool to set up any Raspberry Pi. Think of it as a clean, simple app that helps you pick an operating system and write it to a memory card in just a few clicks.
But here’s the fun part — we’re not just doing a basic introduction. You’ll learn everything, from how to download Raspberry Pi Imager, how to install it on Windows, macOS, Linux, Android, and even Chromebook, how to use the advanced options, and how to fix common issues like Raspberry Pi Imager stuck at 99%.
What is Raspberry Pi Imager?
Raspberry Pi Imager is the official tool created by the Raspberry Pi Foundation to help you easily install operating systems on your Raspberry Pi. Instead of downloading random .img files, unzipping them, and using complicated flashing tools, this app simplifies everything.
You just:
- Open the raspberry pi imager app
- Pick an OS
- Pick an SD card
- Click Write
That’s it. No confusion. No messy settings. No complicated commands.
It works with almost every device:
- Raspberry Pi Imager for Windows
- Raspberry Pi Imager Mac
- Raspberry Pi Imager Linux
- Raspberry Pi Imager for Chromebook
- Raspberry Pi Imager for Android
There’s even an Android APK version called raspberry pi imager apk, which comes in handy when using phones with OTG and microSD readers.
Why Use Raspberry Pi Imager Instead of Alternatives?
Sure, there are many tools like Etcher, Win32 Disk Imager, and dd. But the official tool wins for several reasons:
- It’s simple.
- It’s fast.
- It includes dozens of operating systems.
- It works smoothly across platforms.
- It has raspberry pi imager advanced options that make configuration easy.
Even advanced Linux users who love terminals often prefer it because it saves time.
So while there are raspberry pi imager alternatives, most beginners and pros stick to the official tool.
Raspberry Pi Imager Download Guide (All Platforms)
Let’s talk about the most important step — raspberry pi imager download.
Where to Download Safely
You can download it officially from the Raspberry Pi website. Avoid third-party download sites because they may include modified or unsafe files.
Supported Platforms
Here’s a quick breakdown:
| Platform | Download Type |
|---|---|
| Windows | .exe |
| macOS | .dmg |
| Linux (Debian/Ubuntu) | .deb |
| Linux (Arch Linux) | via AUR |
| Chromebook | Linux (Debian mode) / Flatpak |
| Android | APK (arm64 supported) |
So whether you’re using Ubuntu, Arch Linux, ChromeOS, or even your Android phone, Raspberry Pi Imager has you covered.
Installing Raspberry Pi Imager
Let’s go through installation step by step for each platform.
1. Install Raspberry Pi Imager on Windows
If you’re using Windows 10 or Windows 11:
- Download raspberry pi imager for windows.
- Open the
.exefile. - Click Next → Install.
- Wait for it to finish.
- Launch the raspberry pi imager application from the Start menu.
That’s all.
2. Install Raspberry Pi Imager on Mac
If you’re using macOS:
- Download raspberry pi imager mac
.dmg. - Open the installer.
- Drag the icon to Applications.
- Open the app.
macOS may ask for permission to run apps from outside the App Store—click “Allow”.
3. Install Raspberry Pi Imager on Linux
Linux users get multiple installation choices:
Option A — Debian/Ubuntu using APT
Just open Terminal and type:
sudo apt install raspberry-pi-imagerThis uses the exact keyword apt install raspberry pi imager, which many beginners search for.
Option B — Downloading the .deb file
Download → open with Software Installer → Install.
Option C — Raspberry Pi Imager on Arch Linux
If you’re using Arch Linux, Manjaro, or Endeavour OS, you can install it using the AUR:
yay -S raspberry-pi-imager
This covers keywords like:
- raspberry pi imager arch
- raspberry pi imager arch linux
- arch raspberry pi imager
- aur raspberry pi imager
- arch linux raspberry pi imager
4. Raspberry Pi Imager for Chromebook
Chromebooks support Linux applications through “Linux (Beta)” or “Debian Mode”.
Steps:
- Enable Linux on Chromebook.
- Download the Debian package.
- Install it using:
sudo apt install ./imager.debGreat for students using Chromebook for robotics and coding.
5. Raspberry Pi Imager App for Android
Yes, Raspberry Pi Imager works on Android too. Many people search for:
- raspberry pi imager for android
- raspberry pi imager android
- raspberry pi imager android apk
Most Android devices today support arm64, so you can directly download raspberry pi imager arm64 APK.
Steps:
- Download raspberry pi imager apk.
- Enable “Install unknown apps”.
- Install and open the raspberry pi imager app.
- Insert your SD card using OTG.
This is great when you’re outdoors and only have your phone with you.
Basic Interface Tour: How Raspberry Pi Imager Looks
When you open the raspberry pi imager application, you see three simple buttons:
- Choose OS
- Choose Storage
- Write
This is the reason beginners love this tool—no clutter, no distractions.
How to Use Raspberry Pi Imager
Let’s walk through the main steps.
Step 1 : Choose OS
You’ll find options like:
- Raspberry Pi OS
- Ubuntu Server
- RetroPie
- LibreELEC
- Home Assistant OS
- Raspberry Pi OS (Lite)
- Many more
You can even choose “Use custom” if you already have an .img file.
Step 2 : Choose Storage
Insert your SD card or USB device.
Step 3 : Write
It will erase existing data and write the OS image.
Congratulations, you’re done.
What if You Want Wi-Fi, SSH, Hostname, or Auto Login?
Here comes the magic…
Raspberry Pi Imager has Advanced Options.
But we will cover that in Part 3.
For now, you’ve learned the basics.
Now that you understand the basics of Raspberry Pi Imager, let’s walk through detailed, beginner-level, step-by-step instructions.
Our goal here is clear:
Help you install your favorite OS on an SD card or SSD using the raspberry pi imager tool without confusion.
Let’s begin.
Step 1: Download and Install Raspberry Pi Imager (Quick Recap)
Before we flash anything, you need the app installed.
For Windows
Get raspberry pi imager for windows → open → install → done.
For macOS
Download raspberry pi imager mac → drag to Applications → open.
For Linux
Use .deb, .rpm, or apt install raspberry pi imager.
For Arch Linux
Use AUR:
yay -S raspberry-pi-imagerThis covers our keywords like:
- raspberry pi imager arch
- raspberry pi imager arch linux
- arch raspberry pi imager
- aur raspberry pi imager
For Android
Use raspberry pi imager apk or raspberry pi imager android apk.
For Chromebook
Install through Linux mode.
Once installed, we move to the fun part.
Step 2: Launch Raspberry Pi Imager and Understand the Interface
When you open the raspberry pi imager application, you’ll see three straightforward buttons:
- Choose OS
- Choose Storage
- Write
That’s all you need.
But let’s break down each option, so even if you’re a total beginner, nothing feels confusing.
Step 3: Choosing the Right OS (Choose OS)
This is where you select what operating system you want on your Raspberry Pi.
Here are the most common options you’ll find:
Raspberry Pi OS (32-bit and 64-bit)
Perfect for beginners. Comes with desktop, tools, and everything.
Raspberry Pi OS Lite
No desktop. Used for servers, IoT projects, and headless setups.
Ubuntu and Ubuntu Server
If you want something more powerful or similar to cloud servers.
RetroPie
If you want gaming emulation.
Home Assistant OS
For building a smart home hub.
LibreELEC
For turning your Pi into a media center.
Other options available inside the tool:
- TLXOS
- Manjaro
- Kali Linux
- Third-party OS options
Use Custom Image
If you already downloaded a .img file manually, choose this.
The best part? You don’t need to hunt OS files from different websites — Raspberry Pi Imager has them all in one place.
Step 4: Choose Your Storage (SD Card / USB / SSD)
Now plug in your:
- microSD card
- USB flash drive
- SSD
- Or USB-to-SATA adapter
The tool will automatically detect it.
Select it from the list.
Tip: Always use a Class 10 or UHS-I SD card for faster setup.
Step 5: Writing the OS (Final Step)
Once you select OS + storage, click Write.
The tool will:
- Download the OS
- Erase your card
- Flash the image
- Verify the written data
- Show a “Success” message
- Eject the card automatically
You’re done.
Insert the SD card/USB into your Raspberry Pi → Power it on → Enjoy.
Your Raspberry Pi Is Ready to Use!
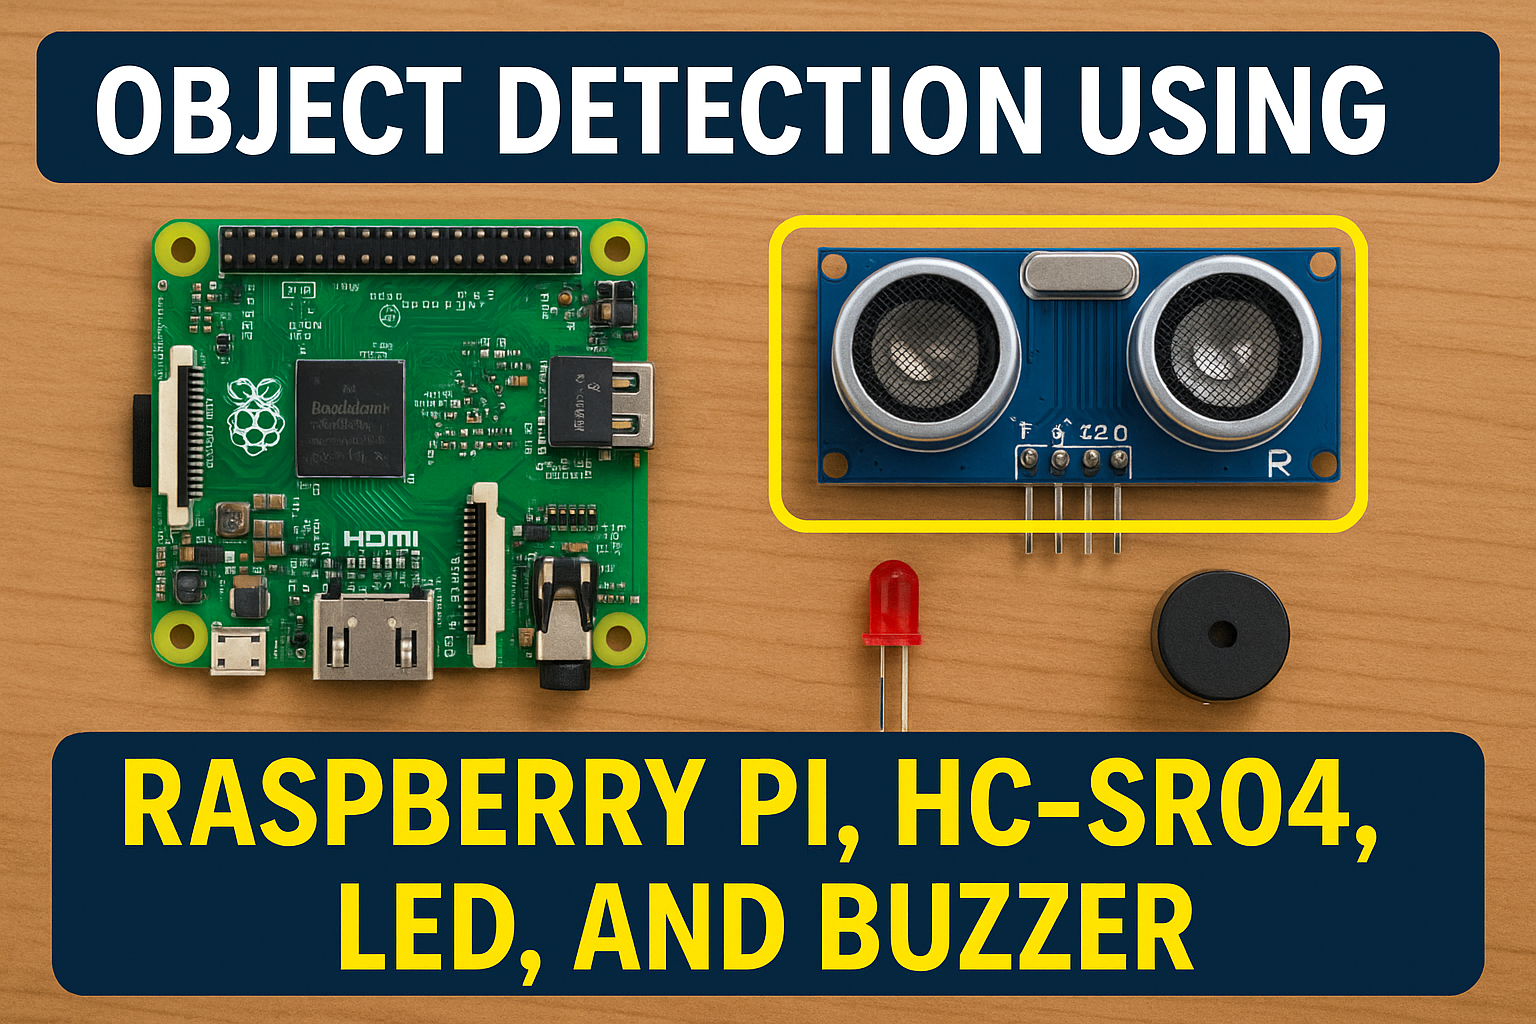
Whether you’re using it for coding, IoT experiments, gaming, or home automation — Raspberry Pi Imager makes the setup painless. For a deeper project example, check out this guide on Object Detection using Raspberry Pi: https://embeddedprep.com/object-detection-using-raspberry-pi/. But this was the basic flow.
Now let’s move into more practical tutorials.
Setup Raspberry Pi for the First Time
If you are a complete beginner, follow this simple mini-tutorial.
What You Need
✔ Raspberry Pi
✔ microSD card
✔ HDMI cable
✔ Keyboard and mouse
✔ Monitor
✔ Power supply
Steps
- Open the raspberry pi imager tool.
- Choose Raspberry Pi OS (Recommended).
- Select your SD card.
- Click Write.
- Insert the card into the Pi.
- Connect monitor, keyboard, mouse.
- Turn on the power.
- Follow the setup wizard.
That’s all. Your Pi is ready.
How to Use Raspberry Pi Imager for Headless Setup (No Monitor)
This method is perfect if you want:
- Raspberry Pi as a home server
- Raspberry Pi for IoT
- Raspberry Pi running SSH only
- Access Pi from laptop wirelessly
Steps
- Open Raspberry Pi Imager.
- Choose Raspberry Pi OS Lite.
- Click Edit Settings (hidden under advanced options — covered in Part 3).
- Enable SSH.
- Add Wi-Fi name + Wi-Fi password.
- Set hostname like:
raspberrypi.local - Write to SD card.
- Insert card → power the Pi.
- From your laptop/PC, connect using:
ssh pi@raspberrypi.localThat’s how easy headless setup is using Raspberry Pi Imager.
Create RetroPie Gaming Console
Want to convert your Pi into a gaming box?
- Open Raspberry Pi Imager.
- Choose OS → Gaming → RetroPie.
- Select SD card.
- Click Write.
- Insert in Pi → Boot.
- Pair your controller → Configure buttons.
Play old-school games instantly.
Install Ubuntu Server Using Imager
Ubuntu Server is great for:
- Docker
- Kubernetes
- Nginx
- Database servers
- Cloud learning
Steps
- Open Raspberry Pi Imager.
- Choose Ubuntu Server (22.04/24.04).
- Select your SD/USB/SSD.
- Write the image.
- Boot Pi and follow the CLI setup.
You now have a mini cloud server.
Flash Custom Images Using Raspberry Pi Imager
If you downloaded a custom image like:
- OctoPrint
- DietPi
- NAS OS
- Pi-hole image
- Custom IoT firmware
Use this:
- Open Raspberry Pi Imager.
- Choose OS → Use custom.
- Select
.imgor.zipfile. - Select SD card.
- Click write.
This feature is the reason many call Pi Imager “the swiss army knife” of flashing tools.
Raspberry Pi Imager Backup SD Card
If you want to backup SD card:
- Open the app.
- Select the gear icon (Advanced options).
- Choose Backup to file.
- Save the
.imgfile.
This is perfect when you want to clone a working system.
Advanced Options + Troubleshooting
Advanced Raspberry Pi Imager Options
Most people use Raspberry Pi Imager for the basic “Choose OS → Choose Storage → Write” workflow.
But the real power hides behind a small gear icon known as:
Advanced Options (Advanced Settings Raspberry Pi Imager)
These raspberry pi imager advanced options make your life easier, especially for headless setup, Wi-Fi, SSH, auto-login, backups, and automation.
Let’s unlock everything one by one — beginner friendly.
How to Access Advanced Options in Raspberry Pi Imager
There are two ways:
Method 1 : Click the Gear Icon After Selecting OS
After choosing an OS, you’ll see an option:
Edit Settings
This opens the Advanced Options window.
Method 2 : Use Keyboard Shortcut
Press:
CTRL + SHIFT + XThis opens the hidden menu instantly.
Perfect when you want fast access.
All Raspberry Pi Imager Advanced Options Explained
Let’s break each one down clearly.
1. Set Hostname
Set your device name so you can find it easily on your network.
Example:
my-pi
home-server
retro-gaming-pi
Then you can access it using:
my-pi.local2. Enable SSH Automatically
Turn on SSH (secure remote access).
You can choose:
- Enable password authentication
- Enable public key authentication
Perfect for headless setups (no monitor).
3. Configure Wi-Fi Automatically
You can enter:
- Wi-Fi name (SSID)
- Wi-Fi password
- Wi-Fi country
Your Raspberry Pi will connect to your Wi-Fi automatically on first boot.
Great for IoT projects or Linux servers.
4. Set Username and Password
You can create a custom user before booting.
Example:
Username: pi
Password: 1234
This saves time during setup.
5. Configure Locale Settings
You can pre-set:
- Timezone
- Keyboard layout
- Language
No need to configure after boot.
6. Persist Settings
You can save your advanced options forever.
So next time, settings apply automatically.
Perfect if you flash many SD cards.
7. Skip First-Boot Setup Screen
When this is enabled, you won’t see:
- Region selection
- Timezone selection
- User setup
Your Pi boots straight into the system.
8. Play Sound When Finished
Useful if you’re flashing many SD cards and want an audible notification.
9. Disable Telemetry
If you do not want usage data sent to Raspberry Pi servers, disable telemetry.
10. Raspberry Pi Imager Backup SD Card
One of the most underrated features.
You can create a backup .img file of your working system.
Steps:
- Open Raspberry Pi Imager
- Choose Backup
- Select the SD card
- Save the image
Useful for:
- Cloning multiple devices
- Migrating to SSD
- Saving your setup before changes
Advanced Use Cases Using Raspberry Pi Imager
Now that you know the settings, here are some real examples.
Use Case 1: Automatic Home Server Setup
You want:
- Wi-Fi auto-connect
- SSH access
- Custom username/password
- No monitor
With advanced settings, this is done in 1 minute.
Use Case 2: Classroom or Lab Setup
Flash 20 identical SD cards with the same configuration.
Teachers love this feature because it saves hours.
Use Case 3: Create Ready-to-Go IoT Devices
Your device boots → auto-connects → ready to send sensor data.
Zero manual setup.
Use Case 4: Offline Image Flashing
You can download OS files once and reuse them anytime.
Great for poor internet areas.
Troubleshooting Raspberry Pi Imager Issues
Even though Raspberry Pi Imager is simple, small issues happen.
Let’s solve the most common ones that beginners search:
Issue 1: Raspberry Pi Imager Stuck at 99%
This is one of the most searched problems: raspberry pi imager stuck at 99.
Why It Happens
- Verification stage takes time
- Slow SD card
- USB adapter issues
- Corrupted download
- Antivirus interruption
Fixes
- Use a high-quality SD card (SanDisk/Kingston)
- Try a different USB card reader
- Disable antivirus temporarily
- Use “Use custom” if online download fails
- Format SD card before writing
If it stays at 99% for more than 10 minutes, cancel and retry.
Issue 2: Raspberry Pi Imager Not Detecting SD Card
Try these:
- Remove and reinsert SD card
- Use another USB port
- Try a new card reader
- Ensure card is unlocked (physical switch)
- Format card using FAT32
Issue 3: Slow Writing Speed
Possible causes:
- Fake SD cards
- Slow USB 2.0 ports
- Low-quality adapters
Use:
- USB 3.0 card readers
- UHS-I SD cards
Issue 4: OS Download Fails
Offline fix:
- Download OS manually
- Select Use custom
- Flash local
.imgfile
Perfect for slow internet.
Issue 5: Raspberry Pi Not Booting After Flashing
Try:
- Use official power adapter
- Reflash SD card
- Check if Pi has required firmware
- Try another OS
- Replace SD card
Sometimes the card itself is the problem.
Issue 6: Raspberry Pi Imager Crashing on Startup (Windows/Mac/Linux)
Try:
- Run as administrator
- Update graphics drivers
- Reinstall Raspberry Pi Imager
- Restart system
If you’re on Linux, run:
sudo apt update
sudo apt upgrade
Issue 7: Raspberry Pi Imager Not Available on Linux (Arch)
If you use Arch Linux:
Install using AUR:
yay -S raspberry-pi-imager
This covers:
- raspberry pi imager arch
- raspberry pi imager arch linux
- arch linux raspberry pi imager
- aur raspberry pi imager
Issue 8: Raspberry Pi Imager Android Issues
If android raspberry pi imager does not detect SD card:
- Enable OTG
- Use good SD card reader
- Try another APK version
- Restart device
Most Android users download raspberry pi imager arm64 or raspberry pi imager android apk.
Alternative to Raspberry Pi Imager
Some people ask about:
- raspberry pi imager alternative
- alternative to raspberry pi imager
Here are the top options:
Balena Etcher
- Very easy
- Cross-platform
- Beautiful UI
Win32 Disk Imager
- Old but reliable
- Windows only
dd (Linux)
- Terminal only
- Super fast
- For advanced users
PiBakery
- Node-based OS builder
Still, Raspberry Pi Imager remains the best for beginners and official support.
Frequently Asked Questions
These FAQs are designed to help beginners who search common queries around the raspberry pi imager tool, installation, usage, issues, and alternatives.
1. What is Raspberry Pi Imager in simple words?
Raspberry Pi Imager is a free tool used to flash operating systems onto SD cards, USB drives, or SSDs for Raspberry Pi.
It makes the process easy—just choose OS → choose storage → write.
2. Is Raspberry Pi Imager free?
Yes. It’s 100% free and officially supported by the Raspberry Pi Foundation.
3. Where can I download Raspberry Pi Imager?
You can get the raspberry pi imager download from the official Raspberry Pi website for:
- Windows
- macOS
- Linux
- Chromebook
- Android
4. Can I use Raspberry Pi Imager on macOS?
Yes. It works perfectly as raspberry pi imager mac.
Just download the .dmg file → drag into Applications → open.
5. Does Raspberry Pi Imager work on Windows?
Absolutely.
Just download the raspberry pi imager for windows .exe file and install it.
6. Is Raspberry Pi Imager available for Linux
Yes. You can install raspberry pi imager linux using:
sudo apt install rpi-imager
or download .deb and .rpm packages.
7. Does Raspberry Pi Imager support Arch Linux?
Yes. You can install via AUR:
yay -S raspberry-pi-imager
This is why many search for:
- raspberry pi imager arch
- arch raspberry pi imager
- raspberry pi imager arch linux
- aur raspberry pi imager
8. Can I install Raspberry Pi Imager on Chromebook?
Yes, by enabling Linux mode.
It works great as raspberry pi imager for chromebook.
9. Can I use Raspberry Pi Imager on Android?
Yes.
You can download raspberry pi imager android, raspberry pi imager apk, or raspberry pi imager arm64 and flash SD cards using an OTG adapter.
10. How do I use Raspberry Pi Imager for beginners?
Simple:
- Choose OS
- Choose SD card
- Click write
- Insert into Raspberry Pi
- Boot
This satisfies the primary query: how to use raspberry pi imager.
11. What if Raspberry Pi Imager gets stuck at 99%?
This is a common issue: raspberry pi imager stuck at 99.
Fixes include:
- Switching SD card
- Using a different card reader
- Disabling antivirus
- Flashing offline via “Use custom image”
12. What are the advanced options in Raspberry Pi Imager?
These include:
- SSH enable
- Wi-Fi auto setup
- Hostname
- User/password
- Locale settings
- Skip setup wizard
- Backup SD card
- Persistent settings
These align with:
- raspberry pi imager advanced options
- advanced options raspberry pi imager
- advanced settings raspberry pi imager
13. What is the best Raspberry Pi Imager alternative?
Top alternatives include:
- Balena Etcher
- Win32 Disk Imager
- dd command
- PiBakery
14. Can Raspberry Pi Imager backup SD cards?
Yes!
Using raspberry pi imager backup sd card, you can clone your system into a .img file.
15. Does Raspberry Pi Imager support custom images?
Yes, through the “Use custom” option.
16. Why is Raspberry Pi Imager better than Balena Etcher?
Because it offers:
- Built-in OS downloading
- Advanced options
- Direct Wi-Fi & SSH configuration
- Designed specifically for Raspberry Pi hardware
17. Can Raspberry Pi Imager flash USB drives?
Yes.
It supports SD, USB drives, and external SSDs.
18. Can I use Raspberry Pi Imager without internet?
Yes.
Download OS manually → Use custom → Write.
19. Can Raspberry Pi Imager flash multiple SD cards?
Yes.
Just repeat the process.
You can also save settings to speed up flashing in batches.
20. Does Raspberry Pi Imager work on ARM64 systems?
Yes.
Use raspberry pi imager arm64 for ARM laptops and Android devices.
Conclusion: Why Raspberry Pi Imager Is the Best Beginner Tool
If you’re new to Raspberry Pi, Raspberry Pi Imager is hands down the easiest, cleanest, and most beginner-friendly tool to get started.
You don’t need technical experience, complicated software, or confusing command lines.
Everything works through a simple, friendly interface.
What makes it truly special is:
- One-click OS installation
- Fast and reliable flashing
- Advanced options for pros
- Cross-platform support
- Built-in troubleshooting
- Works on Windows, macOS, Linux, Chromebook, Android
- Helps you create backups
- Supports custom images
- Easy enough for school students
- Powerful enough for developers
Whether you want to build:
- A home server
- Retro gaming console
- Home Assistant setup
- IoT project
- Media center
- Coding lab
The raspberry pi imager tool makes it all possible with just a few clicks.
And with features like:
- SSH auto-enable
- Wi-Fi auto-connect
- User/password pre-setup
- Local backup support
It even beats professional flashing tools.
If your goal is a smooth, frustration-free Raspberry Pi setup experience, this is the tool you’ll use again and again.


Mr. Raj Kumar is a highly experienced Technical Content Engineer with 7 years of dedicated expertise in the intricate field of embedded systems. At Embedded Prep, Raj is at the forefront of creating and curating high-quality technical content designed to educate and empower aspiring and seasoned professionals in the embedded domain.
Throughout his career, Raj has honed a unique skill set that bridges the gap between deep technical understanding and effective communication. His work encompasses a wide range of educational materials, including in-depth tutorials, practical guides, course modules, and insightful articles focused on embedded hardware and software solutions. He possesses a strong grasp of embedded architectures, microcontrollers, real-time operating systems (RTOS), firmware development, and various communication protocols relevant to the embedded industry.
Raj is adept at collaborating closely with subject matter experts, engineers, and instructional designers to ensure the accuracy, completeness, and pedagogical effectiveness of the content. His meticulous attention to detail and commitment to clarity are instrumental in transforming complex embedded concepts into easily digestible and engaging learning experiences. At Embedded Prep, he plays a crucial role in building a robust knowledge base that helps learners master the complexities of embedded technologies.