Learn QNX Sound Architecture (QSA) step by step. Discover how apps, drivers, and sound cards work together to play and record audio in QNX.
QNX Audio : Imagine you’re sitting in your car on a road trip. You connect your phone, open the music app on the car’s infotainment system, and press Play. A few seconds later, your favorite song flows through the speakers, filling the cabin.
But here’s the real question:
How did that sound actually travel from the app you touched on the screen to the physical speakers hidden inside your car doors?
It feels instant and magical, but behind the scenes, a lot is happening. The music file (which is just digital data) has to pass through several layers—software, drivers, and hardware—before it can become sound waves your ears can enjoy.
This invisible “journey of sound” is managed by something called the QNX Sound Architecture (QSA).
And the cool part? QSA is built not just to play music, but to handle all kinds of sounds at the same time—your music, the navigation voice, and even safety alerts—without them clashing with each other.
That’s where QNX Sound Architecture (QSA) comes into the picture. If you’re new to QNX Neutrino RTOS and want to understand how audio works inside it, this guide is for you.
QNX Audio | QSA
The Building Blocks of QNX Audio
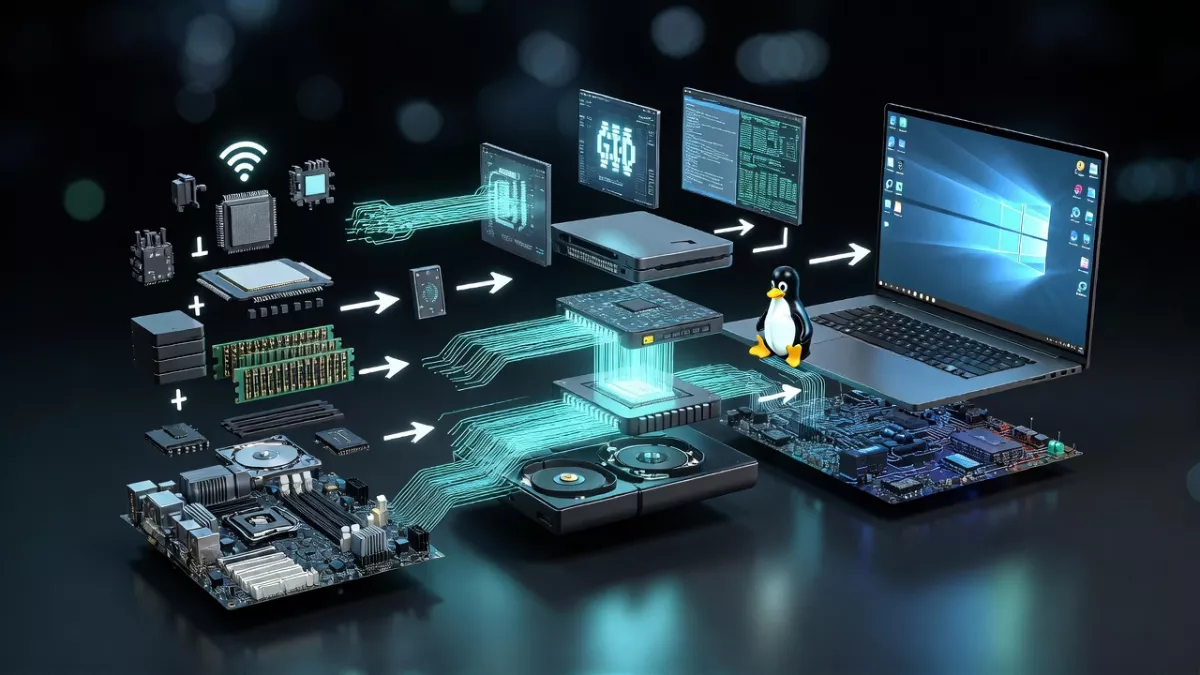
For any system to produce sound, three key ingredients are always required:
- Hardware (Sound Card or Chip)
This is the physical device that generates audio signals. Think of it as the speaker’s “engine.” - Device Driver
The driver is like a translator. It knows how to talk to the hardware and how to make it do things like play, pause, or record audio. - Application Programming Interface (API)
The API is the bridge between your application and the driver. It gives developers a clean, standard way to request audio services (e.g., “play this sound file” or “record from the microphone”).
When these three work together, your app can produce clear, managed sound output.
What is QNX Sound Architecture (QSA)?
QNX Sound Architecture, or QSA, is the audio framework inside QNX Neutrino RTOS.
- You can think of QSA as the “audio brain” of QNX.
- It makes sure applications, drivers, and hardware work smoothly together.
- It is inspired by ALSA (Advanced Linux Sound Architecture) but has evolved in its own direction, meaning QSA is not directly compatible with ALSA anymore.
Why QSA is Special
Unlike simple sound systems, QSA is designed for embedded and real-time environments like cars, medical devices, and industrial systems. Here’s what makes it powerful:
- Audio Concurrency Management
Multiple apps can play sound at the same time. QSA decides which sound has priority. For example, your navigation voice prompt can temporarily lower (duck) your music volume so you don’t miss directions. - Preemption
A critical system sound (like a seatbelt warning) can interrupt background audio immediately. - Volume Ramping
Instead of sound starting or stopping abruptly, QSA can smoothly fade the audio in and out, creating a better user experience.
The Role of APIs in QSA
To a developer, the API is where the magic happens. Instead of dealing with complex hardware registers, you use simple API calls.
For example:
- An app can play a WAV file using the API.
- Another app can record audio from a microphone using the same API framework.
QNX even provides reference code, like:
- wave.c → Example of a WAV player
- waverec.c → Example of a WAV recorder
These help beginners quickly learn how to use the API without reinventing the wheel.
Story Example: Music vs. Navigation in a Car
Imagine you’re driving with your music blasting. Suddenly, the GPS says:
“Turn left in 200 meters.”
Without QSA, you might not hear it because the music is too loud.
With QSA:
- The system ducks the music, lowers its volume,
- Plays the navigation voice clearly,
- Then ramps the music back up once the instruction is done.
That’s audio concurrency in action—something QSA does automatically.
Why Should Developers Care?
If you’re a beginner developer working on QNX Neutrino 7.1, learning QSA is crucial because:
- It ensures your app works with real hardware audio.
- It helps you build apps that feel smooth and professional (no audio glitches).
- It’s the foundation for any media player, voice assistant, telephony, or alert system in QNX.
QNX Sound Architecture might sound complex at first, but at its core, it’s just about managing how apps, drivers, and hardware talk to each other to produce reliable, real-time sound.
If you’re just starting out, try exploring the sample programs (wave.c and waverec.c) provided in the QNX Audio Developer Guide. Once you see how a WAV player or recorder works, the rest of the architecture will start making sense.
In short:
QSA is the reason your QNX system can play music, alerts, and voice instructions seamlessly—even at the same time.
QNX Audio Cards and Devices
When you’re learning QNX Audio for the first time, it can feel like stepping into a music studio filled with wires, mixers, and strange labels. To make sense of it, let’s imagine QNX’s audio system like a sound studio inside your computer or embedded device.
The Heart of Sound: The “Card”
The basic hardware needed to produce or capture sound is an audio chip or sound card, which QNX simply calls a card.
- Think of a card as the “stage” where all your sound activity happens.
- Each card can host multiple sound devices like mixers, controllers, and PCM channels.
- QSA (QNX Sound Architecture) can support more than one card at a time and can even add or remove cards while the system is running—a bit like plugging in or unplugging instruments during a live concert.
So, before you can talk to a device (like the microphone or speaker), you need to know which card it belongs to.
The Devices on a Card
Each card contains several devices that handle different parts of the audio process:
- Control Device
- Manages general settings of the card.
- It’s like the “power switch and configuration panel” of your sound stage.
- Mixer Device
- Controls volumes, balance, and audio routing.
- Just like a DJ mixer adjusts the bass, treble, and volume of different tracks.
- PCM Device (Pulse Code Modulation)
- The real hero of sound conversion.
- Responsible for:
- Playback (Digital → Analog): turning digital audio files into actual sound waves.
- Capture (Analog → Digital): recording microphone input as digital data.
- A PCM device can only work in one direction at a time.
- Typically, they come in pairs: one for playback (
p) and one for capture (c).
Example: pcmC0D0p = Card 0, Device 0, Playback.
How QNX Names Devices
QNX uses a clear naming system under /dev/snd to represent sound devices:
C→ Card number (starts at 0)D→ Device number (inside the card)p→ Playbackc→ Capture
Example Directory Listing
When you run:
ls -l /dev/sndYou might see something like this:
total 0
lrw-rw-rw- 1 root root 0 May 31 11:11 capture -> pcmC0D0c
-rw-rw-rw- 1 root root 0 May 31 11:11 controlC0
-rw-rw-rw- 1 root root 0 May 31 11:11 mixerC0D0
-rw-rw-rw- 1 root root 0 May 31 11:11 pcmC0D0c
-rw-rw-rw- 1 root root 0 May 31 11:11 pcmC0D0p
lrw-rw-rw- 1 root root 0 May 31 11:11 pcmPreferredc -> pcmC0D0c
lrw-rw-rw- 1 root root 0 May 31 11:11 pcmPreferredp -> pcmC0D0p
lrw-rw-rw- 1 root root 0 May 31 11:11 playback -> pcmC0D0p
Breaking It Down
controlC0→ Control device for Card 0mixerC0D0→ Mixer for Card 0, Device 0pcmC0D0p→ PCM Playback for Card 0, Device 0pcmC0D0c→ PCM Capture for Card 0, Device 0pcmPreferredp→ A symbolic link to the preferred playback devicepcmPreferredc→ A symbolic link to the preferred capture device
In plain words:
If you see pcmC0D0p, it means “play audio on card 0, device 0.”
If you see pcmC0D0c, it means “record audio from card 0, device 0.”
A Real-Life Analogy
Let’s imagine:
- The Card = A Music Studio
- Control Device = Studio Manager (keeps everything in order)
- Mixer Device = Sound Engineer (adjusts volumes and effects)
- PCM Device = Performers (singers and instruments either playing music out or recording sound in)
Without the studio (card), the performers (PCM devices) and engineers (mixers) wouldn’t have a place to work.
Why This Matters
As a beginner developer:
- Understanding cards and devices helps you know where your sound is going or coming from.
- It’s the foundation before writing code that plays music, records audio, or mixes multiple streams.
In short:
- Card = The container (sound chip).
- Control, Mixer, PCM = The tools inside the card.
- Naming Convention = Makes it easy to identify exactly where your audio is headed.
Build C++ WAV player for QNX
What the sample app does
- Reads a 16/24/32-bit PCM WAV file header (uncompressed PCM RIFF WAV).
- Opens the QNX PCM device using the ALSA-compatible API (
snd_pcm_*) exposed by QNX. - Configures the device for sample rate / channels / format from the WAV header.
- Streams the audio data in chunks to the device with proper error handling.
C++ WAV player for QNX (single-file)
Save as qnx_wav_player.cpp.
// qnx_wav_player.cpp
// Simple WAV player for QNX using ALSA-style PCM API (libasound)
// Build: g++ qnx_wav_player.cpp -o qnx_wav_player -lasound
// Usage: ./qnx_wav_player audio.wav

#include <iostream>
#include <fstream>
#include <vector>
#include <cstring>
#include <alsa/asoundlib.h>

struct WAVHeader {
    // minimal WAV header fields for PCM
    char riff[4];          // "RIFF"
    uint32_t overall_size; // file size - 8
    char wave[4];          // "WAVE"
    char fmt_chunk_marker[4]; // "fmt "
    uint32_t length_of_fmt;   // 16 for PCM
    uint16_t format_type;     // 1 = PCM
    uint16_t channels;
    uint32_t sample_rate;
    uint32_t byterate;
    uint16_t block_align;
    uint16_t bits_per_sample;
    // we will seek to "data" chunk after reading possible extra fields
};

bool read_wav_header(std::ifstream &in, WAVHeader &h, uint32_t &data_offset, uint32_t &data_size) {
    in.read(reinterpret_cast<char*>(&h), sizeof(WAVHeader));
    if (!in) return false;
    if (std::strncmp(h.riff, "RIFF", 4) != 0 || std::strncmp(h.wave, "WAVE", 4) != 0) return false;

    // find 'data' chunk (there may be extra chunks)
    data_offset = sizeof(WAVHeader);
    // After the initial WAVHeader we've read, there may be extra bytes if length_of_fmt > 16 or there are other chunks.
    // We'll scan forward for "data" ASCII marker.
    in.seekg(12 + 8 + h.length_of_fmt, std::ios::beg); // 12 for RIFF/WAVE, then fmt chunk header (8) + fmt chunk size
    if (!in) return false;

    // Simple scanner for "data" chunk:
    char chunkId[5] = {0};
    uint32_t chunkSize = 0;
    while (in.read(chunkId, 4)) {
        in.read(reinterpret_cast<char*>(&chunkSize), 4);
        if (std::strncmp(chunkId, "data", 4) == 0) {
            data_offset = static_cast<uint32_t>(in.tellg());
            data_size = chunkSize;
            return true;
        }
        // skip this chunk
        in.seekg(chunkSize, std::ios::cur);
    }
    return false;
}

snd_pcm_format_t snd_format_from_bits(int bits) {
    switch (bits) {
        case 8:  return SND_PCM_FORMAT_U8;
        case 16: return SND_PCM_FORMAT_S16_LE;
        case 24: return SND_PCM_FORMAT_S24_3LE; // 24-bit packed
        case 32: return SND_PCM_FORMAT_S32_LE;
        default: return SND_PCM_FORMAT_UNKNOWN;
    }
}

int main(int argc, char* argv[]) {
    if (argc < 2) {
        std::cerr << "Usage: " << argv[0] << " file.wav\n";
        return 1;
    }

    const char *wavfile = argv[1];
    std::ifstream in(wavfile, std::ios::binary);
    if (!in) {
        std::cerr << "Unable to open WAV file: " << wavfile << "\n";
        return 2;
    }

    WAVHeader hdr;
    uint32_t data_offset = 0, data_size = 0;
    if (!read_wav_header(in, hdr, data_offset, data_size)) {
        std::cerr << "Invalid or unsupported WAV file.\n";
        return 3;
    }

    if (hdr.format_type != 1) { // only PCM
        std::cerr << "Only PCM WAV supported (format_type != 1)\n";
        return 4;
    }

    snd_pcm_t *pcm_handle = nullptr;
    const char *device = "default"; // use preferred device
    int err = snd_pcm_open(&pcm_handle, device, SND_PCM_STREAM_PLAYBACK, 0);
    if (err < 0) {
        std::cerr << "snd_pcm_open error: " << snd_strerror(err) << "\n";
        return 5;
    }

    snd_pcm_hw_params_t *hw;
    snd_pcm_hw_params_alloca(&hw);
    snd_pcm_hw_params_any(pcm_handle, hw);
    snd_pcm_hw_params_set_access(pcm_handle, hw, SND_PCM_ACCESS_RW_INTERLEAVED);

    snd_pcm_format_t format = snd_format_from_bits(hdr.bits_per_sample);
    if (format == SND_PCM_FORMAT_UNKNOWN) {
        std::cerr << "Unsupported sample size: " << hdr.bits_per_sample << " bits\n";
        snd_pcm_close(pcm_handle);
        return 6;
    }

    err = snd_pcm_hw_params_set_format(pcm_handle, hw, format);
    if (err < 0) {
        std::cerr << "Cannot set sample format: " << snd_strerror(err) << "\n";
        snd_pcm_close(pcm_handle);
        return 7;
    }

    err = snd_pcm_hw_params_set_channels(pcm_handle, hw, hdr.channels);
    if (err < 0) {
        std::cerr << "Cannot set channels: " << snd_strerror(err) << "\n";
        snd_pcm_close(pcm_handle);
        return 8;
    }

    unsigned int rate = hdr.sample_rate;
    err = snd_pcm_hw_params_set_rate_near(pcm_handle, hw, &rate, 0);
    if (err < 0) {
        std::cerr << "Cannot set sample rate: " << snd_strerror(err) << "\n";
        snd_pcm_close(pcm_handle);
        return 9;
    }

    // Apply HW params
    err = snd_pcm_hw_params(pcm_handle, hw);
    if (err < 0) {
        std::cerr << "snd_pcm_hw_params failed: " << snd_strerror(err) << "\n";
        snd_pcm_close(pcm_handle);
        return 10;
    }

    // compute frame size (bytes per frame = channels * bits/8)
    int frame_bytes = hdr.channels * (hdr.bits_per_sample / 8);
    const size_t BUFS = 4096; // bytes
    std::vector<char> buffer(BUFS);

    // Seek to data start
    in.clear();
    in.seekg(data_offset, std::ios::beg);

    // Stream loop
    while (in && !in.eof()) {
        in.read(buffer.data(), buffer.size());
        std::streamsize bytes_read = in.gcount();
        if (bytes_read <= 0) break;

        // number of frames = bytes_read / frame_bytes
        snd_pcm_sframes_t frames = bytes_read / frame_bytes;
        char *ptr = buffer.data();
        while (frames > 0) {
            snd_pcm_sframes_t written = snd_pcm_writei(pcm_handle, ptr, frames);
            if (written == -EPIPE) {
                // underrun
                std::cerr << "Buffer underrun occurred\n";
                snd_pcm_prepare(pcm_handle);
            } else if (written < 0) {
                std::cerr << "Error writing to PCM device: " << snd_strerror(written) << "\n";
                snd_pcm_close(pcm_handle);
                return 11;
            } else {
                ptr += written * frame_bytes;
                frames -= written;
            }
        }
    }

    snd_pcm_drain(pcm_handle);
    snd_pcm_close(pcm_handle);
    std::cout << "Playback finished.\n";
    return 0;
}
Build & run
- Copy
qnx_wav_player.cppto your QNX development system. - Build (example using
g++):g++ qnx_wav_player.cpp -o qnx_wav_player -lasoundOn some QNX setups you may useqccor need to point to the correct include/lib paths. (Ifalsa/asoundlib.hisn’t found, install QNX audio dev headers or adjust include paths.) (qnx.com, mikecramer.com) - Run:
./qnx_wav_player myfile.wavMake sureio-audio(or equivalent audio manager) is running and the correctdeva-*driver for your hardware is loaded. You can useio-audio -lor checkps/lsfor audio daemons per your QNX version. (qnx.com, OpenQNX)
Notes, tips & troubleshooting
- Supported formats: This example only supports uncompressed PCM WAV. Compressed formats (MP3/AAC) need decoding before feeding PCM to the device.
- Bit-depth choices: Some hardware/drivers may not support all bit depths (e.g., 24-bit packing); choose formats your driver supports. QNX tends to expose ALSA-compatible formats but check your driver docs. (mikecramer.com)
- Device name:
"default"opens the preferred device. You can list available cards/devices using utilities oraplay -lequivalent on your QNX system (if present) or inspectio-audiodriver info. (Stack Overflow, OpenQNX) - Permissions & priorities: If audio glitches occur, check process priorities and that nothing with higher priority starves audio threads (graphics at too-high priority have been known to disturb audio).
io-audiodoc mentions priority considerations. (qnx.com)
Frequently asked questions (FAQ): QNX Audio & QSA
Q1: What is QNX Audio (QSA)?
Ans : QNX Audio, often referred to as QSA (QNX Sound Architecture), is the audio subsystem of the QNX operating system. It provides a framework for audio playback and recording, allowing applications to interface seamlessly with sound hardware on embedded systems.
Q2: How does QSA work in QNX Audio?
Ans: QSA handles audio streams by managing audio drivers, codecs, and buffers. It ensures real-time audio processing and supports multiple audio clients, allowing simultaneous playback and recording without conflicts.
Q3: What are the main components of QNX Audio?
Ans: The key components of QNX Audio include:
Audio drivers: Interface with the hardware.
Audio server (QSA server): Manages audio streams.
Client libraries: Allow applications to send or receive audio data.
Q4: Which hardware does QNX Audio support?
Ans: QSA supports a wide range of embedded audio hardware, including I2S, HDMI audio, USB audio devices, and onboard DACs/ADCs, depending on the QNX platform and board configuration.
Q5: How do I start programming with QNX Audio?
Ans:To begin with QSA, you need to include the QNX audio client library in your project. You can then initialize the audio server, configure your audio stream, and use QSA APIs to play or record audio in real-time.
Q6: Can QNX Audio handle multiple audio streams simultaneously?
Ans: Yes, QSA is designed for multitasking environments. It can handle multiple audio streams concurrently, ensuring synchronization and minimal latency, making it ideal for infotainment, industrial, and embedded applications.
Q7: Is QNX Audio suitable for beginners?
Ans: Absolutely. With proper understanding of QSA APIs and audio principles, even beginners can implement basic audio playback and recording. QNX documentation provides detailed examples and tutorials to help you get started.
Q8: Where can I find more resources for QNX Audio?
Ans: You can explore the official QNX documentation, developer forums, and beginner guides specifically on QNX Audio (QSA). Many tutorials include step-by-step examples for creating audio applications on embedded platforms.
You can also Visit other tutorials of Embedded Prep
- Multithreading in C++
- Multithreading Interview Questions
- Multithreading in Operating System
- Multithreading in Java
- POSIX Threads pthread Beginner’s Guide in C/C++
- Speed Up Code using Multithreading
- Limitations of Multithreading
- Common Issues in Multithreading
- Multithreading Program with One Thread for Addition and One for Multiplication
- Advantage of Multithreading
- Disadvantages of Multithreading
- Applications of Multithreading: How Multithreading Makes Modern Software Faster and Smarter”
- Master CAN Bus Interview Questions 2025
- What Does CAN Stand For in CAN Bus?
- CAN Bus Message Filtering Explained
- CAN Bus Communication Between Nodes With Different Bit Rates
- How Does CAN Bus Handle Message Collisions
- Message Priority Using Identifiers in CAN Protocol


Mr. Raj Kumar is a highly experienced Technical Content Engineer with 7 years of dedicated expertise in the intricate field of embedded systems. At Embedded Prep, Raj is at the forefront of creating and curating high-quality technical content designed to educate and empower aspiring and seasoned professionals in the embedded domain.
Throughout his career, Raj has honed a unique skill set that bridges the gap between deep technical understanding and effective communication. His work encompasses a wide range of educational materials, including in-depth tutorials, practical guides, course modules, and insightful articles focused on embedded hardware and software solutions. He possesses a strong grasp of embedded architectures, microcontrollers, real-time operating systems (RTOS), firmware development, and various communication protocols relevant to the embedded industry.
Raj is adept at collaborating closely with subject matter experts, engineers, and instructional designers to ensure the accuracy, completeness, and pedagogical effectiveness of the content. His meticulous attention to detail and commitment to clarity are instrumental in transforming complex embedded concepts into easily digestible and engaging learning experiences. At Embedded Prep, he plays a crucial role in building a robust knowledge base that helps learners master the complexities of embedded technologies.