Beginner-friendly ESP32 WiFiManager tutorial to easily set up WiFi, save credentials, add custom parameters, and build smart IoT projects with simple Arduino code.
If you’ve ever worked on an ESP32 project, you already know the most annoying part: connecting your board to WiFi without hard-coding the SSID and password every single time. It feels okay during early testing, but the moment you want to give the device to someone else, or move it to a different network, it becomes painful.
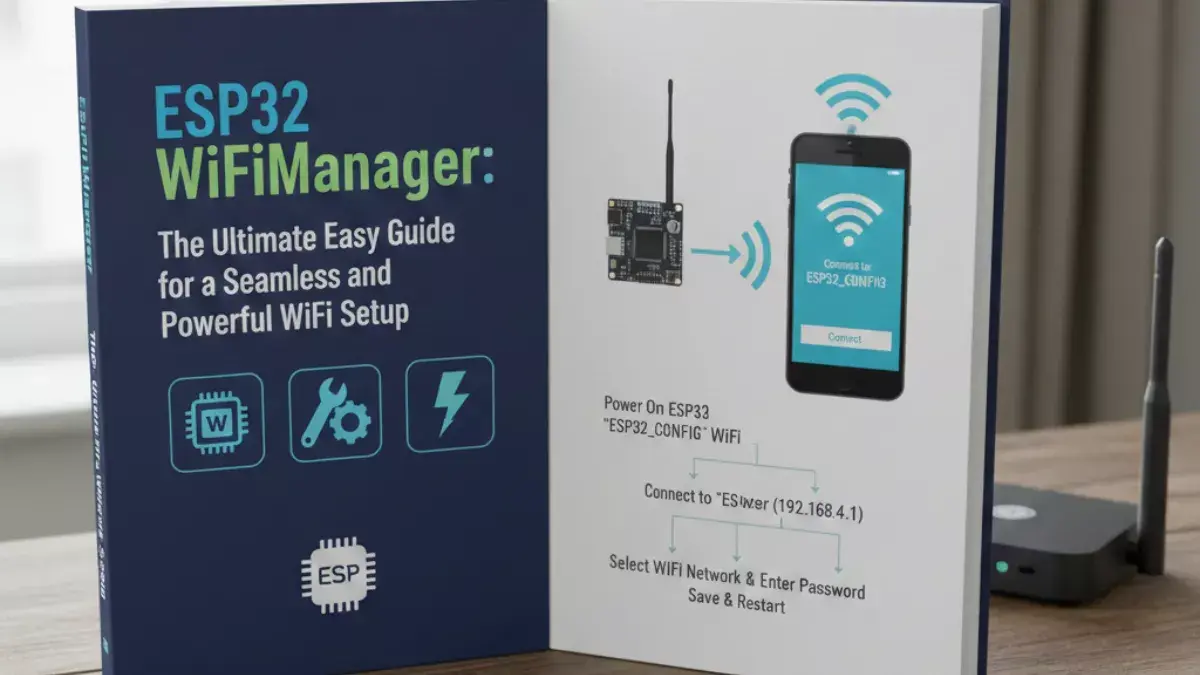
This is where esp32 wifimanager steps in. Think of it as a simple helper that lets your ESP32 create a temporary WiFi Access Point and a small configuration portal. You connect your phone to that portal, type your WiFi name and password, save it, and the ESP32 connects automatically. No more changing code just to update the WiFi.
This tutorial is a complete walk-through. We’ll talk like we’re sitting over coffee: direct, clear, and simple. By the time you finish reading, you’ll know exactly how to use wifimanager esp32, how to add custom parameters, how OTA works with it, how EEPROM can store passwords safely, and how people use it in real projects like esp32 blynk wifimanager or an esp32 ds18b20 webserver wifimanager setup.
What Is ESP32 WiFiManager and Why Do We Even Need It?
Let’s be honest. Hard-coding WiFi credentials is fine if you’re playing around. But once your ESP32 project needs to be installed somewhere—your home, someone else’s home, a school, a farm, anything—hard-coded credentials become a headache.
You don’t want to open the code and flash the ESP32 every time the router password changes.
You don’t want to ship devices that can’t be updated easily.
And you definitely don’t want to ask people for their WiFi password so you can write it inside the source code.
WiFiManager for ESP32 solves all of this by creating a simple flow:
- The ESP32 turns into a hotspot.
- You open that hotspot on your phone.
- A configuration page appears.
- You select your WiFi network, type password, click save.
- ESP32 stores it in non-volatile memory.
- Reboots and connects automatically next time.
In short, WiFiManager removes the single most annoying part of using WiFi on microcontrollers.
The original library by tzapu became super famous on ESP8266. Today, tzapu wifimanager esp32 also works nicely on ESP32 through ports and community updates.
Why ESP32 WiFiManager Is So Useful for Real Projects
If you’re making any of the following:
• Smart home device
• Web server that controls relays
• IoT weather station
• Farming sensor network
• ESP32 Blynk IoT project
• ESP32 DS18B20 web server
• Anything that needs WiFi configuration
…WiFiManager saves time, reduces user frustration, and makes your project feel polished.
Think about a finished IoT gadget. People expect a small webpage where they can configure WiFi—just like connecting a smart plug or smart bulb. WiFiManager gives your ESP32 that user-friendly behavior, without you writing hundreds of lines of backend code.
If you’re using Arduino IDE, PlatformIO, or even the ESP-IDF, there are clean ways to integrate wifimanager esp32 code smoothly.
How WiFiManager Works behind the Scenes
Even though it feels magical, the idea is pretty simple:
• ESP32 tries connecting to saved WiFi credentials.
• If connection fails (e.g., wrong password, router changed), ESP32 switches to AP mode.
• It starts a captive portal—like when you connect to coffee shop WiFi.
• You connect your phone to the ESP32 AP.
• A small web server runs on the ESP32, showing a config page.
• You pick an SSID from the scan list and type the password.
• It stores the password in EEPROM, flash, NVS, etc.
• Then ESP32 reboots and automatically joins the saved WiFi.
Everything happens automatically. Your code just says:
“If WiFi is not configured, launch the configuration portal.”
That’s it.
The Easiest Way to Use WiFiManager on ESP32
The most beginner-friendly way is using the arduino esp32 wifimanager setup. You only install a library and write a few lines of code.
Step 1: Install the WiFiManager Library
Open Arduino Library Manager and search for:
This library includes ESP8266 support by default, but ESP32 versions are maintained by the community and work properly under names like:
• wifimanager esp32
• tzapu wifimanager esp32
• wifimanager esp32 master
• esp32 arduino wifimanager library
The ESP32-compatible versions usually appear as forks, but the experience is the same.
A Simple esp32 wifimanager example
Here’s a minimal ESP32 WiFiManager example beginners use. This works great in Arduino IDE or PlatformIO.
You’ll see how simple it is:
• It starts WiFiManager.
• If ESP32 can’t connect, it opens a portal.
• You configure with your phone.
Why ESP32 WiFiManager Is Better Than Hardcoding Credentials
Let’s compare:
Hardcoding method
• SSID stored in code
• Password stored in code
• Must recompile when router changes
• Not safe
• Not user-friendly
With WiFiManager
• User sets SSID and password themselves
• Stored in flash memory
• Auto-connects on next boot
• No re-flashing needed
• Works even if users have no coding skills
• Your project becomes “consumer-ready”
If you’re new to ESP32 networking, you can also explore a simple web server setup here: ESP32 Web Server Tutorials
It keeps things easy because you don’t have to expose your router password to anyone, you don’t have to worry about the code breaking due to a wrong WiFi entry, and if the router changes, users simply reconnect through the portal.
Where WiFiManager Stores WiFi Credentials in ESP32
Different versions use different places:
• EEPROM
• NVS (Non-Volatile Storage)
• Flash memory
That’s why you’ll see tutorials showing:
esp32 password eeprom wifimanager
or
esp32 read eeprom for ssid and pass wifimanager
Some libraries prefer NVS because it’s safer and faster. EEPROM works too, but you need to allocate space manually.
The good news is you don’t have to dig deep into the memory system. WiFiManager abstracts most of it.
When ESP32 Requires Login Before Configuring WiFi
Some people want security.
Imagine shipping an IoT device and you don’t want strangers connecting to the ESP32 setup portal.
You can require:
• A custom username/password
• A unique AP name
• A unique password based on device ID
• Locked configuration screen
This feature is often used in:
esp32 requires login wifimanager
esp32 wifimanager custom parameters
The portal feels like a normal login page. You enter a password, and only then you can change WiFi details.
WiFiManager Works on Arduino IDE, PlatformIO, and ESP-IDF
Whatever you’re using:
• esp32 wifimanager arduino ide
• wifimanager esp32 platformio
• esp32 wifimanager idf
…WiFiManager integrates smoothly.
Arduino IDE is the simplest.
PlatformIO gives better structure and debugging.
ESP-IDF requires more control and is slightly more complex.
WiFiManager Makes OTA Updates Easier
You can pair WiFiManager with OTA (Over-the-Air updates) so the device updates itself without USB flashing. People often search for:
esp32 wifimanager ota
With OTA, your device can:
• Update firmware wirelessly
• Stay up-to-date without manual flashing
• Serve new device features
• Fix bugs remotely
Imagine flashing 50 devices one-by-one.
OTA + WiFiManager solves that headache by allowing users to upload updates through a browser or cloud.
Real Projects Where People Use ESP32 WiFiManager
Here are common projects where people use WiFiManager naturally:
ESP32 Blynk WiFiManager
This lets you link Blynk IoT dashboard with WiFi configuration.
ESP32 DS18B20 Web Server WiFiManager
You show temperature data in a browser and also configure WiFi easily.
Smart home switches
Where users configure WiFi through a small configuration page.
Weather stations & IoT sensors
That work in fields or farms and must reconnect even if the router changes.
Home automation hubs
That act as local servers.
In all these cases, WiFiManager feels almost necessary.
Setting Up WiFiManager for ESP32 in Arduino IDE
If you are using Arduino IDE, this is the easiest path. Make sure you’ve installed the ESP32 boards package from the Board Manager.
Then install the library:
Search for
WiFiManager by tzapu
Even though this library was originally made for ESP8266, many ESP32-compatible versions exist. You’ll see community ports listed as:
• wifimanager esp32
• tzapu wifimanager esp32
• esp32 arduino wifimanager versions
• wifimanager.h esp32 forks
Choose the one that clearly mentions ESP32 support.
If you prefer PlatformIO, don’t worry; I’ll show the wifimanager esp32 platformio install later in this article.
Your First Simple esp32 wifimanager example
Let’s make a basic example. This code allows your ESP32 to:
• Try connecting to WiFi
• If connection fails, open configuration portal
• Let you set the WiFi through the portal
• Save SSID + password automatically
This is the version most beginners use.
Simple ESP32 WiFiManager Code (Beginner-Friendly)
#include <WiFi.h>
#include <WiFiManager.h>

void setup() {
  Serial.begin(115200);

  WiFiManager wm;

  bool res = wm.autoConnect("ESP32-Setup");

  if (!res) {
    Serial.println("Failed to connect. Restarting...");
    ESP.restart();
  }
  else {
    Serial.println("Connected to WiFi!");
    Serial.println(WiFi.localIP());
  }
}

void loop() {
}
This tiny code does a lot.
When the ESP32 boots:
• It tries using stored credentials
• If no credentials are saved or connection fails
• ESP32 becomes a hotspot named “ESP32-Setup”
• You connect to that hotspot
• A WiFiManager page opens
• You choose your home router
• Enter password
• Save
• ESP32 stores it
• Reboots
• Connects automatically
This is why people love wifimanager esp32 code — it’s simple and it works.
Using WiFiManager on ESP32 with EEPROM
Many newcomers wonder how to store credentials in EEPROM. WiFiManager already manages storage internally, but some versions use EEPROM explicitly. You’ll see tutorials mentioning:
• esp32 password eeprom wifimanager
• esp32 read eeprom for ssid and pass wifimanager
EEPROM can be used if you want to store extra passwords, tokens, or offline settings.
Here’s an example showing how you could write and read EEPROM manually (not required for normal WiFiManager use):
#include <EEPROM.h>

void writeCredentials(String ssid, String pass) {
  EEPROM.begin(128);
  EEPROM.writeString(0, ssid);
  EEPROM.writeString(32, pass);
  EEPROM.commit();
}

void readCredentials() {
  EEPROM.begin(128);
  String ssid = EEPROM.readString(0);
  String pass = EEPROM.readString(32);
  Serial.println("Stored SSID: " + ssid);
  Serial.println("Stored Password: " + pass);
}
Again, WiFiManager handles almost everything, so you only need this if your project demands full control.
Adding Custom Parameters with esp32 wifimanager custom parameters
Sometimes you need more than just WiFi credentials.
Maybe:
• A Blynk token
• A device name
• A server address
• An MQTT username/password
• A unique API key
WiFiManager lets you create custom fields in the portal.
Think of it like:
“Along with SSID and password, also ask the user for whatever else my project needs.”
Here’s a friendly example.
Example: Custom Parameters in WiFiManager
#include <WiFi.h>
#include <WiFiManager.h>

char deviceName[40] = "MyESP32";

void setup() {
  Serial.begin(115200);

  WiFiManager wm;

  WiFiManagerParameter custom_device_name("devname", "Device Name", deviceName, 40);

  wm.addParameter(&custom_device_name);

  bool res = wm.autoConnect("ESP32-Config");

  if (!res) {
    Serial.println("Failed to connect");
    ESP.restart();
  }

  Serial.println("Connected!");
  Serial.print("Device Name: ");
  Serial.println(custom_device_name.getValue());
}

void loop() {

}
Now your portal shows:
• SSID field
• Password field
• Device name text box
Users can enter custom data. This is a must-have in advanced IoT setups, and this is why esp32 wifimanager custom parameters is a very popular search topic.
ESP32 WiFiManager OTA (Over-the-Air Updates)
Adding OTA makes the project feel professional. Imagine shipping sensors everywhere and updating them without touching a USB cable. That’s the power of esp32 wifimanager ota projects.
The flow is simple:
• WiFiManager helps ESP32 join WiFi
• OTA update server becomes active
• You upload new firmware from your browser or Arduino IDE
A basic OTA setup looks like this:
#include <WiFi.h>
#include <WiFiManager.h>
#include <ArduinoOTA.h>

void setup() {
  Serial.begin(115200);

  WiFiManager wm;
  wm.autoConnect("ESP32-OTA");

  ArduinoOTA.begin();

  Serial.println("OTA Ready");
}

void loop() {
  ArduinoOTA.handle();
}
Once the user sets WiFi credentials with WiFiManager, OTA becomes fully available.
If you want rock-solid IoT devices, OTA is essential.
Using WiFiManager for ESP32 on PlatformIO
If you prefer PlatformIO over Arduino IDE, installation is simple.
Add this to your platformio.ini:
lib_deps =
  tzapu/WiFiManager
If that version doesn’t support ESP32, use one of the ESP32 forks:
lib_deps =
  WiFiManager-ESP32
PlatformIO will automatically pull the correct version.
Then the code you write is identical.
If you’re using VS Code, debugging becomes much easier.
Using WiFiManager with ESP-IDF
If you’re building professional-grade applications, you might use ESP-IDF.
While there’s no official WiFiManager for ESP-IDF, several community ports exist.
This helps fulfill:
esp32 wifimanager idf
Developers build:
• Captive portal
• AP mode
• WiFi scanning
• A tiny HTTP server
The logic remains the same as the Arduino version, just more hands-on.
Real-World Example: ESP32 Blynk WiFiManager
Let’s say you’re building a Blynk IoT device.
Hardcoding your Blynk token isn’t ideal since you might want to change it later.
With WiFiManager:
• Add a field for Blynk token
• Save it
• Connect to WiFi
• Connect to Blynk automatically
This is why tutorials for esp32 blynk wifimanager are so popular.
Real-World Example: ESP32 DS18B20 Webserver WiFiManager
Imagine a temperature monitoring project.
You use:
• DS18B20 sensor
• ESP32 web server
• WiFiManager portal
Users can configure WiFi, then see temperature in a browser.
This makes esp32 ds18b20 webserver wifimanager a real and practical topic.
Troubleshooting: When ESP32 Requires Login to Access Portal
Some people face this issue:
esp32 requires login wifimanager
This usually happens because:
• You are using a custom password
• Browser caches old config pages
• Captive portal logic tries redirecting to a login page
Most fixes include:
• Clearing browser cache
• Changing AP name
• Using a unique portal password
• Updating the library version
How to Trigger WiFi Reset with a Button
A very common request is:
“How do I erase WiFi settings and reopen the WiFiManager portal again?”
Because sometimes you ship a device to someone, but they change their router.
Your ESP32 can’t magically guess the new WiFi credentials.
So you need a reset option.
Here’s a simple and clean way to do it:
#include <WiFi.h>
#include <WiFiManager.h>

#define RESET_PIN 0

void setup() {
  Serial.begin(115200);

  pinMode(RESET_PIN, INPUT_PULLUP);

  if (digitalRead(RESET_PIN) == LOW) {
    WiFiManager wm;
    wm.resetSettings();
    delay(1000);
    ESP.restart();
  }

  WiFiManager wm;
  wm.autoConnect("ESP32-Resettable");
}

void loop() {
}
Hold the button at boot → ESP32 wipes stored WiFi → Portal opens again.
This solves a lot of real-world user frustrations.
Captive Portal Behavior Explained
Have you ever connected to hotel WiFi and a page pops up automatically?
Same idea.
WiFiManager tries to:
• Force the browser to load the config page
• Redirect all connections to itself
But sometimes you may see issues like:
• The portal doesn’t pop automatically
• Browser shows “Login Required”
• You manually open 192.168.4.1
This is one of the reasons search phrases like:
• esp32 requires login wifimanager
• wifimanager esp32 examples
are so popular.
Why it happens:
Browsers cache DNS aggressively.
Phones wait for a specific “captive portal detection URL.”
Different devices behave differently.
Quick tips:
• Use a unique AP name
• Avoid special characters
• Update your WiFiManager library
• Restart your phone WiFi
• Try opening any HTTP website (not HTTPS)
It’s normal behavior, not a problem with your code.
Auto-Reconnect Logic for Unstable WiFi
Sometimes routers reboot, or signals drop. The ESP32 tries reconnecting but may fail silently.
You can add a simple reconnect loop:
void loop() {
  if (WiFi.status() != WL_CONNECTED) {
    WiFi.reconnect();
    delay(1000);
  }
}
This ensures your IoT device doesn’t get “lost” after a temporary WiFi outage.
Many real-world IoT devices use this logic, especially for smart farming, home automation, and remote sensors.
Using WiFiManager with MQTT or API Services
If your project uses:
• Blynk
• Node-RED
• Home Assistant
• Thingspeak
• Firebase
• AWS / Azure MQTT
You often need more than SSID + password.
This is where esp32 wifimanager custom parameters becomes the true hero.
You can add custom fields like:
• MQTT server
• MQTT port
• MQTT username
• MQTT password
• Device name
• Access token
Your ESP32 becomes a fully customizable device without touching code again.
Using WiFiManager for Professional IoT Deployment
If you’re building a product (even a small DIY product), WiFiManager gives you:
• User-friendly WiFi setup
• No hardcoding of credentials
• Quick recovery after router change
• Captive portal onboarding
• Optional password protection
This is why it’s still one of the most loved ESP32 utilities.
Securing Your WiFiManager Portal
Security matters.
You don’t want someone nearby hijacking your WiFi portal.
You can add a password:
wm.autoConnect("MyESP32", "mysecretpass");
Now, the WiFi AP needs a password before access.
If this is for a real device deployed in public, always use at least WPA2.
Common Issues and Fixes
Let’s go over the big ones.
Problem: ESP32 Keeps Rebooting After Connection
This happens when:
• WiFi credentials are wrong
• Router signal is weak
• ESP32 brownout due to bad power supply
Fix:
Use a good 5V 2A adapter.
ESP32 is sensitive to power dips during WiFi.
Problem: WiFiManager Portal Doesn’t Open Automatically
This is extremely common.
Phones sometimes ignore captive portals.
Fix:
Open these in browser:
192.168.4.1
or try:
• Turn WiFi off → on
• Forget the ESP32 setup network
• Try a different phone
Problem: ESP32 Connects but No Internet
Sometimes routers block unknown MAC addresses.
Fix:
Allow new devices in router settings.
Problem: WiFiManager not saving credentials
Your library may be outdated.
Fix:
Use an ESP32-supported fork of:
• tzapu wifimanager esp32
• wifimanager esp32 library
• wifimanager esp32 master branch
Different forks handle storage differently.
WiFiManager with ESP32 and EEPROM Explained Simply
People often search for:
• esp32 password eeprom wifimanager
• esp32 read eeprom for ssid and pass wifimanager
Here’s a simple way to think about it:
WiFiManager stores credentials internally, usually in Non-Volatile Storage (NVS).
This is safer and more reliable than EEPROM.
But if you want total control, EEPROM is still an option.
Think of it as writing a note into flash memory that stays even after reboot.
Very helpful in custom authentication setups or offline projects.
WiFiManager + ESP32 Web Server Combo
If your project has a web interface, WiFiManager acts as the initial gateway.
After WiFi is configured:
• ESP32 connects
• Starts a web server
• Serves pages like a mini IoT dashboard
This is popular with sensors like DS18B20.
The search term esp32 ds18b20 webserver wifimanager basically refers to this combo.
WiFiManager + Blynk Setup (Real Use Case)
WiFiManager + Blynk = perfect pair.
You can:
• Add custom parameter for Blynk token
• Save it
• Use it inside your code
• Avoid hardcoding secrets
If you ever switch your Blynk template or token, you don’t need to reflash the device.
This is why esp32 blynk wifimanager tutorials are everywhere.
WiFiManager with OTA to Update Code Wirelessly
OTA is one of the most powerful features in ESP32 development.
The flow looks like:
• Set up WiFi using WiFiManager
• Connect ESP32 to WiFi
• Activate OTA service
• Upload new firmware from PC
• No physical device access needed
This is crucial for remote projects.
Using WiFiManager in Commercial-Grade Projects
Lots of DIY tutorials stop at basic examples.
But real IoT products rely heavily on the following:
• Custom parameters
• Reset button
• Protected WiFi portal
• Auto-reconnect
• OTA support
• Stable hardware power
• Clean fallback logic
I’ve seen full home automation systems built around the simple idea of “configure WiFi only once.”
And yes, WiFiManager makes that possible for the ESP32.
Real-Time ESP32 WebSocket Example With Sensor Data (DHT11,MQ135,OLED, RTC etc.)
If you’re building real IoT dashboards, you often need real-time updates without refreshing the page. WebSockets are perfect for showing live sensor values like temperature, humidity, air quality, RTC time, or even switching GPIO pins.
Below is a simple structure you can expand:
Example Use Case
Your ESP32 collects:
- Temperature & humidity from DHT11
- Air-quality values from MQ135
- Real time from RTC module
- Display on OLED screen
- And sends all data to browser via WebSocket
Why WebSocket Works Best Here
- Real-time data (no refresh)
- Low bandwidth usage
- Works great for dashboards
- Perfect for sensor-based IoT projects
- Smooth UI (graphs, counters etc.)
Complete WebSocket Message Structure (Recommended)
You can send a single JSON string containing all sensor values:
{
  "temperature": 29.4,
  "humidity": 52,
  "air_quality": 210,
  "rtc_time": "2025-11-22 23:20:00",
  "status": "OK"
}
On the browser, you decode it like:
let data = JSON.parse(event.data);
document.getElementById("temp").innerHTML = data.temperature;
ESP32 Code Example: Sending Sensor Values via WebSocket
Below is a beginner-friendly example you can expand later:
#include <WiFi.h>
#include <WebSocketsServer.h>
#include <DHT.h>

#define DHTPIN 4
#define DHTTYPE DHT11
DHT dht(DHTPIN, DHTTYPE);

const char* ssid = "YourWiFi";
const char* password = "YourPass";

WebSocketsServer webSocket = WebSocketsServer(81);

void setup() {
  Serial.begin(115200);
  dht.begin();

  WiFi.begin(ssid, password);
  while (WiFi.status() != WL_CONNECTED) {
    delay(500);
  }

  webSocket.begin();
}

void loop() {
  webSocket.loop();

  float t = dht.readTemperature();
  float h = dht.readHumidity();

  String json = "{\"temperature\":" + String(t) +
                ",\"humidity\":" + String(h) +
                "}";

  webSocket.broadcastTXT(json);
  delay(2000);
}
This acts like a real-time data server.
Client Side (Browser) HTML/JS Example
<!DOCTYPE html>
<html>
<body>

<h2>ESP32 WebSocket Live Dashboard</h2>

<p>Temperature: <span id="temp">--</span> °C</p>
<p>Humidity: <span id="hum">--</span> %</p>

<script>
let socket = new WebSocket("ws://192.168.1.10:81/");

socket.onmessage = function(event){
    let d = JSON.parse(event.data);
    document.getElementById("temp").innerHTML = d.temperature;
    document.getElementById("hum").innerHTML = d.humidity;
};
</script>

</body>
</html>
Just paste it into your browser, and it will update live.
Adding GPIO Control via WebSocket (Turn LED ON/OFF)
You can also allow control + monitoring from a single WebSocket.
Example message:
{"led": "on"}
ESP32 receives it:
if (data.indexOf("on") > 0) {
  digitalWrite(2, HIGH);
}
Browser sends it:
socket.send('{"led":"on"}');
Now your dashboard becomes two-way real-time control.
Best Practices for ESP32 WebSocket Projects
Use JSON
Easy to parse, clean, expandable, and readable.
Keep messages light
Avoid very long or repeated strings.
Send at fixed intervals
1–2 seconds is enough for sensors.
Avoid delays in main loop
Use millis() for stable timing.
Use separate WiFi channel
ESP32 WiFi can get slow if overloaded.


Mr. Raj Kumar is a highly experienced Technical Content Engineer with 7 years of dedicated expertise in the intricate field of embedded systems. At Embedded Prep, Raj is at the forefront of creating and curating high-quality technical content designed to educate and empower aspiring and seasoned professionals in the embedded domain.
Throughout his career, Raj has honed a unique skill set that bridges the gap between deep technical understanding and effective communication. His work encompasses a wide range of educational materials, including in-depth tutorials, practical guides, course modules, and insightful articles focused on embedded hardware and software solutions. He possesses a strong grasp of embedded architectures, microcontrollers, real-time operating systems (RTOS), firmware development, and various communication protocols relevant to the embedded industry.
Raj is adept at collaborating closely with subject matter experts, engineers, and instructional designers to ensure the accuracy, completeness, and pedagogical effectiveness of the content. His meticulous attention to detail and commitment to clarity are instrumental in transforming complex embedded concepts into easily digestible and engaging learning experiences. At Embedded Prep, he plays a crucial role in building a robust knowledge base that helps learners master the complexities of embedded technologies.