Complete ESP32-C3 board guide for beginners. Compare the best ESP32-C3 boards, pinout, layout, price, schematics, and tutorials for your next IoT project.
If you’ve been exploring Wi-Fi and Bluetooth projects, you’ve probably come across the esp32-c3 board. It’s tiny, affordable, powerful, and beginner-friendly, which makes it one of the best choices for hobby electronics, IoT devices, and even small-scale production projects.
Think of this guide as a conversation with a smart friend over coffee—clear, direct, and free from corporate jargon. By the end of this article, you’ll understand the board inside out, know which version to buy, and be ready to build your own ESP32-C3-based projects.
What Is the ESP32-C3 Board?
The esp32-c3 board is a compact development board powered by Espressif’s ESP32-C3 chip, which is based on the RISC-V architecture. You get built-in Wi-Fi, Bluetooth 5, GPIO pins, low power modes, and a strong open-source ecosystem.
If you’ve used ESP8266 or the original ESP32 before, the ESP32-C3 will feel familiar—but lighter, more efficient, and cheaper.
What makes it more appealing is that it is easy to flash, easy to program, and incredibly stable.

Why the ESP32-C3 Board Is So Popular
Let’s break it down like you’d explain to a friend:
- It’s cheap. Seriously cheap.
- It supports modern Wi-Fi and Bluetooth 5 Low Energy.
- It’s based on RISC-V, which is open-source and gaining popularity.
- It works perfectly with Arduino, PlatformIO, and ESPHome.
- It’s power-efficient and ideal for battery-based IoT devices.
- It comes in many versions, including the xiao esp32 c3 board, one of the smallest ESP boards ever built.
Whether you’re a hobbyist or someone making a production-ready IoT device, the esp32-c3 board is a fantastic choice.
Different Versions of the ESP32-C3 Board
The beauty of the ESP32-C3 ecosystem is that you can choose from several variants. Here’s a quick walkthrough.
1. Xiao ESP32 C3 Board
The xiao esp32 c3 board by Seeed Studio is extremely tiny. It’s almost the size of a postage stamp. If you want the smallest esp32 c3 board, this is the one. It has:
- USB-C port
- Low power consumption
- 11 GPIO pins
- Compact layout for wearable or mini IoT devices
Great for ultra-small projects.

2. ESP32-C3 Dev Board
The esp32 c3 dev board is the classic development board format similar to NodeMCU boards. It’s beginner-friendly, breadboard-friendly, and ideal for learning.
This version is the most common choice for students and makers.
3. ESP32 C3 Mini Breakout Board
The esp32 c3 mini breakout board is even smaller than regular development boards but slightly bigger than the Xiao board. It offers:
- Sufficient GPIO
- On-board antenna
- Low cost
Perfect when you want something small but still easy to solder.
Understanding the ESP32-C3 Board Layout
If you’re new to microcontrollers, the layout might look scary, but the esp32-c3 board layout is actually clean and simple. Most boards follow this structure:
- USB connector
- Boot and reset buttons
- On-board Wi-Fi antenna
- Power regulation components
- ESP32-C3 chip module
- User LEDs
- Row of GPIO pins
Since every manufacturer follows a slightly different layout, be sure to check your board’s documentation.
ESP32-C3 Board Pinout
Understanding the esp32 c3 board pinout helps you connect sensors, displays, relays, and everything else. While pinouts vary, most ESP32-C3 boards include:
- GPIO pins (0–10 or more depending on board)
- UART pins for serial communication
- I2C pins (SDA, SCL)
- SPI pins (MOSI, MISO, SCK, CS)
- ADC channels
- PWM pins
- 5V and 3.3V power pins
- Ground pin
Tip for beginners:
If you’re unsure about a pin, search the exact board’s pinout diagram. It prevents mistakes and keeps your board safe.
ESP32-C3 Board Manager on Arduino IDE
If you’re using Arduino IDE, you need to install the esp32 c3 board manager.
Here’s the simple beginner-friendly way:
- Open Arduino IDE
- Go to File → Preferences
- Add ESP boards URL
- Open Tools → Board → Boards Manager
- Search “ESP32”
- Install the package
- Select the esp32-c3 board
That’s it. Your board is ready to program using Arduino.
Using the ESP32-C3 Board with PlatformIO
platformio esp32 c3 board support is excellent. In fact, many developers prefer PlatformIO over Arduino because it:
- Lets you manage libraries easily
- Offers faster compilation
- Supports VS Code
To start, create a new project and choose ESP32-C3 Dev Module under PlatformIO’s board list.
If you’re building bigger projects or multiple firmware variants, PlatformIO is the best choice.
Using the ESP32-C3 Board with ESPHome
Many people use the esphome esp32 c3 board option to build smart home devices. ESPHome allows you to control your device from Home Assistant without writing full C++ code.
You write YAML, flash the board, and ESPHome handles the rest.
Some popular ESPHome uses:
- Smart switches
- Energy meters
- Air quality monitors
- Door sensors
- Temperature & humidity automation
ESPHome + ESP32-C3 is a powerful combination for DIY smart home users.

ESP32-C3 Datasheet (What Beginners Should Know)
The esp32-c3 datasheet is full of electrical details, but here’s the beginner-friendly summary:
- RISC-V single core @ 160 MHz
- Wi-Fi 2.4 GHz
- Bluetooth 5 (BLE)
- 400 KB SRAM + 384 KB ROM
- Low power modes
- 22 programmable GPIO (depends on package)
- Integrated flash (in most modules)
If you want to explore deeper, the datasheet explains everything about power, timing, registers, and memory layout.
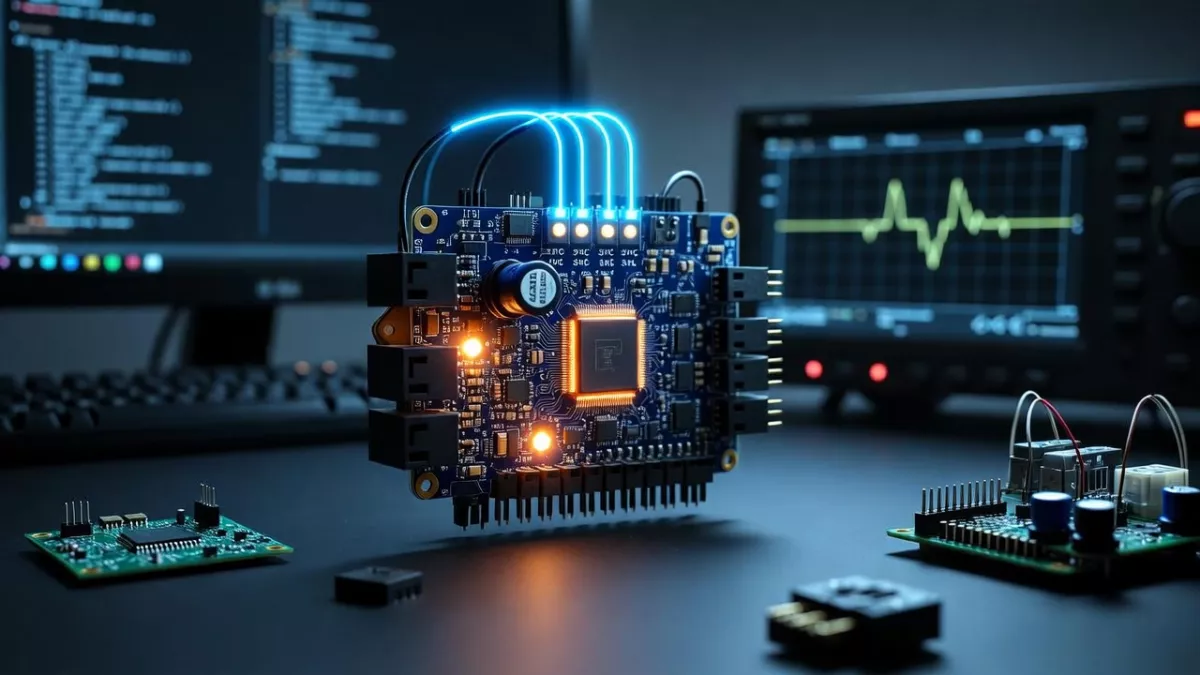
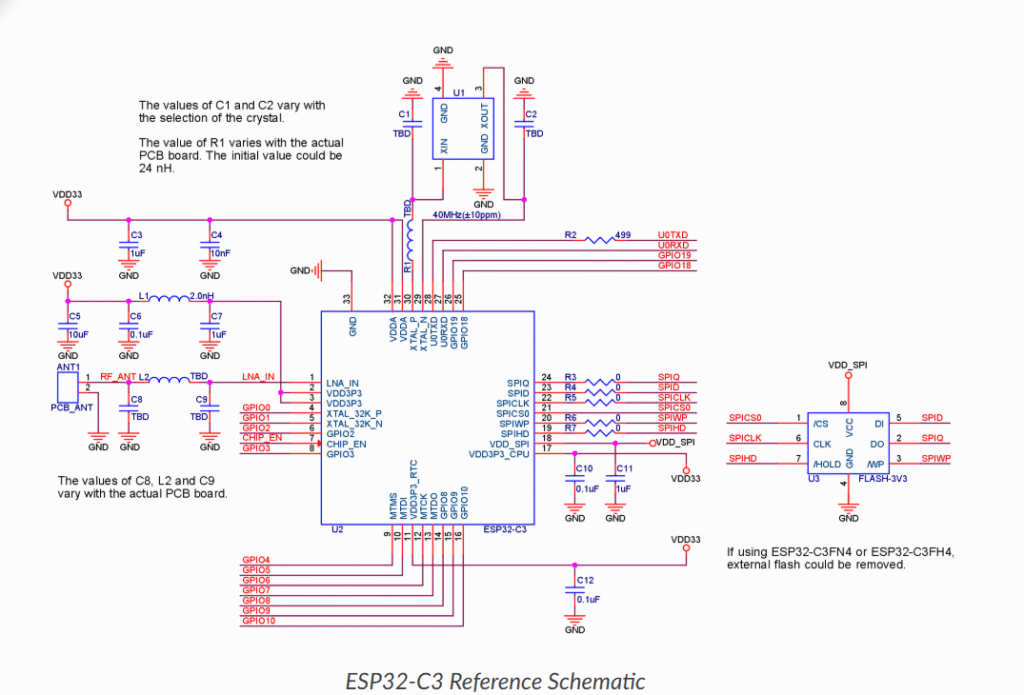
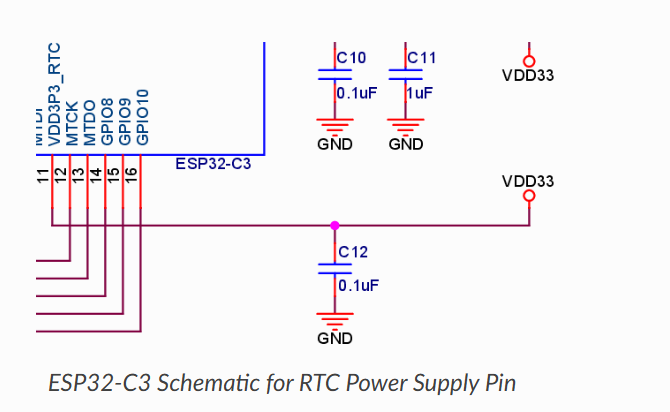
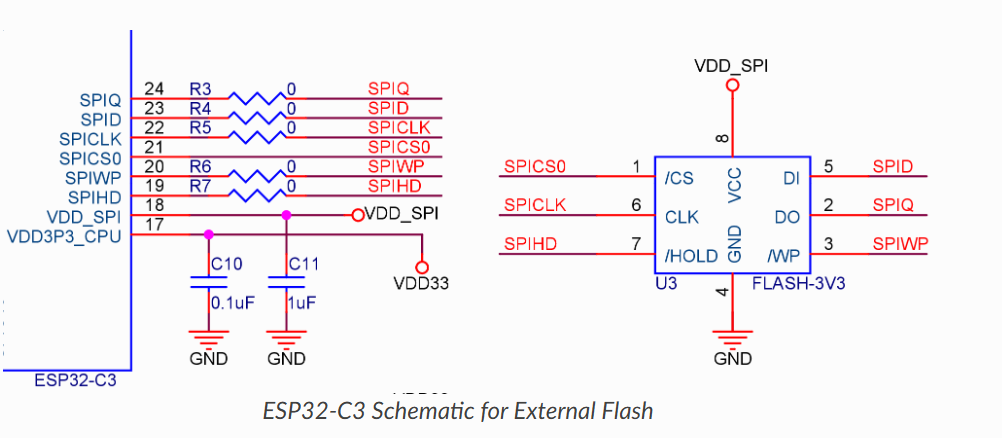
ESP32-C3 Schematic Explained in Simple Words
Many makers get overwhelmed seeing a schematic, but a simple breakdown of the esp32-c3 schematic or esp32-c3 board schematic makes it less scary.
A typical schematic includes:
- Power supply section (5V → 3.3V regulator)
- USB-to-serial converter chip
- ESP32-C3 module
- Reset + boot buttons
- Antenna circuit
- Crystal oscillator
Reading the schematic helps when troubleshooting or designing your own ESP32-C3-based custom PCB.
ESP32-C3 Price: How Much Should You Pay
One of the best things about the board is affordability. The esp32-c3 price usually ranges between:
- ₹200–₹350 in India
- $3–$6 internationally
The Xiao ESP32-C3 Board is slightly more expensive, but still budget friendly.
If you’re building a product prototype, you can buy several boards without worry.
Best ESP32-C3 Board for Beginners
People often ask: What is the best esp32 c3 board?
Here’s a simple answer:
Best overall:
ESP32-C3 Dev Board
Easy to use, breadboard friendly, ideal for learning.
Best for small projects:
Xiao ESP32 C3 Board
The smallest esp32 c3 board, perfect for compact builds.
Best for soldering enthusiasts:
ESP32 C3 Mini Breakout Board
Choose based on your project needs, not just popularity.
Real-World Uses of the ESP32-C3 Board
Here are projects people commonly create:
1. Weather Stations
Using sensors like DHT11/DHT22 with Wi-Fi updates.
2. Smart Home Automation
Lights, relays, motion sensors via ESPHome.
3. IoT Monitoring Devices
Air quality, ESP32-C3 + MQ sensors.
4. Battery-powered trackers
Thanks to low power modes.
5. Wearable Tech
Using the Xiao ESP32 C3.
6. Wireless Controllers
Using BLE with RISC-V optimized code.
The board is flexible enough for hobby work and real products.
Programming the ESP32-C3 Board for the First Time
Let’s go over a simple beginner program: blinking an LED.
Arduino Code Example
void setup() {
  pinMode(2, OUTPUT);
}

void loop() {
  digitalWrite(2, HIGH);
  delay(1000);
  digitalWrite(2, LOW);
  delay(1000);
}
Upload this using Arduino IDE or PlatformIO. On most esp32-c3 boards, GPIO2 is the built-in LED.
Troubleshooting ESP32-C3 Boards
Here are quick fixes for common problems.
Board not detected?
Try another USB cable. Some cables don’t support data.
Port not available?
On Windows, reinstall USB-to-Serial drivers.
Flash failed error?
Press and hold BOOT button while uploading.
Wi-Fi unstable?
Keep antennas clear from metallic objects.
Pin not working?
Check the esp32 c3 board pinout; some pins have specific roles.
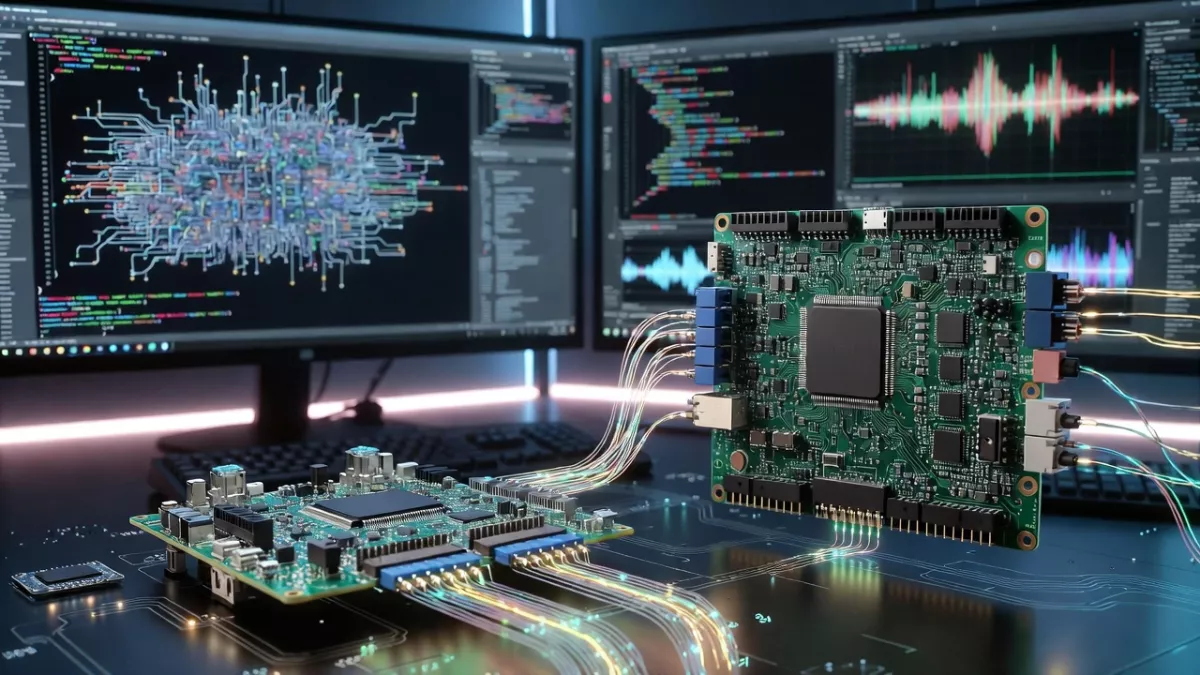
Making Your Own PCB With ESP32-C3
If you plan to create a product or custom board, the esp32-c3 schematic and esp32-c3 board layout documents will help.
Key tips:
- Use a good 3.3V regulator
- Leave clearance around the antenna
- Follow Espressif’s reference design
- Keep USB traces short and neat
Many developers start with a dev board, test the idea, then design a smaller custom PCB.
Frequently Asked Questions About ESP32-C3 Board
1. Is ESP32-C3 better than ESP8266?
Yes, it has Bluetooth, more memory, better Wi-Fi, and RISC-V architecture.
2. Can I use it with Arduino IDE?
Yes, just install the esp32 c3 board manager.
3. Is the ESP32-C3 powerful enough for IoT?
Absolutely. It handles sensors, displays, and network tasks easily.
4. Does every board have USB-C?
Many do, especially modern ones like Xiao ESP32 C3.
5. Which one is the smallest ESP32-C3 board?
The Xiao ESP32 C3 Board.
6. Can I run ESPHome on it?
Yes, ESPHome esp32 c3 board support is excellent.
7. Is the ESP32-C3 good for beginners?
Yes. It’s simple, stable, and well-documented.
If you’re exploring other advanced ESP boards, you might also like the ESP32-C6 PoE Development Board, which offers Power-over-Ethernet for professional IoT builds. You can read the full guide here: ESP32‑C6 PoE Development Board
Final Thoughts
The esp32-c3 board is one of the best microcontroller boards for beginners and hobbyists in 2025. It’s cheap, powerful, and packed with the right features for modern Wi-Fi and Bluetooth projects.
Whether you choose the Xiao ESP32 C3 board, the ESP32-C3 dev board, or the esp32 c3 mini breakout board, you’ll enjoy building with it. With great support from Arduino, PlatformIO, and ESPHome, this board makes IoT development easier than ever.
If you’re just starting out or looking for the best esp32 c3 board for your next project, the ESP32-C3 is absolutely worth it.


Mr. Raj Kumar is a highly experienced Technical Content Engineer with 7 years of dedicated expertise in the intricate field of embedded systems. At Embedded Prep, Raj is at the forefront of creating and curating high-quality technical content designed to educate and empower aspiring and seasoned professionals in the embedded domain.
Throughout his career, Raj has honed a unique skill set that bridges the gap between deep technical understanding and effective communication. His work encompasses a wide range of educational materials, including in-depth tutorials, practical guides, course modules, and insightful articles focused on embedded hardware and software solutions. He possesses a strong grasp of embedded architectures, microcontrollers, real-time operating systems (RTOS), firmware development, and various communication protocols relevant to the embedded industry.
Raj is adept at collaborating closely with subject matter experts, engineers, and instructional designers to ensure the accuracy, completeness, and pedagogical effectiveness of the content. His meticulous attention to detail and commitment to clarity are instrumental in transforming complex embedded concepts into easily digestible and engaging learning experiences. At Embedded Prep, he plays a crucial role in building a robust knowledge base that helps learners master the complexities of embedded technologies.